manuals.online logo
Brands
  1. Home
  2. •
  3. Brands
  4. •
  5. PCB Piezotronics
  6. •
  7. Measuring Instrument
  8. •
  9. PCB Piezotronics 3711B11200G User manual

PCB Piezotronics 3711B11200G User manual

Model 3711B11200G
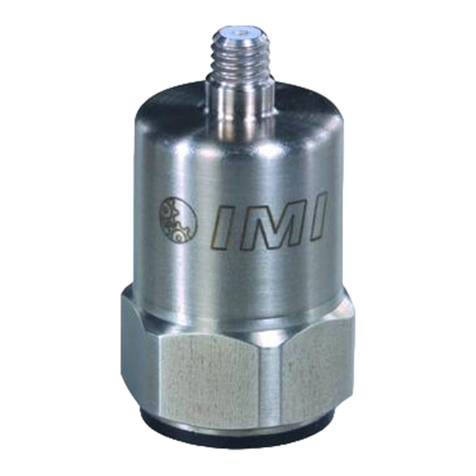
MEMS DC accelerometer, 10 mV/g, +/-200 g range, 0 to 850 Hz, 4-pin connector
Installation and Operating Manual
For assistance with the operation of this product,
contact the PCB Piezotronics, Inc.
Toll-free: 716-684-0001
24-hour SensorLine: 716-684-0001
Fax: 716-684-0987
E-mail: [email protected]
Web: www.pcb.com
Manual 21354 Rev E
ECN 50523
Repair and Maintenance
PCB guarantees Total Customer Satisfaction through its
“Lifetime Warranty Plus” on all Platinum Stock Products
sold by PCB and through its limited warranties on all other
PCB Stock, Standard and Special products. Due to the
sophisticated nature of our sensors and associated
instrumentation, field servicing and repair is not
recommended and, if attempted, will void the factory
warranty.
Beyond routine calibration and battery replacements
where applicable, our products require no user
maintenance. Clean electrical connectors, housings, and
mounting surfaces with solutions and techniques that will
not harm the material of construction. Observe caution
when using liquids near devices that are not hermetically
sealed. Such devices should only be wiped with a
dampened cloth—never saturated or submerged.
In the event that equipment becomes damaged or ceases
to operate, our Application Engineers are here to support
your troubleshooting efforts 24 hours a day, 7 days a
week. Call or email with model and serial number as well
as a brief description of the problem.
Calibration
Routine calibration of sensors and associated
instrumentation is necessary to maintain measurement
accuracy. We recommend calibrating on an annual basis,
after exposure to any extreme environmental influence,
or prior to any critical test.
PCB Piezotronics is an ISO-9001 certified company whose
calibration services are accredited by A2LA to ISO/IEC
17025, with full traceability to SI through N.I.S.T. In
addition to our standard calibration services, we also offer
specialized tests, including: sensitivity at elevated or
cryogenic temperatures, phase response, extended high
or low frequency response, extended range, leak testing,
hydrostatic pressure testing, and others. For more
information, contact your local PCB Piezotronics
distributor, sales representative, or factory customer
service representative.
Returning Equipment
If factory repair is required, our representatives will
provide you with a Return Material Authorization (RMA)
number, which we use to reference any information you
have already provided and expedite the repair process.
This number should be clearly marked on the outside of
all returned package(s) and on any packing list(s)
accompanying the shipment.
Contact Information
PCB Piezotronics, Inc.
3425 Walden Ave.
Depew, NY14043 USA
Toll-free: (800) 828-8840
24-hour SensorLine: (716) 684-0001
General inquiries: in[email protected]
Repair inquiries: rma@pcb.com
For a complete list of distributors, global offices and sales
representatives, visit our website, www.pcb.com.
Safety Considerations
This product is intended for use by qualified personnel
who recognize shock hazards and are familiar with the
precautions required to avoid injury. While our equipment
is designed with user safety in mind, the protection
provided by the equipment may be impaired if equipment
is used in a manner not specified by this manual.
Discontinue use and contact our 24-Hour Sensorline if:
Assistance is needed to safely operate equipment
Damage is visible or suspected
Equipment fails or malfunctions
For complete equipment ratings, refer to the enclosed
specification sheet for your product.
Definition of Terms and Symbols
The following symbols may be used in this manual:
DANGER
Indicates an immediate hazardous
situation, which, if not avoided, may
result in death or serious injury.
Manual 21354 Rev E
ECN 50523
CAUTION
Refers to hazards that could damage
the instrument.
NOTE
Indicates tips, recommendations and
important information. The notes
simplify processes and contain
additional information on particular
operating steps.
The following symbols may be found on the equipment
described in this manual:
This symbol on the unit indicates that
high voltage may be present. Use
standard safety precautions to avoid
personal contact with this voltage.
This symbol on the unit indicates that
the user should refer to the operating
instructions located in the manual.
This symbol indicates safety, earth
ground.
Manual 21354 Rev E
ECN 50523
PCB工业监视和测量设备 - 中国RoHS2公布表
PCB Industrial Monitoring and Measuring Equipment - China RoHS 2 Disclosure Table
部件名称
有害物质
铅(Pb)
汞
(Hg)
镉
(Cd)
六价铬(Cr(VI))
多溴联苯 (PBB)
多溴二苯醚(PBDE)
住房
O
O
O
O
O
O
PCB板
X
O
O
O
O
O
电气连接器
O
O
O
O
O
O
压电晶体
X
O
O
O
O
O
环氧
O
O
O
O
O
O
铁氟龙
O
O
O
O
O
O
电子
O
O
O
O
O
O
厚膜基板
O
O
X
O
O
O
电线
O
O
O
O
O
O
电缆
X
O
O
O
O
O
塑料
O
O
O
O
O
O
焊接
X
O
O
O
O
O
铜合金/黄铜
X
O
O
O
O
O
本表格依据 SJ/T 11364 的规定编制。
O:表示该有害物质在该部件所有均质材料中的含量均在 GB/T 26572 规定的限量要求以下。
X:表示该有害物质至少在该部件的某一均质材料中的含量超出 GB/T 26572 规定的限量要求。
铅是欧洲RoHS指令2011/65/ EU附件三和附件四目前由于允许的豁免。
CHINA RoHS COMPLIANCE
Manual 21354 Rev E
ECN 50523
Component Name
Hazardous Substances
Lead (Pb)
Mercury (Hg)
Cadmium (Cd)
Chromium VI
Compounds
(Cr(VI))
Polybrominated
Biphenyls (PBB)
Polybrominated
Diphenyl Ethers
(PBDE)
Housing
O
O
O
O
O
O
PCB Board
X
O
O
O
O
O
Electrical Connectors
O
O
O
O
O
O
Piezoelectric Crystals
X
O
O
O
O
O
Epoxy
O
O
O
O
O
O
Teflon
O
O
O
O
O
O
Electronics
O
O
O
O
O
O
Thick Film Substrate
O
O
X
O
O
O
Wires
O
O
O
O
O
O
Cables
X
O
O
O
O
O
Plastic
O
O
O
O
O
O
Solder
X
O
O
O
O
O
Copper Alloy/Brass
X
O
O
O
O
O
This table is prepared in accordance with the provisions of SJ/T 11364.
O: Indicates that said hazardous substance contained in all of the homogeneous materials for this part is below the limit
requirement of GB/T 26572.
X: Indicates that said hazardous substance contained in at least one of the homogeneous materials for this part is above the limit
requirement of GB/T 26572.
Lead is present due to allowed exemption in Annex III or Annex IV of the European RoHS Directive 2011/65/EU.
Manual Number: 32650
Manual Revision: E
ECR Number: 53457
3700 series DC Accelerometer Operating Guide
1
General
OPERATING GUIDE
for use with
High Sensitivity DC ACCELEROMETERS
PCB ASSUMES NO RESPONSIBILITY FOR DAMAGE CAUSED TO THIS PRODUCT AS A RESULT OF PROCEDURES THAT ARE INCONSISTENT WITH
THIS OPERATING GUIDE
1.0 Introduction
This operating guide contains information that will familiarize
the user with the basic operation and installation of the 3700
Series MEMS DC Accelerometers. However, it is not intended
to cover all of the specific measurement challenges that one
may encounter while using the device. Therefore, if you have
detailed questions or are unsure of how to properly operate the
sensor after reading this “Operating Guide”, please contact a
PCB Application Engineer using our 24-Hour SensorLineTM at
716-684-0001.
2.0 Common Applications and Features
The 3700 Series MEMS DC Accelerometers achieve true DC
response for measuring uniform (or constant) acceleration and
low-frequency vibration. For this reason, they are often used to:
•Perform ride quality assessments of elevators, automobiles,
trains, and amusement park rides.
•Analyze the low frequency characteristics of buildings,
bridges, and large aerospace objects.
•Acquire tilt and orientation data for feedback control and
stabilization purposes.
Because of the critical nature of these and similar test applica-
tions, all 3700 series MEMS DC Accelerometers have been de-
signed and manufactured with the following common charac-
teristics:
•Built-in electronics provide conveniently standardized sen-
sitivities and low-noise output signals unmatched by simi-
lar sensing technologies.
•Internal voltage regulator allows sensor to be powered
from virtually any unregulated DC voltage source, such as
a bench-top power supply or portable battery source.
•Gas damping extends the upper frequency range, attenuates
unwanted high-frequency vibration, and provides stable
performance over the entire operating temperature range.
3.0 Principle of Operation
The sensor element of the 3700 series features a proof mass,
ring frame, and attachment system between the two. These fea-
tures are micro machined from the same single-crystal silicon
wafer. The movement of the proof mass is directly affected by
acceleration applied in the axis of sensitivity.
The sensor element is connected as a bridge element in the cir-
cuit. The electrical characteristics of one portion of the bridge
increase in value while the characteristics of the other portion
decrease when exposed to acceleration. This approach mini-
mizes common mode errors and improves non-linearity.
A selection of full scale measurement ranges is attained by
modifying the stiffness of the suspension system of the proof
mass. A high natural frequency is accomplished through the
combination of a lightweight proof mass and suspension stiff-
ness.
Ruggedness is enhanced through the use of mechanical stops to
restrict the travel of the proof mass. Damping is used to mitigate
high frequency inputs.
The sensor elements use squeeze-film gas damping. This is the
result of the movement of the proof mass pressing on the gas in
the gap between it and the outer sensor layer. Damping helps
prevent the output of the accelerometer from becoming satu-
rated, as would happen when the resonance of an accelerometer
with no damping is excited by random vibration. The advantage
of gas damping over liquid damping is that it is minimally af-
fected by temperature changes.
The 3710 series accelerometers contain conditioning circuitry
that provides a high sensitivity output. This ASIC ( Application
Specific Integrated Circuit ) also provides compensation of zero
bias and sensitivity errors over temperature.
Manual Number: 32650
Manual Revision: E
ECR Number: 53457
3700 series DC Accelerometer Operating Guide
2
4.0 Typical Measurement System
The 3700 series DC Accelerometers are available in a uniaxial
or triaxial package. The output signal is routed to follow-on sig-
nal conditioning via receptacle and associated cable assembly
or integral cable. Since the High Sensitivity DC Accelerometers
contain a built-in voltage regulator, they may be powered from
virtually any power source without adversely affecting sensor
performance, please refer to sensor specification for voltage
range and current requirements. Consult PCB Application En-
gineering for signal conditioning options if needed. The output
from the signal conditioner is typically routed to readout instru-
mentation such as oscilloscopes or various model data acquisi-
tion instruments.
5.0 Sensor Installation
When choosing an installation technique, be certain to care-
fully examine the different application characteristics that may
affect sensor performance. Characteristics such as mounting lo-
cation may limit the use of large mounting blocks or the ampli-
tude range may necessitate the use of a stud mount rather than
using adhesive. A summary of the recommended mounting
methods is provided below.
Stud Mount: Recommended for permanent mount applications
or in test situations that require a rugged or secure installation.
The necessary information, including surface finish, mounting
hole dimensions, and recommended mounting torque for in-
stalling the sensor is listed on the enclosed Sensor Installation
Drawing. It is recommended that an experienced technician or
machinist with good machining capabilities adequately prepare
the surface.
Adhesive Mount: Recommended for temporary mounting of the
sensor or when the test object surface cannot be properly pre-
pared for stud mounting. Wax works well for temporary mount
applications under conditions where the operating temperature
will not melt the wax or the acceleration levels will not dislodge
the sensor from the test object. If using cyanoacrylate-based ad-
hesives for a quick mounting method or two-part epoxies for a
more secure mount, PCB recommends mounting DC accel-
erometers via an adhesive mounting base. The base acts as a
sacrificial part allowing safe removal of accelerometer after test
is completed. If a base is not used, care must be taken as to not
damage the sensor during removal.
NOTE: A chemical debonder should always be used
With so many adhesives in use (everything from super glues,
dental cement, epoxies, etc), there is no universal de-bonding
agent available. The de-bonder for the Loctite 454 adhesive
that PCB offers is Acetone. If you are using anything other than
Loctite 454, you will have to check with the individual manu-
facturers for their de-bonding recommendations. The de-bond-
ing agent must be allowed to penetrate the surface in order to
properly react with the adhesive, so it is advisable to wait a few
minutes before removing the sensor.
After the de-bonding agent has softened the adhesive, use a gen-
tle shearing (or twisting) motion to remove the base and/or sen-
sor from the test structure.
Easy Mount Clip: Recommended when frequent installation
and removal of Series 3700 series accelerometers is desired.
Depending on the Easy-Mount Clip design, it can either be stud
mounted or adhesively mounted to the test structure. (If adhe-
sively mounting the clip, detach the sensor from the clip first,
as excessive adhesive may creep through the mounting holes
and adhere to the sensor. This will make separation and removal
from the clip difficult.) Once the Easy-Mount Clip has been at-
tached to the test structure, the sensor can be easily snapped into
and out of the clip. Over time, the Easy-Mount Clip must be
replaced as it will “wear-out” and eventually lose its ability to
securely hold the sensor.
6.0 Powering
The 3710 Series contains built-in microelectronics that will op-
erate from many PCB Sensor Signal Conditioners. These signal
conditioners provide the necessary voltage and current required
for all of the powering options available on the 3700 series. If a
signal conditioner is needed, please consult with the factory for
the proper conditioner that best fits the application.
The 3700 series may also be powered by other voltage sources
such as DC voltage laboratory supplies, automotive or marine
batteries, or low-voltage supplies designed for powering PC
Board components. Ensure that the source provides power
within the excitation voltage range and current listed on the
specification sheet for that model. It is important to note that
since the accelerometers contain a built-in voltage regulator,
precise calibration of the power source is generally not re-
quired.
7.0 Operation
After the sensor has been installed and the cable connected for
proper operation, there are a couple of measurement points to
take note of:
•To take advantage of the DC response of the accelerometer,
the readout device must be in a DC coupled state. Consult
the appropriate manufacturer or product manual for your
readout device for details.
•Because the 3700 series can measure static (constant) ac-
celerations, the DC offset voltage will be affected by the
positional alignment relative to the Earth’s gravity. In other

Manual Number: 32650
Manual Revision: E
ECR Number: 53457
3700 series DC Accelerometer Operating Guide
3
words, when the sensor is mounted perpendicular with the
Earth’s surface, the offset will equal that as specified on the
calibration certificate for “zero-g offset voltage.” If the
sensor is mounted parallel with the Earth’s surface, the sen-
sor will be experiencing 1 g of acceleration and the offset
voltage will increase by the sensitivity of the accelerome-
ter.
•If the sensor is extended, in the case of an integral cable
sensor, or a cable length other than 10 ft is used, in the case
of sensor with an integral connector, the offset voltage will
change. To determine the accelerometer’s offset, rotate the
unit 90° so that the sensor is on its side with the sensing
axis perpendicular to Earth’s gravity and record the DC
output. This value is the new “zero-g offset voltage.”
•To ensure that ground loops are not induced, the shield
should only be terminated at one end. Typically, the shield
of the cable is tied to the sensor housing. If the sensor is
mounted with an isolation pad (or other form of electrical
isolation) from the test structure, then the shield should be
tied to signal ground at the instrumentation end. Otherwise,
leave the cable shield floating or not connected at the in-
strumentation end.
8.0 Sensor Verification
If the sensor has been handled in a rough manner or before us-
ing a sensor for a critical measurement application, it is a good
idea to verify that the sensor’s sensitivity is still within specifi-
cation. An accurate static calibration of the 3700 series can be
performed using the Earth’s Gravitational Field as a reference.
The sensor can simply be “flipped” (rotated 180°) in the Earth’s
Gravity to obtain the scaling factor (sensitivity) and DC offset.
First, place the accelerometer in a +1g orientation so that the
base is resting on the table and the model number is facing up.
The sensing axis will be parallel with the Earth’s gravity with
the sensor experiencing +1g acceleration. Record the DC output
by using a DVM. Then rotate the sensor 180° so that the sensor
is inverted (the top of the sensor is resting on the table) and the
sensor is experiencing –1g acceleration. Record the DC output.
To calculate the sensitivity of the accelerometer, refer to equa-
tion 8.1.
Sensitivity = (+1g) – (-1g) Eq 8.1
2
9.0 Sensor Calibration
Due to ISO 9001, ISO Guide 25, or other contractual require-
ments, it may become necessary to send the accelerometer back
to PCB for recalibration. In this case, a complete back-to-back
frequency response test will be performed and the “zero-g” off-
set voltage will be checked with NIST traceable equipment.
10.0 Maintenance and Repair
Because of the sophisticated nature of PCB instrumentation,
field repair of the equipment is not recommended. Most PCB
sensors are of modular construction and are factory repairable.
A repair or replacement quotation is available at no charge. Be-
fore returning equipment for repair, it is recommended that the
user confer with a factory application engineer (or inter-na-
tional representative) to first troubleshoot the problem.
11.0 Return Procedure
To expedite the repair process, contact a factory Application
Engineer to obtain a Return Material Authorization (RMA)
number prior to sending equipment to the factory. Please have
information, such as model number, serial number and descrip-
tion of the problem, available.
Customers outside the U.S. should consult their local PCB dis-
tributor for information on returning equipment. For exceptions
to this guideline, please contact the International Sales depart-
ment to request shipping instructions and an RMA.
For further assistance, please call (716) 684-0001 or fax us at
(716) 684-0987. You may also receive assistance via e-mail at
info@pcb.com or visit our web site at www.pcb.com.
12.0 Customer Service / Warranty
The employees of PCB strive to provide superior, unmatched
customer service. Should you at any time find yourself dissat-
isfied with any PCB product for any reason, consult a factory
Application Engineer or local representative/distributor to dis-
cuss repair, refund, or exchange procedures.
When unexpected measurement problems arise, call our 24-
hour SensorLineTM at (716) 684-0001 to discuss your immedi-
ate dynamic instrumentation needs with a PCB Application En-
gineer.

Other PCB Piezotronics Measuring Instrument manuals

PCB Piezotronics 3741D4HB200G User manual

PCB Piezotronics

PCB Piezotronics 3741D4HB200G User manual

PCB Piezotronics Q353B33 User manual

PCB Piezotronics

PCB Piezotronics Q353B33 User manual

PCB Piezotronics 357A94 User manual

PCB Piezotronics

PCB Piezotronics 357A94 User manual

PCB Piezotronics 356A63 User manual

PCB Piezotronics

PCB Piezotronics 356A63 User manual

PCB Piezotronics HT356A33 User manual

PCB Piezotronics

PCB Piezotronics HT356A33 User manual

PCB Piezotronics 3501A1320KG User manual

PCB Piezotronics

PCB Piezotronics 3501A1320KG User manual

PCB Piezotronics 1515-110-03A User manual

PCB Piezotronics

PCB Piezotronics 1515-110-03A User manual

PCB Piezotronics 356B18 User manual

PCB Piezotronics

PCB Piezotronics 356B18 User manual

PCB Piezotronics P357A19 User manual

PCB Piezotronics

PCB Piezotronics P357A19 User manual

PCB Piezotronics IMI Sensors M602D02 User manual

PCB Piezotronics

PCB Piezotronics IMI Sensors M602D02 User manual

PCB Piezotronics 356A31 User manual

PCB Piezotronics

PCB Piezotronics 356A31 User manual

PCB Piezotronics IMI SENSORS 646B11 User manual

PCB Piezotronics

PCB Piezotronics IMI SENSORS 646B11 User manual

PCB Piezotronics W138A10/038CY020AC User manual

PCB Piezotronics

PCB Piezotronics W138A10/038CY020AC User manual

PCB Piezotronics M352A60 User manual

PCB Piezotronics

PCB Piezotronics M352A60 User manual

PCB Piezotronics 356B11 User manual

PCB Piezotronics

PCB Piezotronics 356B11 User manual

PCB Piezotronics T356A35 User manual

PCB Piezotronics

PCB Piezotronics T356A35 User manual

PCB Piezotronics IMI SENSORS TO607A61 User manual

PCB Piezotronics

PCB Piezotronics IMI SENSORS TO607A61 User manual

PCB Piezotronics 122A21 User manual

PCB Piezotronics

PCB Piezotronics 122A21 User manual

PCB Piezotronics IMI SENSORS M625B01 User manual

PCB Piezotronics

PCB Piezotronics IMI SENSORS M625B01 User manual

PCB Piezotronics 1903-01B User manual

PCB Piezotronics

PCB Piezotronics 1903-01B User manual

PCB Piezotronics 350B23 User manual

PCB Piezotronics

PCB Piezotronics 350B23 User manual

PCB Piezotronics IMI SENSORS 623C10 User manual

PCB Piezotronics

PCB Piezotronics IMI SENSORS 623C10 User manual

PCB Piezotronics J353B51 User manual

PCB Piezotronics

PCB Piezotronics J353B51 User manual

PCB Piezotronics 117B232 User manual

PCB Piezotronics

PCB Piezotronics 117B232 User manual

Popular Measuring Instrument manuals by other brands

Honeywell Elster EK280 Applications manual

Honeywell

Honeywell Elster EK280 Applications manual

Zircon SuperScan M4 user manual

Zircon

Zircon SuperScan M4 user manual

Omega Vortex FV100 Series user guide

Omega

Omega Vortex FV100 Series user guide

RS PRO RS-136 instruction manual

RS PRO

RS PRO RS-136 instruction manual

LaserLiner WoodTester manual

LaserLiner

LaserLiner WoodTester manual

ABB 4690 Series user guide

ABB

ABB 4690 Series user guide

Felix Instruments F-940 Operation manual

Felix Instruments

Felix Instruments F-940 Operation manual

GE DigitalFlow XGM868i Startup guide

GE

GE DigitalFlow XGM868i Startup guide

EINHELL NKL 90/4 operating instructions

EINHELL

EINHELL NKL 90/4 operating instructions

ThermoWorks I.R.K. operating instructions

ThermoWorks

ThermoWorks I.R.K. operating instructions

ENDA EPV141 quick start guide

ENDA

ENDA EPV141 quick start guide

Foxtech TEMPHAWK user manual

Foxtech

Foxtech TEMPHAWK user manual

Maurer 97771 user manual

Maurer

Maurer 97771 user manual

Spectrum 3415F user manual

Spectrum

Spectrum 3415F user manual

Elster A3 ALPHA user manual

Elster

Elster A3 ALPHA user manual

Sennheiser UI 10 BL quick guide

Sennheiser

Sennheiser UI 10 BL quick guide

Compu-Flow C6 quick start guide

Compu-Flow

Compu-Flow C6 quick start guide

Fireye FIRETRON 1000 Series manual

Fireye

Fireye FIRETRON 1000 Series manual

manuals.online logo
manuals.online logoBrands
  • About & Mission
  • Contact us
  • Privacy Policy
  • Terms and Conditions

Copyright 2025 Manuals.Online. All Rights Reserved.