1 2 456
3
2
4
6
5
3
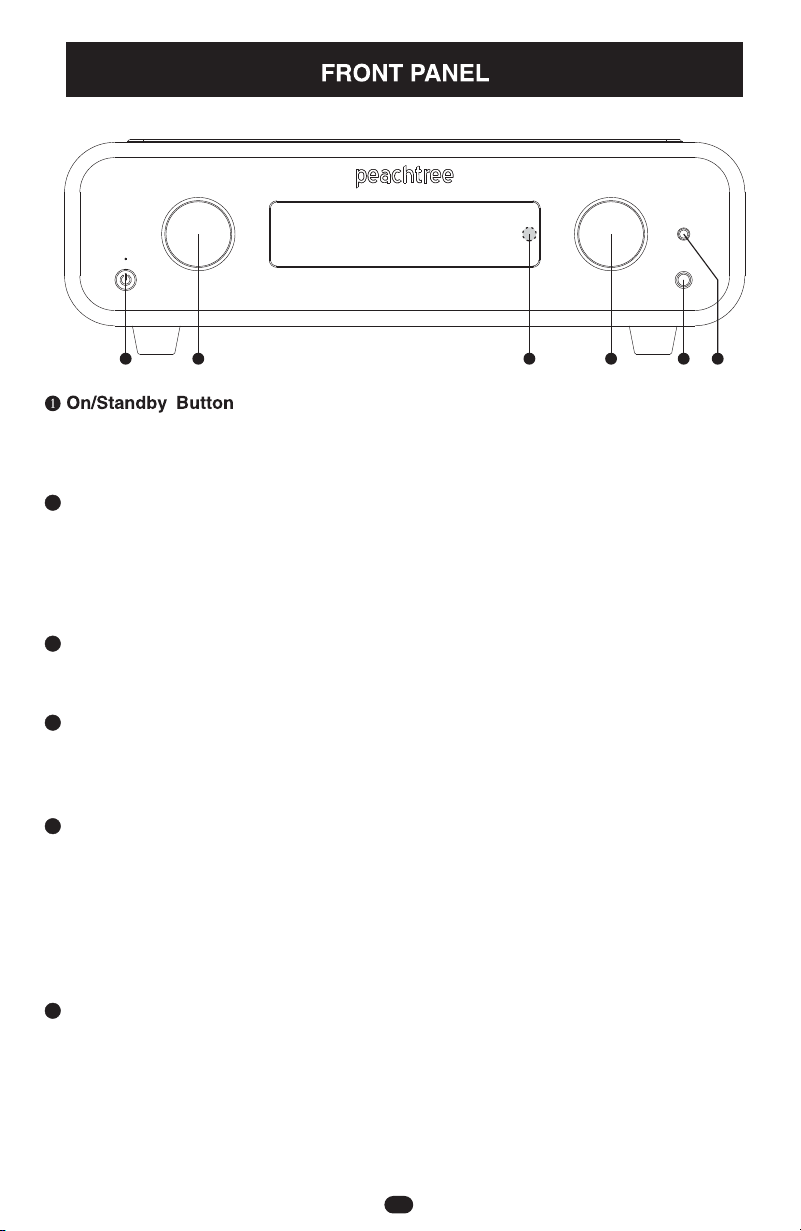
Left knob
Right knob
IR Receiver (concealed behind the front panel display window)
1/4" Unbalanced Headphone Output Connection
4.4mm Balanced T/R/R/S Headphone Output Connection
Rotate in either direction to select the desired input. Push and hold for ~3
seconds to enter the . Rotate to move the option selection arrow up or
down. Rotate the to change the setting of the currently selected
option. To exit the , press and hold this knob for ~3 seconds.
MENU
Right knob
MENU
Rotate clockwise or counter-clockwise to increase or decrease the volume/
output level. Push and release to mute and unmute the output. When in the
, rotate to change the setting of the currently selected option.MENU
For receiving Infra-Red(IR) commands from the included hand-held remote
control or third-party remote control system.
Inserting a headphone connection automatically mutes the
and . Removing a headphone connection
automatically un-mutes the and
Caution please lower the output level when inserting or removing
headphone connections as headphone sensitivity varies widely and a
comfortable speaker listening level may result in a significantly louder output
level when switching to headphones.
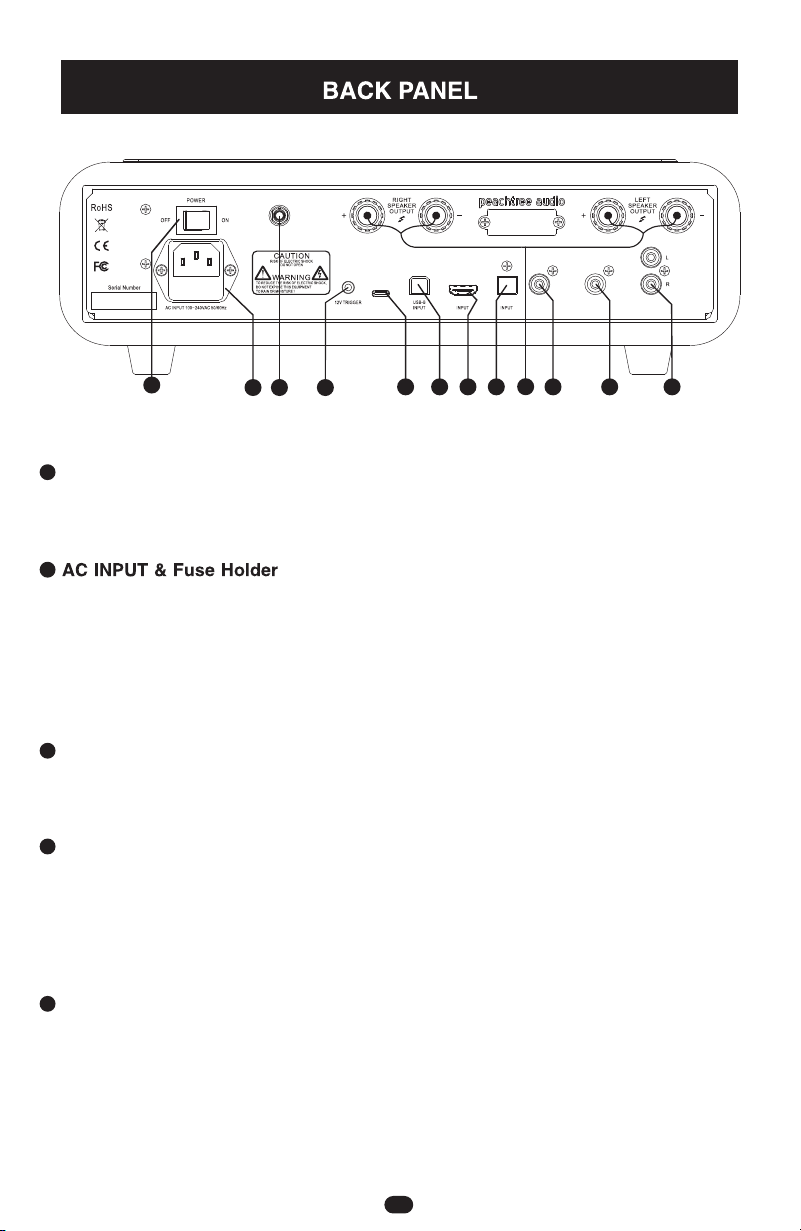
RIGHT & LEFT
SPEAKER L & R PREAMP OUTPUTS
RIGHT & LEFT SPEAKER L & R PREAMP
OUTPUTS. :
Inserting a headphone connection automatically mutes the
and . Removing a headphone connection
automatically un-mutes the and
Caution: please lower the volume / output level when inserting of
removing headphone connections as headphone sensitivity varies widely and a
comfortable speaker listening level may result in a significantly louder output
level when switching to headphones.
RIGHT & LEFT
SPEAKERS L & R PREAMP OUTPUTS
RIGHT & LEFT SPEAKERS L & R PREAMP
OUTPUTS.
Toggles the unit between on mode (green LED) and standby mode (red LED).
Note: AC power cord must be connected and rear panel switch set to
for this button to function.
POWER
ON
9