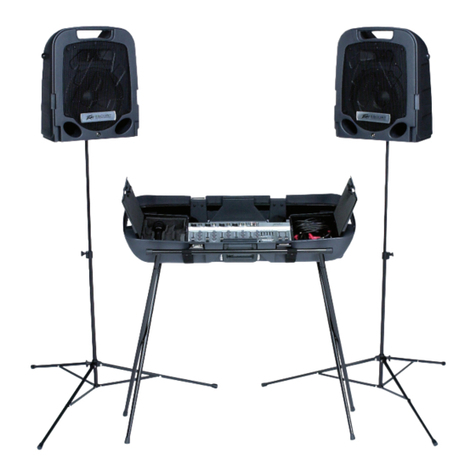
Peavey FX 2 Series User manual

www.peavey.com
FX™2 Mixer Series
FX™2 32 Channel • Four-Bus Mixing Consoles

FX™2 32 Channel
4-Bus Console Mixers
Congratulations on purchasing the Peavey FX™2 32, four-bus console mixer. These studio-quality mixing
consoles are designed to meet diverse needs and feature Peavey-exclusive technology that enhances live studio reproduction
as well as project studio recording. FX™ Series mixers also feature built-in DSP effects that are useful in real-world recording
and sound reinforcement, while parameter controls allow you to tailor each effect to meet your needs.
Please read this guide carefully to ensure your personal safety as well as the safety of your equipment.
FEATURES:
• Silencer™ mic preamps with current-source dual feedback design
• 28 XLR mic inputs on FX2 32
• Two stereo channels with direct-to-L/R assignment capability
• Three-band channel EQ on all input channels
• Sweepable mid-frequency control on all mono input channels
• Variable low-cut filter on all mono input channels, off to 300Hz
• Inserts on all mono channels
• Four-bus design with direct group outputs and L/R assignment
• Four monitor sends per channel, pre-fader
• Two effects sends per channel, post-fader
• Pan and PFL on each channel
• Multi-point clip detection
• Signal presence LEDs on every input, group and return
• Mute switches with LED indicator on every input, group and return channel
• 48-volt phantom power switch
• Dual DSP engines for output processing, dual effects and digital I/O
• Output processing includes EQ, Delay and Compressor/Limiter
• Large LCD graphics user interface
• Dual USB ports
• Direct streaming of audio to and from your computer
• Built-in MP3 compression, direct recording and playback via USB removable data storage device
• Media inputs with level control assignable to L/R mix
• Headphone output with level control
• 12V BNC lamp jacks
• 100mm faders
• Feedback Ferret - Automated Feedback Elimination

Gain
This control establishes the nominal operating level for the channel. The input
gain can be adjusted over a wide range (0 dB – 60 dB) to compensate for soft
voices or very loud drums. To maximize the signal-to-noise ratio, the gain
should be set to the proper level, with the Channel Fader (13) set to 0. It can be
set by pressing the PFL Switch (12) and adjusting for 0 dB on the output meter.
If the clip LED comes on and remains lit, reduce the gain.
Lo Cut
The low-cut lter is variable from off to 300Hz. When engaged‚ it can improve
clarity by removing low frequencies that make a mix sound muddy. This lter
reduces handling and stage noise, breathing noise, and unwanted low frequen-
cy energy that can rob your sound system of power. Turning this control up will
remove those frequencies from the system and restore power where needed.
Hi EQ
This shelving type tone control adjusts treble frequency levels (±15 dB at 10
KHz), resulting in less noise or more brilliance.
Mid EQ
This active tone control is a bandpass (peak/notch) type that varies mid-fre-
quency response by ±15 dB in a range from 100 Hz to 5 kHz. The center frequen-
cy is controlled by the Mid Freq (5) control.
Mid Freq
This control determines the center frequency of the Mid EQ (4) control. Center
frequency for the bandpass lter can be set from 100 Hz to 5 kHz.
Low EQ
This shelving-type tone control adjusts bass frequency levels (±15 dB at 70 Hz),
adding depth to thin signals or clarity to overly thick signals.
Caution: Excessive low frequency boost causes increased power consumption
and increases the possibility of speaker damage.
AUX 1-4 Sends
These controls send the channel’s pre-fader, post-EQ signal to each of four aux
buses. These buses are normally used for monitor sends or for feeding a sepa-
rate mix to external equipment. There are internal jumpers that can be switched
to change the send point to pre-EQ. Unity gain is at the center detent position
with up to 6 dB of gain in the fully clockwise position.
AUX 5-6/EFX 1-2 Sends
These controls send the channel’s post-fader signal to each of two aux (ef-
fects) buses. These buses are normally used for effects sends or for feeding the
internal effects processors. Unity gain is at the center detent position with up
to 6dB of gain in the fully clockwise position.
Front Panel
1
2
3
4
7
5
6
8
MONO INPUT CHANNELS
2
3
4
6
5
1
8
7
9
10
11
12
13

Pan
This control determines the signal’s position with respect to the assigned
L/R and Group 1–4 buses. Rotating the control counterclockwise increases
the amount of signal sent to L and odd-numbered groups; rotating clock-
wise increases the amount sent to R and even-numbered groups. For ex-
ample, with the channel Bus Assign switch (10) in the 1/2 position, rotating
the control counterclockwise increases the amount of signal sent to Group
1, while rotating clockwise increases the amount sent to Group 2. The C
position sends equal amounts to each.
1/2, 3/4, L/R Bus Assign Switches
These post-fader switches determine where the channel signal is being
sent. For example, to send a signal to Groups 1 & 2, depress the 1/2 button.
The PAN control (9) determines the signal level that is sent to each signal
bus.
Mute Switch/Mute-Clip LED
This switch mutes all Aux, Group and L/R sends from the corresponding
channel. This switch is equipped with a red LED that will illuminate when
the channel is muted. When the MUTE button is out, the LED functions as a
Clip indicator that will illuminate at 2 dB below clipping. Muting the channel
does not prevent the PFL signal from being sent to the PFL/AFL mix when
the PFL Switch (12) is in.
PFL Switch/Signal-PFL LED
This switch connects the channel’s pre-fader signal to the PFL/AFL mix.
When the PFL button is in, the channel’s signal can be monitored through
the headphones and/or on the PFL/AFL display. A yellow LED in the Mas-
ter section will blink to indicate that the signal on the Master LED display
and at the headphone output is PFL. Selecting PFL allows the operator to
monitor a channel even with the channel muted, and is especially useful for
cuing CDs/tapes. When the PFL button is out, the yellow channel LED will
function as a signal presence indicator (-20 dBu).
Channel Fader
This control varies the signal level from -∞ to +10 dB and sends the signal
from the channel to the L/R and Group buses and to the Effects Sends. The
optimum setting is the ø (unity gain) position.
Front Panel
9
10
11
13
12
2
3
4
6
5
1
8
7
9
10
11
12
13

Mic Gain
This control establishes the nominal operating level for the mic input
(XLR) of the channel. The mic gain can be adjusted over a wide range (0
dB – 60 dB) to compensate for soft voices or very loud drums. To maxi-
mize the signal-to-noise ratio, the gain should be set to the proper level,
with the Channel Fader (13) set to ø. The mic gain can be set by pressing
the PFL button (12) and adjusting for ø dB on the output meter. If the clip
LED comes on and remains lit, reduce the gain.
Stereo Gain
This control establishes the nominal operating level for the stereo line
inputs (1/4" jacks) of the channel. The Stereo Gain can be adjusted
over a sufcient range (-∞ to +20 dB) to accommodate almost any
input level. It operates in conjunction with the L/R–CH Switch (16) to
route the stereo signal directly to the L/R buses or through the chan-
nel strip.
L/R–CH Switch
This switch establishes the routing of the stereo line input (1/4" jacks)
signal. When the switch is out, the stereo line input signal is routed
directly to the L/R buses, bypassing the channel strip. In this mode, the
mic input (XLR) signal is routed through the channel. When the switch is in, the stereo line input signal is
routed through the channel and the mic input signal is disconnected. The signal level is controlled via the
Stereo Gain control (15).
Input Select Stereo-USB Switch
This switch selects the input signal that will feed the stereo line input of the second stereo channel.
When the switch is out, the signal from the stereo line inputs is routed to the Stereo Gain control (15).
When the switch is in, the signal from the device connected to either USB port (60-61) is routed to the
Stereo Gain control (15).
Mid EQ
In the Stereo Input channels, this active tone control is a bandpass (peak/notch) type that varies
mid-frequency response by ±15 dB at a center frequency of 850 Hz.
Auxiliary Masters 1-4
This control sets the output level of the AUX 1-4 mixes and is adjustable from -∞ to +6 dB.
Auxiliary Masters 5-6
This control sets the output level of the various AUX 5-6 mixes and is adjustable from -∞ to +6 dB. These
signals are also sent to the EFX1 and EFX2 internal effects processors, respectively.
AFL Switch/AFL-Clip LED
This switch directs the post-fader (AFL) signal to the Headphone output (37) and activates the PFL/
AFL LED display. An adjacent red LED illuminates to signify this selection. If AFL is not selected, the LED
functions as a Clip indicator. Selecting AFL allows monitoring of AUX Masters with the full PFL/AFL Level
Display as well as allowing the operator to hear the output.
Front Panel
14
19
16
17
18
21
20
15
STEREO INPUT CHANNELS
MASTER SECTION
Stereo Input Channels
ONLY
14
15
3
18
6
16
17
2

Phantom Power Switch
This switch applies +48 VDC
voltage to the input XLR con-
nectors to power condenser
microphones requiring phantom
power. This switch is recessed
into the console and requires a
small “tool” such as a pencil or
pen tip to activate. A regular low
impedance dynamic mic such as
the PVM™ 22 will not be harmed.
The Line inputs (49&50) are not
connected to the +48 V supply
and are safe for balanced or un-
balanced inputs. An adjacent LED
illuminates when Phantom Power
is activated.
Caution:
If phantom power is used, do not
connect unbalanced dynamic
microphones or other devices to
the XLR inputs. (Some wireless
receivers may be damaged.
Consult their manuals.)
Note:
Make sure the Master Level
Faders (40) are completely down
when switching on the phantom
power and when connecting
microphones to the Mic inputs to
prevent pops from affecting the
loudspeakers.
Left, Right, Bus Assign Switches
These post-fader switches
determine where the Group mix
signal is being sent. For example,
if each individual drum mic is
assigned to Group 1, depress-
ing the Left button will send the
drum mix to the Left bus and
to the Left Out (54) on the rear
panel.
Mute Switch/Mute-Clip LED
This switch mutes its respec-
tive Group send from the Group
channel. This switch is equipped
with a red LED that will illuminate
when the Group is muted. When
the Mute button is out, the LED
functions as a Clip indicator that
will illuminate at 2 dB below
clipping.
Front Panel
22
24
23
44
19
20
21
22
23
26
47
38
39
29
41
40
32
31
42
36
35
34
27
37
33
28
43
30
24
25
45
46

AFL Switch/Signal-AFL LED
This switch connects the Group’s post-fader signal to the PFL/AFL mix. When the AFL button is in, the
Group’s signal can be monitored through the headphones and/or on the PFL/AFL display. A yellow LED
in the Master section will blink to indicate that the signal on the Master LED display and the Headphone
Output is the PFL/AFL mix. When the AFL button is out, the yellow group LED will blink as an indication
of signal presence (-20 dBu).
Group Fader
This control varies the signal level from -∞ to +10 dB and sends the signal from the Group to the Left
and/or Right buses and to the Group Output jacks (53). The optimum setting is the ø (unity gain)
position.
TO AUX 1 & TO AUX 2 Controls
These controls determine the level of the respective Effects Return signal that is sent to the respective
AUX bus, allowing musicians/singers to hear internal and/or external effects in their monitors.
NOTE: Due to the creation of an electronic feedback loop, do not use AUX Sends 1 or 2 as the path to
external equipment that is to be sent back to the corresponding AUX mix (1 or 2).
BAL
This control determines the placement of the Effects Return signal's position with respect to the as-
signed L/R and Group 1-4 buses. Rotating the control counterclockwise (L) sends more signal to the
LEFT output and odd-numbered GROUPS; rotating clockwise (R) sends more signal to the RIGHT output
and even-numbered GROUPS. The C position sends equal amounts to each.
EFX LEVEL Control
This control determines the level of the Effects Return signal being sent to its assigned buses. It func-
tions similarly to the Channel Faders (13).
1/2, 3/4, L/R Bus Assign Switches
Like the channel assign switches, these buttons determine the bus assignment of the Effects Return
signal. They determine where the signal is being sent.
Mute Switch/Mute-Clip LED
This switch mutes its respective Effects Return from being sent to the buses. This switch is equipped
with a red LED that will illuminate when the Effects Return is muted. When the Mute button is out, the
LED functions as a Clip indicator that will illuminate at 2 dB below clipping.
AFL Switch/Signal-AFL LED
This switch connects the Effects Return post-fader signal to the PFL/AFL mix. When the AFL button is in,
the Effects Return signal can be monitored through the headphones and/or on the PFL/AFL display. A
yellow LED in the Master section will blink to indicate that the signal on the Master LED display and the
Headphone Output is the PFL/AFL mix. When the AFL button is out, the yellow Effects Return LED will
blink as an indication of signal presence (-20 dBu).
Effects 2 Patch Switch
This switch determines whether the Effects 2 processor will be used in the Return 2 or will be patched
to an Input Channel or Group insert point. This switch can also be used to perform the bypass function.
When the effects processor is assigned to the EFX 2 Return, the I/O jack (56) is bypassed. Similarly,
when the effects processor is being patched externally, only the external Stereo Return jacks (57) are
used to return a signal.
Media In Level Control
Controls the level of the Media Input signal from the RCA jacks (58) to the Left and Right buses when the
L/R switch (35) is in.
Front Panel
26
27
29
28
30
32
31
33
25
34

Front Panel
Media In L/R Switch
Routes the Media Input signal to the Left and Right buses.
Record Out Control
Controls the Record Output level of the pre-fader Left and Right main output signal to the RCA jacks (59).
Regardless of the position of the L/R–Media Switch (39), when any PFL/AFL switch on the mixer is
activated, this display indicates the signal level being sent to the PFL/AFL bus. The PFL/AFL indicator
ashes if either mode (PFL or AFL) is selected.
Headphone Output Jack
The Headphone Output is a 1⁄4” TRS (Tip= Left; Ring = Right; Sleeve = Ground) jack. The signal sent to
this output is normally the Left/Right mix. When the L/R–Media Switch (39) is engaged, the Media Input
signal is selected and is monitored through headphones. An activated PFL or AFL button (indicated by a
yellow ashing LED) switches the headphone output jack monitor to the selected signal.
Headphone Level
This control sets the Headphone Output level. To avoid damage to your hearing‚ make sure to turn the
control fully counterclockwise before using headphones. Slowly turn the knob clockwise until you reach
a comfortable listening level. Normally, the signal in the headphones is the Left/Right signal. If the
L/R–Media Switch (39) is engaged‚ the Media Input signal is selected and monitored through
headphones. An activated PFL or AFL button (indicated by a yellow ashing LED) switches the head-
phone level monitoring to the selected signal.
L/R–Media Switch
This switch selects the signal that is monitored by the headphones. When out, the Main Left/Right post-
fader signal is monitored. When in, the Media Input post-fader signal is monitored.
Master Level Faders
The Master Faders control the levels sent to the Main Left/Right outputs (54). Best results are obtained
when these controls are set near the 0 point.
Left/Right – PFL/AFL Level Displays
These indicators graphically display the level of the signal selected by the L/R–Media Switch (39). When
the switch is in, these indicators show the amount of the post-fader level of the Media Input. When the
switch is out, these indicators show the level of the Main Left and Right outputs. Signal is sampled at
the summing amp and post-master faders to monitor clipping throughout the Left/Right section. The
Clip LED indicator will illuminate when any level in the signal chain approaches (-2 dB) clipping.
NOTE: Clip LED can illuminate before the rest of the array indicating that the summing amp has reached clipping.
Power LED
This LED indicates that AC power is supplied to the unit‚ the power switch is on, and the unit is function-
ing properly.
Lamp 12Vdc
These outputs are designed to power gooseneck lamps such as the Peavey ML-1.
Page Select Switches (A-B-C)
Use these three switches to select the desired digital processor page that is shown in the LCD
Graphics User interface (47) and controlled by the encoders (45) and the soft switches (46).
38
39
37
40
41
42
43
35
36
DIGITAL PROCESSOR
44

Software Encoders
These encoders allow you to edit the selected parameters as indicated on the LCD (47).
Software Switches
These switches select the functions that are indicated on the LCD (47).
LCD
The Liquid Crystal Display reveals all of the menus available for editing.
This is a brief overview of the digital processing capabilities of your new FX™ 2 mixer. While you can
expect incredible results following this guide, mastering the art of digital processing will be achieved
through experimentation. Keep in mind that until you conrm your changes by pressing "save," no
alterations have been made to the presets. Peavey engineers programmed your mixer with a variety of
the most commonly used presets, which are ready to use right out of the box. However, your FX 2 mixer
will only reach its full digital processing potential through your acquired expertise. Review the process
below and begin exploring the digital mixing world beyond factory presets.
Effects: The Effects section of the FX mixer provides two discrete effects processors, each capable of
chaining two (2) different effects at the same time. EFX1 (left side of screen) is permanently routed to the
Aux5/EFX1 send and return bus. EFX 2 (right side of screen) is routed to the Aux6/EFX2 bus, but can be
routed from the EFX2 Patch Jack on the rear panel and routed to the insert of a single channel or inserted
into a group/bus. Effects that modify amplitude such as compressors, limiters, gates, expanders and de-
essers, when used individually, work best when inserted into channels or busses.
While they may be edited, the edited versions may not be saved in positions 0-49. Presets 50-99 are
user presets, custom and/or edited presets can be named and saved in these slots. Edited but unsaved
EFX have an “*” next to the preset number.
Selecting an Effects preset: Press the “Effects” button to activate the Effects window. Turn the encoder
knobs until the desired preset number is in the window and press the encoder knob to “select” it. The
“Select” button will turn into a “Recall” button. Pressing it will recall the last used preset. You may press
the “Edit” button to adjust any parameters of the selected preset. You must “Save” a preset to save the
adjusted parameters.
Creating a preset: Press the “Effects” button and turn either data knob to select any preset between 50-
99. Press “select” (ashing) and then “edit #”.
Press the “Type” button and the screen will display the DSP Library of available effects. You may scroll
through the entire list by turning the left data knob.
Rotate the data knob to highlight the effect you
wish and press “select” to add it.
Select a “style” from the available models. Press
select to choose it and then “back” to return to the
main page ... or ... cursor to another effect block and
repeat the process.
Press “edit” to adjust the parameters of the effect
types.
Front Panel
45
46
47
DIGITAL PROCESSING ARENA

Scroll through the parameters with the left knob and adjust the values with the right knob. Rotate the left
encoder knob to view the entire list of parameters available as there may be more than those shown on
the screen. Press “back” when completed.
Press “save” to save the preset. Press “back” to return to the main menu.
If you make a mistake editing a parameter for an effect, you do not have to start over. The “undo” button
will revert the last change to its original setting, much like the undo command in a word processor. To
make further renements to any user-dened preset, you have two choices: press the "back" button
and start completely over, or simply use the soft knobs (45-46) to return to the individual effect within
a preset. Remember, factory presets cannot be altered by the user. If you choose to adjust or build on a
factory preset (which we encourage you to do), your saved settings will be automatically directed to the
next, unused, customized preset.
WARNING: When user-dened, customizable presets are saved, they will automatically replace the
current settings for that preset UNLESS you assign a new preset number. If you overwrite the originally
saved preset settings, the old settings are no longer retrievable.
User Tip: You can select up to two (2) of the internal
effects and arrange them in series in any order using
one instance of any effect in the chain. Since they
are in series, the order will affect the sound quality.
Adjustments to the Wet/Dry proportions can also
make a big difference to the sound of the effect.
IMPORTANT: When a signal passes through a digital
effects processor, a short delay results. When this
same signal returns to the mixer and combines with
the main output, the small delay difference results in
a comb lter. (Short changing delays are the basis of wah-wah effects.) To prevent the comb-lter effect,
increase the delay time simply by including an effect block such as reverb or delay.
Note that many effects like compressor, limiter, gate, chorus, etc., do not work well when used alone on
an effects send. Fortunately, the EFX 2 Patch Jack (56) can be patched directly into an Insert (48) on any
channel or subgroup (Group Inserts (54)). Simply connect the EFX 2 Patch jack (56) to the desired insert
jack with a stereo cable. Then, press the EFX 2 Patch Switch (33) to activate the patch. In this congura-
tion, comb ltering is eliminated because the only signal path is through the processor.
QUICK TIP: From anywhere within the digital arena, you can return to the main effects screen simply by
pressing the Effects Button.
OUTPUT PROCESSING:
The Peavey FX series mixers are equipped with Digital output processing on the Left and Right mains
outputs. The processing may not be switched to the aux busses.
Modes: The FX mixers can operate in any of three (3)
output modes.
Stereo: This is the normal output mode. In this mode,
the output processors are tied together so that what
you edit is applied equally to both channels at the
same time.
Dual Mono: This mode sums the left and right busses
together after the Feedback Ferret into a single mono
output. The L & R outputs get the same mono signal
but are capable of processing each output separately
OUTPUT PROCESSING
EDIT TYPE MODE
FB EQ DLY LIM
DIGITAL PROCESSING ARENA
DIGITAL PROCESSING ARENA
so that an adjustment made to the L output will not make that same adjustment to the R output. This
would be handy should the L & R outputs of your system be set up in an asymmetrical fashion (e.g., one
speaker stack is set up near a corner and the other centered along a wall). This would probably require
different EQ for each speaker to be balanced. It is also appropriate where one output drives a main
speaker cluster and the other output drives a remote speaker (or a different speaker conguration).
Subwoofer: This again combines the L & R busses and installs an electronic crossover in the output sec-
tion. This crossover may be adjusted so that one output (Left main) drives the low or sub output and the
other (Right main) drives the main or HF output. The Delays and the Limiters may be adjusted indepen-
dently for the two different outputs. The crossover employs a 4th order set of lters (24 dB/oct) and
Butterworth or Linkwitz-Riley lters may be selected. CD horn compensation is available for Constant
Directivity horns.
PROCESSOR MODULES
Feedback Ferret:
Press the “Output Processing” button.
Turn the left knob to highlight the rst block (the Feedback Ferret block), and select it by pressing the knob.
Press “Type” and use the left knob to select “Feedback Ferret.” Press it again to choose between “Dynam-
ic” and “Static” mode.
Dynamic Mode: Dynamic mode, when on, will detect feedback and eliminate it automatically. Once a feed-
back elimination lter has been activated, it will be released after a certain amount of time to allow other
feedback frequencies to be detected. If the feedback is severe enough, the feedback elimination lter for
that frequency will lock in place, not allowing it to be released. The only way to release a locked lter is to
select “Clear” on the “Edit” page, which will clear all of the current lters, locked or not.
Static Mode: Unlike Dynamic mode, Static mode involves a setup process and is the recommended mode
for more robust feedback elimination. Once Static mode has been selected, select “Detect” to begin de-
tecting feedback. In order for feedback to be eliminated, feedback must be present, so it is recommended
to increase the gain of the mixer in order to achieve feedback. Once feedback is sufciently present, a
lter should be activated to eliminate the feedback and the number of available lters should decrement
accordingly. Once you are satised with the feedback elimination lters, select “Back” to lock these lters
in place. Once this is accomplished, feedback will no longer be detected and the lters in place will not
release until “Detect” is selected again. A group of lters can be saved in the library by name and recalled
when you play the venue again, although it would be best to repeat the setup process again as things will
always change a little.
PEQ: Highlight the second box from the left and select "type." You can press the “Lib” button to select a
saved setting, or you can edit the existing setting by navigating around the screen.
The left encoder knob selects the band (1-5) to edit. Once you have selected that band, pressing the left
knob will allow you to adjust the center frequency of the lter selected. The right encoder knob toggles
between “bandwidth” and “gain.” Bandwidths between 0.3 octave and 2.0 octaves may be selected as
well as gain levels from -12 dB to +12dB. When you have made your adjustments, you may save them to
the Library by pressing the “Lib” button and selecting “Save current settings.” You can title your settings
by selecting the name button and assigning a name or you can save it over an existing setting. Select a
name or a “free” setting and press “save.”
GEQ: Highlight the second box from the left and select “type.” Scroll to “Graphic EQ” and select by
pressing the left encoder knob.
The left encoder knob controls the selection of the frequency to be modied and the right encoder knob
selects the gain, +/- 12 dB. The left encoder knob can also select the left most slider for gain adjustment
of the GEQ as a whole. Selecting the “Lib” button will allow you to save or recall your settings.

Delay: Highlight the third box from the left to select the “Delay” and press the “edit” knob down to ad-
just the amount of delay desired. You can select the “Lib” button to save the current adjustments to the
library or to load from the library. The delay is most often used when remote speakers are set up away
from the regular Main speakers. The number of ms of delay needed is close to the distance in feet plus
20 ms (so that a remote speaker located away from the Mains by 100 feet will need a delay of approxi-
mately 120 ms). This should normally be done in the “Dual Mono” output mode.
This delay is very useful in the “Stereo” mode for adding delay to compensate for the distance between
the backline ampliers and the front Main speakers. It is probably best to set this in relationship to the
loudest (peak) sound coming from the backline (usually the snare drum). If the snare drum is 12 feet
from the front of the stage, start with about 12 ms of delay plus 10 - 30 ms for the Haas effect (so be-
tween 22 and 42 ms or to taste). By adjusting the backline to the FOH Main speakers, a sort of focus
will take place. The audience will hear the sound as though it is coming from the band itself and not so
much coming from the PA ... a good thing to do!
Limiter: Selecting this function sets a limiter on the L/R outputs of your FX mixer. This helps to prevent the
mixer from clipping as well as overdriving the rest of the output chain. Press “edit” to adjust the parameters
of the output limiter. The threshold should probably be adjusted to max (+10 dB) and the mode adjusted
to “soft knee” in most cases. 50 ms of Attack and 500 ms of Release time are good starting points but may
be adjusted as necessary. If you are “hearing” this limiter actually work, then you are probably driving too
hard and should back off. This limiter is not intended to be a “sonic shaper” (use the “compressor” function
in the “Effects” processors). You may “save” or “load” from the library as necessary.
Digital I/O:
The digital I/O section of the FX mixer consists of the Utility and USB functions.
UTILITY
Screen Adjustment: Turn knob to adjust the contrast of the screen. You may also choose to invert the
screen colors. Press the “save” button to keep your adjustment or “back” to ignore.
Change Security Settings: The user can lock out others from changing effect, output or digital I/O
presets by selecting the appropriate check boxes. Once a box is checked, a password will be required to
make a change to that setting.
Change Password: A password may be set by
turning the left encoder knob to select a char-
acter for each of the four placeholders. Once
you have selected the characters, press the
“enter” button and validate your choice. This
password will now be necessary for making
changes to any of the settings that have been
selected in the “Security Settings” above. This
password will also be necessary to do a factory
reset.
Restore Factory Settings: Resets all param-
eters to factory settings and will erase all user presets and passwords.
USB
The FX2 mixer console allows the user to record or play back MP3’s directly to/from a thumb drive placed
in the USB A port. Note the USB B port directly streams audio in or out and is treated as a “sound card”
by the computer. How you treat this output will depend on the computer you use and the software you
are running to control it. Only one USB output may be connected at a time, and the USB B cable must
be disconnected before a device in the USB A port is accessed, and vice versa.
DIGITAL PROCESSING ARENA

Memory Stick Mode: Navigate to the Digital I/O screen. Select Memory Stick, the message “Media Not
Detected, Please Re-Insert Memstick” will appear until a memory stick is plugged in to the USB port.
Once inserted, the drive will be evaluated for available space. When ready, the menu will appear allowing
the user to select MP3 Playback or MP3 Record.
MP3 Recording: The FX2 mixer can record MP3’s at a sample rate of 48k and bit rates are selectable
from 96kbps to 320kbps. The recording bit rate and gain can be adjusted by selecting the CFG button.
MP3 Playback: The FX2 mixer can play back MP3’s at sample rates of 44.1kHz and 48kHz.
Once in the MP3 File Browse screen, you may select an MP3 le to play. The File Browse screen will only
show Directories (marked with “<DIR>” on the right side of the screen), MP3 les (with the .mp3 ex-
tension excluded), and M3U playlist les. (Note: for M3U playlists, all les included in the playlist must
be in the same directory in order for les to play correctly)
If you are in the root directory of the device, “[ROOT]” will be displayed at the top of the list. Select a
directory to view the les in that directory, or select “[UP DIR]” to back out of a directory. Once an MP3
or M3U le is selected, the MP3 Playback Screen will be shown.
When an MP3 le is nished playing, the player will seek to the next le in the list, or if a playlist is se-
lected it will seek to the next le in the playlist. Once the last le is reached, the player will loop back to
the rst le in the list. To scroll to a position in the song, spin the right encoder until the progress indica-
tor triangle indicates the desired position, then press the right encoder to set the position.
Computer Mode: The USB B port streams 48k sample rate, 24 bit audio to an external computer or other
recording device. To activate this mode, navigate to the Digital I/O screen and select Computer Mode.
The screen will show a message saying “CHANGE MODE TO COMPUTER MODE?” Select OK to activate
Computer Mode or CANCEL to exit this screen. Playback through this port may be assigned to the last
stereo channel by pushing the “Input Select” button to the “USB” position. It then may be routed any-
where throughout the console by using the Aux Sends or Bus assignment buttons on that channel strip.
FIRMWARE UPDATE
From time to time, there will be rmware updates that will address bugs or make performance improve-
ments. To update the mixer to the latest rmware, please go to www.peavey.com for instructions.
DIGITAL PROCESSING ARENA

CONNECTIONS
Inserts: These jacks are 1/4” Tip/Ring/Sleeve (TRS) connectors that allow external signal processors to
be inserted into the Input Channel signal path. Tip=Send; Ring=Return; Sleeve=Ground. One of the on-
board effects processors can be patched to any channel with an Insert.
Line (1/4”) Inputs: These jacks are 1/4” balanced (TRS) high-impedance inputs. The tip is the positive input
and should be used for unbalanced inputs. It has 20 dB less gain than the XLR input and does not have
phantom power available. The Mic and Line inputs should not be used simultaneously.
Mic (XLR) Inputs: XLR balanced inputs optimized for a microphone or other low impedance source. Pin
2 is the positive input. Because of the wide range of gain adjustment, signal levels up to +14 dBu can be
accommodated.
Stereo (1/4”) Inputs: These 1/4” unbalanced inputs work as a stereo line input using both jacks or as a
mono input if the connection is made to the L/Mono input only.
Group Inserts: These jacks are 1/4” TRS connectors that allow external signal processors to be inserted
into the Group signal path. Tip=Send; Ring=Return; Sleeve=Ground. One of the on-board effects proces-
sors can be patched to any Group Insert.
Group Outputs: These Group Outputs feature 1/4” TRS balanced jacks and provide output signal from
the Groups. The output level is set by the Group Level faders (26).
Left/Right Outputs: The Left/Right Outputs feature two 1⁄4” TRS Z-balanced jacks and two fully bal-
anced XLR outputs. The 1⁄4” outputs can be used with Tip‚ Ring, Sleeve (TRS) balanced or Tip, Sleeve
(TS) unbalanced connectors. The output level is set by the Master Level faders (40). Both outputs can be
used simultaneously.
AUX 1 - 6 Outputs:
These AUX Outputs
feature 1/4” TRS
balanced jacks and
provide signal from the
Auxiliary Outputs. The
output level is set by
the AUX Level controls
(19, 20).
Effects 2 Patch Jack:
This 1/4” TRS jack
allows the internal
Effects 2 processor to
be patched to an Input
or Group Insert or to an
external device. The tip
carries the input (return)
signal to the compres-
sor and the ring carries
the output (send).
EFX 2 Return Jacks: These 1/4” high-impedance balanced inputs can be used as stereo or individual
returns. Designed for effects return, they can also be used as additional stereo inputs. The L/Mono input
provides signal to both inputs if no connector is attached to the Right jack. The tip is the positive input
for both balanced and unbalanced use.
Rear Panel
48
49
50
51
52
53
54 56 57 58 59
55 60 61
49
48
54
55
56
57
53
50
51
52

Rear Panel
Media In Jacks: The Media Input jacks are set up for a +4 dBu input from a stereo audio media source.
The signal feeds the Media In level control (34).
Record Output Jacks: The output jacks can provide a +4 dBu output signal to a stereo recording device.
The output level is controlled by the Record Output level control (36).
USB Memory Connector: Use this A-type USB connector to plug in a removable data storage device to
read or write MP3- formatted les.
USB Computer Connector: Use this B-type USB connector to connect with a computer.
Power Switch: Pressing the power switch supplies power to the unit.
Removable Power Cord: This receptacle is for the IEC line cord (included) that provides AC power to the
unit. Connect the line cord to this connector and to a properly grounded AC supply. Damage to the equip-
ment may occur if an improper line voltage is used (see voltage marking on unit).
Never remove or cut the ground pin of the line cord plug. The console is supplied with a properly rated
line cord. If lost or damaged, replace this cord with one of the proper rating.
NOTE FOR UK ONLY: If the colors of the wires in the mains lead of this unit do not correspond with the colored
markings identifying terminals in your plug, proceed as follows: (1) The wire that is colored green and yellow
must be connected to the terminal marked by the letter E, or by the Earth symbol, or colored green or green and
yellow. (2) The wire that is colored blue must be connected to the terminal that is marked with the letter N, or
colored black. (3) The wire that is colored brown must be connected to the terminal that is marked with the letter
L or colored red.
58
59
60
61
62
63
62 63

FX™ 2 Series Specications
Inputs
Function Input Z
(Ohms min)
Input Gain
Setting Min* Nominal** Max
Bal/
Unbal
Connector
Microphone
(150 Ohms)
2.2k
Max Gain
(60 dB)
Min Gain
(0 dB)
-76 dBu
-16 dBu
-56 dBu
+4 dBu
-40 dBu
+20 dBu
Bal
XLR Pin 1 Gnd
Pin 2 (+)
Pin 3 (-)
Line
(10 k Ohms)
20k
Max Gain
(40 dB)
Min Gain
(-20 dB)
-56 dBu
+4 dBu
-36 dBu
+24 dBu
-20 dBu
+40 dBu
Bal
1/4" TRS;
Tip (+)
Ring (-)
Sleeve Ground
Stereo Line
(direct to L/R)
10k
Max Gain
(20 dB)
Nominal Gain
(0dB)
-26 dBu
-6 dBu
-16 dBu
+4 dBu
+2 dBu
+22 dBu
Unbal 1/4" TS;
Tip (+)
Sleeve Ground
Stereo Line
(via channel)
10k
Max Gain
(20 dB)
Nom Gain
(0dB)
-36 dBu
-16 dBu
-16 dBu
+4 dBu
+2 dBu
+22 dBu
Unbal 1/4" TS;
Tip (+)
Sleeve Ground
Channel and
Group Insert
Return
22k
N/A
(0dB) -16 dBu +4 dBu +22 dBu Unbal
1/4" TRS; Tip (send)
Ring (return)
Sleeve Ground
EFX2 Return 20k
Max Gain
(10 dB)
Nom gain
(0dB)
-16 dBu
-6 dBu
-6 dBu
+4 dBu
+12 dBu
+22 dBu
Bal
1/4" TRS; Tip (+)
Ring (-)
Sleeve Ground
Media In 10k
Max Gain
(10dB)
Nom Gain
(0db)
-16 dBu
-6 dBu
-6 dBu
+4 dBu
+10 dBu
+20 dBu
Unbal
RCA Jacks
Input Levels
0 dBu=0.775 V (RMS)
* Min Input Level (sensitivity) is the smallest signal that will produce nominal output (+4 dBu) with channel and
master faders set for maximum gain.
** Nominal settings are dened as all controls set at 0 dB (or 50% rotation for rotary controls) for nominal output.
Microphone gain control is as specied.

Outputs
Function Min Load
Z (Ω) Nominal Max Bal/
Unbal
Connector
Master Left/Right 600
+4 dBu
+4 dBu
+22 dBu
+22 dBu
Bal
XLR Pin 1 Gnd
Pin 2 (+), Pin 3 (-)
1/4" TRS; Tip (+), Ring (-)
Sleeve Ground
Groups 1-4 and
Aux 1-6
600 +4 dBu +22 dBu Bal 1/4" TRS: Tip (+), Ring (-)
Sleeve Ground
Record Out 2k +4 dBu +22 dBu Unbal RCA Jacks
Channel and Group
Insert Send
600 +4 dBu +22 dBu Unbal 1/4" TRS; Tip (send), Ring (return)
Sleeve Ground
Headphone 8 +4 dBu +22 dBu Unbal 1/4" TRS; Tip (left), Ring (right)
Sleeve Ground
Output Levels
0 dBu=0.775 V (RMS)
Gain
Mic Input Gain Adjustment Range: 0 dB to +60 dB
Mic Input to Left/Right Balanced Output 80 dB (max gain)
Line Input Gain Range: -20 dB to +40 dB
Line Input to Left/Right Balanced Output 60 dB (max gain)
Stereo Line Input Gain Range: -∞ to +20 dB
Stereo Line Input to Left/Right Balanced Output +30 dB direct to L/R output - +40 dB via channel (max gain)
Total Harmonic Distortion & Noise
0.01% 20 Hz to 20 kHz Mic to Left/Right Output (22 Hz to 22 kHz BW)
0.005% Mic Pre-amp (22 Hz to 22 kHz BW)
Frequency Response
Mic Input to Left/Right Output 20 Hz to 20 kHz 0 dB/-1 dB
Hum and Noise
Output Residual Noise S/N Ratio (Ref: +4dBu) Test Conditions
Master Left/Right -100 dBu
-82 dBu
-80 dBu
104 dB
86 dB
84 dB
Master Fader Down, Channel Levels Down
Master Fader Nominal, Channel Levels Down
Master Fader Nominal, Channel Faders Nominal,
Panned Odd Channels (left), Even Channels (right)
Groups 1-4 -98 dBu
-90 dBu
-83 dBu
102 dB
94 dB
87 dB
Master Fader Down, Channel Levels Down
Master Fader Nominal, Channel Levels Down
Master Fader Nominal, Channel Faders Nominal
Panned Odd Channels (left), Even Channels (right)
Aux 1-6 -101 dBu
-81 dBu
105 dB
85 dB
All controls off
All channel sends nominal, masters nominal
(Hum and noise measurements: 22 Hz to 22 kHz BW)

Crosstalk/Attenuation
Adjacent Input Channels (1 kHz) -70 dB typical Mute Button Attenuation (1 kHz) -80 dB typical
Left to Right Outputs (1 kHz) -70 dB typical Channel Fader Kill (1 kHz) -80 dB typical
Weight Power Requirements
FX2 16: 22 lbs. (10.0 kg)
FX2 24: 25 lbs (11.4 kg)
FX2 32: 30 lbs. (13.6 kg)
Installation Note, Ventilation:
This unit must have the following clearances from any combustible surface: top: 8", sides: 12", back: 12"
Dimensions
Phantom Power Signal/Clip Indicators
Yellow: -20 dBu Red: 2 dB below clipping
+48 volts
Equivalent Input Noise (EIN)
-129 dBu (Mic input terminated with 150 Ohms)
Common Mode Rejection Ratio (Mic Input)
Test Conditions: 120 VAC 60 Hz maintained throughout testing
FX2 16 : 8"h x 19.0"w x 20.25"d on table top
16.7" wide without rack ears
(20.32cm x 48.3cm x 51.44cm on table top)
(42.4cm wide without rack ears)
12RU (20") x 19.0" x 8" in equipment rack;
7" behind rack
(44.3cm x 48.3cm x 20.32cm in equipment rack)
(17.78cm behind rack)
FX2 24: 8" high x 24.65" wide x 21.25" deep
(20.32cm x 62.6cm x 53.975cm)
FX2 32: 8" high x 32.75" wide x 21.25" deep
(20.32cm x 83.185cm x 53.975cm)
-50 dB minimum (20 Hz to 20 kHz)
-60 dB typical @ 1 kHz
Features and specifications are subject to change without notice.
Peavey Electronics Corporation • 5022 Hartley Peavey Dr • Meridian, MS 39305
(601) 483-5365 • FAX (601) 486-1278 • www.peavey.com © 2012 EX000165
FX2 16: 100-240 VAC 50/60 Hz 40 watts nominal
FX2 24: 100-240 VAC 50/60 Hz 55 watts nominal
FX2 32: 100-240 VAC 50/60 Hz 60 watts nominal

Graphic EQ
Meridian, MS 39301
••••••••••••••••••••••••
P. O. Box 2898
4
3
2
1
D
4
3
2
1
CBA
A B C D
• • • • • • • •• • • •
• • • • • •
Sheet Date:
of
D
EQ
LO MID HI
HI PASS
EQ
LO MID HI
HI PASS
EQ
LO MID HI
Graphic EQ
PAN
BALANCE
BALANCE
BALANCE
MEMORY
COMPUTER
USB
INTERFACE
GAIN
USB
STEREO
STEREO
CHAN 15/16
ONLY
AUX1
OUT
GROUP
CLIP
AFL/
AUX
OUT
OUT
OUTPUTS
OUTPUTSINPUT
L/R RIGHT
LEFT
PROCESSOR
PFL/AFL
LOGIC
MUTE
SIG/
AFL
LEVEL
1/2
L/R
3/4
3/4
L/R
1/2
ASSIGN
R
FEEDBACK
FERRET
FERRET
FEEDBACK
R
AUX 1-4
GAIN
AFL
AFL
AFL
AFL
OUT
MONO
FADER
FADER
BAL
BAL
LEFT
RIGHT
UNBAL
ASSIGN
INSERT
MONO
LEFT/
+/- F
LOW HI
+/-
PFL
MUTE
MIC
MIC
LINE
1/2
1/2
FADER
MUTE/
AUX2
AUX
AUX2
HEADPHONE
OUT
L/R
3/4
L/R
ASSIGN
3/4
LEFT/
AUX2
AUX3
AUX4
MIC
AUX3
AUX4
LOW
+/- MID
+/- +/-
HI
CHANNEL
L/R DIRECT
LOW CUT
LOW CUT
AUX1
AUX 1-4
PRE EQ SELECT
POST EQ SELECT
AUX1
FADER
MUTE
AUX1
SEND
SEND
AUX2
SEND
AUX
SEND
PFL
MUTE/
CLIP
ASSIGN
PATCH
EFX2
R=OUT
T=IN
AUX 2
AUX 1
LEVEL
HEADPHONE
L/R
FROM AUX 6
FROM AUX 5
EFX1
LEVEL
MUTE
AFL
SIG/
PFL
CLIP
SIG/
PFL CLIP
MUTE/
MUTE/
CLIP
AFL
SIG/
AFL
ACTIVE
LOGIC
PFL/AFL
LEFT
RIGHT
PROCESSOR
EFX 1
EFX 2
INT EFX2 RTN
EXT PATCH
EFX2 PATCH
AUX
AUX 5 & 6
AUX
AUX 6 TO EFX 2
AUX 5 TO EFX 1
GAIN
+/-
MID
EFX2
RIGHT
LEFT
RIGHT
LEFT
INPUT
AUX 3 & 4
UNBAL
STEREO CHANNELS
MONO CHANNELS
AUX5/EFX1
AUX6/EFX2
AUX5/EFX1
AUX6/EFX2
MUTE
MUTE/
CLIP
FADER
T=OUT
R=IN
AUX1
AUX2
AUX1
AUX2
GROUP GROUP
LEFT
AUX
RIGHT
CLIP
AFL/
CLIP
AFL/
AFL/
CLIP
STEREO
RIGHT
EFX2 RETURN
LEFT/
MONO
PFL/AFL
SHORT TO MIX
AFL
GROUP
OUT
INSERT
GROUPS 1-4
LEVEL
STEREO INPUT
RIGHT
MONO
MONO
LEFT/ RIGHT/
MONO
MEDIA IN
MEDIA
REC OUT
LEVEL
MEDIA INPUT
PHANTOM PWR FROM SWITCH IN MASTER SECTION+48V
REC OUT
OUT
OUT
RIGHT/
MONO
MONO
LEFT/
RIGHT/
PFL
SIG/
+48V PHANTOM PWR FROM SWITCH IN MASTER SECTION
PRE EQ SELECT
AUX 1-4
AUX 1-4
POST EQ SELECT
L/R & MEDIA IN
AUX6/EFX2
AUX5/EFX1
AUX4
AUX3
PFL/AFL
AUX1
GROUP4
GROUP2
RIGHT
LEFT
FX_SERIES_BLOCK
3-2-2005_15:222 4
GROUP1
GROUP3
AUX2
PFLCTRL
Table of contents
Other Peavey Dj Equipment manuals

Peavey
Peavey DJS 1500 User manual

Peavey
Peavey SRC Series User manual

Peavey
Peavey DPM SX II User manual

Peavey
Peavey DeltaFex Twin User manual

Peavey
Peavey LM 8s User manual

Peavey
Peavey XRD 680 User manual

Peavey
Peavey Lighting Solutions LICON 416 User manual

Peavey
Peavey ESCORT 3000 User manual

Peavey
Peavey Illuminator 600 User manual

Peavey
Peavey MULTIFEX User manual