PEEX rX User manual

PEEX rX User Guide V1.0
© PowerChord Group Limited 2018
1 Blythe Road, London W14 0HG
Hold for
3 seconds on/off
5 seconds Bluetooth Pairing
(whilst off)
For more info on the PEEX rX please visit
www.peex.live
Status (While ON)
Bluetooth Pairing
Required
Flash = Incorrect
Concert ID / Solid =
Low Battery
Ready to receive
PEEX signal /
concert audio
Charging/Charged PEEX signal available /
LIVE audio on
Bluetooth Pairing
Go to > PEEX App > Account > BT
Pairing > Select Device
(PEEXControl-123456) > Enter BT
Pairing Code > Complete
NOTE: You will have to classically pair the rX to your
phone, as well as the PEEX App.
Accessories
rX receiver
Quick Start Guide

Bluetooth Pairing Code
Some copy here
PEEX rX consists of:
2
MAC code
Hardware Serial Number
Further details and safe handling info can
be found at: www.peex.live
1) Custom PEEX Earphones
2) PEEX Lanyard
3) PEEX rX Receiver
3
Congratulations on
purchasing your PEEX rX -
The Future of live music
is in your hands!
1
Firt step is to download the PEEX App
PowerChord Group Limited
Registered in England & Wales No. 9303518
Registered Office: 1 Blythe Road, London W14 0HG
PWHH-RXFG –User Guide
The following information is to be included on the PEEX Website in support of the PWHH-
RXFG User Guide, which will accompany the product on a printed insert as per the design
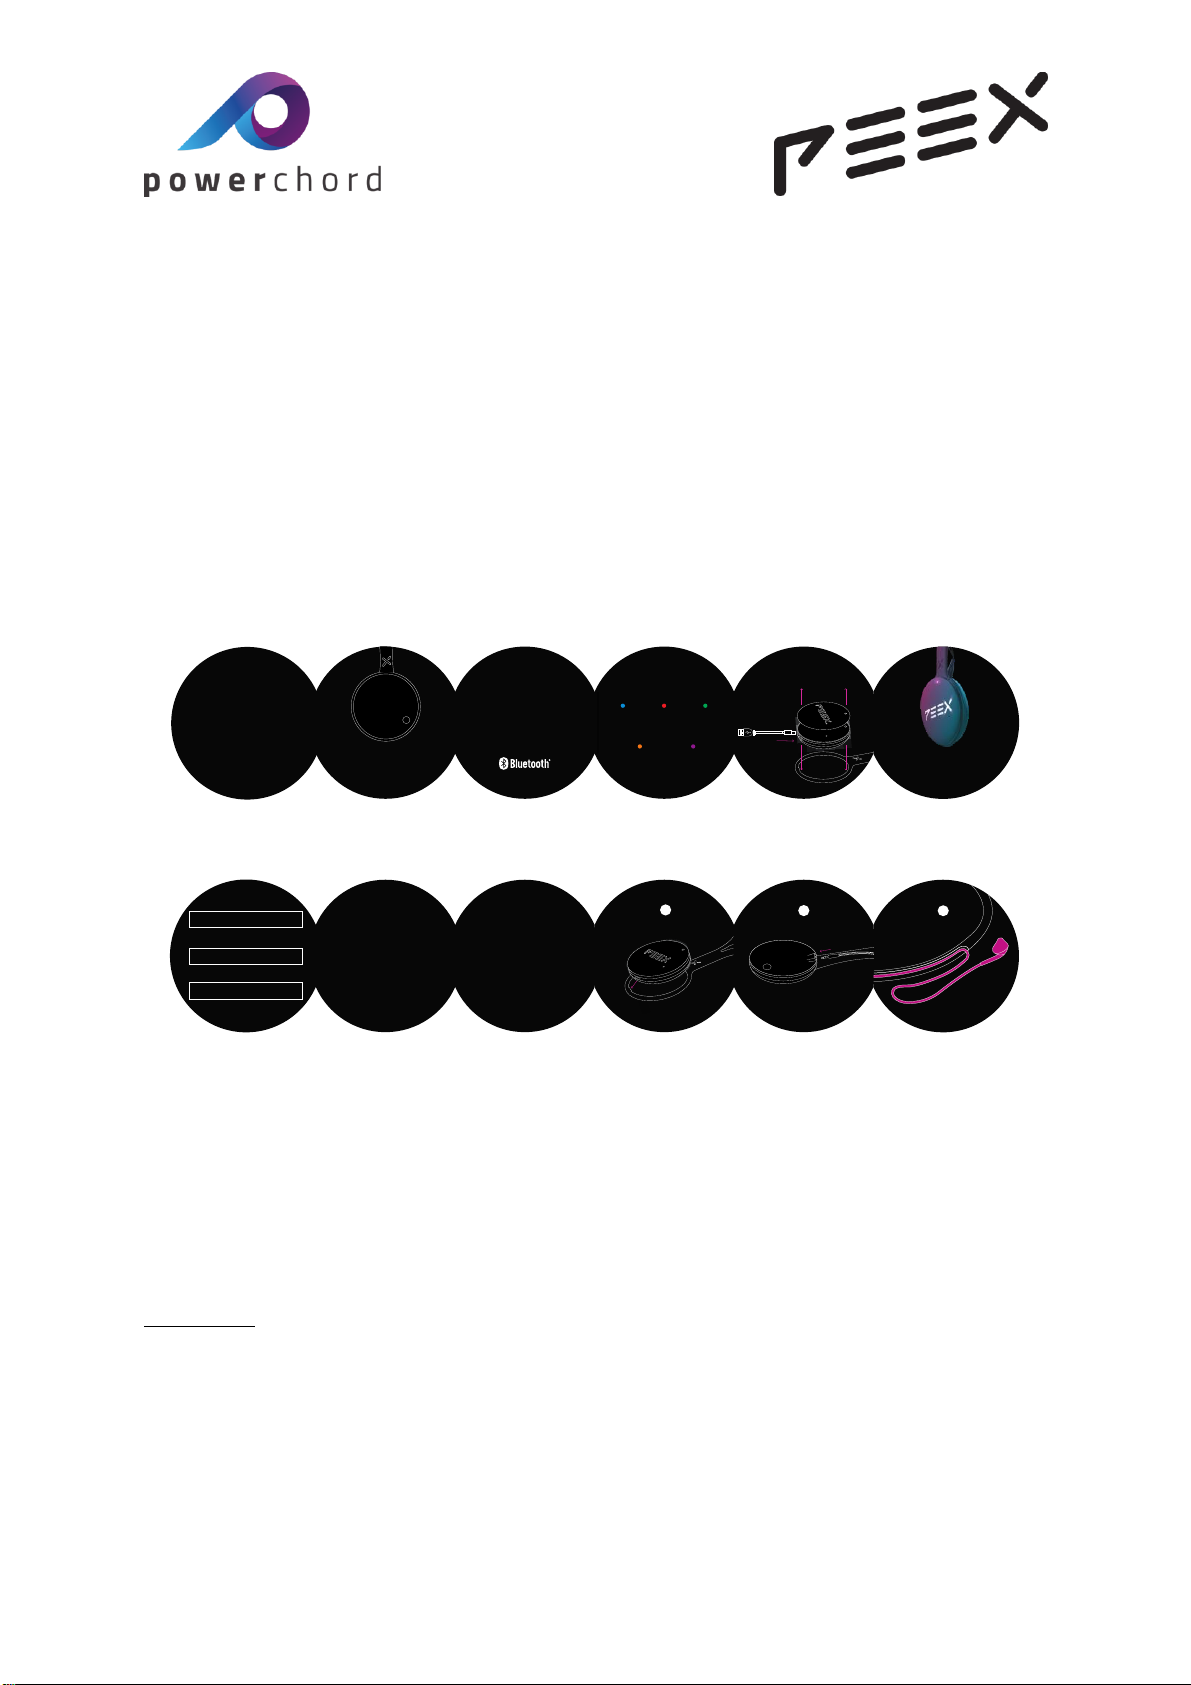
example in Fig.1. To reduce the risk of confusion, the guide has been deliberately designed
to make maximum use of graphics and with a minimal use of text. Where more information
on the use of the product is sought, the user is directed to additional content on the
www.peex.live website. For readability, the product is described as the PEEX rX Receiver
and PEEX rX in this guide.
The user guide document, included with the physical product, will be a folding insert with
images and words to clearly describe features and functions available to the user; similar to
this example:
Figure 1. The proposed circular, concertina style PWHH-RXFG User Guide
For the more detailed information to be included on the PEEX website, the following
information will be included. Details may be further enhanced with simple animations or
videos of the product in use.
There will be four main elements covered, Assembly; Use; Status and Care.
Assembly:
1) Take the three pieces from the packaging and find the small plug at the bottom of the
lanyard ring.
2) This will fit into the USB C connector at the bottom of the rX receiver and help when
fitting the lanyard to the rX. It also seals it.
3) Make sure the lanyard is the correct way around (X logo facing front) and place the rX
receiver in the loop. A little effort will allow the lanyard loop to locate in the groove around
the outside of the rX and hold it securely.
PEEXrX User Guid e V1 .0
©Pow erChord Grou p Limit ed 20 18
1 Blyt he Road , Londo n W14 0 HG
Holdfor
3 seconds on/ off
5 s e conds Bluet o oth Pairing
(w hils t off)
For more info on th e P EEXrX p lea s e vis it
ww w.pe ex.live
Status (While ON)
Bluet oo th P airing
Requ ired
Flas h = Incorre ct
Concer t ID / S olid =
Low Bat te ry
Rea dy to re ceive
PEEXs igna l /
conc ert a udio
Charging/ Char ged PEEXs igna l ava ila ble /
LIVEa udio o n
Bluet ooth Pairing
Go to > P EEXApp > Account > BT
Pa iring > Select Device
(P EEXCo nt rol- 12 3 45 6 ) > En te r BT
Pairing Code > Complete
NOTE: You w ill h ave to clas s ica lly pa ir t he rX t o yo ur
ph one , as w ell as t he P EEXApp.
Acces sories
rXreceiver
Quick Start Guide
BluetoothPairingCode
Somecopyhere
PEEXrXcons is ts of:
2
MACcode
HardwareSerial Number
Furt he r det ails an d sa fe h andling info ca n
be fou nd a t: w ww .pee x.live
1 ) Cu st om P EEX Earp hon es
2 ) PEEX La nya rd
3 ) PEEXrX Rece iver
3
Congra tulat ions on
purchasing your PEEXrX-
TheFuture of live music
isinyour hands!
1
Firt st e p is to d ow nload t he P EEXApp

PowerChord Group Limited
Registered in England & Wales No. 9303518
Registered Office: 1 Blythe Road, London W14 0HG
4) Next the earphones can be connected to the rX receiver and fitted to the lanyard.
5) Start by inserting the 3.5mm audio jack in the socket at the top of the rX receiver.
6) Next orientate the cables to ensure that the left and right earpieces are correctly
positioned. The cables can be retained in the special grooves on the rear of the lanyard.
7) Finally, try the lanyard on for comfort. The magnetic clasp is easily pulled open and snaps
back together.
Use:
8) On the rear of your rX is the power button. To power the device on and off hold for
approximately 3 seconds until the LED on the front goes green followed by flashing red. See
LED status information later in this guide.
9) To enter Bluetooth pairing mode, first make sure the device is switched off. Then press
and hold the power button for approximately 5 seconds until the LED on the front flashes
blue.
10) You can now discover and pair your device using the ID pairing code found under the
front cover and in the packaging.
11) In the PEEX App go to your Account page and select BT Pairing and select the device
PEEXControl-xxxxxx, where the x’s represent the unique device ID.
12) Follow the dialogue to enter your unique BT Pairing code and wait for confirmation that
this has been successful.
13) BT Classic pairing is also necessary using the normal BT pairing procedure for your
phone. Select PEEXPlayer--xxxxxx, where the x’s represent the unique device ID.
Status:
14) The PEEX rX provides status information via the LED at the top of the front cover.
Different colours and flash speeds indicate different operating modes:
BLUE: BT Pairing Required. Fast flash = both modes need pairing, slow flash = only one
mode needs pairing.
RED: Slow flash = incorrect Concert ID (see app for details) and solid = low battery power.
ORANGE:Slow flash = charging and solid = fully charged.
Green: no PEEX signal available.
PURPLE: Slow flash = PEEX signal available and solid = live audio on.
This information may be supported by an animation or video to better demonstrate the
different LED flash speeds, colours and modes.
Care:
16) To charge your PEEX rX, remove the lanyard and insert the USB cable supplied. This can
then be connected to a standard USB charger or USB port on a computer.
17) To remove or replace the front cover, use either your finger nail or one of the guitar
picks include with your PEEX rX. You will find three small recesses at 11, 3 and 7 o’clock to
help with removal.
18) To keep your rX clean, use a damp cloth to remove any marks and then dry
thoroughly. Do not immerse in water.


