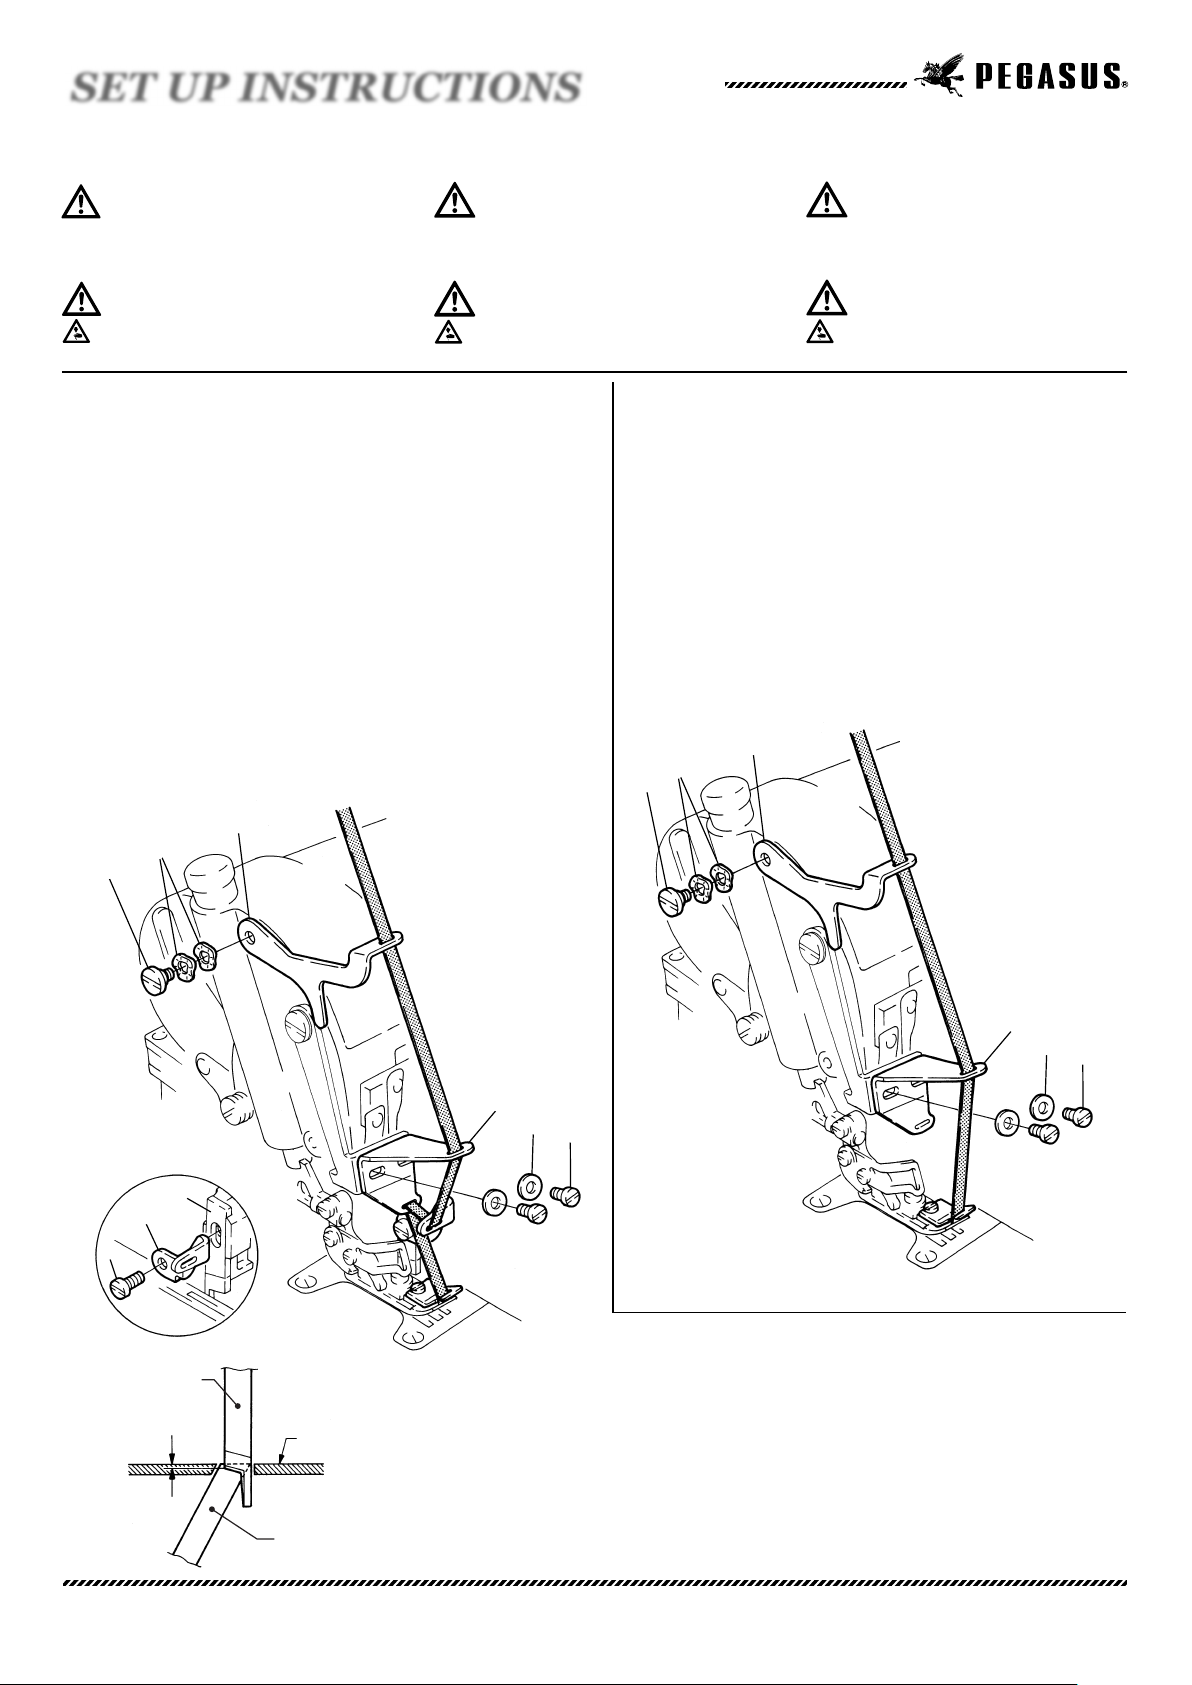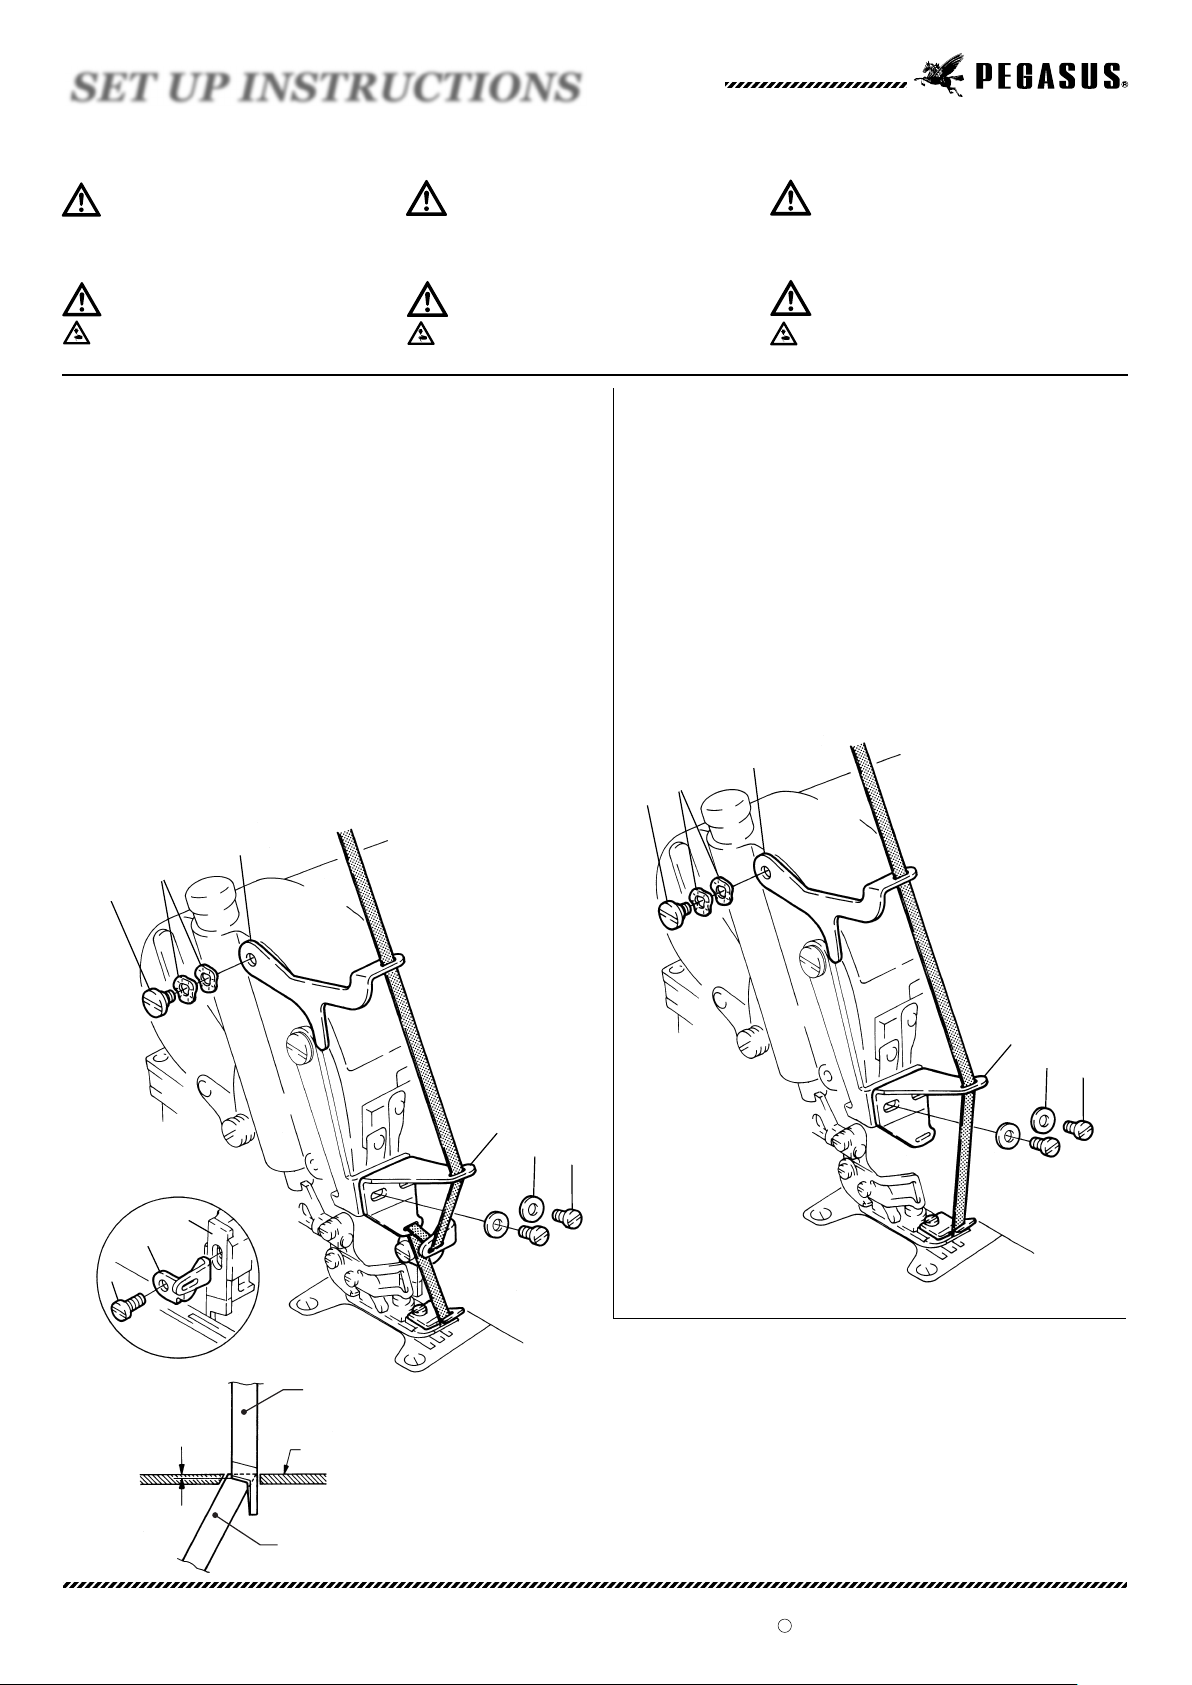
■テープ捌きを使用する場合
1.テープ案内(上) 1をネジ 2・座金 3で取り付けてください。
2.ネジ 4を緩めて、アイガードを外してください。
3.外したネジ 4・座金 5でテープ案内(下) 6を取り付けてください。
4.
テープ捌き 7を図のように上メス 8の止ネジ 9で仮締めしてください。
5.テープ捌き 7仮締め後、下記の調節を行ってください。
注意
注意
テープ案内・テープ捌きの取り付け方
図を参照してテープ案内・テープ捌きを取り付けて
ください。
この取付説明書に記載されている内容は、改良のため予告なく変更することがあります。 Cat. No. 9B400400000 February 2003
2003 PEGASUS SEWING MACHINE MFG. CO., LTD.
C
Installing the tape guide / tape take-up
Install the tape guide and tape take-up by referring
to the illustrations.
The description in this SET UP INSTRUCTIONS is subject to change without prior notice for improvement.
VORSICHT
VORSICHT
CAUTION
CAUTION
取り付け作業を行うときは、必ずミシンの電源スイッチ
を切り、電源プラグをコンセントから抜いて、専門技術
者が行ってください。
Always turn off the power first, unplug the machine
and then well-qualified technicians should install
the tape guide and tape take-up.
警告
警告
■テープ捌きを使用しない場合
1.テープ案内(上) 1をネジ 2・座金 3で取り付けてください。
2.ネジ 4を緩めて、アイガードを外してください。
3.外したネジ 4・座金 5でテープ案内(下) 6を取り付けてください。
Änderungen dieser MONTAGEANLEITUNG jederzeit vorbehalten.
●手でミシンプーリーを回して、上メス台を最下位置まで下げてください。
その時、上メスが下メスと 0.5 〜1.0 mm かみ合う位置になるように、
ネジ 9を緩めて調節してください。調節後、ネジ 9を締めてください。
●Turn the machine pulley by hand until the upper knife holder is at the
bottom of its travel. Loosen screw 9. Achieve 0.5 ~ 1.0 mm overlap
of the upper and lower knives. After this adjustment tighten screw 9.
●Das Handrad von Hand drehen, bis sich der Obermesserhalter in seiner tiefsten
Stellung befindet. Schraube 9lösen. Die Überlappung von Ober- und Untermesser
auf 0
.
5 - 1
.
0 mm einstellen. Anschließend Schraube 9wieder festziehen.
針板上面
Top surface of the needle plate
Oberkante der Stichplatte
上メス
Upper knife
Obermesser
下メス
Lower knife
Untermesser
0.5 〜1.0 mm
1
2
3
4
5
6
8
9
7
23
1
6
54
上メスや下メスで手や指を切り、ケガをする危険
がありますので十分注意して作業を行ってください。
WARNUNG
WARNUNG
WARNING
WARNING
■If you use the tape take-up
1. Install upper tape guide 1with screw 2and washers 3.
2. Loosen screws 4. Remove the eye guard.
3. Install lower tape guide 6with screws 4and washers 5removed in the
previous procedure.
4. Install tape take-up 7temporarily with screw 9for upper knife 8(see the
illustration below).
5. Adjust overlap of the upper and lower knives as shown below.
■If you do not use the tape take-up
1. Install upper tape guide 1with screw 2and washers 3.
2. Loosen screws 4. Remove the eye guard.
3. Install lower tape guide 6with screws 4and washers 5removed in
the previous procedure.
Pay close attention to the knife edges not to
injure your hands and/or finger.
Montage der Bandfürung/des Bandgebers
Montieren Sie die Bandführung/den Bandgeber wie
abgebildet.
Stets zuerst die Maschine ausschalten und ausstecken.
Die anschließende Montage von Bandführung/Bandgeber
hat durch qualifizierte Mechaniker zu erfolgen.
Verletzungsgefahr für Hände und/oder Finger
an Messerschneiden!
■Mit Bandgeber
1. Bandführung 1mit Schraube 2und Beilagscheiben 3befestigen.
2. Schrauben 4lösen. Augenschutz entfernen.
3. Untere Bandführung 6mit den in Schritt 2 entfernten Schrauben 4und
Beilagscheiben 5montieren.
4.
Bandgeber 7provisorisch mit Schraube 9für das Obermesser 8befestigen
(siehe Abbildung unten).
5. Überlappung von Ober- und Untermesser wie unten abgebildet einstellen.
SET UP INSTRUCTIONS MX Series
■Ohne Bandgeber
1. Obere Bandführung 1mit Schraube 2und Beilagscheiben 3befestigen.
2. Schrauben 4lösen. Augenschutz entfernen.
3. Untere Bandführung 6mit den in Schritt 2 entfernten Schrauben 4und
Beilagscheiben 5montieren.