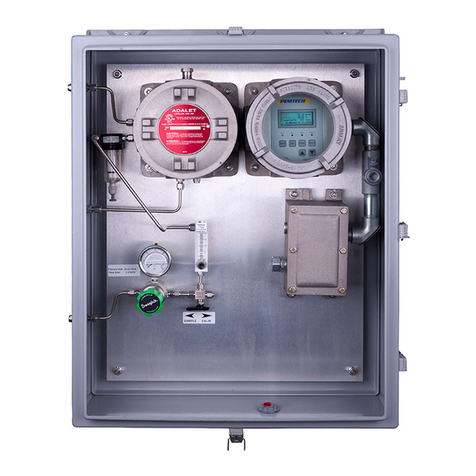
Unit Startup Check list
Use the following steps as a guide for proper startup procedure.
Unit must be installed in shaded area to avoid extreme heat conditions.
Perform all the system wiring as discussed in the previous section.
Be sure the unit is connected with proper AC or DC supply. But DO NOT switch the
power ON at this time.
Secure and tighten all covers to the junction boxes.
Check for maximum stream pressure and temperature. For high pressure streams install a
regulator at the sampling point and then run ¼” tubing to the analyzer regulator. Do not
connect stream with high pressure straight to the regulator installed on the analyzer.
Be sure the stream is free of heavy particles, contaminants and heavy moisture to avoid
damage to the sampling system.
Shut off the regulator on the analyzer by rotating the knob counter clockwise.
Connect the stream to the analyzer via ¼” stainless steel tube.
Make sure the 3 - way valve next to the pressure regulator is switched to “SAMPLE”
position.
Switch ON the AC or DC power to the analyzer. The LCD should display start up
messages.
After start up messages and warm up cycle the unit will begin its normal operation. If
alarm relays are being used then set alarm levels when the system is in normal cycle. Refer
to section on programming alarm set points later in this document.
Switch ON the flow from the gas stream.
Slowly turn the pressure regulator knob in clockwise direction to start the sample flow to
the analyzer. Set the pressure between 25 and 30 PSIG indicated on the pressure gauge.
Set the flow rates in the Air and Sample flow meter to 1.0 SCFH. The flow meters are
located in the sampling system enclosure. Secure and tighten the cover on the sampling
system enclosure. See System layout diagram.
The analyzer is calibrated at the factory and is therefore, ready for normal operation.
However, if the user wishes to calibrate the unit then wait for at least 5 to 10 minutes
before attempting the calibration.