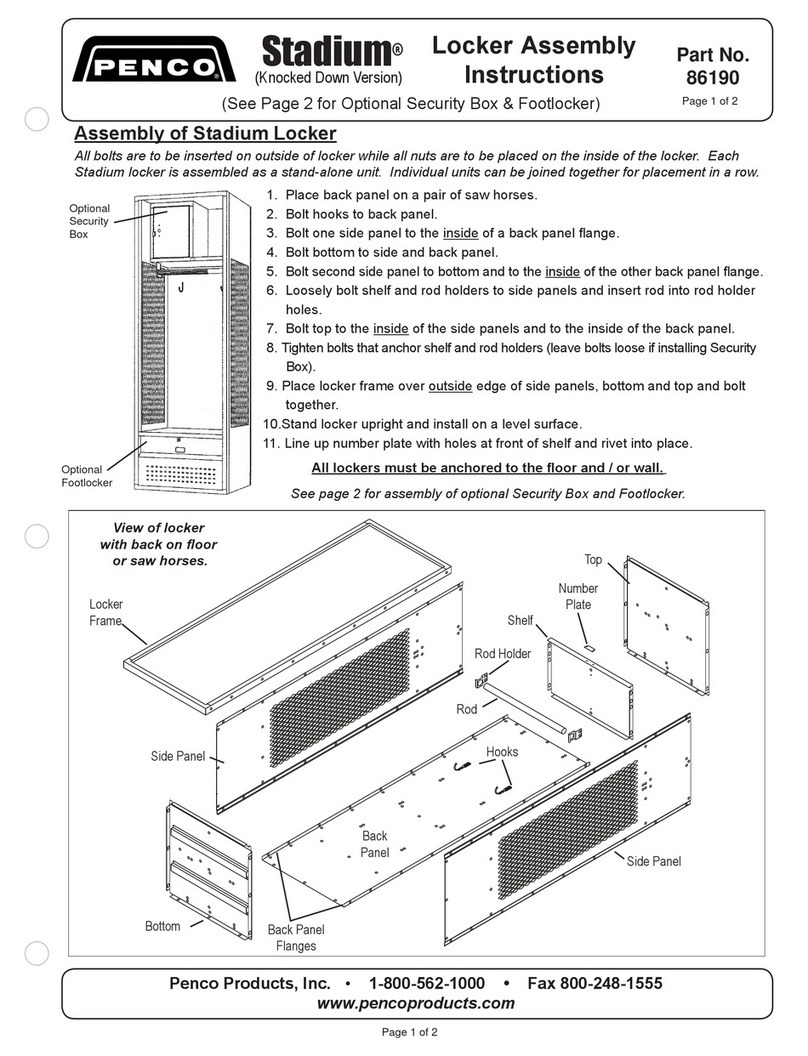
PENCO KD User manual

Stadium Fully Framed LOCKER – KD
Assembly Instructions
www.pencoproducts.com
PENCO PRODUCTS, INC |1820 Stonehenge Drive, Greenville, NC 27858
800-562-1000 |Fax: 800-248-1555 |general@pencoproducts.com
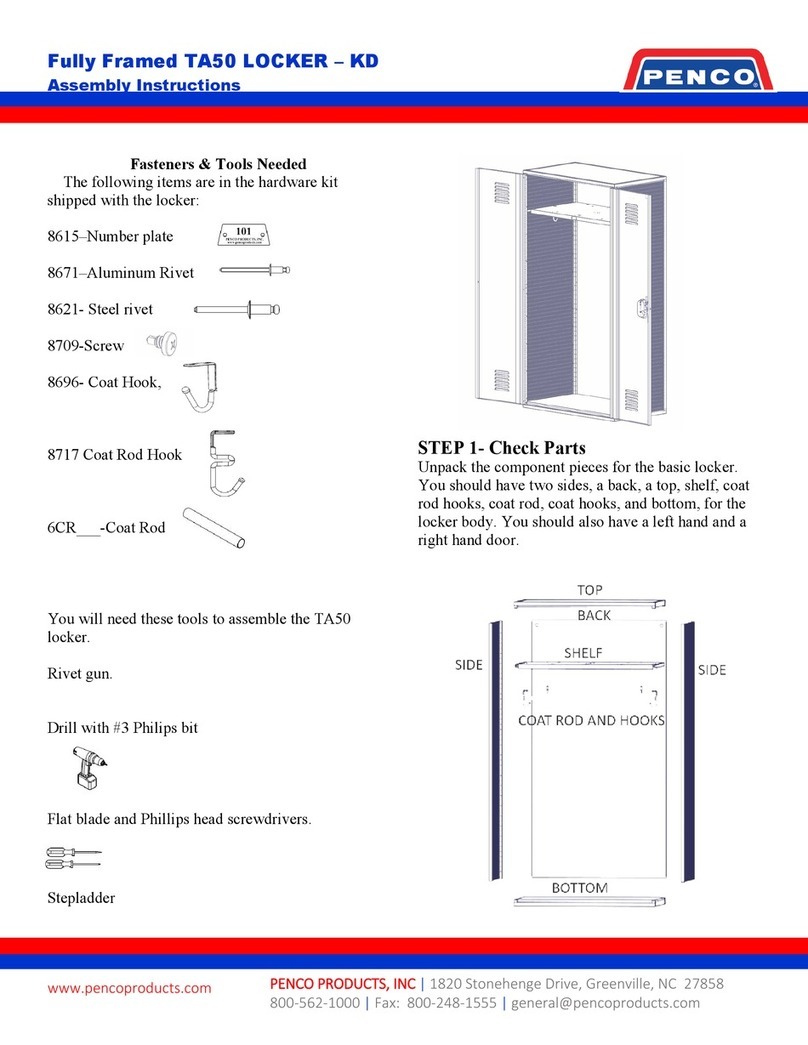
Fasteners & Tools Needed
The following items are in the hardware kit
shipped with the locker:
8615–Number plate
8671–Aluminum Rivet
8621- Steel rivet
8709-Screw
8696- Coat Hook,
8717 Coat Rod Hook
6CR___-Coat Rod
You will need these tools to assemble the Stadium
locker.
Rivet gun.
Drill with #3 Philips bit
Flat blade and Phillips head screwdrivers.
Stepladder
STEP 1- Check Parts
Unpack the component pieces for the basic locker.
You should have two sides, a back, a top, shelf, coat
rod hooks, coat rod, coat hooks, and bottom, for the
locker body. Options could include security box
and/or foot locker

Stadium Fully Framed LOCKER – KD
Assembly Instructions
www.pencoproducts.com
PENCO PRODUCTS, INC |1820 Stonehenge Drive, Greenville, NC 27858
800-562-1000 |Fax: 800-248-1555 |general@pencoproducts.com
Note- Assemble locker upside down to
allow screw insertion into underside of
locker bottom. Images shown may differ
from your locker, as there are different
configuration options.Some parts show with
transparency in these instructions to add
clarity to assembly.
STEP 2 – Assemble the locker body
2A- Lay locker top on flat surface on the ground.
Insert the two sides onto the cast corner pieces of the
top assembly.
2B-1 Insert locker back into slot of the top.

Stadium Fully Framed LOCKER – KD
Assembly Instructions
www.pencoproducts.com
PENCO PRODUCTS, INC |1820 Stonehenge Drive, Greenville, NC 27858
800-562-1000 |Fax: 800-248-1555 |general@pencoproducts.com
2B-2 With the back inserted install one 8709 screw
on each side of the back about half way up. Note
holes are to align to make sure back is in proper
position.

Stadium Fully Framed LOCKER – KD
Assembly Instructions
www.pencoproducts.com
PENCO PRODUCTS, INC |1820 Stonehenge Drive, Greenville, NC 27858
800-562-1000 |Fax: 800-248-1555 |general@pencoproducts.com
2C-1 Insert cast corner pieces of locker bottom into
the side channels.

Stadium Fully Framed LOCKER – KD
Assembly Instructions
www.pencoproducts.com
PENCO PRODUCTS, INC |1820 Stonehenge Drive, Greenville, NC 27858
800-562-1000 |Fax: 800-248-1555 |general@pencoproducts.com
2C-2 Install one screw into each corner of the locker
bottom as shown.

Stadium Fully Framed LOCKER – KD
Assembly Instructions
www.pencoproducts.com
PENCO PRODUCTS, INC |1820 Stonehenge Drive, Greenville, NC 27858
800-562-1000 |Fax: 800-248-1555 |general@pencoproducts.com
2D- Next install one screw into the locker top in each
corner as shown.

Stadium Fully Framed LOCKER – KD
Assembly Instructions
www.pencoproducts.com
PENCO PRODUCTS, INC |1820 Stonehenge Drive, Greenville, NC 27858
800-562-1000 |Fax: 800-248-1555 |general@pencoproducts.com
2E- Now rotate locker body so the bottom is on the
ground.

Stadium Fully Framed LOCKER – KD
Assembly Instructions
www.pencoproducts.com
PENCO PRODUCTS, INC |1820 Stonehenge Drive, Greenville, NC 27858
800-562-1000 |Fax: 800-248-1555 |general@pencoproducts.com
2F-Install screws to locker back at U cut locations (6
inch intervals) on each side.

Stadium Fully Framed LOCKER – KD
Assembly Instructions
www.pencoproducts.com
PENCO PRODUCTS, INC |1820 Stonehenge Drive, Greenville, NC 27858
800-562-1000 |Fax: 800-248-1555 |general@pencoproducts.com
2G-1 Install mounting rails for shelf using one 8607
screw in the front upright and back upright. Location
of rail should be 13.1 inches from the top outside
corner of the locker to the top of the rail.

Stadium Fully Framed LOCKER – KD
Assembly Instructions
www.pencoproducts.com
PENCO PRODUCTS, INC |1820 Stonehenge Drive, Greenville, NC 27858
800-562-1000 |Fax: 800-248-1555 |general@pencoproducts.com
2G-2 Insert shelf and attach shelf to rails using one
rivet in each corner.

Stadium Fully Framed LOCKER – KD
Assembly Instructions
www.pencoproducts.com
PENCO PRODUCTS, INC |1820 Stonehenge Drive, Greenville, NC 27858
800-562-1000 |Fax: 800-248-1555 |general@pencoproducts.com
2H-Now install 8696, 8717 coat hooks, and coat rod
using two rivets per hook.

Stadium Fully Framed LOCKER – KD
Assembly Instructions
www.pencoproducts.com
PENCO PRODUCTS, INC |1820 Stonehenge Drive, Greenville, NC 27858
800-562-1000 |Fax: 800-248-1555 |general@pencoproducts.com

Stadium Fully Framed LOCKER – KD
Assembly Instructions
www.pencoproducts.com
PENCO PRODUCTS, INC |1820 Stonehenge Drive, Greenville, NC 27858
800-562-1000 |Fax: 800-248-1555 |general@pencoproducts.com

Stadium Fully Framed LOCKER – KD
Assembly Instructions
www.pencoproducts.com
PENCO PRODUCTS, INC |1820 Stonehenge Drive, Greenville, NC 27858
800-562-1000 |Fax: 800-248-1555 |general@pencoproducts.com
STEP 3 – Assemble and install optional
security box.
Parts:
3A-Security box assembly and Installation
Now assemble the security box side to the frame
using two rivets.

Stadium Fully Framed LOCKER – KD
Assembly Instructions
www.pencoproducts.com
PENCO PRODUCTS, INC |1820 Stonehenge Drive, Greenville, NC 27858
800-562-1000 |Fax: 800-248-1555 |general@pencoproducts.com
3B- Install security box by sliding it onto the shelf in
the appropriate position and secure it using four
rivets as shown.

Stadium Fully Framed LOCKER – KD
Assembly Instructions
www.pencoproducts.com
PENCO PRODUCTS, INC |1820 Stonehenge Drive, Greenville, NC 27858
800-562-1000 |Fax: 800-248-1555 |general@pencoproducts.com
3C- Install top clip to locker top rail and door frame
using screw and rivets as shown.

Stadium Fully Framed LOCKER – KD
Assembly Instructions
www.pencoproducts.com
PENCO PRODUCTS, INC |1820 Stonehenge Drive, Greenville, NC 27858
800-562-1000 |Fax: 800-248-1555 |general@pencoproducts.com

Stadium Fully Framed LOCKER – KD
Assembly Instructions
www.pencoproducts.com
PENCO PRODUCTS, INC |1820 Stonehenge Drive, Greenville, NC 27858
800-562-1000 |Fax: 800-248-1555 |general@pencoproducts.com
3D- Install screw through security box division and
into the locker top back rail as shown.

Stadium Fully Framed LOCKER – KD
Assembly Instructions
www.pencoproducts.com
PENCO PRODUCTS, INC |1820 Stonehenge Drive, Greenville, NC 27858
800-562-1000 |Fax: 800-248-1555 |general@pencoproducts.com
STEP 4- Install Footlocker
Parts:
4A- Install the side mounting rails at the proper
height locations using one screw in each corner. Rail
height for footlocker is 13.9 inches from the outside
bottom corner to the top of the rail. Two mounting
rails required one on each side.

Stadium Fully Framed LOCKER – KD
Assembly Instructions
www.pencoproducts.com
PENCO PRODUCTS, INC |1820 Stonehenge Drive, Greenville, NC 27858
800-562-1000 |Fax: 800-248-1555 |general@pencoproducts.com
4B- Now install the footlocker front panel by
inserting it behind the vertical corner posts and into
the slots of the horizontal side rails and attach using
four rivets.
Other PENCO Indoor Furnishing manuals
Popular Indoor Furnishing manuals by other brands

ApexDesk
ApexDesk Little Soleil DX Assembly guide

Cooper Lighting
Cooper Lighting Sure-Lites RG1 specification

siena GARDEN
siena GARDEN Almada Assembly instruction

Coaster
Coaster VANITY 931143 Assembly instructions

Woodland
Woodland CAPT'N COOK 503 Assembly instructions

Alice's Home
Alice's Home FLOKI IFKCHEST4D manual

Germania
Germania 0269 Assembly instruction

Notável Móveis
Notável Móveis NT 1190 Assembly instructions

DREAMS
DREAMS Eppy Sofa Bed Assembly instructions

Best-Rite
Best-Rite 27701 Assembly instructions

Allen + Roth
Allen + Roth 1412VA-48-201-925 installation instructions

Monarch Specialties
Monarch Specialties I 4535 Assembly instructions