Tempering Valve Adjustment
Max “Hot” Temperature Adjustment
760748 Rev C 10-1-2021
5
1-800-732-0717 www.pennerbathing.com 1-866-736-6377
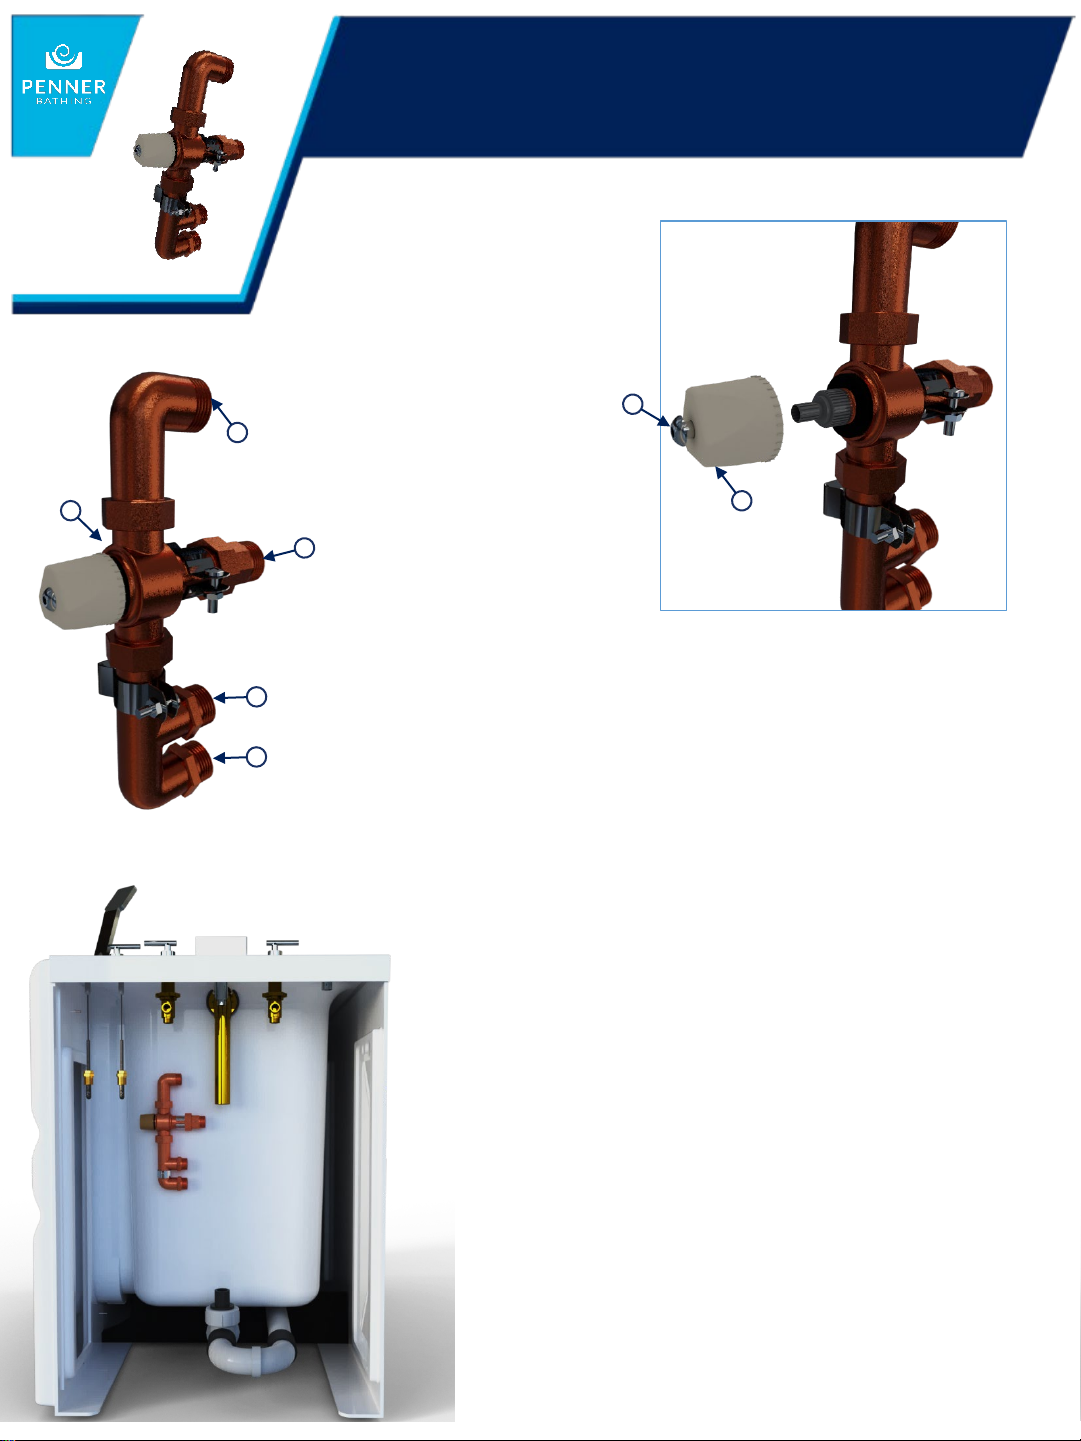
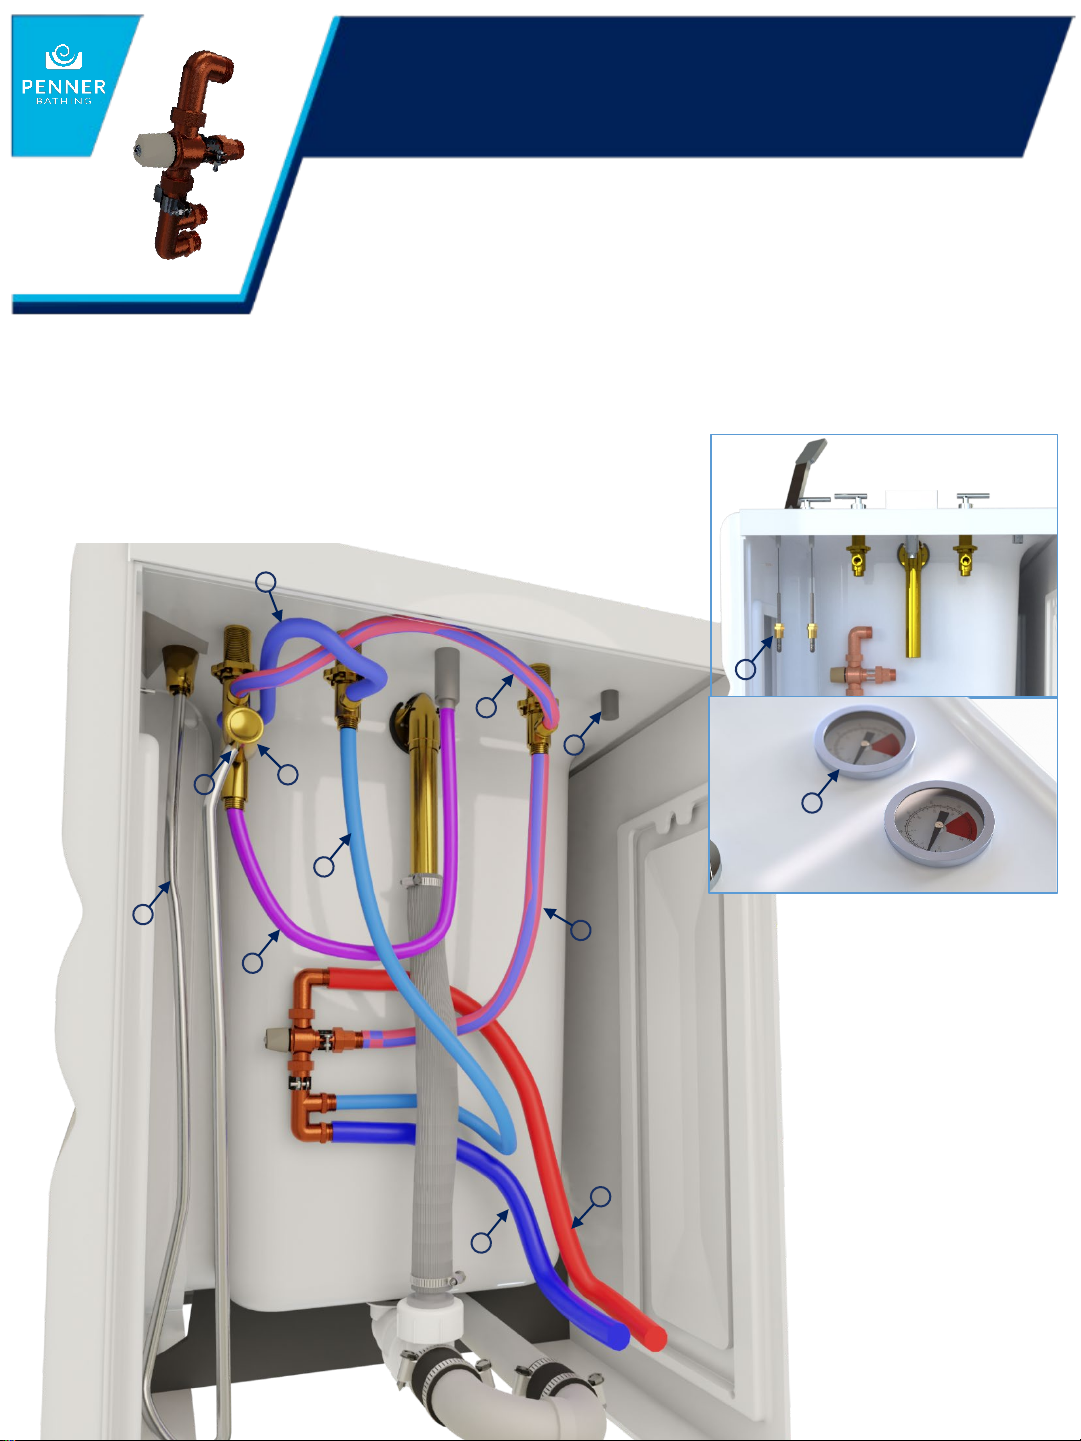
1. 760200
2. Allen Screw
3. Adjustment Cap
4. “Hot” Supply
5. “Cold” Supply
6. “Cold” Supply
7. Delivery
Tempering Valve
Allen Wrench supplied with valve
Partially remove, used as adjustment tool.
¾” NPT Supply inlet
¾” NPT Supply inlet
¾” NPT Supply inlet
¾” NPT Delivery outlet
7
4
3
2
1
5
6
Tempering Valve Adjustment Procedure
To adjust the max hot temperature, use the provided Allen
wrench to remove screw from cap of tempering valve. Take
cap part way off valve so only inner splines of cap make
contact with brass splines of valve. Rotate cap clockwise to
decrease hot water temperature. Rotate cap counterclockwise
to increase hot water temperature. This is done looking at the
face of the cap as mounted on the tempering valve.
Note: A little turn can make a big temperature adjust. Make
sure to test temp to avoid scalding. Using a known good
temperature gauge and to verify let water run on wrist.


 owner's manual")