8
Ensure that a minimum of 3 laps of rope remain on the winch drum at all times. With a Penny Hydraulics
rope this is easily indicated by the fact that the rope is coloured red but may not be the case with other
manufacturers ropes.
Putting the winch to work
1. Review winching area
2. Decide on equipment required
3. Decide on method of operation
4. Put on gloves
5. Turn on power to the winch
6. Connect the remote control
7. Free the winch hook
8. Disengage the freewheel clutch
9. Pull wire rope to anchor point or load
10. Secure to anchor point
11. Lock the freewheel clutch
12. Inch the rope until it is under slight tension
13. Check the anchor point
14. Begin winching
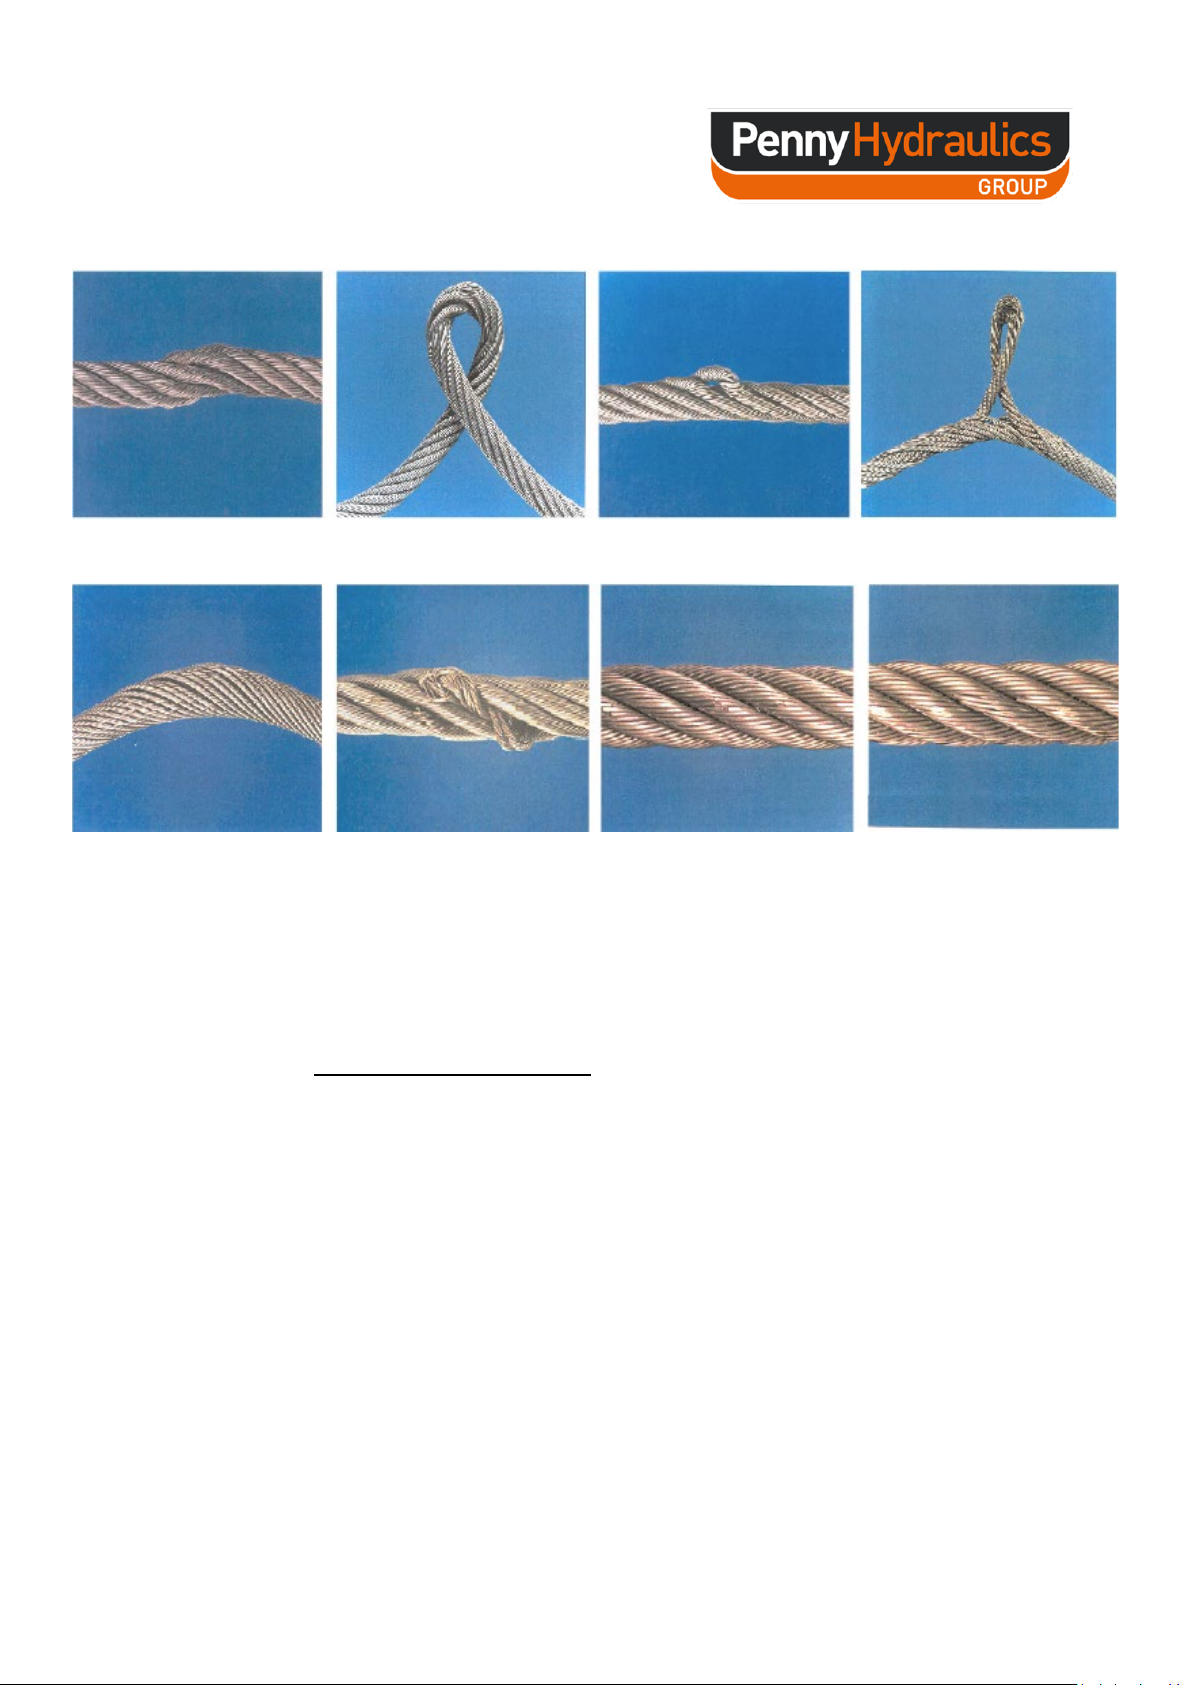
Thorough Examination of hoists and wire ropes
•The continued safe use of wire ropes depends on regular assessment of the condition of the ropes and the
equipment with which they are used.
•Some winches operate in conditions where the wire ropes and equipment are particularly liable to damage,
e.g. corrosive atmosphere, abrasive particles. In such circumstances, assessment of the condition of the rope
and the equipment should be carefully carried out and the rope removed from service when the damage
affects its safe operation.
•Records should be kept of the examination and replacement of wire ropes. These should consist of the
reports of Thorough Examination for the winch and certificates of test for the wire ropes at time of supply.
•When carrying out inspections and examinations to assess the fitness of the wire rope for further service,
both general deterioration and localized deterioration or damage should be considered. Therefore, the
whole length of the rope should be examined, paying particular attention to the rope adjacent to the
terminations, lengths that have been running or are stationary over drums, sheaves and deflection pulleys
and any other areas likely to sustain damage.
NOTE Information on the installation, maintenance and Thorough Examination of wire ropes is given in BS 7121-1.
If you spot any defects it is important to replace the rope. Common indicators of a worn rope include: