manuals.online logo
Brands
  1. Home
  2. •
  3. Brands
  4. •
  5. Warn
  6. •
  7. Winch
  8. •
  9. Warn 70825 User manual

Warn 70825 User manual

WARN INDUSTRIES PAGE1 70966A1
©2006 Warn Industries, Inc.
WARN® and the WARN logo are trademarks of Warn Industries Inc.
INJURY HAZARD
Failure to observe these instructions could lead to severe injury or death.
Always use extreme caution when drilling on any vehicle. Make sure that all fuel lines, brake lines, electrical
wires, and other objects are not punctured or damaged when / if drilling on the vehicle. Thoroughly inspect
the area to be drilled (on both sides of material) prior to drilling, and relocate any objects that may be
damaged. Failure to inspect the area to be drilled may result in vehicle damage, electrical shock, fire or
personal injury.
Always wear safety glasses when installing this kit. A drilling operation will cause flying metal chips.
Flying chips can cause eye injury.
Always use extreme caution when cutting and trimming during fitting.
Always remove jewelry and wear eye protection.
Never lean over battery while making connections.
Never route electrical cables:
Across any sharp edges.
Through or near moving parts.
Near parts that become hot.
Always insulate and protect all exposed wiring and electrical terminals.
Always install terminal boots as directed in installation instructions.
Always use appropriate and adequate care in lifting components into place.
Always insure components will remain secure during installation and operation.
Always tighten all nuts and bolts securely, per the installation and operation.
Always perform regular inspections and maintenance on the winch, winch mount and related hardware.
Never operate this WARN product with damaged or missing parts.
WARNING
INSTALLATION INSTRUCTIONS
WINCH MOUNTING KIT
Part Number: 70825
Application: Kawasaki Brute Force 650 4x4 and 650i 4x4
Your safety, and the safety of others, is very important. To help you make informed decisions about
safety, we have provided installation and operating instructions and other information on labels and in
this guide. This information alerts you to potential hazards that could hurt you or others. It is not
possible to warn you about all potential hazards associated with this product, you must use your own
good judgment.
CARELESS INSTALLATION AND OPERATION CAN RESULT IN SERIOUS INJURY OR EQUIPMENT
DAMAGE. READ AND UNDERSTAND ALL SAFETY PRECAUTIONS AND OPERATING
INSTRUCTIONS BEFORE INSTALLING AND OPERATING THIS PRODUCT.
This guide identifies potential hazards and has important safety messages that help you and others avoid
personal injury or death. WARNING and CAUTION are signal words that identify the level of hazard.
These signal words mean:
WARNING signals a hazard that could cause serious injury or death, if you do not follow
recommendations. CAUTION signals a hazard that may cause minor to moderate injury, if you
do not follow recommendations.
This guide uses NOTICE to call attention to important mechanical information, and Note: to emphasize
general information worthy of special attention.
WARN INDUSTRIES PAGE2 70966A1
©2006 Warn Industries, Inc.
WARN® and the WARN logo are trademarks of Warn Industries Inc.
Notice
Equipment Damage
Always refer to the Installation and Specification Guide, supplied in the winch kit, for all wiring schematics and specific details
on how to wire this WARN product to your vehicle.
Read installation and operating instructions thoroughly.
II. TABLE OF CONTENTS
Parts List page 3
Tools Required page 3
Torque Specifications page 3
Installation page 4-6
Maintenance/Care page 7
Caution
MoMo
MoMo
Moving Pving P
ving Pving P
ving Parar
arar
arts Entanglement Hazardts Entanglement Hazard
ts Entanglement Hazardts Entanglement Hazard
ts Entanglement Hazard
FF
FF
Failure tailure t
ailure tailure t
ailure to obsero obser
o obsero obser
o observv
vv
ve these instructions could lead te these instructions could lead t
e these instructions could lead te these instructions could lead t
e these instructions could lead to minor or moderato minor or moderat
o minor or moderato minor or moderat
o minor or moderate injure injur
e injure injur
e injuryy
yy
y..
..
.
Always take time to fully read and understand the installation and Operations Guide included with this product.
Never operate this product if you are under 16 years of age.
Never operate this product when under the influence of drugs, alcohol or medications.
Read installation and operating instructions thoroughly.
I. BEFORE YOU BEGIN
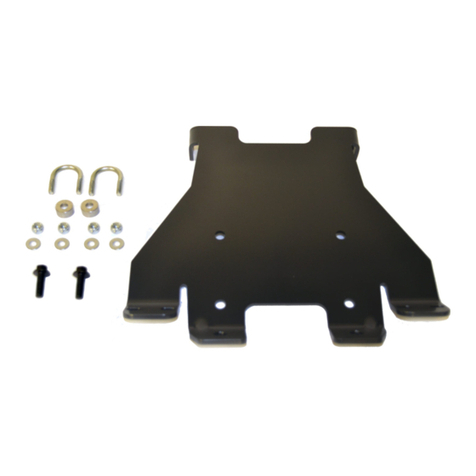
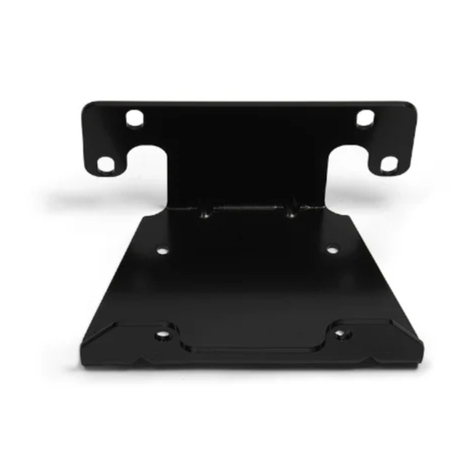
This kit includes mounting plate, hardware, and
instructions for installing the winch wiring contactor.
WARN INDUSTRIES PAGE3 70966A1
©2006 Warn Industries, Inc.
WARN® and the WARN logo are trademarks of Warn Industries Inc.
III. PARTS LIST
Ref Part # Qty Description
A1 70854 1 Winch Mounting Plate
A2 63583 1 Contactor Mounting Plate
B1 60870 2 5/16-18 x 1-1/4” x 1-3/4” U-bolt
B2 61262 2 5/16-18 x 1-1/2” x 2-3/16” U-bolt
B3 1324 8 5/16” Flat Washer
B4 2002 8 5/16-18 Lock Nut
B5 31209 2 1/4-20 x 1-1/4” x 2-1/4” U-bolt
B6 1320 4 1/4” Flat Washer
B7 1321 4 1/4” Lock Washer
B8 1322 4 1/4-20 Nut
V. TORQUE SPECIFICATIONS
1/4 8 lb. ft. (10.8 N-m)
5/16 17 lb. ft. (12.5 N-m)
3/8 30 lb. ft. (40.7 N-m)
7/16 50 lb. ft. (67.8 N-m)
1/2 75 lb. ft. (101.7 N-m)
IV. TOOLS REQUIRED
- Ratchet
- 7/16” Socket
- 1/2” Socket
or
- 7/16” Box Wrench
- 1/2” Box Wrench
- Phillips Screwdriver
B2
B1
A1
B3
B4
B4 B3 B3
B3
B3
WARN INDUSTRIES PAGE4 70966A1
©2006 Warn Industries, Inc.
WARN® and the WARN logo are trademarks of Warn Industries Inc.
VI. INSTALLATION
Note: Pictures are of a Brute Force 650
1. Rotate the winch mounting plate (A1) sideways and
slide it into position beneath the radiator shroud,
Figure 1.
2. Remove the four screws securing the side plastic shield
to the left side of the ATV (referenced from the sitting
on the seat in the riding position), Figure 2. Carefully
pull the shield away from the bike to allow room.
Note: Skip this step if mounting winch on 650i.
3. Slide the winch into place, Figure 3. Make sure
that the clutch side of the winch is facing the left side
of theATV.
Figure 1
Figure 2
Figure 3
Remove
A1
Radiator Shroud
WARN INDUSTRIES PAGE5 70966A1
©2006 Warn Industries, Inc.
WARN® and the WARN logo are trademarks of Warn Industries Inc.
INSTALLATION CONT.
Figure 4
4. Fasten the winch to the mounting plate (A1) with the
four 5/16-18 x 1” bolts supplied in the winch fastener
kit. Rotate the mounting plate upward if additional
room is necessary, Figure 4. Tighten down the winch
bolts to the recommended torque value.
5. Fasten the roller fair lead to the mounting plate using
the 3/8” hardware found in the winch fastener
kit, Figure 5.
6. Place the four u-bolts (B1 and B2) around the vehicle
frame and through the mounting plate, Figure 6. Use
the washers (B3) and lock nuts (B4) to fasten the u-
bolts, and tighten to the recommended torque value.
Re-install the guard using the screws that were removed
in step 2.
Figure 5
Figure 6
B1
B2
B3 B4
WARN INDUSTRIES PAGE6 70966A1
©2006 Warn Industries, Inc.
WARN® and the WARN logo are trademarks of Warn Industries Inc.
Figure 7
Figure 8
INSTALLATION CONT.
The following instructions are for mounting the wiring
contactor.
7. Remove the seat from the ATV. Disconnect the battery
cables and remove the battery from the battery
compartment.
8. Place the contactor mounting plate (A2) into position
on the frame tube just below the battery compartment,
Figure 7. Attach with the two 1/4-20 u-bolts (B5), flat
washers (B6), lock washers (B7), and nuts (B8).
NOTE: The contactor will attach to the bracket utilizing
one of the legs on each of the u-bolts. When attaching the
bracket to the frame tube, only use the upper leg of the u-
bolt to hold the bracket in place. Only tighten finger tight
at this time.
9. Place the contactor on to the bracket (A2) and attach
using a flat washer (B6), Lock washer (B7), and nut
(B8), Figure 8.
NOTE: The contactor will attach to the bracket utilizing
one of the legs on each of the u-bolts.
10. After attaching the contactor to the bracket, attach all
the wiring to the contactor and route wires to
appropriate locations on the ATV (see installation
manual that came with the winch). Rotate the
contactor and bracket into a position so the wiring will
not interfere with any moving parts or anything that
may become to hot. Tighten the u-bolts around the
frame tube to 5 - 6 lb. ft.
Tube
Figure 9
WARN INDUSTRIES PAGE7 70966A1
©2006 Warn Industries, Inc.
WARN® and the WARN logo are trademarks of Warn Industries Inc.
VII. MAINTENANCE/CARE
1. Inspect all parts on the winch, winch mount, and related hardware prior to each use. Replace all hardware that
appears rusted or deformed.
2. Inspect all nuts and bolts on the winch, winch mount,, and related hardware prior to each use. Tighten all nuts that
appear to be loose. Stripped, fractured, or bent bolts or nuts need to be replaced.
3. Check all cables prior to use. Replace cables that look worn or frayed.
4. Check all moving or rotating parts. Remove debris that may inhibit the part from moving freely.
WARNING
PERFORM REGULAR INSPECTIONS ON THE WINCH, WINCH MOUNT, AND RELATED HARD-
WARE. NEVER OPERATE THE WINCH WITH DAMAGED OR MISSING PARTS. FAILURE TO
FOLLOW THIS WARNING MAY CAUSE VEHICLE DAMAGE AND OPERATOR INJURY OR DEATH.
FAILURE TO SECURELY TIGHTEN ALL BOLTS
ON THE WINCH PLATE, WINCH, AND
FAIRLEAD CAN RESULT IN PRODUCT FAILURE
WHICH MAY RESULT IN VEHICLE DAMAGE
AND OPERATOR INJURY OR DEATH. DOUBLE
CHECK THAT ALL BOLTS ARE SECURELY
TIGHTENED PRIOR TO USE.
WARNING
READ THE VEHICLE’S OPERATOR MANUAL,
WINCH OPERATOR MANUAL, AND ALL WARN-
ING LABELS PRIOR TO OPERATION OF ATV AND
WINCH.
WARNING
THE WINCH MOUNTING PLATE INSTALLATION IS NOW COMPLETE.
• Assemble winch to mounting plate, using hardware found in winch kit.
• Wire winch according to instructions found in winch kit.
PROCEED TO SECTION TITLED “MAINTENANCE/CARE”.

Other Warn Winch manuals

Warn 39116 User manual

Warn

Warn 39116 User manual

Warn 60272 User manual

Warn

Warn 60272 User manual

Warn VR EVO User manual

Warn

Warn VR EVO User manual

Warn 71983 User manual

Warn

Warn 71983 User manual

Warn 72008 User manual

Warn

Warn 72008 User manual

Warn ZEON Specifications

Warn

Warn ZEON Specifications

Warn PullzAll Specifications

Warn

Warn PullzAll Specifications

Warn VRX 25 User manual

Warn

Warn VRX 25 User manual

Warn 72492 User manual

Warn

Warn 72492 User manual

Warn 9.0Rc User manual

Warn

Warn 9.0Rc User manual

Warn 102600 User manual

Warn

Warn 102600 User manual

Warn TABOR 8000 User manual

Warn

Warn TABOR 8000 User manual

Warn 93790 User manual

Warn

Warn 93790 User manual

Warn 95740 User manual

Warn

Warn 95740 User manual

Warn Endurance 12.0 User manual

Warn

Warn Endurance 12.0 User manual

Warn VR EVO User manual

Warn

Warn VR EVO User manual

Warn 70924 User manual

Warn

Warn 70924 User manual

Warn ZEON User manual

Warn

Warn ZEON User manual

Warn 61019 User manual

Warn

Warn 61019 User manual

Warn PROVANTAGE 4500-S Operating instructions

Warn

Warn PROVANTAGE 4500-S Operating instructions

Warn 3000ACI User manual

Warn

Warn 3000ACI User manual

Warn 84704 User manual

Warn

Warn 84704 User manual

Warn 60004 User manual

Warn

Warn 60004 User manual

Warn 99963 User manual

Warn

Warn 99963 User manual

Popular Winch manuals by other brands

Comeup CWS-80 instruction manual

Comeup

Comeup CWS-80 instruction manual

Ingersoll-Rand BU7A Parts, operation and maintenance manual

Ingersoll-Rand

Ingersoll-Rand BU7A Parts, operation and maintenance manual

Mile Marker SEC8 Scout ES Installation & operator's manual

Mile Marker

Mile Marker SEC8 Scout ES Installation & operator's manual

ERBA 33252 instruction manual

ERBA

ERBA 33252 instruction manual

Gude GSZ 100 Translation of original operating instructions

Gude

Gude GSZ 100 Translation of original operating instructions

HES OzBlok OBW0545 Operator's manual

HES

HES OzBlok OBW0545 Operator's manual

Portable Winch Greenworks Commercial 82W1 PCW3000-Li user guide

Portable Winch

Portable Winch Greenworks Commercial 82W1 PCW3000-Li user guide

KC 30.000 manual

KC

KC 30.000 manual

WCT TUF-Lugger Operating instructions manual

WCT

WCT TUF-Lugger Operating instructions manual

Scheppach hrs 250 Translation from the original instruction manual

Scheppach

Scheppach hrs 250 Translation from the original instruction manual

Hilka 35084 Safety & operation manual

Hilka

Hilka 35084 Safety & operation manual

GEBUWIN WW1500 D/MR operating instructions

GEBUWIN

GEBUWIN WW1500 D/MR operating instructions

SAHLINS 3020-1000 instruction manual

SAHLINS

SAHLINS 3020-1000 instruction manual

SuperATV WN-12000 Guide

SuperATV

SuperATV WN-12000 Guide

Tractel 354 Operating and maintenance instructions

Tractel

Tractel 354 Operating and maintenance instructions

Mile Marker SEC8 ES Installation and operator's manual

Mile Marker

Mile Marker SEC8 ES Installation and operator's manual

Ingersoll-Rand Force FH5i Product Maintenance Information

Ingersoll-Rand

Ingersoll-Rand Force FH5i Product Maintenance Information

VIME INDUSTRIAL EPH 10000 Installation and operating service manual

VIME INDUSTRIAL

VIME INDUSTRIAL EPH 10000 Installation and operating service manual

manuals.online logo
manuals.online logoBrands
  • About & Mission
  • Contact us
  • Privacy Policy
  • Terms and Conditions

Copyright 2025 Manuals.Online. All Rights Reserved.