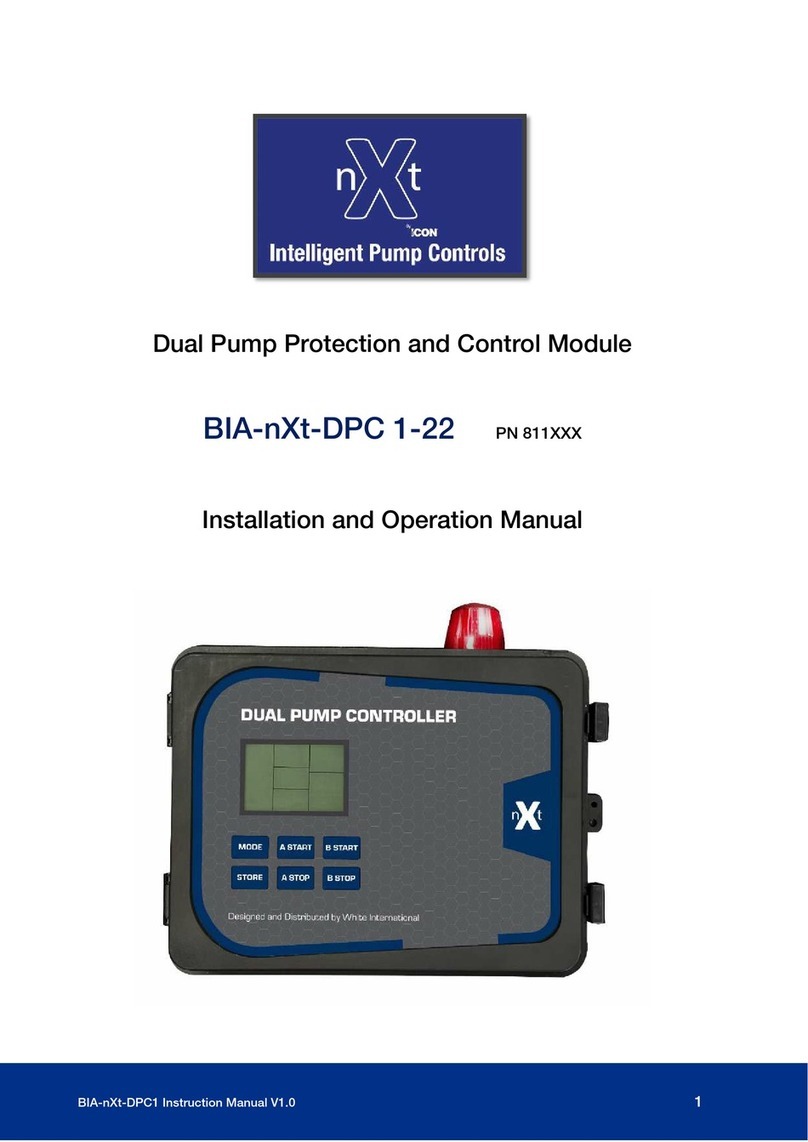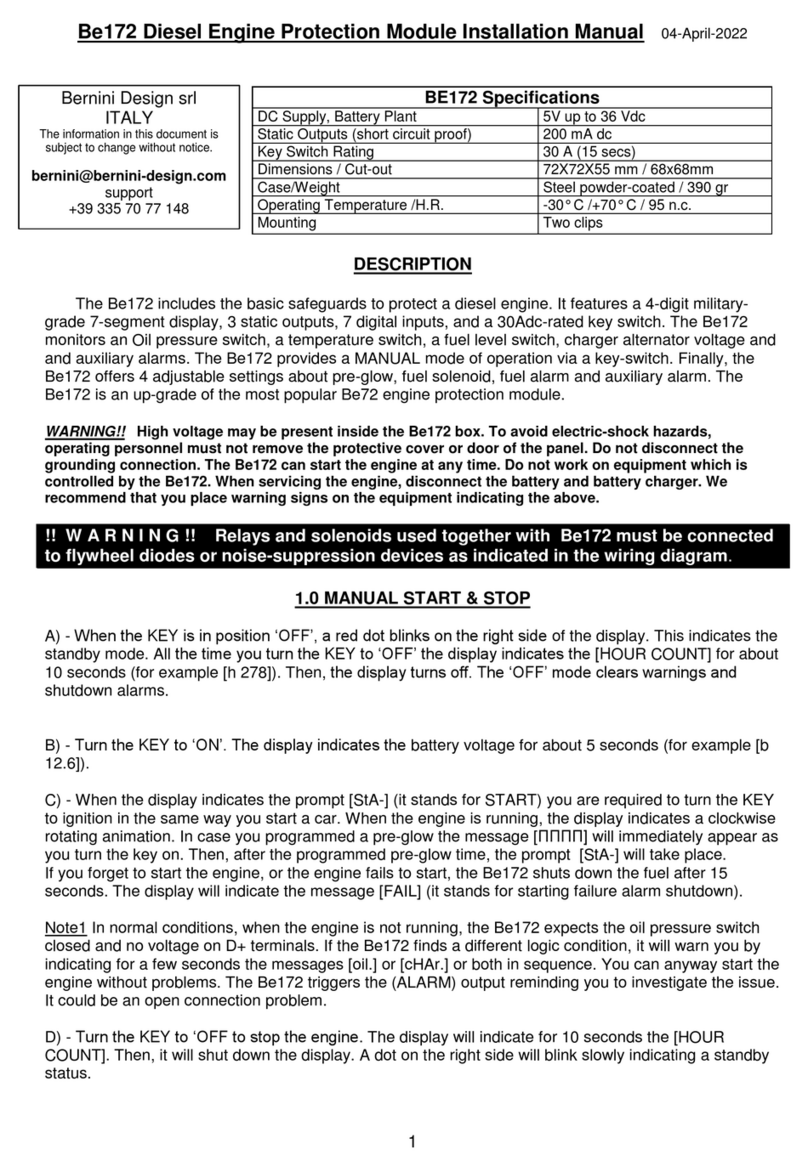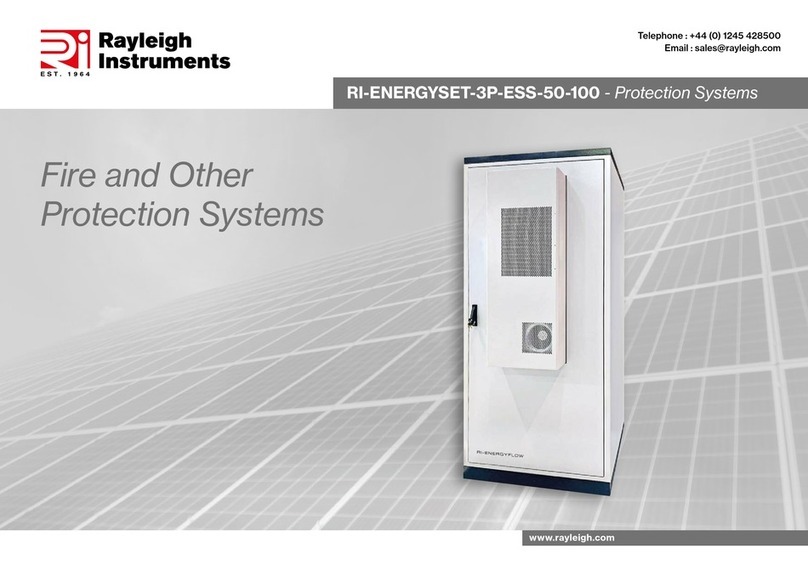
LS/DROP/3/2015
DISPOSITIVO ELETTRONICO
PER LA PROTEZIONE DELL'ELETTROPOMPA
ELECTRONIC PROTECTION DEVICE
FOR THE ELECTRIC PUMP
DISPOSITIF ELECTRONIQUE POUR LA
PROTECTION DE LA POMPE ELECTRIQUE
MANUALE D’ISTRUZIONI
IT
MANUEL D’INSTRUCTIONSINSTRUCTION MANUAL
GB FR
Leggere le istruzioni prima di installare l'apparecchio e
verificare che le catteristiche tecniche dell'apparecchio e
del motore della pompa siano compatibili.
1 - Verificato il corretto funzionamento dell'impianto idrico far funzionare
la pompa con un utilizzo aperto (Fig.1a).
2 - Staccare la spina del cavo di alimentazione della pompa dalla presa
di corrente lasciando aperto l'utilizzo e scaricare completamente
l’impianto (Fig. 1b).
3 - Inserire la spina del cavo di alimentazione del motore della pompa
nell'apparecchio (Fig. 2a).
4 - Inserire l'apparecchio nella presa di corrente.
Sul pannello dell'apparecchio si accendono il Led Verde "Power on"
ed il Led Rosso intermittente
"Failure" (Fig. 2b).
5 -
Premere il pulsante rosso "Restart" entro 10 secondi dall'inseri-
mento del cavo di alimentazione.
Il Led Verde "Power on" resta acceso, il Led Giallo "Pump on" si
accende, il Led Rosso "Failure" passa da intermittente a acceso
fisso e l'apparecchio acquisisce i dati del motore (Fig. 3).
6 -
Attendere alcuni secondi che il Led Rosso "Failure" si spenga.
I dati del motore sono stati acquisiti e l’apparecchio adesso può
proteggere la pompa. (Fig. 4).
7 -
Chiudere l'utilizzo ed attendere che la pompa si fermi (Fig. 5).
E' possibile adesso utilizzare l'impianto normalmente.
Staccare e inserire nuovamente la spina del cavo di alimentazione del
motore dall'apparecchio, oppure l'apparecchio stesso dalla presa di
corrente non compromette l'acquisizione dei dati del motore.
Qualora invece fosse necessario sostituire la pompa e/o spostare
l'apparecchio su altro impianto deve essere rifatta la procedura di
acquisizione: vedere punti 2 - 3 - 4 - 5 - 6 - 7.
In caso di sostituzione della pompa rispettare la tempistica indicata al
punto 5, diversamente l'apparecchio funzionerà con dati non corretti.
Anomalie di funzionamento
Se viene a mancare l'acqua in aspirazione l'apparecchio ferma la pompa
proteggendola dalla marcia a secco.
L'anomalia viene segnalata dal Led Rosso "Failure" acceso intermittente.
Se si verifica un assorbimento di corrente superiore a 8
Ampere l'appa-
recchio ferma il motore della pompa proteggendolo da sovracorrente.
L'anomalia viene segnalata dal Led Rosso "Failure" acceso fisso.
Per ripristinare il normale funzionamento dell'apparecchio e dell'im-
pianto è sufficiente premere il pulsante rosso "Restart".
In caso di interruzione della corrente elettrica l'apparecchio si riarma
automaticamente dopo alcuni secondi dal ritorno della stessa.
Dichiarazione di conformità
Tensione di linea monofase 230 Vac
Variazioni di tensione accettabili ± 10%
Frequenza 50 Hz
Corrente minima motore pompa 3 A
Corrente massima motore pompa 8 A
Temperatura di funzionamento min 5 °C - max 45 °C
Temperatura massima ambiente 55 °C
Caratteristiche tecniche
Led Verde acceso Power on Apparecchio in tensione
Led Giallo acceso Pump on Pompa in marcia
Led Rosso intermittente
Failure Funzionamento a secco
Led Rosso acceso fisso
Failure Sovracorrente
Acquisizione dati motore
Reset dopo anomalia
Pannello di controllo
Installazione e funzionamento
Lire les instructions avant d’installer l’appareil et contrô-
ler que les caractéristiques techniques de l’appareil et du
moteur de la pompe soient bien compatibles.
Caractéristiques techniques
Tension de ligne monophasée 230 Vac
Variations de tension acceptables ± 10%
Fréquence 50 Hz
Courant minimum du moteur de la pompe
3 A
Courant maximum du moteur de la pompe
8 A
Température de fonctionnement min 5 °C - max 45 °C
Température ambiante maximale 55 °C
Read the instructions before installing the device and
check that the technical characteristics of the device are
compatible with those of the pump motor.
Technical features
Singlephase mains voltage 230 Vac
Acceptable voltage fluctuations ± 10%
Frequency 50 Hz
Minimum pump motor current 3 A
Maximum pump motor current 8 A
Operating temperature min 5 °C - max 45 °C
Maximum ambient temperature 55 °C
Installation and operation
1 - Once checked the correct operation of the water system, make the
pump run with a tap open (Fig. 1a).
2 - Disconnect the power supply plug of the pump from the power point
leaving the tap open and completely empty the system (Fig. 1b).
3 - Insert the power supply plug of the pump motor into the device
(Fig. 2a).
4 - 1. Connect the device to the power point.
The green “Power on” LED and the blinking red “Failure” LED will
light up on the panel of the device (Fig. 2b).
5 -
Press the “Restart” red button within 10 seconds after connecting
the power supply cable. The green “Power on” LED will remain on,
the yellow “Pump on” LED will light up and the red “Failure” LED will
stop blinking and remain steady while the device acquires the
motor data (Fig. 3).
6 -
Wait a few seconds until the red “Failure” LED turns off. The motor
data have been acquired and the device is now able to protect the
pump (Fig. 4).
7 -
Close the tap and wait for the pump to stop (Fig. 5).
It is now possible to use the system normally.
Disconnect and reconnect the power supply cable of the motor from
the device, or the device itself from the mains power point, it will not
have any effect on the acquisition of the motor data.
If instead you wish to the replace the pump and/or move the device
to another pump. It must be repeated the acquisition procedure
following steps 2 - 3 - 4 - 5 - 6 -7.
In case of replacing the pump, observe the times indicated in point 5,
otherwise the device will operate with incorrect data.
Malfunctioning
In case of water shortage the device will stop the pump and protect it from
dry running.
This fault will be indicated by the blinking red “Failure” LED.
In case the input current exceeds 8 amperes, the device will stop the
pump and protect it from overcurrent.
This fault will be indicated by the steady red “Failure” LED.
To restore normal operation to the device and the system, just press the
“Restart” red button.
In case of power supply cut-offs the device will automatically rearm a few
seconds after the power returns.
Certificate of conformity
Installation et fontionnement
1 -
Après avoir vérifié le bon fonctionnement de l’installation hydrique, faire
marcher la pompe avec un robinet ouvert (Fig. 1a).
2 - Débrancher la fiche du câble d’alimentation de la pompe de la prise
de courant en laissant ouvert robinet et purger entièrement
l’installation (Fig. 1b).
3 - Brancher la fiche du câble d’alimentation du moteur de la pompe
dans l’appareil (Fig. 2a).
4 - Introduire l’appareil dans la prise de courant.
Sur le panneau de l’appareil s’allument le Témoin vert «Power on»
et le Témoin rouge intermittent «Failure» (Fig. 2b).
5 -
Presser sur le bouton rouge «Restart» dans les 10 secondes
suivant l’introduction du câble d’alimentation.
Le Témoin vert «Power on» reste allumé, le Témoin jaune «Pump
on» s’allume, le Témoin rouge «Failure» passe d’intermittent à
allumé fixe et l’appareil saisit les données du moteur (Fig. 3).
6 -
Attendre quelques secondes que le Témoin rouge «Failure» ne
s’éteigne. Les données du moteur ont été acquises et l’appareil
peut désormais protéger la pompe (Fig. 4).
7 -
Fermer le robinet et attendre que la pompe s’arrête (Fig. 5).
Il est possible à présent d’utiliser normalement l’installation.
Débrancher et introduire de nouveau la fiche du câble d’alimentation
du moteur de l’appareil, ou bien l’appareil lui-même à partir de la prise
de courant ne compromet pas la saisie des données du moteur.
Au cas où par contre il faudrait remplacer la pompe et/ou déplacer
l’appareil sur une autre installation, il faut refaire la procédure de
saisie: voir les points 2 - 3 - 4 - 5 - 6 - 7.
En cas de remplacement de la pompe, respecter les délais indiqués
au point 5, sinon l’appareil fonctionnera avec des données erronées.
Anomalies de fonctionnement
Si l’eau vient à manquer à l’aspiration, l’appareil arrête la pompe en la
protégeant du fonctionnement à sec.
L’anomalie est signalée par le témoin rouge «Failure» allumé de façon
intermittent. S’il se produit une absorption de courant supérieure à 8
Ampères, l’appareil arrête le moteur de la pompe en le protégeant du sur
courant. L’anomalie est signalée par le Témoin «Failure» allumé de façon
fixe. Pour rétablir le fonctionnement normal de l’appareil et de
l’installation, il suffit de presser sur le bouton
rouge
«Restart».
En cas d’interruption du courant électrique, l’appareil se réarme automa-
tiquement après quelques secondes dès le retour de ce dernier.
Declaration de conformite
Control panel Panneau de controle
Témoin vert allumé Power on Appareil sous tension
Témoin jaune allumé Pump on Pompe en marche
Témoin rouge intermittent
Failure Manque d’eau
Témoin rouge allumé fixe
Failure Sur courant
Acquisition des données
du moteur
Reset après anomalie
Green LED on Power on Device energised
Yellow LED on Pump on Pump operating
Red LED blinking
Failure Dry-running
Red LED on
Failure Overcurrent
Acquisition motor data
Reset after fault
Red Button Restart Bouton rouge Restart
Pulsante Rosso Restart
La Ditta PENTAIR INTERNATIONAL S.a.r.l. dichiara sotto la propria
responsabilità che l’apparecchio LOGIC-DROP è conforme ai Requisiti
Essenziali di Sicurezza e di Tutela della Salute di cui alle direttive:
EN60730-1
EN55014-1
EN545014-2
EN61000-3-2
EN61000-3-3
PENTAIR INTERNATIONAL S.a.r.l.
Avenue de Sevelin, 18
1004 LAUSANNE
SWITZERLAND
The company PENTAIR INTERNATIONAL S.a.r.l. declares under its own respon-
sibility that the LODIC-DROP device is compliant with the Essential Safety and
Health Protection Requirements pursuant to the EN60370-1 Directives.
EN60730-1
EN55014-1
EN545014-2
EN61000-3-2
EN61000-3-3
PENTAIR INTERNATIONAL S.a.r.l.
Avenue de Sevelin, 18
1004 LAUSANNE
SWITZERLAND
La société PENTAIR INTERNATIONAL S.a.r.l. déclare sous sa propre
responsabilité que l’appareil LOGIC-DROP est conforme aux Critères
Essentiels de Sécurité et de Protection de la Santé des directives:
EN60730-1
EN55014-1
EN545014-2
EN61000-3-2
EN61000-3-3
PENTAIR INTERNATIONAL S.a.r.l.
Avenue de Sevelin, 18
1004 LAUSANNE
SWITZERLAND
Made in Italy
Restart
Power on
Pump on
Failure
Fig.1a
Fig.1b
Fig.2a
Fig.2b
Restart
Power on
Pump on
Failure
Restart
Power on
Pump on
Failure
LOGIC-DROP
230 Vac 50 Hz Min 3 A Max 8 A
LS230/PENTAIR/07/2019
ISTRUZIONI ORIGINALI PER L’USO ORIGINAL OPERATING INSTRUCTIONS
INSTRUCTIONS ORIGINALES POUR L’UTILISATION
LS/DROP/3/2015
DISPOSITIVO ELETTRONICO
PER LA PROTEZIONE DELL'ELETTROPOMPA
ELECTRONIC PROTECTION DEVICE
FOR THE ELECTRIC PUMP
DISPOSITIF ELECTRONIQUE POUR LA
PROTECTION DE LA POMPE ELECTRIQUE
MANUALE D’ISTRUZIONI
IT
MANUEL D’INSTRUCTIONSINSTRUCTION MANUAL
GB FR
Leggere le istruzioni prima di installare l'apparecchio e
verificare che le catteristiche tecniche dell'apparecchio e
del motore della pompa siano compatibili.
1 - Verificato il corretto funzionamento dell'impianto idrico far funzionare
la pompa con un utilizzo aperto (Fig.1a).
2 - Staccare la spina del cavo di alimentazione della pompa dalla presa
di corrente lasciando aperto l'utilizzo e scaricare completamente
l’impianto (Fig. 1b).
3 - Inserire la spina del cavo di alimentazione del motore della pompa
nell'apparecchio (Fig. 2a).
4 - Inserire l'apparecchio nella presa di corrente.
Sul pannello dell'apparecchio si accendono il Led Verde "Power on"
ed il Led Rosso intermittente
"Failure" (Fig. 2b).
5 -
Premere il pulsante rosso "Restart" entro 10 secondi dall'inseri-
mento del cavo di alimentazione.
Il Led Verde "Power on" resta acceso, il Led Giallo "Pump on" si
accende, il Led Rosso "Failure" passa da intermittente a acceso
fisso e l'apparecchio acquisisce i dati del motore (Fig. 3).
6 -
Attendere alcuni secondi che il Led Rosso "Failure" si spenga.
I dati del motore sono stati acquisiti e l’apparecchio adesso può
proteggere la pompa. (Fig. 4).
7 -
Chiudere l'utilizzo ed attendere che la pompa si fermi (Fig. 5).
E' possibile adesso utilizzare l'impianto normalmente.
Staccare e inserire nuovamente la spina del cavo di alimentazione del
motore dall'apparecchio, oppure l'apparecchio stesso dalla presa di
corrente non compromette l'acquisizione dei dati del motore.
Qualora invece fosse necessario sostituire la pompa e/o spostare
l'apparecchio su altro impianto deve essere rifatta la procedura di
acquisizione: vedere punti 2 - 3 - 4 - 5 - 6 - 7.
In caso di sostituzione della pompa rispettare la tempistica indicata al
punto 5, diversamente l'apparecchio funzionerà con dati non corretti.
Anomalie di funzionamento
Se viene a mancare l'acqua in aspirazione l'apparecchio ferma la pompa
proteggendola dalla marcia a secco.
L'anomalia viene segnalata dal Led Rosso "Failure" acceso intermittente.
Se si verifica un assorbimento di corrente superiore a 8
Ampere l'appa-
recchio ferma il motore della pompa proteggendolo da sovracorrente.
L'anomalia viene segnalata dal Led Rosso "Failure" acceso fisso.
Per ripristinare il normale funzionamento dell'apparecchio e dell'im-
pianto è sufficiente premere il pulsante rosso "Restart".
In caso di interruzione della corrente elettrica l'apparecchio si riarma
automaticamente dopo alcuni secondi dal ritorno della stessa.
Dichiarazione di conformità
Tensione di linea monofase 230 Vac
Variazioni di tensione accettabili ± 10%
Frequenza 50 Hz
Corrente minima motore pompa 3 A
Corrente massima motore pompa 8 A
Temperatura di funzionamento min 5 °C - max 45 °C
Temperatura massima ambiente 55 °C
Caratteristiche tecniche
Led Verde acceso Power on Apparecchio in tensione
Led Giallo acceso Pump on Pompa in marcia
Led Rosso intermittente
Failure Funzionamento a secco
Led Rosso acceso fisso
Failure Sovracorrente
Acquisizione dati motore
Reset dopo anomalia
Pannello di controllo
Installazione e funzionamento
Lire les instructions avant d’installer l’appareil et contrô-
ler que les caractéristiques techniques de l’appareil et du
moteur de la pompe soient bien compatibles.
Caractéristiques techniques
Tension de ligne monophasée 230 Vac
Variations de tension acceptables ± 10%
Fréquence 50 Hz
Courant minimum du moteur de la pompe
3 A
Courant maximum du moteur de la pompe
8 A
Température de fonctionnement min 5 °C - max 45 °C
Température ambiante maximale 55 °C
Read the instructions before installing the device and
check that the technical characteristics of the device are
compatible with those of the pump motor.
Technical features
Singlephase mains voltage 230 Vac
Acceptable voltage fluctuations ± 10%
Frequency 50 Hz
Minimum pump motor current 3 A
Maximum pump motor current 8 A
Operating temperature min 5 °C - max 45 °C
Maximum ambient temperature 55 °C
Installation and operation
1 - Once checked the correct operation of the water system, make the
pump run with a tap open (Fig. 1a).
2 - Disconnect the power supply plug of the pump from the power point
leaving the tap open and completely empty the system (Fig. 1b).
3 - Insert the power supply plug of the pump motor into the device
(Fig. 2a).
4 - 1. Connect the device to the power point.
The green “Power on” LED and the blinking red “Failure” LED will
light up on the panel of the device (Fig. 2b).
5 -
Press the “Restart” red button within 10 seconds after connecting
the power supply cable. The green “Power on” LED will remain on,
the yellow “Pump on” LED will light up and the red “Failure” LED will
stop blinking and remain steady while the device acquires the
motor data (Fig. 3).
6 -
Wait a few seconds until the red “Failure” LED turns off. The motor
data have been acquired and the device is now able to protect the
pump (Fig. 4).
7 -
Close the tap and wait for the pump to stop (Fig. 5).
It is now possible to use the system normally.
Disconnect and reconnect the power supply cable of the motor from
the device, or the device itself from the mains power point, it will not
have any effect on the acquisition of the motor data.
If instead you wish to the replace the pump and/or move the device
to another pump. It must be repeated the acquisition procedure
following steps 2 - 3 - 4 - 5 - 6 -7.
In case of replacing the pump, observe the times indicated in point 5,
otherwise the device will operate with incorrect data.
Malfunctioning
In case of water shortage the device will stop the pump and protect it from
dry running.
This fault will be indicated by the blinking red “Failure” LED.
In case the input current exceeds 8 amperes, the device will stop the
pump and protect it from overcurrent.
This fault will be indicated by the steady red “Failure” LED.
To restore normal operation to the device and the system, just press the
“Restart” red button.
In case of power supply cut-offs the device will automatically rearm a few
seconds after the power returns.
Certificate of conformity
Installation et fontionnement
1 -
Après avoir vérifié le bon fonctionnement de l’installation hydrique, faire
marcher la pompe avec un robinet ouvert (Fig. 1a).
2 - Débrancher la fiche du câble d’alimentation de la pompe de la prise
de courant en laissant ouvert robinet et purger entièrement
l’installation (Fig. 1b).
3 - Brancher la fiche du câble d’alimentation du moteur de la pompe
dans l’appareil (Fig. 2a).
4 - Introduire l’appareil dans la prise de courant.
Sur le panneau de l’appareil s’allument le Témoin vert «Power on»
et le Témoin rouge intermittent «Failure» (Fig. 2b).
5 -
Presser sur le bouton rouge «Restart» dans les 10 secondes
suivant l’introduction du câble d’alimentation.
Le Témoin vert «Power on» reste allumé, le Témoin jaune «Pump
on» s’allume, le Témoin rouge «Failure» passe d’intermittent à
allumé fixe et l’appareil saisit les données du moteur (Fig. 3).
6 -
Attendre quelques secondes que le Témoin rouge «Failure» ne
s’éteigne. Les données du moteur ont été acquises et l’appareil
peut désormais protéger la pompe (Fig. 4).
7 -
Fermer le robinet et attendre que la pompe s’arrête (Fig. 5).
Il est possible à présent d’utiliser normalement l’installation.
Débrancher et introduire de nouveau la fiche du câble d’alimentation
du moteur de l’appareil, ou bien l’appareil lui-même à partir de la prise
de courant ne compromet pas la saisie des données du moteur.
Au cas où par contre il faudrait remplacer la pompe et/ou déplacer
l’appareil sur une autre installation, il faut refaire la procédure de
saisie: voir les points 2 - 3 - 4 - 5 - 6 - 7.
En cas de remplacement de la pompe, respecter les délais indiqués
au point 5, sinon l’appareil fonctionnera avec des données erronées.
Anomalies de fonctionnement
Si l’eau vient à manquer à l’aspiration, l’appareil arrête la pompe en la
protégeant du fonctionnement à sec.
L’anomalie est signalée par le témoin rouge «Failure» allumé de façon
intermittent. S’il se produit une absorption de courant supérieure à 8
Ampères, l’appareil arrête le moteur de la pompe en le protégeant du sur
courant. L’anomalie est signalée par le Témoin «Failure» allumé de façon
fixe. Pour rétablir le fonctionnement normal de l’appareil et de
l’installation, il suffit de presser sur le bouton
rouge
«Restart».
En cas d’interruption du courant électrique, l’appareil se réarme automa-
tiquement après quelques secondes dès le retour de ce dernier.
Declaration de conformite
Control panel Panneau de controle
Témoin vert allumé Power on Appareil sous tension
Témoin jaune allumé Pump on Pompe en marche
Témoin rouge intermittent
Failure Manque d’eau
Témoin rouge allumé fixe
Failure Sur courant
Acquisition des données
du moteur
Reset après anomalie
Green LED on Power on Device energised
Yellow LED on Pump on Pump operating
Red LED blinking
Failure Dry-running
Red LED on
Failure Overcurrent
Acquisition motor data
Reset after fault
Red Button Restart Bouton rouge Restart
Pulsante Rosso Restart
La Ditta PENTAIR INTERNATIONAL S.a.r.l. dichiara sotto la propria
responsabilità che l’apparecchio LOGIC-DROP è conforme ai Requisiti
Essenziali di Sicurezza e di Tutela della Salute di cui alle direttive:
EN60730-1
EN55014-1
EN545014-2
EN61000-3-2
EN61000-3-3
PENTAIR INTERNATIONAL S.a.r.l.
Avenue de Sevelin, 18
1004 LAUSANNE
SWITZERLAND
The company PENTAIR INTERNATIONAL S.a.r.l. declares under its own respon-
sibility that the LODIC-DROP device is compliant with the Essential Safety and
Health Protection Requirements pursuant to the EN60370-1 Directives.
EN60730-1
EN55014-1
EN545014-2
EN61000-3-2
EN61000-3-3
PENTAIR INTERNATIONAL S.a.r.l.
Avenue de Sevelin, 18
1004 LAUSANNE
SWITZERLAND
La société PENTAIR INTERNATIONAL S.a.r.l. déclare sous sa propre
responsabilité que l’appareil LOGIC-DROP est conforme aux Critères
Essentiels de Sécurité et de Protection de la Santé des directives:
EN60730-1
EN55014-1
EN545014-2
EN61000-3-2
EN61000-3-3
PENTAIR INTERNATIONAL S.a.r.l.
Avenue de Sevelin, 18
1004 LAUSANNE
SWITZERLAND
Made in Italy
Restart
Power on
Pump on
Failure
Fig.1a
Fig.1b
Fig.2a
Fig.2b
Restart
Power on
Pump on
Failure
Restart
Power on
Pump on
Failure
LOGIC-DROP
230 Vac 50 Hz Min 3 A Max 8 A
Solo per Paesi UE. Secondo la Direttiva Europea 2012/19/CE sui rifiuti di appa-
recchiature elettriche ed elettroniche e la sua attuazione in conformità alle norme
nazionali, le apparecchiature esauste devono essere raccolte separatamente, al fine
di essere reimpiegate in modo eco-compatibile. Non gettare le apparecchiature
elettriche tra i rifiuti domestici. Per il loro corretto smaltimento rivolgersi ai sogget-
ti competenti e autorizzati. Per lo smaltimento delle apparecchiature elettriche ad
alimentazione trifase potete contattare il costruttore. Il simbolo del bidone barrato,
presente sull’etichetta posta sull’apparecchio, indica la rispondenza di tale prodotto
alla normativa relativa ai rifiuti di apparecchiature elettriche ed elettroniche. L’ab-
bandono nell’ambiente dell’apparecchiatura o lo smaltimento abusivo della stessa
sono puniti dalla legge.
For EU countries only. According to the European Directive 2012/19/CE on Waste
Electrical and Electronic Equipment and its implementation in compliance with na-
tional regulations, the exhausted equipment must be collected separately, in order
to be reused in an environmentally friendly way. Do not dispose the electrical equi-
pment as household waste. For their correct disposal, contact the competent and
authorized authorities. For the disposal of three-phase electrical equipment, please
contact the manufacturer. The crossed-out dustbin symbol on the label of the equi-
pment indicates that the product complies with the regulations on electrical and
electronic waste. The dumping of the equipment in the environment or its illegal
disposal is punishable by law.
Uniquement pour les pays de l’UE. Selon la Directive européenne 2012/19/CE sur
les déchets d’équipements électriques et électroniques et sa mise en œuvre con-
formément aux règles nationales, les équipements usagés doivent être collectés
sélectivement, afin d’être réutilisés dans le respect de l’environnement. Ne pas
jeter les appareils électriques avec les ordures ménagères. Pour leur élimination
correcte, contacter les sujets compétents et autorisés. Pour l’élimination des ap-
pareils électriques triphasés, veuillez contacter le fabricant. Le pictogramme de la
poubelle barrée sur l’étiquette de l’appareil indique que le produit est conforme
à la réglementation sur les déchets d’équipements électriques et électroniques.
L’abandon de l’équipement dans l’environnement ou son élimination illégale est
punissable par la loi.
Pentair International S.a.r.l.
Avenue de Sevelin, 18
1004 Lausanne, Switzerland
Lausanne, 16-01-2015
Guillaume Gousse
European Operations Vice President
Prodotto/Product:
LOGIC-DROP
Pentair International S.a.r.l.
Avenue de Sevelin, 18
1004 Lausanne, Switzerland
Lausanne, 16-01-2015
Guillaume Gousse
European Operations Vice President
Prodotto/Product:
LOGIC-DROP
Pentair International S.a.r.l.
Avenue de Sevelin, 18
1004 Lausanne, Switzerland
Lausanne, 16-01-2015
Guillaume Gousse
European Operations Vice President
Prodotto/Product:
LOGIC-DROP
