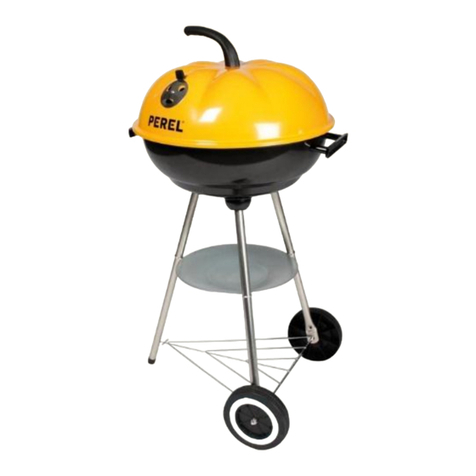
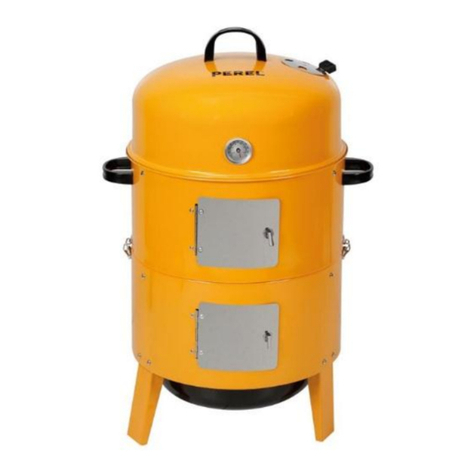
Perel BB100110 User manual

BB100110
V. 02 –07/11/2018 2 ©Velleman nv
[EN]
Do not use the barbecue in a confined and/or habitable space, e.g. houses, tents,
caravans, motorhomes, boats. Danger of carbon monoxide poisoning fatality.
[NL]
Gebruik de barbecue niet in gesloten of bewoonbare ruimtes, bv. huizen, tenten,
caravans, motorhomes, boten. Gevaar voor koolmonoxidevergiftiging.
[FR]
Ne pas utiliser le barbecue dans un espace confiné et/ou habitable, p.ex. des
maisons, tentes, caravanes, camping-cars, bateaux. Risque de décès par
empoisonnement au monoxyde de carbone.
[ES]
No use la barbacoa en un espacio cerrado y/o habitable, p.ej. vivienda, tienda de
campaña, caravana, auto caravana, embarcación. Peligro de envenenamiento mortal
por monóxido de carbono.
[DE]
Betreiben Sie den Grill nicht in geschlossenen und/oder bewohnbaren Räumen, z.B.
Gebäuden, Zelten, Wohnwagen, Wohnmobilen Booten. Es besteht Lebensgefahr
durch Kohlenmonoxid Vergiftung.
[PL]
Nie należy używać grilla w miejscu o ograniczonej przestrzeni i/lub zamieszkałym,
tj. w domach, namiotach, przyczepach kempingowych, samochodach
kempingowych, łodziach. Grozi to zatruciem tlenkiem węgla.
[PT]
Não utilize o grelhador num espaço confinado e/ou habitável, por exemplo, dentro
de casas, tendas, caravanas, autocaravanas, barcos. Perigo de morte por
intoxicação por monóxido de carbono.

BB100110
V. 02 –07/11/2018 3 ©Velleman nv

BB100110
V. 02 –07/11/2018 4 ©Velleman nv
USER MANUAL
1. Introduction
To all residents of the European Union
Important environmental information about this product
This symbol on the device or the package indicates that disposal of the device after its lifecycle
could harm the environment. Do not dispose of the unit (or batteries) as unsorted municipal
waste; it should be taken to a specialized company for recycling. This device should be
returned to your distributor or to a local recycling service. Respect the local environmental
rules.
If in doubt, contact your local waste disposal authorities.
Thank you for choosing Perel! Please read the manual thoroughly before bringing this device
into service. If the device was damaged in transit, do not install or use it and contact your
dealer.
2. Safety Instructions
Read and understand this manual and all safety signs before using this appliance.
Damages caused by not following the instructions (improper assembly, misuse, inadequate
maintenance...) are not covered by the warranty.
WARNING! This barbecue will become very hot, do not move it during operation!
WARNING! Keep children and pets away.
WARNING! Do not use indoors!
Use the appliance outdoors only. Using it indoors, even in a garage or shed, can cause carbon
monoxide poisoning.
oPlace the appliance at least three meters away from any building, in an open and well-
ventilated area.
oMake sure the appliance is not under an overhanging structure (a porch, a shelter...) or
under foliage.
oThe barbecue has to be installed on a secure level base prior to use. Never put it on a
moving vehicle (a boat, a trailer...).
Do not leave the appliance unattended when in use.
Use appropriate protection when handling hot parts.
Keep flammable materials, flammable liquids and dissoluble objects away from an
appliance in use.
Keep a bucket of water or sand at hand when using the appliance, especially on very hot
days and in dry areas.

BB100110
V. 02 –07/11/2018 5 ©Velleman nv
3. General Guidelines
Refer to the Velleman®Service and Quality Warranty on the last pages of this manual.
All modifications of the device are forbidden for safety reasons. Damage caused by user
modifications to the device is not covered by the warranty.
Only use the device for its intended purpose. Using the device in an unauthorised way will
void the warranty.
Damage caused by disregard of certain guidelines in this manual is not covered by the
warranty and the dealer will not accept responsibility for any ensuing defects or problems.
Nor Velleman nv nor its dealers can be held responsible for any damage (extraordinary,
incidental or indirect) –of any nature (financial, physical…) arising from the possession,
use or failure of this product.
Keep this manual for future reference.
4. Overview
Refer to the illustrations on page 2 of this manual.
Parts Description
1
cooking grid
9
short leg
2
charcoal plate
10
long leg
3
front wind shield
11
base grid
4
left wind shield
12
cross pipe
5
right wind shield
13
wheel
6
middle wind shield
14
grid handle
7
handle
15
axle
8
fire bowl
Mounting Accessories
part
quantity
description
A
13
M5 screw
B
13
M5 nut
C
2
M6x16 screw
D
6
M6x12 washer
E
4
M6 nut
F
4
M6x10 screw

BB100110
V. 02 –07/11/2018 6 ©Velleman nv
G
4
M6 long screw
H
2
M8 plastic washer
I
2
M8 nut
Required tools (not included)
10 mm wrench
Philips screwdriver
5. Assembly
Do not modify the appliance when assembling it. It is very dangerous and not allowed to
alter parts of the appliance.
The user is responsible for the correct assembly of the appliance. Damages caused by
improper assembly are not covered by the warranty.
The barbecue has to be installed on a secure level base prior to use.
Assemble the appliance according to the illustrations on page 3.
Refer to the illustrations on page 3 of this manual.
1. Set up the long legs [10], short legs [9] and cross pipe [12]. Fasten with four M6 long
screws [G].
2. Install the wheels [13] on the axles [15]. Fasten with two washers [H] and nuts [I].
3. Place the fire bowl [8] onto the legs and fix with four screws [F], washers [D] and nuts [E].
4. Attach the front [3], right [5], left [4] and middle wind shield [6] to the fire bowl. Fasten
with thirteen screws [A] and nuts [B].
5. Attach the handle [7] to the fire bowl. Fasten with two screws [C] and washers [D].
6. Place the base grid [11] onto the cross pipe [12].
7. Fix the handles [14] on the cooking grills [1]. Place the charcoal plate [2] and cooking grills
in the fire bowl.
6. Use
Fuel
Always light your appliance with traditional charcoal, never with briquettes. Once the
appliance is lit, you can add briquettes. Use good quality charcoal to light the appliance,
preferably complying with EN 1860-2. Good quality charcoal is composed of large, shiny
bricks and does not give off much dust.
Do not overfill the bowl. Maximum 50 % of the bowl can be filled with charcoal. Overfilling
the bowl can seriously damage your barbecue due to extensive heat.

BB100110
V. 02 –07/11/2018 7 ©Velleman nv
Lighting
The barbecue shall be heated up and the fuel kept red for at least 30 minutes prior to first
cooking. This removes any remaining manufacturing greases from the appliance.
Do not put the grill on the appliance yet. An empty grill can deform when held in the heat for
too long.
WARNING! Do not use spirit or petrol for lighting or re-lighting! Use only firelighters complying
to EN 1860-3!
1. Put some firelighters on the bottom of the bowl. Always use firelighters that comply with
EN 1860-3.
2. Cover the firelighters with charcoal.
oDo not use too much charcoal. The bowl should only be filled one third.
oMake sure you can reach the firelighters.
oUse small pieces of charcoal to light the appliance. You can add larger bricks
afterwards.
3. Take a long match and light the firelighters.
4. Do not cook before the fuel has a coating of ash. Normally, this takes about 15 minutes.
5. Put the grill on the appliance, with its supports on the hooks in the bowl. Always put the
grill in this position when using the appliance.
7. Care and Maintenance
Cleaning the Bowl
We recommend cleaning the bowl after each use. Proceed as follows:
oLet the appliance cool down completely and remove the grill.
oEmpty the bowl from its ashes and dispose of the ashes in a safe way.
Cleaning the Grill
Clean the grill with a soft detergent or with sodium bicarbonate. Never use oven cleaners
on the grill.
Dry well after cleaning.
Storing
Store the appliance after each use.
Clean the bowl and the grill as described above.
Put the grill back on the appliance, in the lowest position.
Cover the appliance if desired. Store in a dry and clean place indoors.

BB100110
V. 02 –07/11/2018 8 ©Velleman nv
8. Technical Specifications
dimensions
total.................................................................................................. 96 x 37 x 95 cm
cooking grid ...............................................................................................40 x 33 cm
recommended max. charcoal amount........................................................................ 3.0 kg
colour...................................................................................................................... black
Use this device with original accessories only. Velleman nv cannot be held
responsible in the event of damage or injury resulting from (incorrect) use of this
device. For more info concerning this product and the latest version of this manual,
please visit our website www.perel.eu. The information in this manual is subject to
change without prior notice.
© COPYRIGHT NOTICE
The copyright to this manual is owned by Velleman nv. All worldwide rights reserved.
No part of this manual may be copied, reproduced, translated or reduced to any electronic
medium or otherwise without the prior written consent of the copyright holder.

BB100110
V. 02 –07/11/2018 9 ©Velleman nv
HANDLEIDING
1. Inleiding
Aan alle ingezetenen van de Europese Unie
Belangrijke milieu-informatie betreffende dit product
Dit symbool op het toestel of de verpakking geeft aan dat, als het na zijn levenscyclus wordt
weggeworpen, dit toestel schade kan toebrengen aan het milieu. Gooi dit toestel (en eventuele
batterijen) niet bij het gewone huishoudelijke afval; het moet bij een gespecialiseerd bedrijf
terechtkomen voor recyclage. U moet dit toestel naar uw verdeler of naar een lokaal
recyclagepunt brengen. Respecteer de plaatselijke milieuwetgeving.
Hebt u vragen, contacteer dan de plaatselijke autoriteiten betreffende de
verwijdering.
Bedankt voor uw aankoop! Lees deze handleiding grondig door voor u het toestel in gebruik
neemt. Werd het toestel beschadigd tijdens het transport, installeer het dan niet en raadpleeg
uw dealer.
2. Veiligheidsvoorschriften
Lees en begrijp deze handleiding en de veiligheidsinstructies vóór ingebruikname.
Schade wegens het niet naleven van de instructies (verkeerde montage, misbruik, verkeerd
onderhoud, enz.) wordt niet gedekt door de garantie.
WAARSCHUWING! Het toestel wordt zeer heet. Verplaats deze niet tijdens het gebruik!
WAARSCHUWING! Houd kinderen en huisdieren op een veilige afstand.
WAARSCHUWING! Niet binnenshuis gebruiken!
Gebruik het toestel alleen buitenshuis. Als u het toestel binnenshuis gebruikt, zelfs in een
garage of schuur, bestaat er gevaar voor vergiftiging door koolmonoxide.
oPlaats het toestel op minstens drie meter van een gebouw, op een open en goed
geventileerde plaats.
oPlaats het toestel niet onder een overhangende structuur (veranda, afdak, ...) of onder
gebladerte.
oPlaats het toestel op een stevige en stabiele ondergrond. Plaats het toestel nooit op
een bewegend voertuig (boot, oplegger, ...).
Laat het toestel niet alleen achter terwijl deze in gebruik is.
Gebruik geschikte bescherming wanneer u hete onderdelen moet vastnemen.
Houd brandbare materialen, brandbare vloeistoffen en oplosbare objecten op een veilige
afstand van het toestel wanneer deze in gebruik is.
Houd een emmer water of zand bij de hand wanneer u het toestel gebruikt, in het
bijzonder op zeer warme dagen en in droge omgevingen.

BB100110
V. 02 –07/11/2018 10 ©Velleman nv
3. Algemene richtlijnen
Raadpleeg de Velleman® service- en kwaliteitsgarantie achteraan deze handleiding.
Om veiligheidsredenen mag u geen wijzigingen aanbrengen. Schade door wijzigingen die
de gebruiker heeft aangebracht aan het toestel valt niet onder de garantie.
Gebruik het toestel enkel waarvoor het gemaakt is. De garantie vervalt automatisch bij
ongeoorloofd gebruik.
De garantie geldt niet voor schade door het negeren van bepaalde richtlijnen in deze
handleiding en uw dealer zal de verantwoordelijkheid afwijzen voor defecten of problemen
die hier rechtstreeks verband mee houden.
Noch Velleman nv noch zijn verdelers kunnen aansprakelijk gesteld worden voor schade
(buitengewoon, incidenteel of onrechtstreeks) –van welke aard dan ook (financieel,
fysisch…) voortvloeiend uit het bezit, gebruik of falen van dit product.
Bewaar deze handleiding voor verdere raadpleging.
4. Omschrijving
Raadpleeg de afbeeldingen op pagina 2 van deze handleiding.
Onderdelen
1
grillrooster
9
korte poot
2
houtskoolplaat
10
lange poot
3
windscherm, voorkant
11
opbergrooster
4
windscherm, links
12
dwarssteun
5
windscherm, rechts
13
wiel
6
windscherm, midden
14
grijphaak voor grillrooster
7
handgreep
15
as
8
grillkuip
Accessoires
onderdeel
aantal
omschrijving
A
13
M5-schroef
B
13
M5-moer
C
2
M6x16-schroef
D
6
M6x12-sluitring
E
4
M6-moer
F
4
M6x10-schroef

BB100110
V. 02 –07/11/2018 11 ©Velleman nv
G
4
M6 lange schroef
H
2
M8 plastic sluitring
I
2
M8 moer
Benodigd materiaal (niet meegelev.)
ringsteeksleutel, 10 mm
kruiskopschroevendraaier
5. Montage
Breng geen wijzigingen aan het toestel aan wanneer u deze in elkaar zet. U mag geen
onderdelen van het toestel wijzigen, want dit is zeer gevaarlijk.
De gebruiker is verantwoordelijk voor de correcte montage van het toestel. Schade
veroorzaakt door een foutieve montage wordt niet gedekt door de garantie.
Plaats het toestel op een effen oppervlak.
Monteer het toestel zoals aangegeven op pagina 3.
Raadpleeg de afbeeldingen op pagina 3 van deze handleiding.
1. Monteer de lange poten [10], korte poten [9] en dwarssteun [12]. Bevestig met 4 M6 lange
schroeven [G].
2. Monteer de wielen [13] op de assen [15]. Bevestig met 2 sluitringen [H] en moeren [I].
3. Plaats de grillkuip [8] op het onderstel en bevestig met 4 schroeven [F], sluitringen [D] en
moeren [E].
4. Bevestig de windschermdelen [3] [5] [4] [6] aan de grillkuip. Bevestig met 13 schroeven
[A] en moeren [B].
5. Bevestig de handgreep [7] aan de grillkuip. Bevestig met 2 schroeven [C] en sluitringen
[D].
6. Plaats het opbergrooster [11] op de dwarssteun [12].
7. Bevestig de grijphaken [14] aan de grillroosters [1]. Plaats de houtskoolplaat [2] en de
grillroosters in de grillkuip.
6. Gebruik
Brandstof
Maak het toestel altijd aan met klassieke houtskool, nooit met briketten. Als het toestel
aangemaakt is, kunt u briketten toevoegen. Gebruik houtskool van goede kwaliteit om het
toestel aan te maken, bij voorkeur houtskool die voldoet aan EN 1860-2. Houtskool van
goede kwaliteit bestaat uit grote, glanzende stukken en produceert niet veel stof.
Let erop om de kuip niet teveel vullen Zorg ervoor dat de houtskoolstukken niet boven de
rand van de kuip komen (max. 50 %). De kuip overvullen kan uw toestel ernstig
beschadigen door de extreme warmte.

BB100110
V. 02 –07/11/2018 12 ©Velleman nv
Het toestel aanmaken
Wanneer u het toestel voor het eerst gebruikt, dient u het 30 minuten te laten branden.
Hierdoor worden resterende fabricagevetten uit het toestel verwijderd.
Plaats het rooster nog niet op het toestel. Een leeg rooster kan vervormd raken wanneer het te
lang in de hitte wordt gehouden.
WAARSCHUWING! Gebruik geen alcohol of benzine bij het aansteken of aanwakkeren van het
vuur! Gebruik enkel aanmaakproducten die voldoen aan EN 1860-3!
1. Leg aanmaakproducten op de bodem van de kuip. Gebruik altijd aanmaakproducten die
voldoen aan EN 1860-3.
2. Bedek de aanmaakproducten met houtskool.
oGebruik niet te veel houtskool. De kuip mag slechts voor een derde gevuld worden.
oZorg ervoor dat u nog bij de aanmaakproducten kunt komen.
oGebruik kleine stukken houtskool om het toestel aan te maken. U kunt later grotere
stukken toevoegen.
3. Gebruik een lange lucifer en steek de aanmaakproducten aan.
4. U kunt met grillen beginnen wanneer de houtskool bedekt is met een dun laagje witte as.
Dit duurt ongeveer 15 minuten.
5. Plaats het rooster op het toestel, met de steunen op de haken van de kuip. Plaats het
rooster altijd in deze positie wanneer u het toestel gebruikt.
7. Reiniging en onderhoud
De kuip reinigen
Het is aan te bevelen het rooster na elk gebruik te reinigen. Ga als volgt te werk:
oLaat het toestel volledig afkoelen en verwijder het rooster.
oVerwijder de as op een veilige manier.
Het rooster reinigen
Reinig het rooster met een zacht reinigingsmiddel of met natriumbicarbonaat. Gebruik
nooit ovenreinigers om het rooster te reinigen.
Droog het rooster goed na het reinigen.
Opslag
Berg het toestel na elk gebruik op.
Reinig de kuip en het rooster (zie hierboven).
Plaats het rooster weer in de laagste positie op het toestel.
Plaats het deksel op het toestel. Berg het toestel op in een droge en propere plaats
(binnenshuis).

BB100110
V. 02 –07/11/2018 13 ©Velleman nv
8. Technische specificaties
afmetingen
totaal ................................................................................................ 96 x 37 x 95 cm
grillrooster .................................................................................................40 x 33 cm
max. aanbevolen hoeveelheid houtskool .................................................................... 3.0 kg
kleur .......................................................................................................................zwart
Gebruik dit toestel enkel met originele accessoires. Velleman nv is niet aansprakelijk
voor schade of kwetsuren bij (verkeerd) gebruik van dit toestel. Voor meer
informatie over dit product en de laatste versie van deze handleiding, zie
www.perel.eu. De informatie in deze handleiding kan te allen tijde worden gewijzigd
zonder voorafgaande kennisgeving.
© AUTEURSRECHT
Velleman nv heeft het auteursrecht voor deze handleiding. Alle wereldwijde rechten
voorbehouden. Het is niet toegestaan om deze handleiding of gedeelten ervan over te
nemen, te kopiëren, te vertalen, te bewerken en op te slaan op een elektronisch medium
zonder voorafgaande schriftelijke toestemming van de rechthebbende.

BB100110
V. 02 –07/11/2018 14 ©Velleman nv
MODE D'EMPLOI
1. Introduction
Aux résidents de l'Union européenne
Informations environnementales importantes concernant ce produit
Ce symbole sur l'appareil ou l'emballage indique que l’élimination d’un appareil en fin de vie
peut polluer l'environnement. Ne pas jeter un appareil électrique ou électronique (et des piles
éventuelles) parmi les déchets municipaux non sujets au tri sélectif ; une déchetterie traitera
l’appareil en question. Renvoyer l'appareil à votre fournisseur ou à un service de recyclage
local. Respecter la réglementation locale relative à la protection de l’environnement.
En cas de questions, contacter les autorités locales pour élimination.
Nous vous remercions de votre achat ! Lire attentivement le présent mode d'emploi avant la
mise en service de l’appareil. Si l'appareil a été endommagé pendant le transport, ne pas
l’installer et consulter votre revendeur.
2. Consignes de sécurité
Lire et comprendre ce mode d'emploi et toutes les consignes de sécurité avant d'utiliser
l'appareil.
Les dommages résultant du non-respect des instructions suivantes (assemblage incorrect,
mauvaise utilisation, entretien inadéquat...) ne sont pas couverts par la garantie.
AVERTISSEMENT ! L’appareil devient très chaud, ne pas le déplacer pendant l'utilisation !
AVERTISSEMENT ! Tenir les enfants et les animaux à distance.
AVERTISSEMENT ! Ne pas utiliser à l'intérieur !
Utiliser l’appareil à l’extérieur uniquement. Son utilisation à l’intérieur, même dans un garage
ou un abri de jardin, peut entraîner une intoxication au monoxyde de carbone.
oPlacer l’appareil à 3 mètres au moins de toute construction, dans un endroit ouvert et
bien ventilé.
oS’assurer que l’appareil n’est pas sous une structure couverte (un porche, un abri...) ou
sous le feuillage.
oPoser l’appareil sur une surface ferme et stable. Ne jamais le placer dans un véhicule
en mouvement (un bateau, une caravane...).
Ne pas laisser l’appareil sans surveillance lorsqu’il est allumé.
Se protéger de façon adéquate lors de la manipulation des éléments chauds.
Conserver les matières et les liquides inflammables ainsi que les objets solubles à l’écart de
l’appareil en cours d’utilisation.
Garder à proximité du barbecue en cours d’utilisation un seau d’eau ou de sable, et cela
particulièrement en cas de grandes chaleur ou par temps très sec.

BB100110
V. 02 –07/11/2018 15 ©Velleman nv
3. Directives générales
Se référer à la garantie de service et de qualité Velleman® en fin de ce mode d'emploi.
Toute modification est interdite pour des raisons de sécurité. Les dommages occasionnés
par des modifications par le client ne tombent pas sous la garantie.
N’utiliser l'appareil qu’à sa fonction prévue. Un usage impropre annule d'office la garantie.
La garantie ne se s’applique pas aux dommages survenus en négligeant certaines
directives de ce mode d'emploi et votre revendeur déclinera toute responsabilité pour les
problèmes et les défauts qui en résultent.
Ni Velleman nv ni ses distributeurs ne peuvent être tenus responsables des dommages
exceptionnels, imprévus ou indirects, quelles que soient la nature (financière,
corporelle, etc.), causés par la possession, l’utilisation ou le dysfonctionnement de ce
produit.
Garder ce mode d'emploi pour toute référence ultérieure.
4. Description
Se référer aux illustrations en page 2 de ce mode d'emploi.
Liste des pièces
1
grille de cuisson
9
pied court
2
plaque à charbon
10
pied long
3
pare-vent, frontal
11
grille de rangement
4
pare-vent, gauche
12
traverse
5
pare-vent, droite
13
roue
6
pare-vent, central
14
poignée de grille
7
poignée
15
essieu
8
cuve
Accessoires
partie
quantité
description
A
13
vis M5
B
13
écrou M5
C
2
vis M6x16
D
6
rondelle M6x12
E
4
écrou M6
F
4
vis M6x10

BB100110
V. 02 –07/11/2018 16 ©Velleman nv
G
4
longue vis M6
H
2
rondelle en plastique M8
I
2
écrou m8
Outils requis (non incl.)
clé mixte, 10 mm
tournevis cruciforme
5. Montage
Ne pas modifier l'appareil lors de son assemblage. Il est interdit car très dangereux de
modifier des éléments de l'appareil.
L'utilisateur est tenu responsable de l'assemblage adéquat de l'appareil. Les dommages
résultant d'un assemblage incorrect ne sont pas couverts par la garantie.
Poser l’appareil sur une surface ferme et stable.
Assembler l'appareil comme indiqué à la page 3.
Se référer aux illustrations en page 3 de ce mode d'emploi.
1. Monter les pieds longs [10], pieds courts [9] et traverse [12]. Fixer avec 4 vis longues M6
[G].
2. Monter les roues [13] sur les essieux [15]. Fixer avec 2 rondelles [H] et écrous [I].
3. Placer la cuve [8] sur les pieds et fixer avec 4 vis [F], rondelles [D] et écrous [E].
4. Attacher les éléments du pare-vent [3] [5] [4] [6] à la cuve. Fixer avec 13 vis [A] et
écrous [B].
5. Attacher la poignée latérale [7] à la cuve. Fixer avec 2 vis [C] et rondelles [D].
6. Placer la grille de rangement [11] sur la traverse [12].
7. Fixer les poignées de grille [14] aux grilles de cuisson [1]. Placer la plaque à charbon [2] et
les grilles de cuisson dans la cuve.
6. Emploi
Combustible
Toujours allumer l'appareil avec du charbon de bois traditionnel, jamais avec des
briquettes. Une fois l'appareil allumé, vous pouvez ajouter des briquettes. Utiliser du
charbon de bois de bonne qualité pour allumer l'appareil, de préférence conforme à la
norme EN-1860-2. Un charbon de bois de bonne qualité se compose de grandes briques
luisantes et ne dégage pas beaucoup de poussière.
Ne pas trop remplir la cuve. S'assurer que les morceaux de charbon ne dépassent pas le
bord supérieur de la cuve (max. 50 %). Le remplissage excessif de la cuve peut
endommager gravement l'appareil en raison d’une température conséquente trop élevée.

BB100110
V. 02 –07/11/2018 17 ©Velleman nv
Allumer l'appareil
Lors de la première utilisation de l'appareil, laisser le chauffer pendant 30 minutes. Cela
permet d'éliminer de l'appareil toutes les graisses employées lors de la fabrication.
Ne pas encore placer la grille sur l'appareil. Une grille vide peut se déformer si elle est chauffée
trop longtemps.
AVERTISSEMENT ! Ne pas utiliser d'alcool ou d'essence pour allumer ou raviver l'appareil !
N'utiliser que des allume-feux conformes à la norme EN 1860-3 !
1. Placer quelques allume-feux sur le fond de la cuve. Toujours utiliser des allume-feux
conformes à la norme EN 1860-3.
2. Couvrir les allume-feux avec du charbon.
oNe pas trop utiliser de charbon de bois. La cuve doit être remplie au tiers.
oS'assurer de pouvoir atteindre les allume-feux.
oUtiliser des petits morceaux de charbon de bois pour allumer l'appareil. Vous pouvez
ajouter des briques plus grandes par la suite.
3. Prendre une longue allumette et allumer les allume-feux.
4. Vous pouvez commencer à griller lorsque le charbon de bois est recouvert d'une fine
couche de cendres grises. Cela dure environ 15 minutes.
5. Placer la grille sur l’appareil, ses supports reposant sur les crochets de la cuve. Toujours
placer la grille dans cette position lors de l'utilisation.
7. Entretien
Nettoyer la cuve
Nous recommandons de nettoyer la cuve après chaque utilisation. Procéder comme suit :
oLaisser l'appareil refroidir complètement et retirer la grille.
oÉliminer les cendres en toute sécurité.
Nettoyer la grille
Nettoyer la grille avec un détergent doux ou du bicarbonate de soude. Ne jamais utiliser de
décapants four pour nettoyer la grille.
Sécher la grille et ranger le au sec.
Rangement
Ranger l'appareil après chaque utilisation.
Nettoyer la cuve et la grille (voir ci-dessus).
Remettre la grille sur l'appareil, dans sa position la plus basse.
Placer le couvercle sur l'appareil. Ranger l’appareil dans un endroit sec et propre (à
l'intérieur).

BB100110
V. 02 –07/11/2018 18 ©Velleman nv
8. Spécifications techniques
dimensions
total.................................................................................................. 96 x 37 x 95 cm
grille de cuisson..........................................................................................40 x 33 cm
quantité de charbon recommandée ........................................................................... 3.0 kg
couleur......................................................................................................................noir
N'employer cet appareil qu’avec des accessoires d’origine. Velleman SA ne peut, dans
la mesure conforme au droit applicable être tenue responsable des dommages ou
lésions (directs ou indirects) pouvant résulter de l’utilisation de cet appareil. Pour
plus d’informations concernant cet article et la dernière version de ce mode d'emploi,
visiter notre site web www.perel.eu. Les spécifications et le continu de ce mode
d'emploi peuvent être modifiés sans notification préalable.
© DROITS D’AUTEUR
Velleman SA est l’ayant droit des droits d’auteur de ce mode d'emploi. Tous droits
mondiaux réservés. Toute reproduction, traduction, copie ou diffusion, intégrale ou partielle,
du contenu de ce mode d'emploi par quelque procédé ou sur tout support électronique que ce
soit est interdite sans l’accord préalable écrit de l’ayant droit.

BB100110
V. 02 –07/11/2018 19 ©Velleman nv
MANUAL DEL USUARIO
1. Introducción
A los ciudadanos de la Unión Europea
Importantes informaciones sobre el medio ambiente concerniente a este producto
Este símbolo en este aparato o el embalaje indica que, si tira las muestras inservibles, podrían
dañar el medio ambiente. No tire este aparato (ni las pilas, si las hubiera) en la basura
doméstica; debe ir a una empresa especializada en reciclaje. Devuelva este aparato a su
distribuidor o a la unidad de reciclaje local. Respete las leyes locales en relación con el medio
ambiente.
Si tiene dudas, contacte con las autoridades locales para residuos.
¡Gracias por elegir Perel! Lea atentamente las instrucciones del manual antes de usar el
aparato. Si ha sufrido algún daño en el transporte no lo instale y póngase en contacto con su
distribuidor.
2. Instrucciones de seguridad
Lea y comprenda este manual y todas las instrucciones de seguridad antes de usar el aparato.
Los daños causados por no seguir las instrucciones (montaje incorrecto, uso indebido,
mantenimiento inadecuado, etc.) anula la garantía.
¡ADVERTENCIA! Este aparato se calentará mucho. No lo mueva durante el uso.
¡ADVERTENCIA! Mantenga alejados a niños y mascotas.
¡ADVERTENCIA! ¡Este aparato no es apto para el uso en interiores!
Utilice el aparato solo al aire libre. El uso en interiores, incluso en un garaje o cobertizo, puede
provocar la intoxicación por monóxido de carbono.
oInstale el aparato a una distancia de mín. 3 m de cualquier edificio, en un área abierta
y bien ventilada.
oAsegúrese de que el aparato no esté bajo una estructura saliente (un porche, un
cobertizo...). o bajo follaje.
oColoque el aparato sobre una superficie segura y nivelado antes de su uso. Nunca
coloque el aparato en un vehículo en marcha (barco, caravana, etc.).
No deje el aparato sin vigilancia cuando esté en uso.
Utilice protección adecuada cuando toque las partes calientes.
Mantenga los materiales y líquidos inflamables y los objetos solubles lejos del aparato
cuando esté en uso.
Asegúrese de tener un cubo de agua o arena a mano cuando utilice el aparato,
especialmente en días muy calurosos y en zonas secas.

BB100110
V. 02 –07/11/2018 20 ©Velleman nv
3. Normas generales
Véase la Garantía de servicio y calidad Velleman® al final de este manual del usuario.
Por razones de seguridad, las modificaciones no autorizadas del aparato están prohibidas.
Los daños causados por modificaciones no autorizadas, no están cubiertos por la garantía.
Utilice sólo el aparato para las aplicaciones descritas en este manual Su uso incorrecto
anula la garantía completamente.
Los daños causados por descuido de las instrucciones de seguridad de este manual
invalidarán su garantía y su distribuidor no será responsable de ningún daño u otros
problemas resultantes.
Ni Velleman nv ni sus distribuidores serán responsables de los daños extraordinarios,
ocasionales o indirectos, sea cual sea la índole (financiera, física, etc.), causados por la
posesión, el uso o el fallo de este producto.
Guarde este manual del usuario para cuando necesite consultarlo.
4. Descripción
Véase las figuras en la página 2 de este manual del usuario.
Descripción
1
parrilla para cocinar
9
pata corta
2
bandeja de carbón
10
pata larga
3
pantalla protectora frontal
11
bandeja inferior
4
pantalla protectora izquierda
12
barra transversal
5
pantalla protectora derecha
13
rueda
6
pantalla protectora media
14
mango de parrilla
7
asa
15
eje
8
bol para fuego
Accesorios de montaje
pieza
incluye
descripción
A
13
tornillo (M5)
B
13
tuerca (M5)
C
2
tornillo (M6x16)
D
6
arandela (M6x12)
E
4
tuerca (M6)
F
4
tornillo (M6x10)
Other manuals for BB100110
1
Table of contents
Languages:
Other Perel Grill manuals

Perel
Perel BB100111 User manual

Perel
Perel PUMPKIN User manual

Perel
Perel BB100115 User manual

Perel
Perel BB100200 User manual

Perel
Perel BB100101 User manual

Perel
Perel BB100113 User manual

Perel
Perel BB100110 User manual

Perel
Perel BB100301 User manual

Perel
Perel BB100114 User manual

Perel
Perel BB100112 User manual