Pergola Depot Big Kahuna PLUS User manual

Assembly Instructions
Big Kahuna™ PLUS Covered Pergola Kit
Thank you for purchasing a do-it-yourself pergola kit from Pergola Depot!
Please carefully read these instructions entirely before beginning to familiarize yourself with the
whole process.In addition to these instructions, we have a variety of information and resources
available on our website under the Resources menu, including How to Measure for a Pergola
and Installation Information (including videos for some of the important steps in the installation
process).
Contact us if you have questions or need help!
Call: 1-877-563-0002
Email: info@pergoladepot.com
Visit: https://pergoladepot.com/
The Team at Pergola Depot

Assembly Instructions – Big Kahuna™ PLUS Covered Pergola Kit – 877-563-0002 – www.pergoladepot.com
Page 2
Tools and Supplies Needed
o Helpers - at least 2 recommended, especially for larger kits
o Tape measure (2 better), hammer, level, leveling string and stakes, sawhorses (2) or
substitute, clamp, and a few pieces of scrap wood for propping up beams for post
location (size and quantity depending upon rafter length and slope of installation
location)
o Spray paint, chalk, flags or other materials for marking post locations
o Ladder (tall enough to work the top of your pergola during assembly)
o Screw gun, power drill (min. 18V fully charged cordless) and power saw (skill saw min.
7 ½”blade) and hand saw
o Socket attachments, wrenches, drill bits:
o Supplied with Kit: Two star-drive bits (T25, T27) for 3” and 6” screws and one
nut driver bit (5/16”) for roofing screws
o 3/4” socket or open-end wrench for bolts
o 9/16” socket for angle brace lags – drill attachment preferred
o 1/4” drill bit for pre-drilling post at angle brace attachment
o 1/2” drill bit for pre-drilling angle brace to beam and rafter attachments
o 5/8” drill bit for installing rebar into post (if posts going into new concrete
foundations)
o For all kits using post bases on concrete: 5/8” masonry drill bit; and 15/16” socket
o For new footings: post hole digger, dry concrete mix, gravel, trowel, shovel and
mixing bin or wheelbarrow and concrete footing form tubes
o For Pressure Treated Pine kits using post bases on concrete: 5/32" masonry drill bit,
and #2 Philips bit or #2 Philips screwdriver
Kit Components

Assembly Instructions – Big Kahuna™ PLUS Covered Pergola Kit – 877-563-0002 – www.pergoladepot.com
Page 3
Reference the packing list that was provided with your shipment confirmation for a complete list
of kit components, including the piece count for each type of lumber and hardware pack
components. Here is a summary of the kit components:
o 2x8 Beams (4 for standard size kits)
o 2x8 Notched Rafters (# depends upon kit size)
o 6x6 Notched Posts (4 for standard size kits)
o 4x6 Angle Braces (8 for standard size kits) – 4 shorter (post to beam), 4 longer (post to
rafter)
o 2x2 Top Slats (# depends upon kit size)
o Metal Roofing Panels (# depends upon kit size)
o Hardware Pack (box) – see Pack List for detailed contents
o Post base mounting hardware (4 for standard sizes kits) and Tapcons (for PT pine kits
only) – for slab or footer post mounting if purchased
o Optional: post base trim
Instructions
For installations on top of new footings, allow the concrete to dry before completing the rest of
the pergola installation. This may require that you dig holes and pour footings a few days or
more prior to assembling the pergola depending upon the concrete used and climate.
Additional instructions are provided below.
For installations on top of new or existing concrete foundations, we supply post bases, anchors
and Tapcons as part of your kit if purchased with the option to be installed “on a concrete slab
or footer”.These materials can also be purchased as accessories from us or from your local
hardware store. Instructions for post base installation are provided below, and we have a video
on the Installation Information page on our website.
Please wait for the wood to dry completely before painting or staining a pressure treated
pine kit, which may take several months or more depending upon climate and weather
conditions.

Assembly Instructions – Big Kahuna™ PLUS Covered Pergola Kit – 877-563-0002 – www.pergoladepot.com
Page 4
Step by Step:
• Step 1 – Move all parts close to where you will be installing the pergola for easy access
during assembly.
• Step 2 - Place all four beams on the ground (with the x’s facing up) exactly where you
would like the pergola to stand, like shown below. Position the beams perpendicular to
the ribs of the roofing panels (roofing ribs will run parallel with the rafters). Once
assembled, one set of beams will be higher than the other to create slope for water
drainage.
• Step 3 - Slide two rafters over the two X marks on the beams just outside where “post” is
labeled on top of the beams – these are the second X marks in from the outside tips of
the beams, marked like this: IXI.Position the rafters with the arrows marked on the top
pointing toward the downslope (shorter post and beam assembly) side. Make sure each
rafter is positioned on top of the same mark on both beams so there is equal amount of
beam outside of each rafter. Use blocks of wood to prop up one set of beams to allow
the rafters to sit squarely over the beams (see table below for post and beam height
differential assuming level assembly surface). You may also have to move the beams
around a little to get the rafters into place. Using 6” screws provided, temporarily screw
each rafter through the predrilled holes into the beams. Screw them in just enough to
hold the rafter in place.

Assembly Instructions – Big Kahuna™ PLUS Covered Pergola Kit – 877-563-0002 – www.pergoladepot.com
Page 5
• Step 4 – To ensure the assembly is square, hook one end of a tape measure on the
outside tip of the rafters and pull the tape to the opposite corner. Write down the
measurement. Then repeat for the opposite corner like this. This is easier if you and your
helper both have a tape measure and pull them across at the same time.
Move one set of the beams from side to side until you have the same measurement both
ways. When you have the same measurement, it is perfectly square. Once square, make
sure the assembly does not move.
• Step 5 – To identify the location for each post hole or post base, look at the top of the
beams just inside the rafter where “post” is written with two lines on either side, like this:
IpostI. Ensuring the assembly does not move, use spray paint, chalk, flags or other
material to mark the ground or concrete surface at the center of the lines around the
word post and the mid-point between the two boards making up each beam assembly.
Repeat at all corners.
Unscrew and remove the rafters from the beams and move all the boards to the side.
Now you should be left with four marks where the post holes or post bases will be
located.
• Step 6 – If mounting posts using post bases on top of new footings, dig footer holes with
the center of the hole where marked, minimum 2’4” deep (depending on the depth
desired for frost line etc. – see our website under Resources>Pergola Post Guide) and
min. 16” diameter. Use concrete footing form tubes and leveling line to ensure the top of
each footing is level with each other. Pour in gravel to fill the first 4” of each post hole.
Mix the concrete according to the directions for the concrete purchased and fill the hole
to about two-thirds of the way to the top. Use a shovel or piece of rebar to eliminate air
bubbles. Insert one piece of 18” rebar supplied with the kit into the wet concrete so that
it sits diagonally from the bottom of one side of the hole toward the top of the other side.
Pour in more concrete to cover the rebar and until the concrete is level with the top of the
form tubes. Work the top portion of concrete to eliminate bubbles and smooth the top
with a trowel or shovel. Repeat for each footing. Allow concrete to dry completely, which
will depend upon the concrete used and weather conditions.
• Step 7 – This section will provide information and instructions of securing the posts to the
ground and achieving the proper roofing slope, (1) using post bases on top of newly

Assembly Instructions – Big Kahuna™ PLUS Covered Pergola Kit – 877-563-0002 – www.pergoladepot.com
Page 6
poured footings, (2) burying the posts into newly poured footings, or (3) using post bases
on top of an existing concrete surface (slab or footing).
To achieve the proper roofing slope, you will adjust the above grade post (and beam
assembly) height by trimming the length of the posts provided, by burying the posts to
the appropriate depths, or a combination of the two. For standard orders we provide
posts in lengths of either 8’, 10’ or 12’ based upon your specifications at the time of
order.
! For orders specifying post base mounting on top of new footings or existing
concrete surfaces, we supply two posts at 8’ or 10’ (based upon your low side
preference). The other two posts are provided 2’ longer, either 10’ or 12’.During
installation, you will likely need to trim the bottom of at least two posts to achieve
the required post height differential as explained below.
! For orders specifying buried posts (posts installed into concrete foundations), we
supply all four posts at lengths of 12’ requiring either deeper holes and/ or
trimming at the bottom of the posts.
All standard kits are designed for a slope of ½”for every 12” of total rafter length, making
the height difference between the two post and beam assemblies greater for longer
rafter lengths, as follows:
Rafter Length
Post Height
Differential (1)
8 feet
2 ½inches
9 feet
3 inches
10 feet
3 ½inches
11 feet
4 inches
12 feet
4 ½inches
13 feet
5 inches
14 feet
5 ½inches
15 feet
6 inches
16 feet
6 ½inches
17 feet
7 inches
18 feet
7 ½inches
19 feet
8 inches
20 feet
8 ½inches
(1) Post height differential measured from the outside of upslope to downslope posts.
Mounting Posts on New Footings
When mounting posts using post bases on top of new footings, the tops of the footings
are assumed to be level with each other (per instructions above). Check using a leveling
string and level, measure the height differential between the upslope and downslope
post locations, and adjust for that difference as described for an existing concrete surface
below.With level footings, the upslope post length will be equal to the shorter/
downslope posts plus the post height differential from the table above.
For example: Assume pergola size is 12x16 (12’ rafter length), desired 8’ post
height at shorter/ downslope side, two 8’ and two 10’ posts supplied, and tops of
all footers are level with each other.

Assembly Instructions – Big Kahuna™ PLUS Covered Pergola Kit – 877-563-0002 – www.pergoladepot.com
Page 7
Post height differential required = 4 ½”(for 12’ rafters per table). Upslope post
length requirement = 8’ or 96” (downslope post length) + 4 ½”(post height
differential) = 100 ½”.
Place 10’ posts on sawhorses, measure 100 ½”from the top (notched end) of the
posts down and mark a line toward the bottom across two opposite sides of the
posts.Adjust measurements accordingly for higher desired low side post height.
Double check all measurements before cutting.Using a power saw, evenly trim
the bottom portion of the posts below the lines.Most saws will require that you
cut one side of the posts, flip the posts to cut the other side, then finish with a
hand saw for a clean cut.
Mounting Posts on Existing Concrete Surface
When mounting posts on top of an existing concrete surface (pre-existing slab or
footings), you must account for any existing slope: using a leveling string and level,
measure the height differential between the upslope and downslope outside post
locations, then adjust for that difference to the required post height differential from the
table above.
For example: Assume pergola size is 18x20 (18’ rafter length), desired 9’ above
ground post height at shorter/ downslope side, two 10’ and two 12’ posts
supplied, and 2” of height differential for slope of existing concrete surface
(ground surface is 2” lower on the shorter/ downslope side).
Post height differential required = 7 ½”(for 18’ rafters per table) minus 2” (for
existing slope) = 5 ½”. Upslope post length requirement = 9’ or 108” (downslope
post length) + 5 ½”(calculated post height differential) = 113 ½”.
Place 10’ posts on sawhorses, measure 9’ or 108” from the top (notched end) of
the post down and mark a line toward the bottom across two opposite sides of the
posts. Place 12’ posts on sawhorses, measure 113 ½”from the top (notched end)
of the posts down and mark a line toward the bottom across two opposite sides of
the posts. Adjust measurements accordingly for different desired low side post
height.
Double check all measurements before cutting. Using a power saw, evenly trim
the bottom portion of the posts below the lines. Most saws will require that you
cut one side of the posts, flip the posts to cut the other side, then finish with a
hand saw for a clean cut.
Burying Posts into Concrete Footers
When burying posts into the ground (into concrete footers), you will be able to make
smaller post height adjustments later and may be able to avoid trimming the post
lengths. Measure and mark posts for the required above ground post length, then dig
the post holes to accommodate – typically the downslope post holes will be deeper
unless trimming posts. Like existing concrete surfaces described above, you will need to
account for any existing slope using a leveling string and level: measure the height
differential between the upslope and downslope outside post locations, then adjust for
that difference to the required post height differential from the table above.

Assembly Instructions – Big Kahuna™ PLUS Covered Pergola Kit – 877-563-0002 – www.pergoladepot.com
Page 8
For example: Assume pergola size 20x20 (20’ rafter length), desired 10’ above
ground post height at shorter/ downslope side, using four 12’ posts supplied, 4”
of height differential for slope of existing ground surface, and minimum post
depth of 2 feet or 24 inches (varies depending upon your situation for frost line
etc.).
Post height differential required = 8 ½”(for 20’ rafters per table) minus 4” (for
existing slope) = 4 ½”.Downslope above ground post height = 10’ (or 120”).
Upslope above ground post height = 10’ (or 120”) + 4 ½”= 124 ½”.
For the downslope posts, place two posts on sawhorses, measure 120” from top
(notched end) down and mark a line toward the bottom across two opposite sides
of the posts – at approximately 2’ or 24” from the bottom of the post.
For posts being installed into concrete footings, we recommend inserting one
piece of supplied 10” rebar into the bottom of each post. Locate and mark a spot
at the center of each post approximately 10” below ground level. Using a 5/8"
drill bit, drill a hole through the post at the desired mark on each post. Note that
the rebar will be inserted in a later step.
For the upslope posts place two posts on sawhorses, measure 124 ½”from top
(notched end) down and mark a line toward the bottom across two opposite sides
of the posts – at approximately 19 ½”from the bottom of the post. Repeat
measurement and drill for rebar position as described above.
Double check all measurements before digging or trimming posts.
Dig downslope holes to a depth of 28” (24” plus 4” for gravel layer at the bottom
of the hole) and min. 12” diameter.Dig upslope holes to a depth of 23 ½”(19 ½”
plus 4” for gravel layer) and min. 16” diameter.Pour in gravel to fill the first 4” of
each post hole. Test correct depth by inserting posts into the holes.The marked
lines should be level with the tops of the holes and ground surface. Adjust hole
depth as needed by adding or removing material from the holes.
• Step 8 - If installing using post bases on top of an existing concrete foundation or
previously poured footings, the concrete must be dry before installing post bases. Place
the bases on the concrete in the exact position where they will be installed at your marks
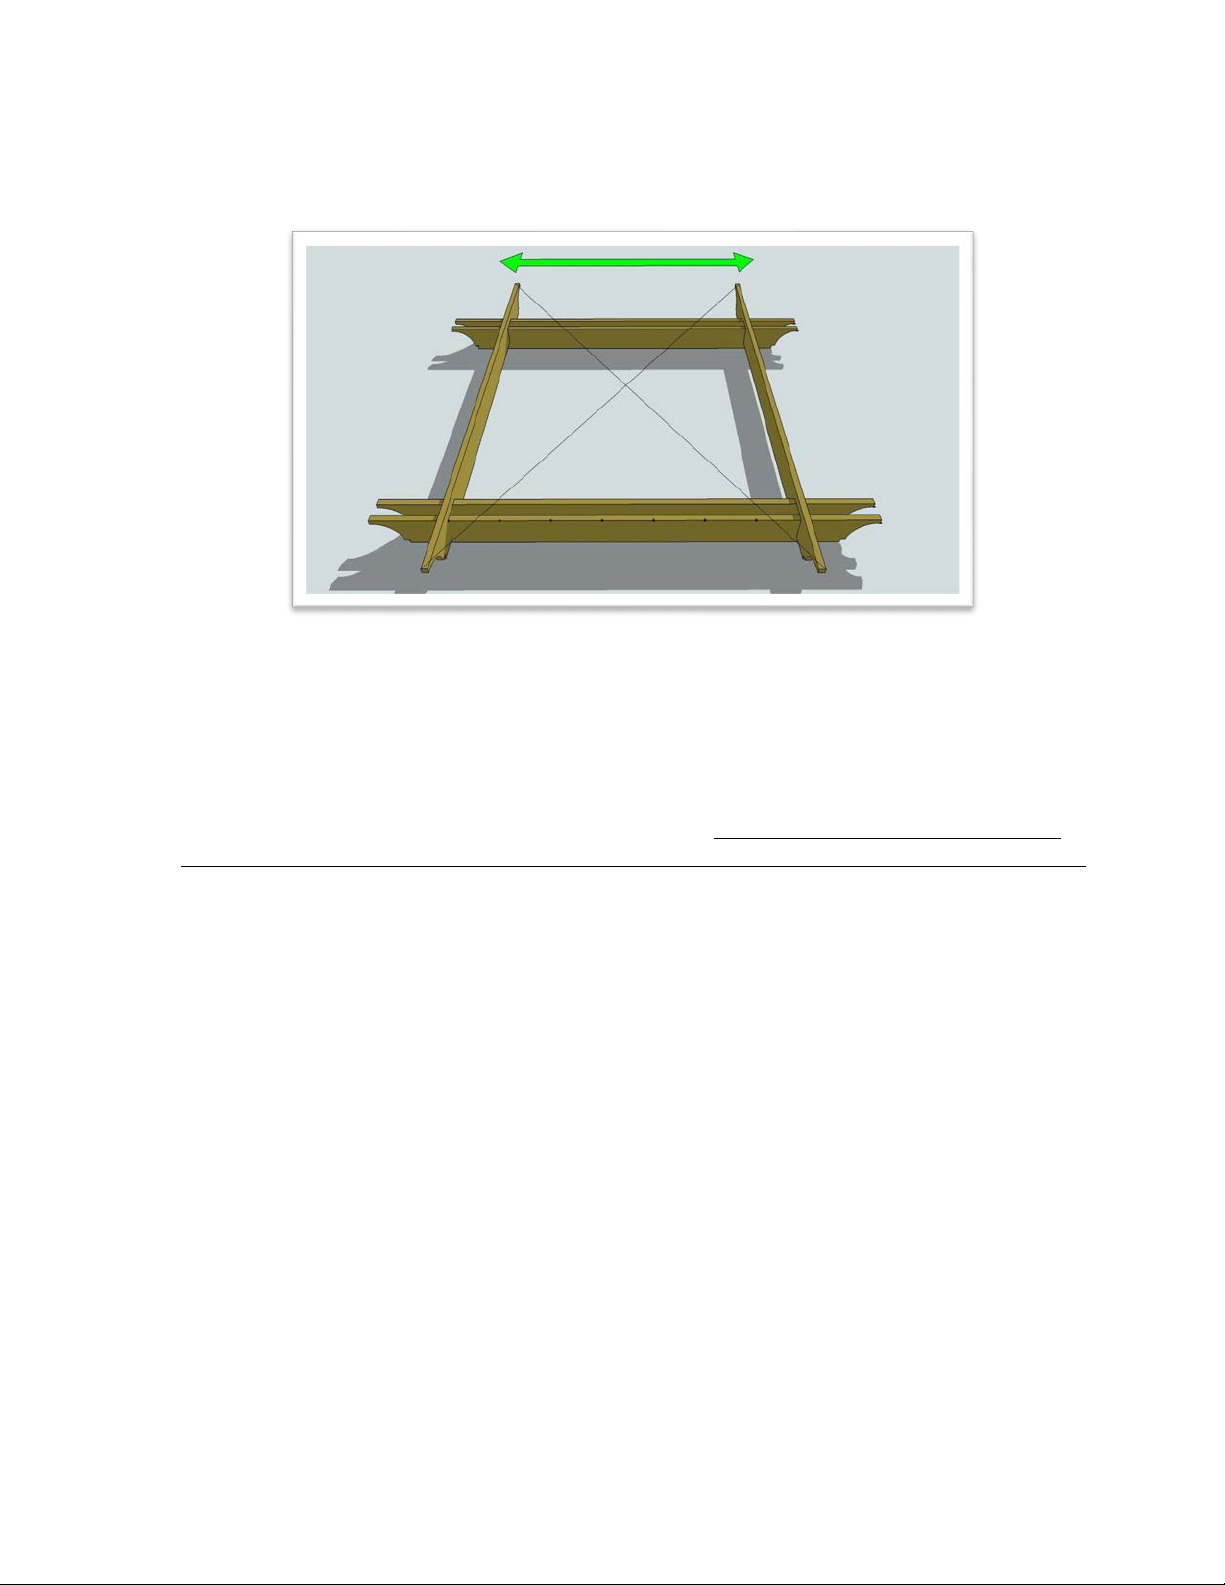
from an earlier step.Measure the distance between the center of each post base to
ensure they match the prescribed distance between the center of each post for your size
pergola. The center post to post measurement (for standard sizes) is 3’6” less than the
overall length of each dimension. For example, a 10x12 (rafter x beam) pergola has a
center post to post measurement of 6’6” (10’ rafter minus 3’6”) x 8’6” (12’ beam minus
3’6”). Once post base placement is confirmed, mark the concrete at the center of the hole
at the bottom of each base.
Remove the bases and drill into the concrete at each marked point with a 5/8” concrete
drill bit to a depth of at least 4”. Clear excess debris from the hole. Place the washer and
nut on the concrete anchor, place the flared end of the anchor through the post base and
into the hole in the concrete.Hammer the anchor down into the hole in the concrete
until it is against the post base, but do not tighten. Repeat for each base.
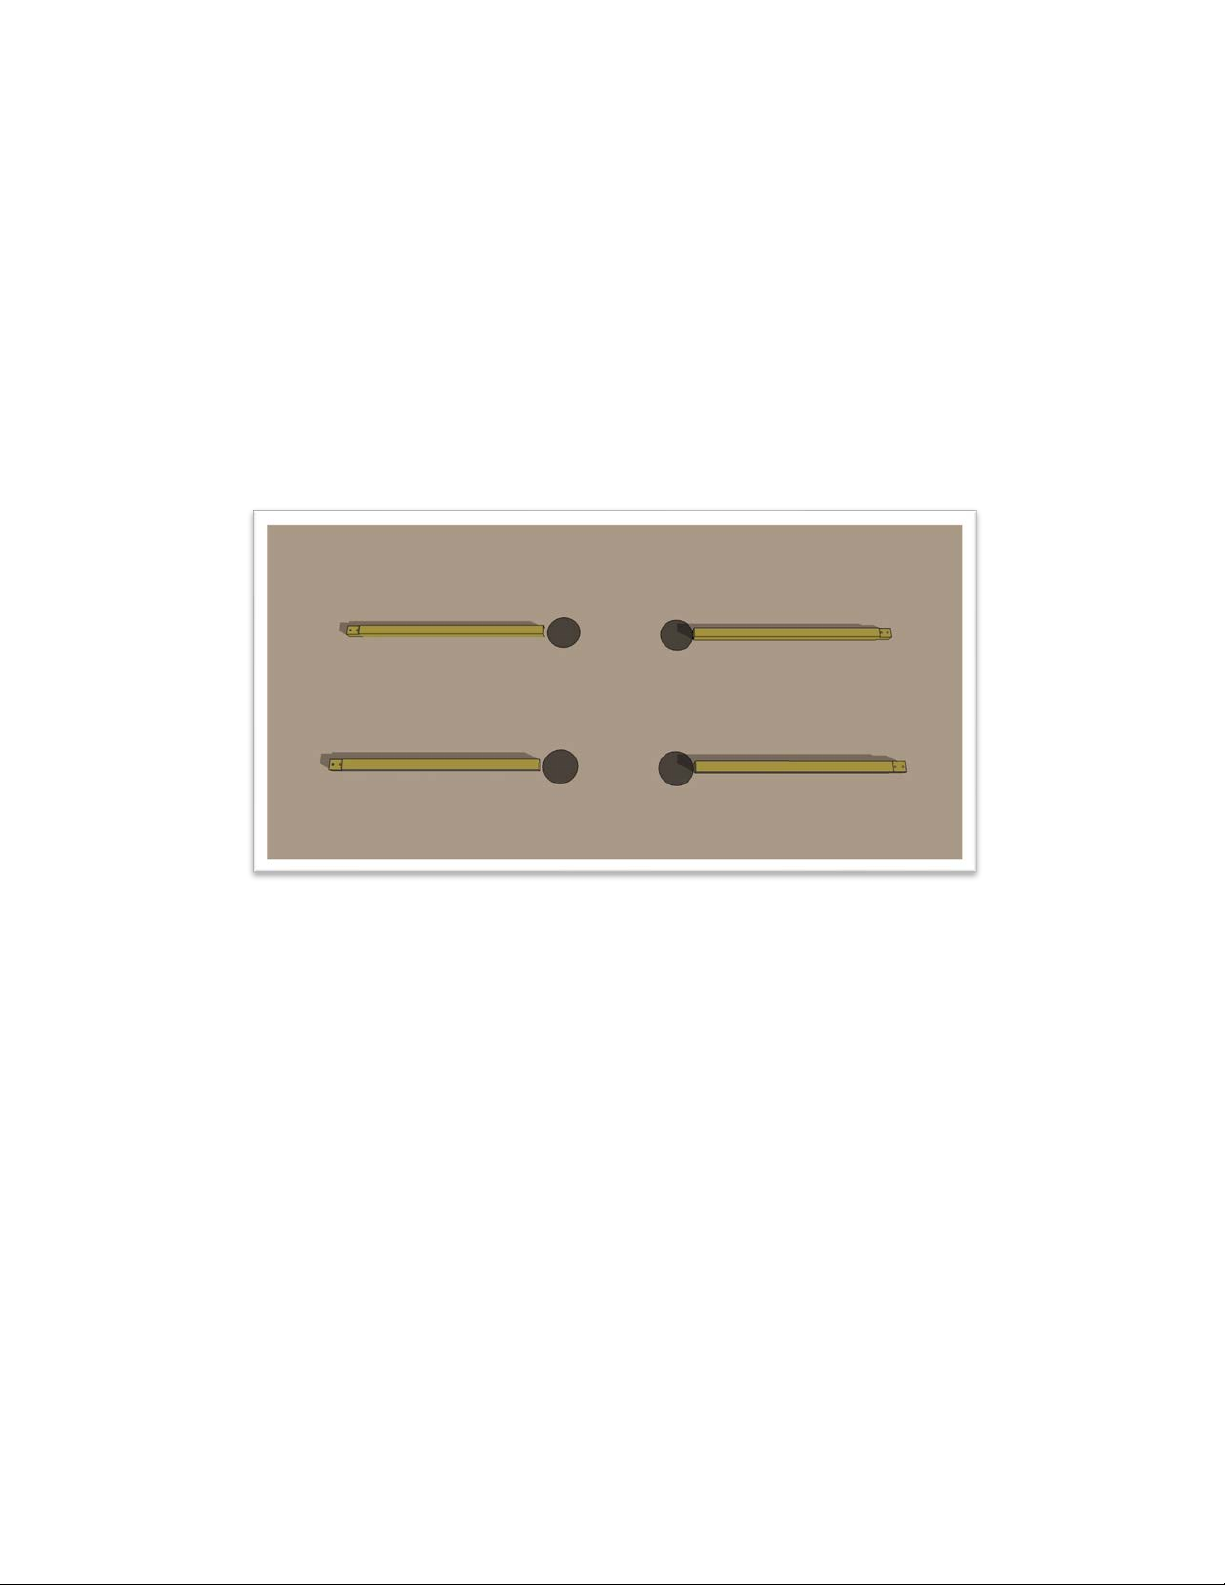
Before tightening the anchor to the post base, turn the post bases so that the side walls
(vertical pieces of the bases) are parallel with the direction of the rafters (once installed).

Assembly Instructions – Big Kahuna™ PLUS Covered Pergola Kit – 877-563-0002 – www.pergoladepot.com
Page 9
This will allow for small adjustments in the placement of the post in the base on the rafter
side of the structure. Then, square each base to the outside edge of the pergola
footprint. To square bases, lay one of the beams or rafters (depending upon length
needed) on the ground directly outside two of the post bases, then rotate the post bases
until the outside edges of each base are touching and square with the board and the side
walls are parallel with the rafters.Repeat this for the other bases. Tighten each anchor
with a 3/4" socket or wrench until snug to the base.
• Step 9 - Lay the posts on the ground, with the bottoms at the edge of each hole or post
base, the tops (notched end) facing away from each other, and notched end up and
down so that pre-drilled holes are showing as pictured below. Ensure the shorter posts
(or the posts with shorter above ground length) are placed on the low side of the pergola
footprint – the lower side of the roof slope once installed.
• Step 10 - If installing post base trim, slide trim over the bottom of each post and up
the post so it will be out of the way for the next couple steps. For posts being
installed into the ground (into concrete footings), insert the rebar through the hole at
the bottom of each post. Use a hammer to move the rebar through the hole until
there are approximately equal lengths of rebar on either side of the post.
• Step 11 - Lay one beam down on the ground near the top of the posts. Slide the
posts up and onto the beam between the lines on the beam where it says “post”. Set
the other beam on top sandwiching the post in between the two beams.
• Step 12 - Place 1 washer on each ½”x 8” bolt. Lift the beam assembly enough to fit
the bolts between the ground and the beam and insert the bolts into the holes from
the bottom. You may want to place a block of wood on the ground under the bolt, so
you can push the beam down to get the bolt to come up through the hole. Place a
washer and nut on each of the bolts and make them snug but do not tighten them
down yet. Now you should have this:

Assembly Instructions – Big Kahuna™ PLUS Covered Pergola Kit – 877-563-0002 – www.pergoladepot.com
Page 10
• Step 13 - With one person at each post, tilt one assembly up, lift and drop the posts
into the postholes, or into the post bases if on concrete. Have your helper(s) hold the
assembly plumb.
If posts are going into footers, check to ensure the ground lines marked toward the
bottom of the posts are level with the tops of the holes. Adjust the hole depth until
lines are level with the top of the ground.Once lines are at ground level, fill the holes
around the posts with dry concrete. Do not water in the concrete yet.
Check for level across the top of each beam assembly and on the sides of the posts. If
needed, adjust the amount of dry concrete under the posts by lifting-up the low post
and allowing a small amount of dry concrete to fill in underneath.If installing with
post bases you may need to use a shim under one of the posts.
If installing with post bases, have your helper continue to hold the assembly or prop
the assembly up (using 2x4’s for example) so that it does not fall.
Repeat for the other beam and post assembly.
• Step 14 - Move the stepladder in between the two assemblies. Position one of the
rafters with the arrows marked on the top pointing toward the downslope side (the
shorter post and beam assembly). Slide the rafter onto the same X marks on the
beams as you did on the ground in an earlier step (the second X marks in from the
outside tips of the beams), leaving the outermost set of rafters for a later step after the
angle braces have been installed. The notch on either side of the rafter should slide
over the beams on each side and fit squarely with the rafter sloping from one side to
the other. If not, check the direction of the rafter (arrow pointing to low side beam
assembly), and adjust the posts if needed to allow the rafters to slide on and fit
squarely and the posts are plumb.If more significantly out of alignment, you may
need to further adjust post placement or height for one of the post and beam
assemblies.Please contact us as needed to assist.
When the first rafter fits squarely over the beams, secure the rafter to the beams using
6” screws provided through the predrilled holes in the rafter onto the top of the
beams.Then move to the opposite side and secure another rafter into position over

Assembly Instructions – Big Kahuna™ PLUS Covered Pergola Kit – 877-563-0002 – www.pergoladepot.com
Page 11
the corresponding X marks on the other side of the beam assembly (second X marks
in from the tip of the beams). Adjust as described above as needed.
Now your helpers should be able to let go of the assembly.
Leaving the outermost rafters for later, install the remaining interior rafters over the
“X” marks and secure them to the beams with 6” screws through the predrilled holes.
• Step 15 – If using post bases, secure the bases to the posts using the galvanized nails
supplied. If installing a pressure treated pine kit using post bases, install one Tapcon
screw provided through one of the holes in the side of each post base and into the
concrete.Using a 5/32" concrete bit, drill the Tapcon screw hole to a depth of at least
2”. Once the hole is drilled, clear excess debris from the hole, and slowly screw the
Tapcon through the post base using a #2 Philips head screw bit or screwdriver until
snug to the base. Repeat for each base.
• Step 16 – Install two angle braces per post, the shorter (36” long) brace for
attachment between the post and beam and the longer (~40 ½”long) brace between
the post and inside edge of the outside rafter – as shown in the picture below. Each
angle brace is pre-drilled for attachment at the post. Attachment of the angle braces
to beams and rafters require pre-drilling at the time of installation through the angles
and beams to accommodate the ½”bolts provided.
Using one of the shorter braces for the beam side, position the brace with long side
up towards the beams and predrilled side down towards the post. Slide the top part
of the brace between the two boards that make up the beam until flush with the top of
the beam, then place the bottom side against the post. Note: the angle braces are
planed to fit but will likely fit tightly between the beam assembly. As needed, loosen
the bolts connecting the beams to the post, and have your helper hold the beams
open while moving the angle brace into place. Using a hammer and scrap block of
wood carefully tap the angle into place and/ or sand the sides of the angles at the top
to allow for easier insertion. Make sure the angles are flush to the post and to the top
of the beam. Re-tighten bolts and use a clamp or have your helper hold the angle in
place until secured.
Ensuring the top of the angle brace remains flush with the top of the beam, secure the
angle brace to the post using one 3/8”x6” lag screw through the pre-drilled hole in
the brace. You may find it easier to pre-drill the post first, using a 1/4” bit, pre-drill
with the angle in place to ensure proper location of the pre-drilled hole in the post.
Tighten using 9/16" socket or drill attachment.
For the brace to beam attachment, with top of angle brace flush to top of beam,
carefully mark the outside of the outer beam for pre-drilling two holes through both
beams and angle brace as follows. For the first hole, mark a spot that is two inches up
from the bottom of the beam and in the center (side to side) of the angle brace.
Then, mark another spot down two inches from the top of the beam (where the angle
brace meets the top of the beam) and in the center (side to side) of the angle brace –
avoid the rafter as shown in the picture below. Ensuring the beams and angle brace
do not move, pre-drill through the beam and angle brace at the marked spots using
1/2” drill bit. Once pre-drilled, fasten using two ½”x8” bolts with one washer on the
outside of each beam. Tighten bolts using 3/4” socket or wrench.

Assembly Instructions – Big Kahuna™ PLUS Covered Pergola Kit – 877-563-0002 – www.pergoladepot.com
Page 12
Repeat for the remaining angle brace to beam attachments.
For the angle brace to rafter attachment, place one of the longer angle braces with
predrilled side towards the post and long side against the inside of the outer rafter
(there will be one more rafter mounted on each side of the beam that will become the
outermost rafter in a later step). Make sure the angles are flush to the post, level with
(at the same height as) the angle on the beam side, and flush to the top of the rafter.
Use a clamp or have your helper hold the angle in place until secured. Ensuring the
top of the angle brace remains in place, repeat angle brace to post attachment as
outlined above. For brace to rafter attachment, carefully mark and pre-drill through
the rafter and angle brace as outlined above. Once pre-drilled, fasten using two
½”x6” bolts with one washer on the outside of rafter and brace.Tighten bolts using
3/4” socket or wrench.
Repeat for remaining angle brace to rafter connections.
This is what they should look like when installed correctly:

Assembly Instructions – Big Kahuna™ PLUS Covered Pergola Kit – 877-563-0002 – www.pergoladepot.com
Page 13
• Step 17 - Install the remaining two rafters over the two outermost X marks on the
beam assemblies. Secure each rafter to the beams using 6” screws provided with
your kit through the predrilled holes.
• Step 18 - Place the top slats into position across the top of the rafters between the
marked lines, with equal spacing outside the outer rafters on both sides.Then screw
the top slats down to the rafters using 3” screws. Start on one side and make your way
across to the other side screwing down each outer and every other inner rafter.
Stagger your screw pattern as pictured below:
Be careful with the screws because stainless steel is a soft metal, and they strip easily.
Make sure your screw gun is straight and that the bit is inserted all the way into the
screw, then push down hard while screwing them in. There are extra screws in every
kit just in case you strip some, but if you need more you should be able to find them
at any local hardware store. If you are having trouble with the screws stripping, it is
helpful to get a bar of soap and rub the threads of the screw across it before screwing
them in. This lubricates the screw, and they will go in a little easier.
• Step 19 – Check the whole pergola assembly, tighten down loose bolts, screws and
lags.
• Step 20 – Install roofing panels with panel ridges running parallel to the rafters,
secured into the top slats (purlins) using 1 ½”roofing screws at each end (beam sides)
and every other top slat in between.
Please reference roofing panel manufacturer installation instructions provided and
available for download on our website under Resources>Installation Information.
To ensure proper fit before fastening, lay all panels on top of the pergola, starting on
one side and overlapping panels as needed to align the edge of the outer panels with
the edge of the top slats and outer rafters.There will be more or less panel overlap
required depending upon pergola size. Make note of overlap pattern, then remove
panels.

Assembly Instructions – Big Kahuna™ PLUS Covered Pergola Kit – 877-563-0002 – www.pergoladepot.com
Page 14
For PT Pine kits, cover the top of each top slat (purlin) with tape supplied to create a
barrier between the wood and metal roofing.
Starting from one outer rafter, place and secure each panel following noted pattern
from above using 1 ½”roofing screws according to manufacturer instructions. For
each panel seam follow instructions for application of Side Lap tape and 7/8” Lap Tek
screws supplied.
• Step 21 - Water in the concrete around the posts if applicable.Mix the concrete with
a shovel following the directions for the concrete you purchased and eliminating air
bubbles. Be sure not to move the unit around while the concrete cures (amount of
time depending upon concrete used and weather conditions).
Please let us know if you have any questions or feedback on the instructions, products or our
support process. We always appreciate receiving photos of the build and finished spaces!
Congratulations and thank you for being a Pergola Depot customer!
Hand made in the U.S.A!
Call: 1-877-563-0002
Email: [email protected]
www.pergoladepot.com
Other manuals for Big Kahuna PLUS
1
Table of contents
Other Pergola Depot Lawn And Garden Equipment manuals