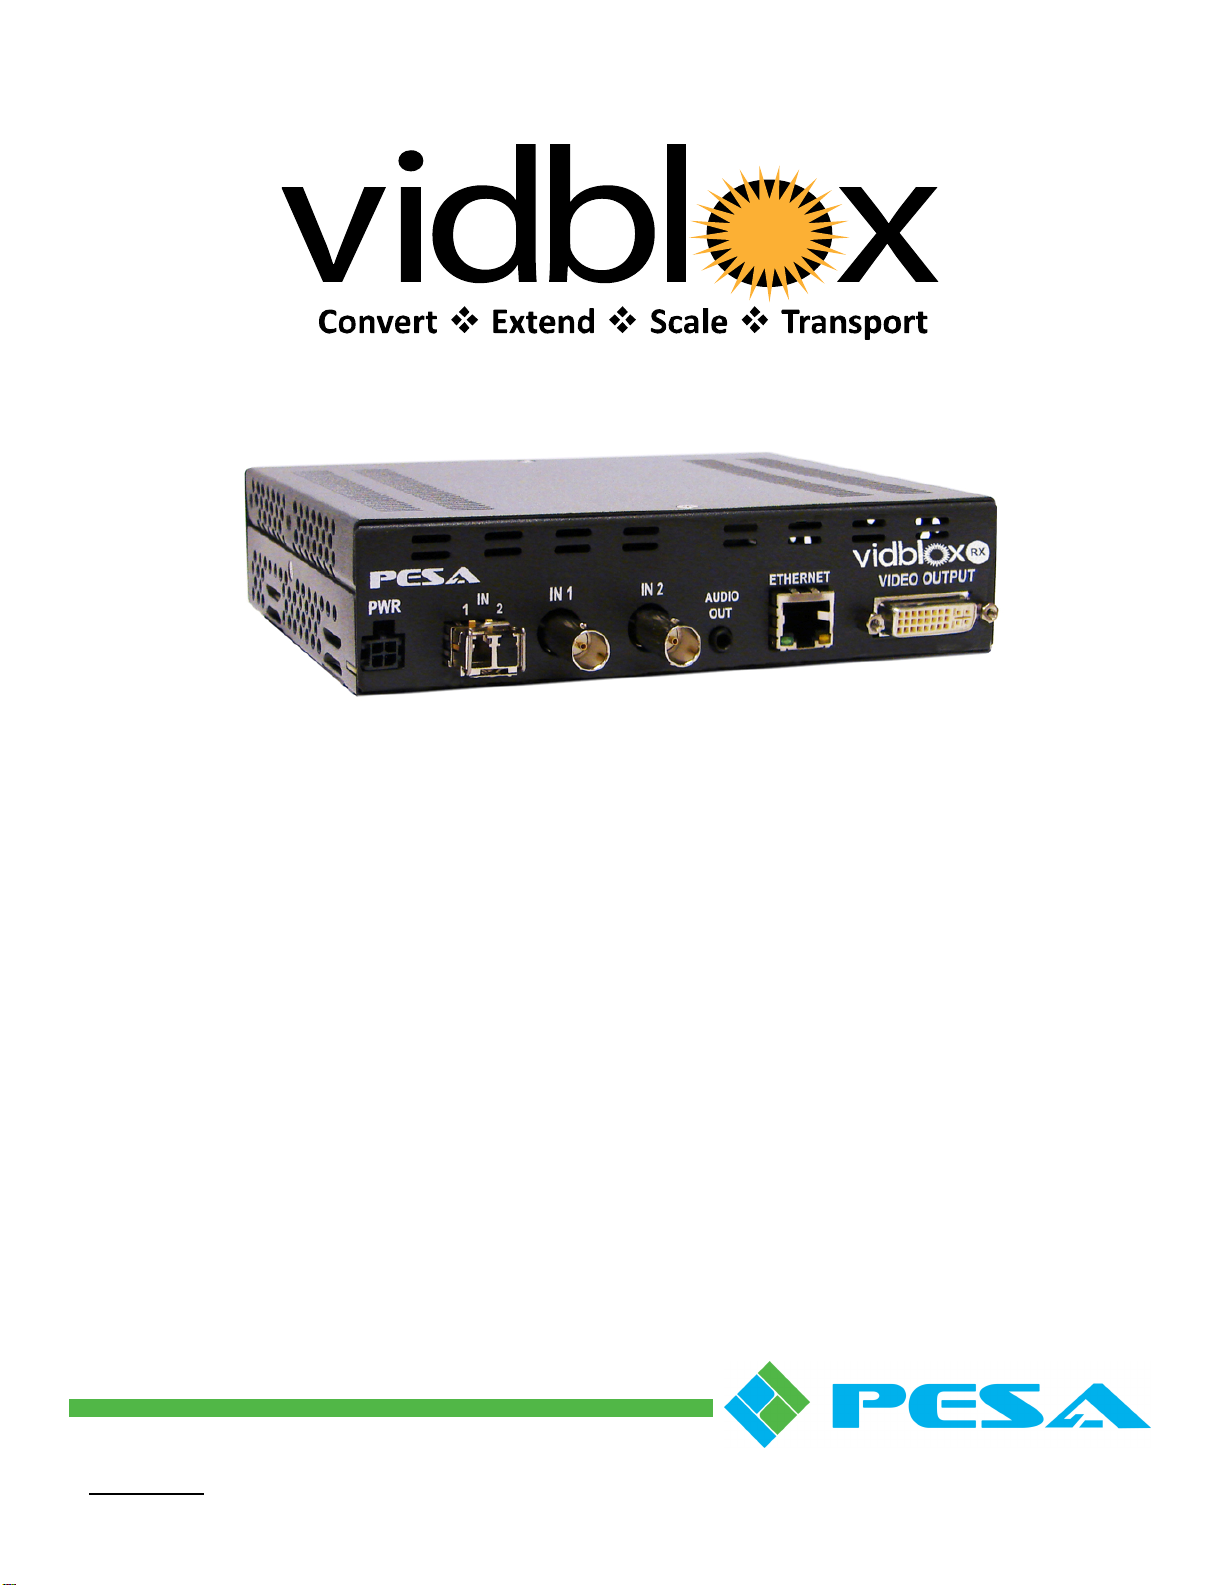
V
IDBLOX
3G-SL
AND
3G-NE
RX
M
ODULE
Publication 81-9059-0667-0, Rev. C
March 2011
Proprietary Information of PESA II
T
ABLE OF
C
ONTENTS
CHAPTER 1 ABOUT THIS MANUAL....................................................................................1-1
1.1
D
OCUMENTATION AND
S
AFETY
O
VERVIEW
........................................................................ 1-1
1.2
W
ARNINGS
,
C
AUTIONS
,
AND
N
OTES
................................................................................... 1-1
1.2.1 Caution.................................................................................................................1-1
1.2.2 Note......................................................................................................................1-1
CHAPTER 2 INTRODUCTION...............................................................................................2-1
2.1
D
ESCRIPTION
.................................................................................................................... 2-1
2.2
F
EATURES
......................................................................................................................... 2-3
2.3
S
PECIFICATIONS
................................................................................................................ 2-5
CHAPTER 3 INSTALLATION.................................................................................................3-1
3.1
G
ENERAL
I
NSTALLATION
C
ONSIDERATIONS
....................................................................... 3-1
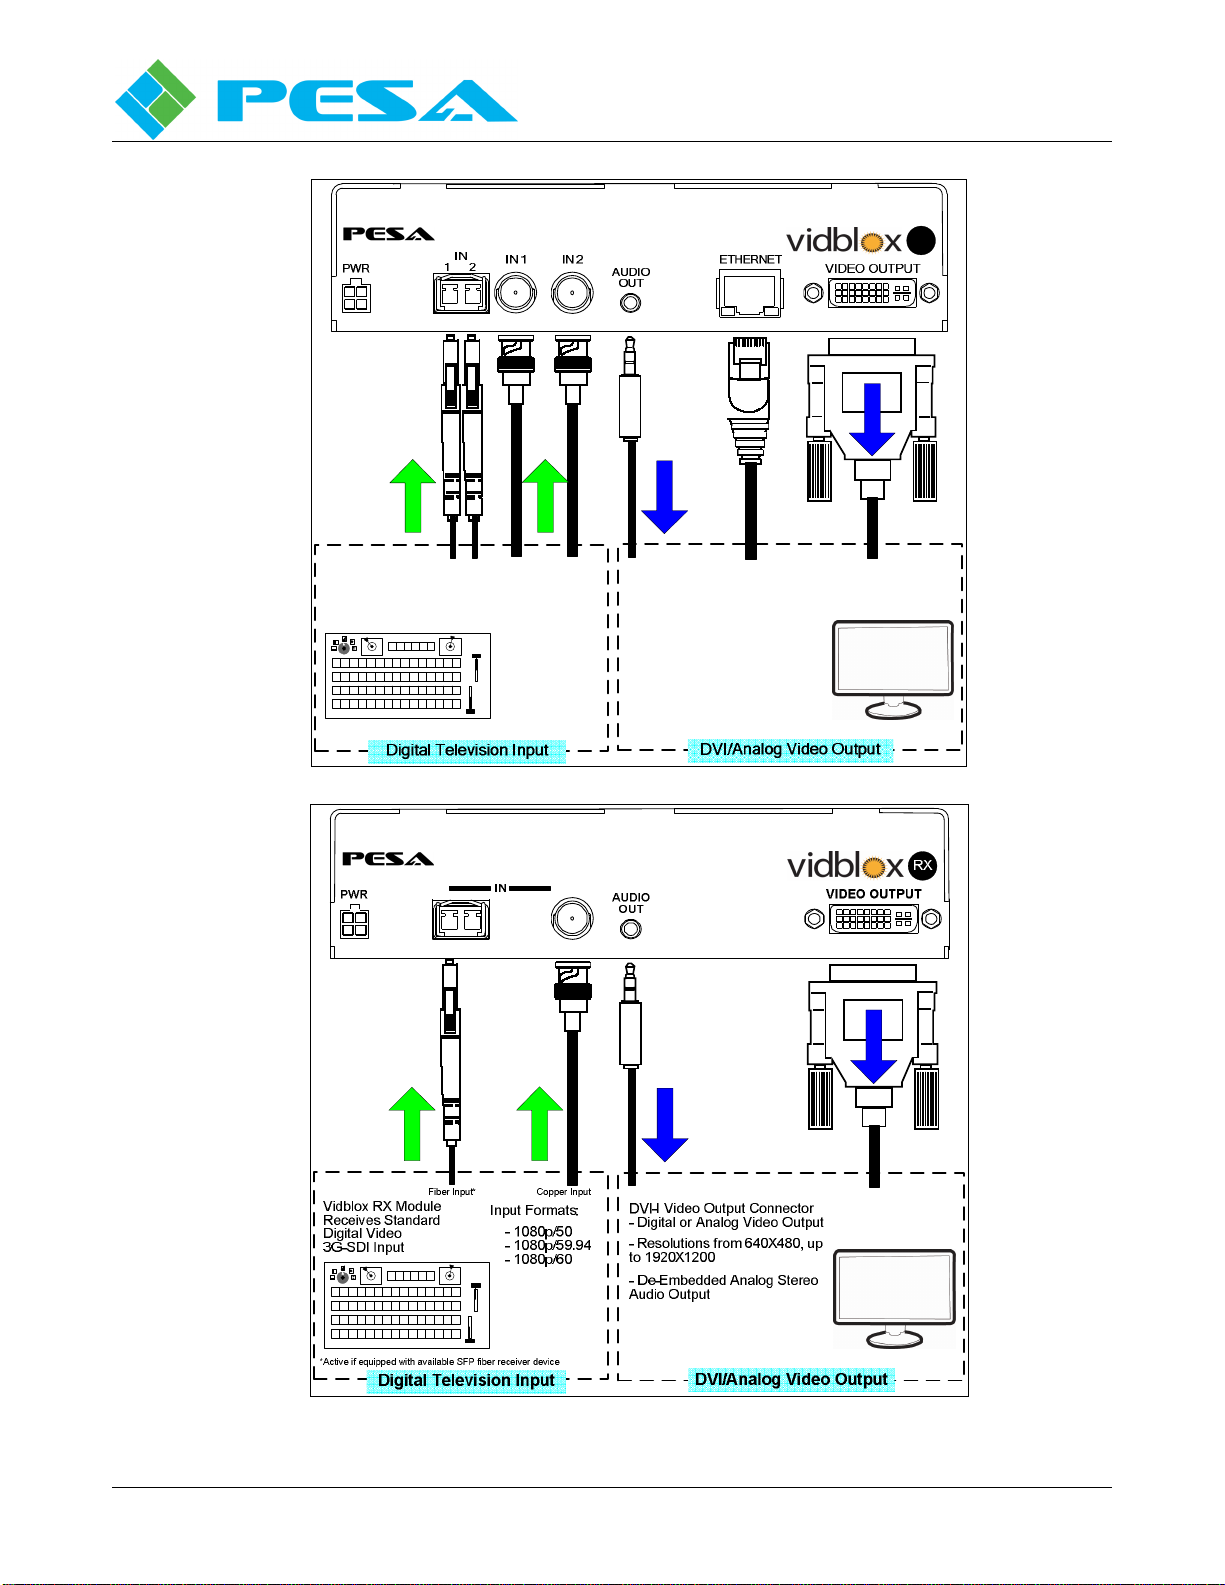
3.2
I
NSTALLING
V
IDBLOX
R
ECEIVER
M
ODULES
....................................................................... 3-1
3.3
V
IDBLOX
A
UDIO
C
ONNECTIONS
......................................................................................... 3-3
3.4
S
TATUS
LED
S
................................................................................................................... 3-4
3.5
V
IDBLOX
R
ACK
M
OUNT
E
XTENDER
F
RAME
....................................................................... 3-4
3.6
P
OWER
D
ISTRIBUTION
/F
AN
M
ODULE
R
EDUNDANT
P
OWER
,
A
LARMS AND
LED
S
................. 3-6
CHAPTER 4 SYSTEM SET-UP AND CONFIGURATION....................................................4-1
4.1
I
NTRODUCTION TO THE
C
ATTRAX AND
C
ATTRAX
C
UB
C
ONTROL
A
PPLICATION
................... 4-1
4.2
I
NITIAL
S
ET
-U
P
S
TEPS
....................................................................................................... 4-2
4.3
N
ETWORK
C
ONFIGURATION WITH
C
ATTRAX
....................................................................... 4-2
4.4
I
NSTALL
C
ATTRAX
C
UB AND
USB
D
RIVER
O
NTO THE
H
OST
PC.......................................... 4-4
4.5
C
ONNECT
A
V
IDBLOX
M
ODULE TO THE
H
OST
PC
T
HROUGH
A
USB
P
ORT
.......................... 4-6
4.6
S
TART
C
ATTRAX OR
C
ATTRAX
C
UB
A
PPLICATION
.............................................................. 4-8
4.6.1 Devices View Window..........................................................................................4-9
4.6.2 Alarms and Events Window................................................................................4-10
4.7
R
ECEIVER
M
ODULE
C
ONFIGURATION
S
CREENS
................................................................ 4-11
4.7.1 Status Overview Display.....................................................................................4-11
4.7.2 Information Menu ..............................................................................................4-12
4.7.3 Controls Menu ...................................................................................................4-14
4.7.4 Configurations Menu..........................................................................................4-20
4.7.5 Custom Resolutions ............................................................................................4-24
4.7.6 Input Video Status Screen ...................................................................................4-30
4.7.7 Fiber Module Status Menu ..................................................................................4-32
4.7.8 Hardware Status Menu........................................................................................4-33
4.8
U
NINSTALLING
C
ATTRAX
................................................................................................ 4-36
4.9
U
PDATING
V
IDBLOX
F
IRMWARE
...................................................................................... 4-36