manuals.online logo
Brands
  1. Home
  2. •
  3. Brands
  4. •
  5. Pessl
  6. •
  7. Measuring Instrument
  8. •
  9. Pessl METOS CLIMA LoRa User manual

Pessl METOS CLIMA LoRa User manual

Thank you for choosing μMETOS CLIMA LoRA station for
monitoring your agrometeorological and other environmental
needs. The μMETOS CLIMA LoRA has been designed to monitor
data with a variety of sensors. Like all products of the nMETOS/
µMETOS/iMETOS family, it measures, logs and sends data to the
FieldClimate cloud. Users have free access to data through web
and mobile applications. Additional services (like plant disease
models and hyper localized weather forecasts) are available upon
a licenced fee. Web API is also available for interface with other
custom applications.
μMETOS CLIMA LoRA systems will be mainly used for:
• Easy to use, mobile and rapid measurements
• Agro-Meteorological monitoring.
• Site Specic weather forecast corrected with local
measurements.
• Plant disease models (depending on the conguration of the
equipment).
• Irrigation systems monitoring.
• Hydrology and ood warning applications.
• Environmental monitoring.
It is designed to monitor basic meteorological parameters (rain
and temperature, humidity, frost, leaf wetness, solar radiation,
wind speed) as well as water level, water EC and pH.
μMETOS CLIMA LoRA can handle additional sensors if required.
Data is permanently measured in 5-minute intervals and sent
every 15 minutes to the server. All the data is synchronized in the
FieldClimate platform.
Pessl Instruments GmbH,
Werksweg 107, 8160 Weiz, Austria
Tel: +43 (0) 3172 5521
Email: o[email protected]
ENGLISH
μMETOS CLIMA LoRA
USER MANUAL
Version 2.0, 02-2022
YOUR μMETOS CLIMA LoRA
The μMETOS CLIMA LoRA consists of one plastic case containing
the electronics, the battery and the internal antenna. In the
package with the aμMETOS CLIMA LoRA, you will also nd taped
to the solar panel, a sticker with a unique serial number and the
keys that grant you access to the data in the FieldClimate platform.
1. Solar panel
2. Global radiation sensor
3. Battery
4. Rain gauge
5. Temperature and
relative humidity sensor
with radiation shield
6. Ultrasonic Wind speed
sensor
On picture:
μMETOS CLIMA ET0
PRODUCT VARIATIONS
Communication: All product
variations use LoRaWAN®
communication protocols.
PRODUCT VARIANTS
In addition to the μMETOS CLIMA ET0 (pictured above) are also
the underneath station variants, dierentiated by the number of
sensors connected to the PCB.
1
23
4
5
6
1. μMETOS Base
2. μMETOS Frost
3. μMETOS Disease
4. μMETOS Hydro
Plus
Solar Panel + Battery
Solar Panel + Battery + Air
Temperature (Wet and Dry Bulb)
Solar Panel + Battery + PI Air Temp
+ PI Rel Humidity + Leaf Wetness +
Rain
Solar Panel + Battery + PI Air Temp
+ PI Rel Humidity ++ Leaf Wetness
+ Rain + Ultrasonic Speed and
Direction (Ultrasonic)
START-UP THE μMETOS CLIMA LoRA
1. Open the upper housing by unscrewing the 6 screws after
removing the 6 Silicone cover plugs.
2. Loosen the nut from the cable gland on the battery.
3. Plug the battery cable into the BAT connector on the PCB
(circled red).
4. Close the cover to its nal position and don’t forget to put
the Silicone cover plugs back after screwing.
For more detailed info visit
www.metos.at/micrometos-clima/#D-1.
Silicone cover plug
LPWAN DATA LOGGER FOR REMOTE
AND URBAN AREAS (with LoRaWAN®
connectivity)
μMETOS CLIMA LoRA is a LPWAN (Low Power Wide Area Network)
weather station that operates on the LoRaWAN® network. It can
be connected to any existing LoRaWAN® network if present at
your location. LoRaWAN® conguration can be required based on
network provider congurations.
The μMETOS CLIMA LoRA needs to be provisioned on a LoRa
network server (provided by the LoRa network provider) and
integration between LoRa network provider and FieldClimate is
needed.
All our LoRaWAN® based products are by default provisioned on
our TTN LoRaWAN® network provider account. When there is a
need to use a dierent LoRaWAN® network provider, this is to be
done during ordering by using the Order Details Form.
There is no requirement for a SIM card. If ne tuning of the
conguration is needed, the user must open the housing and
connect the board to the PC via serial-to-usb cable (provided
with the station). The menu description is available on the
extended manual for μMETOS CLIMA LoRa (metos.at/imetos-lora-
manual/#D-3).
During the complete process you will get support for each step by
using our ticketing system [email protected].
INSTALLING YOUR µMETOS CLIMA LoRA
Where applicable:
1. Insert the lter of the
rain gauge.
2. The leaf wetness sensor can be tied to a branch of the plant
slightly inclined with the lter paper looking up. Mount it in
a position that allows the sensor to pick up early rain and to
stay wet in the shade.
3. Set the mounting metal pole for at least 50 cm into the
ground, keeping the pole as vertical as possible using a
level. Hammer the metal pole, keeping the top protected
with a piece of wood. The height of the unit should be
120 cm above the ground. If mounted too close to the
ground, you will have warmer temperatures during the
day. The μMETOS has to be mounted on the pole: at
the bottom of the unit there is a plastic ring with a metal
clamp on it. Check the bubble level on the rain gauge
to ensure the μMETOS is installed vertically at the pole.
4. The solar panel should face south in the northern
hemisphere while in the southern hemisphere, it should
point towards north.
To start using services provided by Pessl Instruments, you need
to register on the FieldClimate platform (see below), which will
provide you access to the various sensor data in graphs or tables.
FieldClimate also provides a powerful decision support system
for growing your crops (plant protection, irrigation, sowing,
harvesting, fertilizing).
USE YOUR µMETOS CLIMA LoRA
1. Go to eldclimate.com/login and click the button “+”.
2. Insert your personal data & e-mail.
3. Check your e-mail and click on the link to activate the user
account you created.
Now you can login to FieldClimate.com. To add your μMETOS
CLIMA LoRA device:
Click on the icon in the top right corner User Menu > Add/
Remove station. It will ask you for a Station Serial number (SN)
and a station key. The silver sticker (in the gure), which came
with your μMETOS CLIMA LoRA, has to be used at this point. Key
1 gives you full (admin) access and enables you to change all the
settings and set up the μMETOS
CLIMA LoRA (for example data
transfer interval, SMS warning,
etc.), with Key 2 the user is not
allowed to change the station
parameters, but can access all the
sensor data.
REGISTER AS A NEW USER ON FieldClimate.com OR
DIRECTLY FROM THE APP
ADD YOUR μMETOS CLIMA LoRA DEVICE TO YOUR ACCOUNT
The new Dashboard is designed with a widgeted structure, which
allows the user to customize access to the services of highest
interest. On the top right corner, Station List allows the user to
choose among all the nMETOS/µMETOS/iMETOS devices and
select a single one.
In the navigation bar, the Station data page displays the
data measured by your μMETOS CLIMA LoRA station. Data
can be viewed in detailed graphs and tables. You can access
the structured menu, which allows you to dene time series-
resolution and export data in image/table format. On the left
side, you can see all the sensors connected to your μMETOS
CLIMA LoRA (see gure below).
With the activation of licenses for site specic localized weather
forecast and plant disease models, it is possible to set these
services for each of your METOS® stations. To activate them
please contact your local distributor or [email protected].
On the Station settings page, you can congure your μMETOS
CLIMA loRA. Station settings > Conguration: Under Time
zone and location, you need to provide the precise information,
as weather forecast and other services require it for accuracy.
Under Logging and transfer settings, you can dene how your
μMETOS CLIMA LoRA station logs and sends data. Please note
that the μMETOS CLIMA LoRA station is delivered with the default
factory settings (as in the gure on the next page). More options
are available by clicking the “Advanced options’’ button.
Station settings > Sensors and nodes: You can dene a custom
name for your station and nodes connected to it. For convenient
viewing of data, you can also rename each sensor and customize
its color in the graph.
For further inquiries visit metos.at/eldclimate-manual.
DASHBOARD, STATION DATA AND SETTINGS
Pessl Instruments GmbH,
Werksweg 107, 8160 Weiz, Austria
Tel: +43 (0) 3172 5521
Email: o[email protected]
Thank you for choosing Pessl Instruments GmbH iMETOS CropVIEW®
for Remote Crop Image Monitoring. iMETOS CropVIEW® has been de-
signed to periodically take high-resolution photos of the farmland.
Photos are automatically uploaded to the FieldClimate platform with-
out the need of any user intervention, thus allowing a continuous crop
quality and yield control.
The high-resolution pictures enable checking seeds for germination,
monitoring the effect of fertilizers or pesticides on crop development,
and help decide whether a disease or pest already threatens prota-
bility. iMETOS CropVIEW® is the result of the combination of years of
experience and “state of the art” technology.
iMETOS CropVIEW® features:
• 10 Megapixel resolution images.
• Embedded GPS location.
• Easy installation.
• Firmware upgrade “over the air”.
• Cloud Data Storage.
• Time series of pictures stored for further analysis.
• Personalized web interface.
iMETOS CropVIEW
USER MANUAL
Version 1.0, 05-2018
Pessl Instruments GmbH
Werksweg 107, 8160 Weiz, Austria
ofce@metos.at
+43 317 255 21
all the settings and set up the iMETOS (e.g. data transfer interval, SMS
warning, etc.). With Key 2 the user is not allowed to change the station
parameters, but can access all the data.
THE iMETOS CropVIEW®: STATION DATA AND SETTINGS
You can browse through all stations by clicking the icon Station List in
top right corner.
Click on the station name to select it.
Access the iMETOS CropVIEW® page, by clicking the Eye icon on the
left side of the bar.
Hovering over picture with a mouse and use the mouse wheel to zoom
in and out.
To choose which picture you want to see in full-size, use the date se-
lection tool at the bottom of the page. You can also choose between
the two cameras – wide angle lens and zoom lens (see picture below).
THE iMETOS CropVIEW®: Slideshow
You can create a time-lapse from pictures taken by iMETOS CropVIEW®
device to see how your crop was growing and developing from seed-
ing to harvesting. For more details see help in slideshow section on
ng.eldclimate.com
.
FRUIT DIAMETER MEASURING TOOL
Use your mouse to draw rectangles on the image and add user detec-
tions of apple fruits. Click on the image where your target apple fruit is
and draw a rectangle around it. If you want to edit the drawn rectangle,
you can click (drag and drop) on the edges of the rectangle to change its
size or click (drag and drop) on the center of the rectangle and move the
rectangle around.You can click on the rectangle and delete it by pressing
DELETE or BACKSPACE on your keyboard.
On STATION SETTINGS page you can set up your iMETOS device.
Station settings > Conguration: ensure that Time zone and location are
properly set (you need to set it up manually, otherwise the station will not
take and send photos at the time in your time zone). Under transfer settings,
you can dene how your iMETOS device sends data. Please note that the
settings for logging interval and transmission times will work with the de-
fault values – photo taken at 7am Austrian time - as long it is not changed.
Setup how your iMETOS CropVIEW® sends the data. Note that taking
and sending pictures consumes a lot of data and energy which is why a
limitation of three pictures per day is set.
Under Camera,you can setup camera settings. Note that wrong settings can
result in corrupted images. Change these settings only if you are an expert.
For further inquiries visit metos.at/eldclimate-manual.
MAINTAINING THE iMETOS CropVIEW®
Keep the lenses clean.
When the solar panel of the iMETOS is exposed to the sun and gets
enough sunlight it should constantly recharge the battery of the system.
The lifespan of the battery is expected to be 5 to 6 years with sufcient
recharging from the solar panel. Deep discharge shortens its lifetime.
The iMETOS will prevent this to happen and protect the battery by lim-
iting the data transfer to the safe level of charge. In doing so, data is
not lost and battery recovers faster. Please make sure to clean the solar
panel if it is dirty or covered with snow or some other material.
Note: When the season is over, remove the device from the eld, dis-
connect the solar panel and the battery to avoid discharge and store it
indoors until the next season.
UPDATING YOUR iMETOS CropVIEW®
Every time the iMETOS CropVIEW® connects to FieldClimate, it checks
for the latest rmware version. If it nds a newer version, it automati-
cally downloads it and updates itself. iMETOS CropVIEW® can also be
updated manually via the USB connection.
For full user manual please visit:
metos.at/imetos-cropview-series
Visit metos.at/terms-of-use/ to view
legal information for Pessl Instruments
products and services.
The weather station should be checked periodically to ensure
that sensors are in optimal condition. Regular maintenance is
necessary for awless operation and durability.
At the beginning of the new season, check that the station is
working correctly; data must be transmitted at the set interval to
FieldClimate. Keep the solar panel and sensors clean, especially
the rain gauge. Clean rain gauge ensures correct rainfall
measurements. Also, make sure it is levelled by checking the
bubble indicator and ensure that it is not obstructed by leaves,
insects or debris that could prevent it from functioning properly.
Check if the leaf wetness sensor has the appropriate lter paper
intact and positioned correctly.
When the solar panel of the μMETOS CLIMA LoRA is exposed to
the sun and the unit receives enough sunlight, it will constantly
recharge the battery for operations.
For full user manual please visit:
metos.at/eldclimate-manual.
Visit metos.at/terms-of-use/ to view legal information for Pessl
Instruments products and services.
MANTAINING THE μMETOS CLIMA LoRA

Other Pessl Measuring Instrument manuals

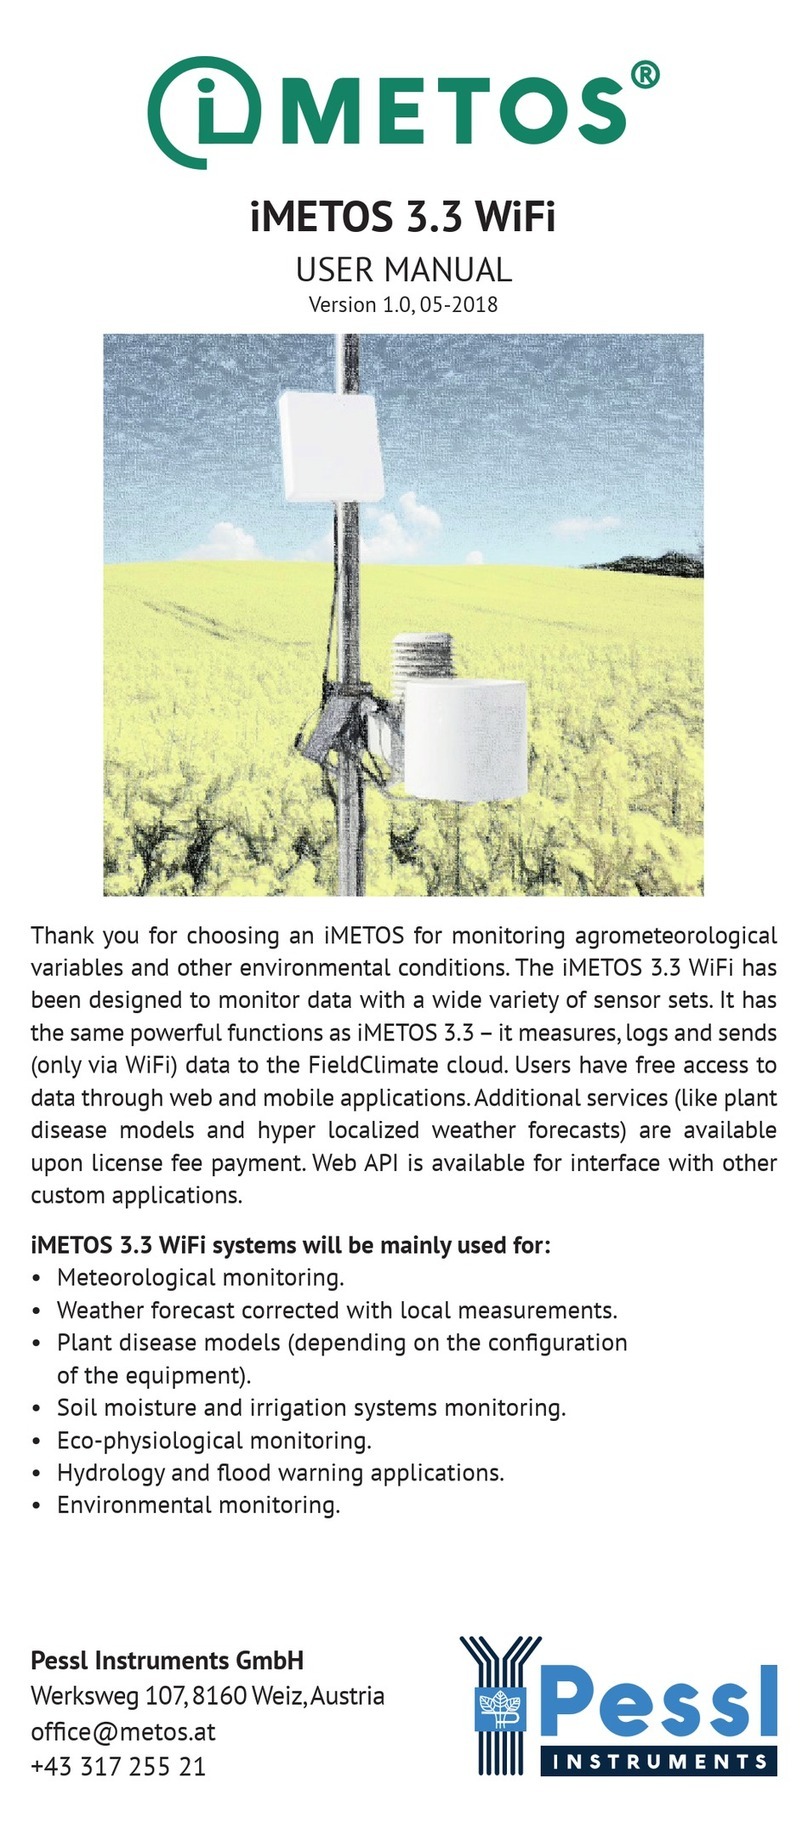
Pessl iMETOS 3.3 WiFi User manual

Pessl

Pessl iMETOS 3.3 WiFi User manual

Pessl iMETOS RadioNode User manual

Pessl

Pessl iMETOS RadioNode User manual

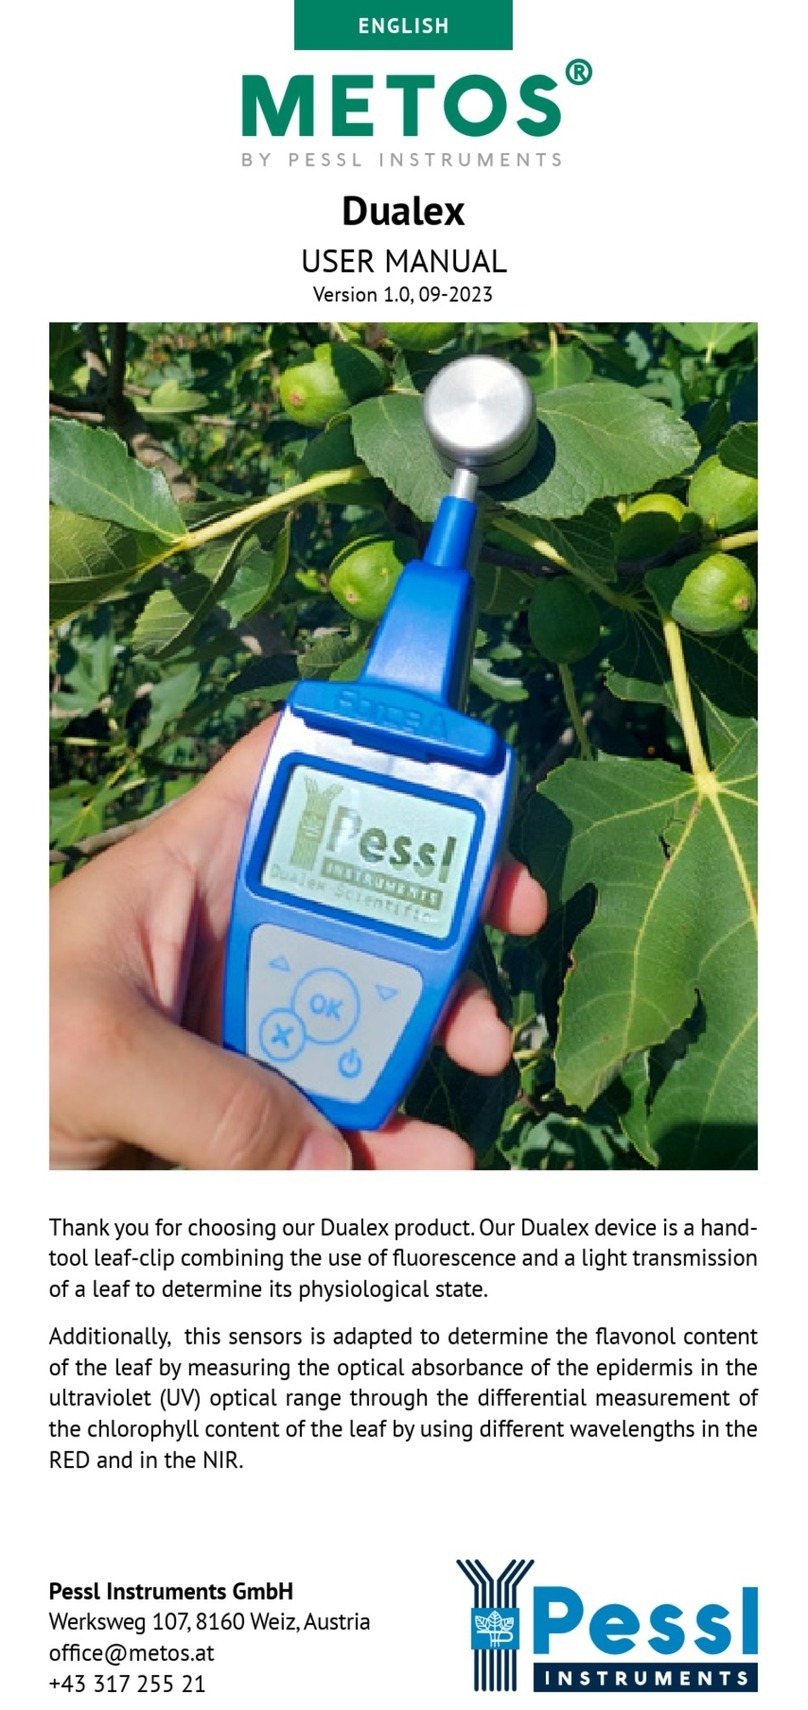
Pessl Metos Dualex User manual

Pessl

Pessl Metos Dualex User manual

Pessl iMETOS ECO D3 User manual

Pessl

Pessl iMETOS ECO D3 User manual

Popular Measuring Instrument manuals by other brands

Kroks ARINST SSA TG R2s manual

Kroks

Kroks ARINST SSA TG R2s manual

Radcal Accu-Gold Touch user guide

Radcal

Radcal Accu-Gold Touch user guide

TechniSat DIGIMETER 9 Operation manual

TechniSat

TechniSat DIGIMETER 9 Operation manual

Starrett SR100 manual

Starrett

Starrett SR100 manual

IUL iPeak Europium Instructions for use

IUL

IUL iPeak Europium Instructions for use

Dynojet 424 installation guide

Dynojet

Dynojet 424 installation guide

AGL GradoPlane 15 Operator's manual

AGL

AGL GradoPlane 15 Operator's manual

Krohn-Hite 3210C operating manual

Krohn-Hite

Krohn-Hite 3210C operating manual

EUTECH INSTRUMENTS CYBERSCAN DO 100 DISSOLVED OXYGEN METER instruction manual

EUTECH INSTRUMENTS

EUTECH INSTRUMENTS CYBERSCAN DO 100 DISSOLVED OXYGEN METER instruction manual

YHLO BIOTECH UNION Operation manual

YHLO BIOTECH

YHLO BIOTECH UNION Operation manual

NARDA PMM CA0010 user manual

NARDA

NARDA PMM CA0010 user manual

Rayto RT-7200 user manual

Rayto

Rayto RT-7200 user manual

Beta 1883 Instructions for use

Beta

Beta 1883 Instructions for use

YOKOGAWA WT500 user manual

YOKOGAWA

YOKOGAWA WT500 user manual

Oakton pHTutor instruction manual

Oakton

Oakton pHTutor instruction manual

beta sensorik Hansford Sensors HS-620 operating manual

beta sensorik

beta sensorik Hansford Sensors HS-620 operating manual

Rosemount 1054B instruction manual

Rosemount

Rosemount 1054B instruction manual

Hanna Instruments HI 713 instruction manual

Hanna Instruments

Hanna Instruments HI 713 instruction manual

manuals.online logo
manuals.online logoBrands
  • About & Mission
  • Contact us
  • Privacy Policy
  • Terms and Conditions

Copyright 2025 Manuals.Online. All Rights Reserved.