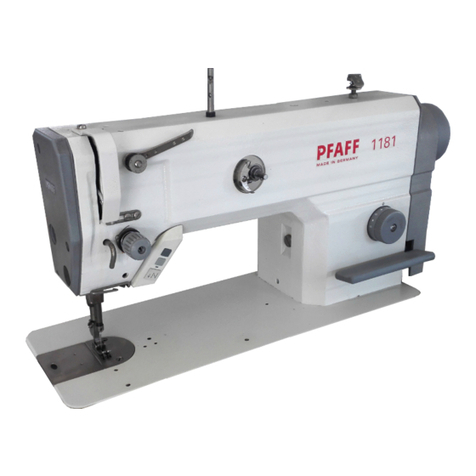
Pfaff 8310-041 User manual

INSTRUCTION MANUAL
296-12-18 934/002
Betriebsanleitung engl. 06.09
This instruction manual applies to machines from the
following serial numbers onwards:
# 2 731 737
8310
Industrial
®
-041, -042, -043

The reprinting, copying or translation of PFAFF Instruction Manuals, whether in whole or
in part, is only permitted with our previous authorization and with written reference to the
source.
PFAFF Industriesysteme
und Maschinen AG
Hans-Geiger-Str. 12 - IG Nord
D-67661 Kaiserslautern
This Instruction Manual is valid for all models and subclasses listed in the
chapter "Specifications ".
The parts list for the machines can be downloaded free of charge from the in-
ternet address
www.pfaff-industrial.com/pfaff/de/service/downloads
As an alternative to the internet download the parts list can also be ordered in
book form under part no. 296-12-18 934.

Contents
Contents ....................................................................................Chapter - Page
1Safetyt................................................................................................................................... 6
1.01 Directives............................................................................................................................... 6
1.02 General notes on safety......................................................................................................... 6
1.03 Safety symbols ...................................................................................................................... 7
1.04 Important notes for the user.................................................................................................. 7
1.05 Operating and technical staff ................................................................................................. 8
1.05.01 Operating staff ....................................................................................................................... 8
1.05.02 Technical staff ........................................................................................................................ 8
1.06 Danger ................................................................................................................................... 9
2Proper use .......................................................................................................................... 10
2.01 General ................................................................................................................................ 10
2.02 Machine versions................................................................................................................. 10
2.02.01 Post version (PFAFF 8310-041/001)...................................................................................... 10
2.02.02 Off arm version (PFAFF 8310-041/002) ................................................................................ 11
2.02.03 Flat-bed version (PFAFF 8310-042 und PFAFF 8310-043)..................................................... 11
3Specifications ..................................................................................................................... 12
4Disposal of Machine .......................................................................................................... 13
5Transportation, packing and storage................................................................................ 14
5.01 Transportation to customer‘s premises ............................................................................... 14
5.02 Transportation inside the customer‘s premises................................................................... 14
5.03 Disposal of packing materials ..............................................................................................14
5.04 Storage ................................................................................................................................ 14
6Explanation of symbols..................................................................................................... 15
7Controls .............................................................................................................................. 16
7.01 Summary of control elements ............................................................................................. 16
7.02 Main switch ......................................................................................................................... 17
7.03 Pedal .................................................................................................................................... 17
7.04 Adjustment wheel for roller clearance ................................................................................. 18
7.05 Control panel........................................................................................................................ 18
8Installation and commissioning ....................................................................................... 19
8.01 Installation............................................................................................................................ 19
8.01.01 Setting up the PFAFF 8310-041/001 and the PFAFF 8310-041/002..................................... 19
8.01.02 Setting up the PFAFF 8310-042 and the PFAFF 8310-043 ................................................... 20
8.02 Commissioning .................................................................................................................... 21
8.03 Switching the machine on/off .............................................................................................. 21
9Preparation ......................................................................................................................... 22
9.01 Adjusting the roller clearance............................................................................................... 22
9.02 Selecting a program............................................................................................................. 23

Contents
Contents ....................................................................................Chapter - Page
9.03 Entering the sealing parameters.......................................................................................... 24
9.03.01 Entering the sealing power or the sealing amplitude........................................................... 25
9.03.02 Entering the sealing speed .................................................................................................. 27
9.03.03 Entering the roller pressure ................................................................................................. 29
9.04 Adjusting the control panel .................................................................................................. 30
10 Sealing ................................................................................................................................ 31
10.01 Sealing principle................................................................................................................... 31
10.02 Manual sealing..................................................................................................................... 32
10.03 Dynamic sealing................................................................................................................... 34
10.04 Basting................................................................................................................................. 36
10.05 Creating/altering a sealing program ..................................................................................... 37
10.05.01 Notepad ............................................................................................................................... 38
10.05.02 Basic functions for the program input.................................................................................. 39
10.05.03 Sealing parameters .............................................................................................................. 40
10.05.04 Functions for switching to other zones ................................................................................ 40
10.05.05 Entering further sealing parameters .................................................................................... 41
10.05.06 Concluding programming..................................................................................................... 42
10.05.07 Example of how to enter a sealing program........................................................................ 43
10.06 Programmed sealing with individual programs.................................................................... 47
10.07 Creating/processing sequences........................................................................................... 48
10.08 Programmed sealing with sequences.................................................................................. 49
10.09 Error messages.................................................................................................................... 50
10.10 Turning the rollers ................................................................................................................ 50
11 Input .................................................................................................................................... 52
11.01 Summary of the functions in the input mode ...................................................................... 52
11.02 Program management .........................................................................................................53
11.03 Further settings.................................................................................................................... 55
11.03.01 Automatic ply recognition .................................................................................................... 57
11.03.02 Feed roller parameters......................................................................................................... 59
11.03.03 Rights of access .................................................................................................................. 60
12 Care and Maintenance....................................................................................................... 63
12.01 Maintenance intervals.......................................................................................................... 63
12.02 Checking/adjusting the air pressure..................................................................................... 63
12.03 Cleaning the air filter of the air-filter/lubricator ..................................................................... 64
12.04 Cleaning the feed rollers ...................................................................................................... 64
12.05 Changing the lamps (only on flat-bed version)..................................................................... 65
13 Adjustment ......................................................................................................................... 66
13.01 Notes on adjustment ........................................................................................................... 66
13.02 Tools, gauges and other accessories ................................................................................... 66
13.03 Abbreviations ....................................................................................................................... 66
13.04 Changing the top feed roller on the flat-bed version............................................................ 67
13.05 Changing the bottom feed roller on the feed-off-the-arm and post version .............................68
Contents
Contents ....................................................................................Chapter - Page
13.06 Feed roller clearance............................................................................................................ 69
13.07 Position of the feed rollers to each other ............................................................................. 70
13.08 Adjusting the secondary rollers ........................................................................................... 71
13.09 Protective switch and boot key............................................................................................ 72
13.10 Service menu....................................................................................................................... 73
13.10.01 Machine configuration ......................................................................................................... 74
13.10.02 Loading/updating the operating program............................................................................. 75
13.11 Description of the error numbers ........................................................................................ 77
13.11.01 General errors ...................................................................................................................... 77
13.11.02 Ultrasonoic generator errors ................................................................................................ 78
13.11.03 DC-motors error................................................................................................................... 79
13.12 List of outputs and inputs .................................................................................................... 79
13.12.01 Digital Outputs..................................................................................................................... 79
13.12.02 Digital Inputs........................................................................................................................ 79
13.12.03 Analog Outputs.................................................................................................................... 80
13.12.04 Analog Inputs....................................................................................................................... 80
14 Circuit diagrams................................................................................................................. 82

Safety
6
1 Safetyt
1.01 Directives
This machine is constructed in accordance with the European regulations indicated in the
conformity and manufacturer’s declarations.
In addition to this instruction manual, please also observe all generally accepted, statutory
and other legal requirements, including those of the user’s country, and the applicable pollu-
tion control regulations! The valid regulations of the regional social insurance society for oc-
cupational accidents or other supervisory authorities are to be strictly adhered to!
1.02 General notes on safety
The machine may only be operated by adequately trained operators and only after these
have read the appropriate Instruction Manual!
The danger and safety instructions attached to the machine must be followed!
The machine may only be used for the purpose intended and may not be operated wit-
hout its safety devices. All relevant safety regulations must be adhered to.
When changing the anvil wheel, when leaving the machine unattended or during mainte-
nance work, the machine must be disconnected from the power supply by operating the
main switch or by pulling out the plug!
The daily maintenance work may only be carried out by appropriately trained personnel!
Repair work and special maintenance work many only be carried out by specialists or ap-
propriately trained personnel.
Work on electrical equipment may only be carried out by appropriately trained personnel!
Work is not permitted on parts and equipment which are connected to the power supply!
Exceptions to this rule are found in the regulations EN 50110.
Modifications and alterations to the machine may only be carried out under observance
of all the relevant safety operations!
Only spare parts which have been approved by us are to be used for repairs! We draw
special attention to the fact that spare parts and accessories not supplied by us have not
been subjected to testing nor approval by us. Fitting and/or use of any such parts may
cause negative changes to the design characteristics of the machine. We shall not accept
any liability for damage caused by the use of non-original parts.
●
●
●
●
●
●
●
●
●
●

Safety
7
1.03 Safety symbols
Danger!
Special points to observe.
Danger of hands being crushed!
Danger of burns from hot surface!
Danger from electric voltage!
Caution
Do not operate without finger guard and safety de-
vices.
Turn off the main switch and let the machine cool down
before any setting up, maintenance or cleaning work!
1.04 Important notes for the user
This instruction manual belongs to the equipment of the machine and must be available to
the operating staff at all times.
This instruction manual must be read before the machine is operated for the first time.●
Both operating and technical staff must be instructed on the safety devices of the machi-●
ne and on safe working methods.
It is the duty of the user to operate the machine in perfect running order only.●
The user must ensure that none of the safety devices are removed nor put out of wor-●
king order.
The user must ensure that only authorized persons operate and work on the machine.●
The user must make sure there is no high-frequency welding equipment being operated●
in direct proximity to the machine that exceeds the EMC limit values according to
EN 60204-31 for the machine.
For further information please refer to your PFAFF agency.
o
o
o
o

Safety
8
1.05 Operating and technical staff
1.05.01 Operating staff
Operating staff are the persons responsible for setting up, operating and cleaning the machi-
ne and for removing any disturbances in the sewing area.
The operating staff is obliged to observe the following points, and must:
always observe the notes on safety in this instruction manual!
avoid using any working methods which adversely affect the safety of the machine!
avoid wearing loose-fitting clothing or jewelry such as necklaces or rings!
also ensure that only authorized persons are allowed near the danger area of the
machine!
immediately report to the user any changes to the machine that may affect its safety!
1.05.02 Technical staff
Technical staff are persons who have been trained in electrical engineering, electronics and
mechanical engineering. They are responsible for lubricating, servicing and repairing the ma-
chine.
The technical staff is obliged to observe the following points, and must:
always observe the notes on safety in this instruction manual!
switch off the on/off switch before carrying out any maintenance and repair work on the
machine!
never work on parts or equipment still connected to the power supply! Exceptions to this
are only permissible according to regulations EN 50110.
replace all safety covers after maintenance and repair work!
●
●
●
●
●
●
●
●
●

Safety
9
1.06 Danger
When the machine is in operation, a work area of 1 m must be kept free in
front of and behind the machine, so that access to the machine is possible at all
times without difficulty.
Do not operate the post-bed and feed-off-the-arm versions of the machine
without ultrasonic guard 1. Danger of hearing damage!
Do not operate the flat-bed versions of the machine without finger guard 2!
Danger of crushing if the fingers are drawn in!
During operation do not place your hands in the area of feed roller 3 and
sonotrode 4! Danger of fingers being drawn in and crushed!
During operation do not touch sonotrode 4!
Danger of burns from the heat-generating surface!
3
Fig. 1 - 01
1
2
3
4
4
3
2

Proper use
10
2 Proper use
2.01 General
The PFAFF 8310 is available in four versions. The special applications of the individual versi-
ons are described below, see Chapter 2.02 Machine versions. All the machine versions are
used for continuous sealing of thin, thermoplastic materials, such as e.g. fleeces, felts,
woven and knitted fabrics using ultrasonics.
Any use of these machines which is not approved by the manufacturer shall be
considered as improper use! The manufacturer shall not be liable for any dama-
ge arising out of improper use! Proper use shall also be considered to include
compliance with the operation, adjustment, service and repair measures speci-
fied by the manufacturer!
Fig. 2 - 01
2.02 Machine versions
2.02.01 Post version (PFAFF 8310-041/001)
The post version is particularly suitable for
heat-sealing three-dimensional shapes, such
as e.g. hoods, caps, pouches etc. With the
aid of the post, two parts can be joined to-
gether flat or one part sealed to form a shor-
ter tube. To do so the part is wrapped around
the post and then sealed from out of the
post (e.g. the lengthwise seam of a sleeve
or a filter tube).
On the post-bed version the top roller is the
sonotrode.

Proper use
11
Fig. 2 - 02
2.02.02 Off arm version (PFAFF 8310-041/002)
The off arm version is ideal for heat-sealing
the lengthwise seam of a sleeve or tube
(up to a length of ca. 30 cm). A variation is
also available as a special version, which is
suitable for sealing the lengthwise seam of
a longer or endlessly long tube.
On the feed-off-the-arm version the top
roller is the sonotrode.
Fig. 2 - 03
2.02.03 Flat-bed version (PFAFF 8310-042 und PFAFF 8310-043)
The flat-bed version is used in particular for
sealing two flat parts. Possible seam ty-
pes are lapped seams, peeling seams, top-
stitched and binding seams. The application
possibilities correspond to those of a typical
high-speed sewing machine.
On the flat-bed version the bottom roller is
the sonotrode.
The only difference between
the PFAFF 8310-043 and the
PFAFF 8310-042 is that the for-
mer has a smaller roller enab-
ling a smaller curve radius.

Specifications
12
3 Specifications▲
Abmessungen und Gewichte
Version:
8310
Post
-041/001
Off arm
-041/002
Flat-bed
-042, -043
Depth: ca. 700 mm ca. 750 mm ca. 600 mm
Width: ca. 1.100 mm ca. 1.100 mm ca. 1.250 mm
Height: ca. 1.300 mm ca. 1.300 mm ca. 1.300 mm
Weight: ca. 170 kg ca. 175 kg ca. 145 kg
Clearance width: ...........................................................................................................400 mm
Clearance under the rollers:............................................................................................25 mm
Connection data
Operating voltage: ..................................................................230 V ± 10%, 50/60 Hz, 1-phase
Max. capacity:...............................................................................................................800 kVA
Fuse: ....................................................................................................................1 x 16 A, inert
Working air pressure:......................................................................................................... 6 bar
Air consumption:....................................................................................................... < 10 l/min.
Sealing pressure .............................................................................................................. 750 N
Sealing power: .................................................................................................................500 W
Sealing speed: .................................................................................................. max. 10 m/min.
..................................................................................... (optional max. 20 m/min. or 30 m/min.)
Seam width:........................................................................................................... max. 10 mm
Noise data
Emission sound level at the workplace:.............................................................LpA < 70 dB(A)■
(Noise measurement in acc. with DIN 45 635-48-A-1, ISO 11204, ISO 3744, ISO 4871)
Ambient temperature
85% rel. humidity (condensation not permitted): ...................................................... 5 – 40° C
▲Subject to alterations
■K
pA = 2,5 dB

13
Disposal of Machine
4 Disposal of Machine
Proper disposal of the machine is the responsibility of the customer.
The materials used for the machine are steel, aluminium, brass and various plastic
materials. The electrical equipment comprises plastic materials and copper.
The machine is to be disposed of according to the locally valid pollution control regula-ti-
ons; if necessary, a specialist ist to be commissioned.
Care must be taken that parts soiled with lubricants are disposed of separately
according to the locally valid pollution control regulations!
●
●
●

Transportation, packing and storage
14
5 Transportation, packing and storage
5.01 Transportation to customer‘s premises
The machines are delivered completely packed.
5.02 Transportation inside the customer‘s premises
The manufacturer cannot be made liable for transportation inside the customer‘s premises
nor to other operating locations. It must be ensured that the machines are only transported
in an upright position.
5.03 Disposal of packing materials
The packing materials of this machine comprise paper, cardboard and VCE fibre. Proper dis-
posal of the packing material is the responsibility of the customer.
5.04 Storage
If the machine is not in use, it can be stored as it is for a period of up to six months, but It
should be protected against dust and moisture.
If the machine is stored for longer periods, the individual parts, especially the surfaces of
moving parts, must be protected against corrosion, e.g. by a film of oil.

Explanation of symbols
15
6 Explanation of symbols
In this instruction manual, work to be carried out or important information is accentuated by
symbols. These symbols have the following meanings:
Note, information
Cleaning, care
Lubrication
Maintenance, repairs, adjustment, service work
(only to be carried out by technical staff)

Controls
16
The machine has the following control elements:
Main switch 1, see Chapter 7.02
Pedal 2, see Chapter 7.03
Adjustment wheel 3 for roller clearance, see Chapter 7.04
Control panel 4, see Chapter 7.05
Top roller 5
Bottom roller 6
Key switch 7, see Chapter 11.03.03 Rights of access
Disk drive 8
●
●
●
●
●
●
●
●
7 Controls
7.01 Summary of control elements
Fig. 7 - 01
1
2
3
4
5
6
7
8

Controls
17
Fig. 7 - 02
7.02 Main switch
The machine is switched on or off by
turning main switch 1.
Position "O": Machine is switched off
Position "I": Machine is switched on
●
1
Fig. 7 - 03
7.03 Pedal
The function method of the
pedal depends on the selec-
ted pedal mode (level or flip-
flop mode), see Chapter 11.03
Further settings
-1 = Stop sealing operation /
raise top roller
0 = Neutral position
+1 = Lower top roller
+2 = Sealing start
113-005
+1
0
+2
-1

Controls
18
Fig. 7 - 04
7.04 Adjustment wheel for roller clearance
After loosening clamp screw 1, the clea-
rance between the top and bottom feed
rollers is changed by turning adjustment
wheel 2.
The clearance can be read on the scale.
●
1
2
Fig. 7 - 05
7.05 Control panel
The current operating conditions are dis-
played on control panel 1. Operation takes
place in a constant dialogue between the
control unit and the operator. For this pur-
pose, depending on the operating conditi-
on of the machine, different symbols and/or
texts are displayed. If the symbols or texts
are framed, these show functions which can
be selected by pressing the appropriate po-
sition on the monitor. By pressing the cor-
responding function this is carried out or
switched on or off immediately, or a further
menu appears, e.g. for entering a value. Ac-
tivated functions are shown with inverted
symbols. Unframed symbols or texts are
only used for display purposes and cannot
be selected by pressing.
1

Installation and commissioning
19
8 Installation and commissioning
After the machine has been unpacked, check it for any damages caused during transportati-
on. If there are any damages, please notify the transport company and your
local PFAFF agency.
The machine must only be installed and commissioned by qualified personnel.
All relevant safety regulations must be strictly adhered to!
8.01 Installation
Suitable connections for electricity and compressed air must be available at the machine’s lo-
cation (see Chapter 3 Specifications). An even and firm foundation as well as sufficient
lighting must also be available at the machine’s location.
8.01.01 Setting up the PFAFF 8310-041/001 and the PFAFF 8310-041/002
Slide the machine off the pallet.
Turn the six legs 1 to level the machine horizontally.
Connect the plugs from pedal 2 and from any existing foot switches to the control box.
Loosen screws 3 and 4 and adjust the height of the machine by turning crank 5.
Well tighten screws 3 and 4 again.
●
●
●
●
●
Fig. 8 - 01
1
2
3
4
54
44

Installation and commissioning
20
8.01.02 Setting up the PFAFF 8310-042 and the PFAFF 8310-043
If the machine is delivered without a table, be sure that the frame and the table
top which you intend to use can hold the weight of the machine and the motor.
It must be ensured that the supporting structure is sufficiently sturdy, even du-
ring sewing operations.
The method of packaging used requires that the table top be lowered for trans-
port. The following is a description of how to adjust the height of the table top.
Fig. 8 - 02
Loosen screws 1 and 2 and set the desired table-top height
Tighten screws 1 well.
Adjust the position of the pedal so that you can operate it comfortably and tighten
screw 2.
●
●
●
11
2
2
This manual suits for next models
2
Table of contents
Other Pfaff Sewing Machine manuals

Pfaff
Pfaff 212 User manual

Pfaff
Pfaff 417 User manual

Pfaff
Pfaff Tiptronic 6230 User manual

Pfaff
Pfaff 1245 User manual

Pfaff
Pfaff 3811-3/55 User manual

Pfaff
Pfaff 259 User manual

Pfaff
Pfaff 3822-1/22 User manual

Pfaff
Pfaff 1244 User manual

Pfaff
Pfaff hobbylock 4752 User manual

Pfaff
Pfaff Creative Vision User manual