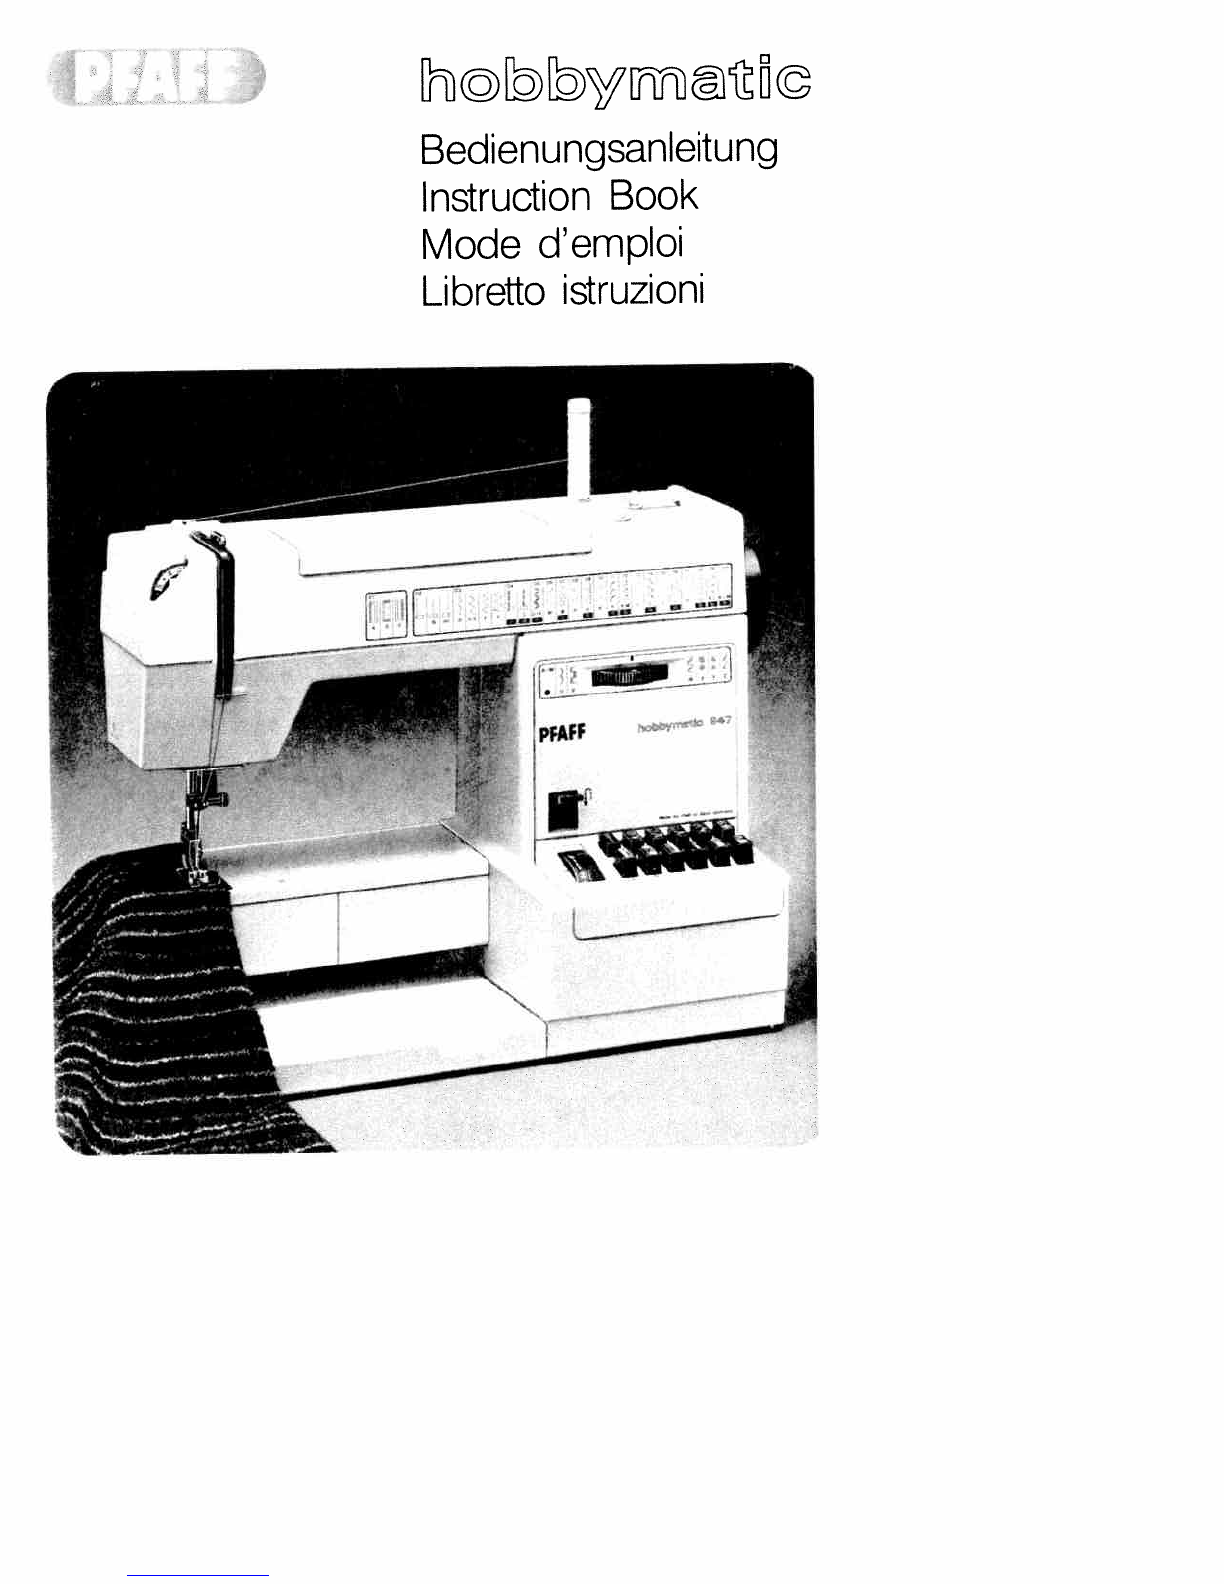
Pfaff hobbymatic 917 User manual

Bedlenungsanlejtun
Instruction
Boofr
Mode
d’empioj
Libreo
istruzionj

4

Teile
der
Nähmaschine
Parts
of
the sewing
machine
101
Fadenhebel
101
Take-up
lever
102
Spuler-Vorspannung
102
Bobbin
winder
tension
103
Tragegriff
103
Carrying
handle
104
Spuler
104
Bobbin
winder
105
Handrad
105
Hand
wheel
106
Auslösescheibe
106
Stop
motion
knob
107
Stichlangen-Einsteller
107
Stitch
length
key
108
Verwandlurigsnahflache
108
Detachable
work
support
with
mit
Zubehörfach
accessory
compartment
109
Stichplatte
109
Needle plate
110
NãhfuBhalter
mit
NãhfuB
110
Sewing
foot
holder
with
sewing
foot
111
Einfadelschlitze
111
Threading
slots
112
Oberfadenspannung
112
Needle
thread
tension
113
Stoffdrückerhebel
113
Presser
bar
lifter
114
Nadelhalter
mit
Halteschraube
114
Needle
holder
with
screw
115
Garnrollenstifte
115
Spool
pins
116
Stichmustertabelle
116
Table
of
stitch
patterns
117
Tipptasten
117
Finger-tip
controls
118
Grundplatte
118
Bedplate
119
Verschlul3klappe
dahinter
Greifer
119
Free
arm
cover
120
Fadenfuhrung
(enclosing sewing
hook)
121
Anschlag
zum
Stopfen
120
Thread
guide
122
Zierstich-Einstellrad
121
Stop
for
darning
operations
123
Rückwärtstaste
122
Fancy-stitch
thumb
wheel
124
Freiarm
123
Reverse-feed
control
125
Hauptschalter
124
Free
arm
125
Master
switch
)

Pièces
de
Ia
machine
Parti
della
macchina per
cucire
101
Levier
releveur
de
fil
101
Leva
tendifilo
102
Pretension
du
dévidoir
102
Tensione
dello
spolatore
103
Poignee
103
Maniglia
104
Dévidoir
104
Spolatore
105
Volant
105
Volantino
106
Disque
de
debrayage
du
volant
106
Disco
di
disinnesto
107
Regle-point
107
Regolatore
lunghezza
punto
108
Plaque de
rangement
avec
botte
a
108
Piano
variabile
con
scomparto
per
accessoires
accessori
109
Plaque
a
aiguille
109
Placca
d’ago
110
Support avec
pied
presseur
110
Supporto
del
piedino
con piedino
111
Fentes
denfilage
111
Fessura
per
infilatura
112
Tension
dii
fil
d’aiguille
112
Tensione
superiore
113
Levier
presse-tissu
113
Leva
alzapiedirio
114
Pince-aiguille
avec
vis
de
fixation
114
Morsetto
d’ago
con
vite
115
Broches
a
bobines
115
Perni
portarocchetti
116
Tableau de
points
116
Tabella
del
punti
117
Touches
de
commando
117
I
tasti automatici
118
Plaque
de
base
118
Base
piana
119
Compartiment
du
crochet
119
Sportello, dietro
crochet
120
Guide-fil 120
Guidafili
121
Butee
pour
travaux de
reprisage
121
Fermo
per
rammendo
122
Disque
do
reglage
des
points
122
Regolatore
punto
ornamentale
d’ornementation
123
Tasto
per
cucire
indietro
123
Touche
marche
arriére
124
Braccio
libero
124
Bras
libre
125
Interruttore
principale
125
Interrupteur
general

Die
Kofferhaube
abheben
und
den
Tragegriff
umklappen.
Lift
off
the
cover and
fold
down
the
carrying
handle.
rabattre
a
poignée.
Enlever
Ic
couvercle
de
a
valisette
et
Sollevare
1
coperchio
della
valigetta
e
ribaltare a
maniglia.
______
__
-
Den
Anlasser
und
die
Bedienungsanlei
tung
aus
dem Fach
N
nehmen,
So
wie
die Abbildung
oben
zeigt,
beides
wieder
einräumen.
Take
foot
control
and
Instruction
Book
out
of
compartment
N.
Put
back
again
as
shown
in
the
illustration
above.
Retirer
le
rheostat
a
pedale
et a
notice
d’emploi
de
Ia
case
N
et
es
remettre
dans
a
case
comme
on
voit
sur
Ia
photo
du
haut.
Togliere
1
pedale
davviamento
e
le
istruzioni
per
l’uso
dal
contenitore
N.
Come
rappresentato
nella figura
supe
riore,
riporre
entrambi
nd
contenitore.

Elektrischer
Anschlul3:
Anlasser
auf
den
Boden
stellen.
Stecker
N
in
die
Maschine,
und
Stecker
0
in
die
Wand
steckdose
stecken.
Electrical
connection:
Set
the
foot
con
trol
on
the
floor.
Insert
plug
N
in
the
machine
and
plug
0
in
the
wall
socket.
Branchement
electrique:
Placer
le
rheostat
a
pedale
sur
le
sol.
Brancher
Ia
fiche
N
dans
a
machine
et
Ia
fiche
0
dans
Ia
prise
murale.
Collegamento elettrico:
Porre
il
reostato
sul
pavirnento.
Inserire
spina
N
nella
macchina.
e
spina
0
nella
presa
a
Hauptschalter
P
drücken,
wobei
das
Nählicht
aufleuchtet.
Anlasser
nieder
treten.
Je
tiefer man drückt,
urn
so
schneller
näht
die
Pfaff.
Electronic-Anlasser
(Schalter
0)
Stellung
=
halbe
Endgeschwindigkeit
Stellung
41
=
voIle
Endgeschwindigkeit
Push
master
switch
P;
the
sewing
light
goes
on.
Operating
the
foot
control:
The
farther
you
press
the
pedal
down
the faster
the
machine
runs.
Electronic
foot
control
(slide
0)
Position
=
half
the
top
speed
Position
44
=
full
top
speed
Enfoncer
le
bouton
de
linterrupteur
general
P;
Ia
lampe s’allume.
Abaisser
Ia
pédale
du
rheostat.
Plus
Ia
pédale
sera
abaissée,
plus
Ia
Pfaff”
coudra
vite.
Rheostat electronlque
(interrupteur
Q)
Position
=
derni-vitesse
rnaximale
Position
11
=
vitesse
maximale
integrale
Prernendo
l’interruttore
principale
P
si
accende
il
ritlettore.
Premere
II
reostato:
Piü
a
fondo
si
preme
il
pedale,
piU
veloce
cucirà
Ia
“Pfaff”.
Reostato
elettronico
(commutatore
Q)
Posizione
=
velocitá
finale
dirnezzata
Posizione
44
=
velocità
finale
intera
muro.
4

4
Spulen
vorbereiten:
Verwandlungsnahfläche etwas
anheben
und
herausnehmen.
Preparation
for
bobbin
winding:
Lift
detachable
work
support
and
remove
it.
Preparation
des
canettes:
Lever
quolque
peu
Ia
boite
de
rangement
et
Ia
sortir.
Preparazione
per
avvolgere
Ia
spohna:
Sollevare
eggermente
II
piano
variabile
e
toglierlo.
Verschlu3klappe
119
nach
unten
Offnen.
Open
free
arm
cover
119.
Ouvrir
le
capot
119
vers
le
bas.
Aprire
sportello
119
verso
basso.
Hauptschalter
125
ausschalten.
Klappe
N
anheben
und
die
Spulenkapsel
herausziehen.
Switch
off
master
switch
125.
Raise
latch
N
and
pull
out
the
bobbin
case.
Tourner
l’interrupteur
general
125
sur
ArrêP’.
Lever
le
loquet
N
et
retirer
Ia
boite
a
canette.
•
Disinserire
I’interruttore
principale
125.
Sollevare
ii
chiusion
N
e
togliere
Ia
\cpsula
della
spolina.
Kiappe
N
loslassen
und
die
Spule
her
ausnehmen.
Release
latch
N
and
take
out
the bobbin.
Lãcher
le
loquet
N
et
retirer
Ia
canette.
Rilasciare
chiusino
N
e
togliere
Ia
spolina.
4
4

N
,4
Spule
aut
den Spuler
104
stecken.
Stiff
N
muB
in
Schlitz
0.
Place a
bobbin
on
spindle
104,
making
sure
pin
N
enters
slot
0.
•
Mettre
a
canette
sur
le
dévidoir
104;
le
tenon
N
doit
s’engager
dans
Ia
fente
0.
Nähwerk
ausschalten:
Handrad
105
fest
halten
und
Scheibe
106
nach
vorn
drehen.
Disengaging
the
sewing mechanism:
Hold
the hand
wheel
steady
and
turn
knob
106
toward
you.
Débrayer
le
mécanisme
de
couture:
Retenir
le
volant
105
et
tourner
le
disque
106
vers
lavant.
Disinnestare
meccanismo
del
cucito:
Tenere
fermo
1
volantino
105
e
girare
disco
106
in
avanti.
Garnrollenstifte
115
ganz
hochziehen
und
Garnrolle
aufstecken.
Pull
thread
stand
pins
115
up
completely
and
place thread
reels
on
them.
Tirer
les
broches
115
a
fond
vers
le
haut
et
mettre
Ia
bobine
en
place.
Estrarre
completamente
i
perni
porta
rocchetti
115
e
sistemarci
il
rocchetto
del
file.
Mettere
a
spolina
su
spolatore
104.
Perno
N
deve
entrare
in
fessura
0.
Spule
nach
rechts
gegen
den
Anschlag
P
drücken.
Push
the
bobbin
to
the
right
against
stop
P.
Poussor
Ia
canette
vers
Ia
droite
centre
Ia
butée
P.
Spingere
Ia
spolina
verso
destra
centre
il
fermo
P.

Avvolgere
Ia
spolina
Inserire
l’interruttore
principale.
Tirare
ii fib
dat
rocchetto
nella
tensione
deblo
spolatore
102,
riportarlo
verso
destra
e
avvolgerlo
alcune
volte
in
senso
della
freccia attorno
Ia
spolina.
Quindi
azionare
II
reostato
e
avvolgere
Ia
spolina.
Quando
Ia
spolina
è
piena
Si
ferma
da
sola,
Premere
a
spolina
piena
verso
sinistra,
toglierla e
tagliare
it
fib.
N
4
(
4
Spulen
Hauptschabter
einschalten,
Den
Faden
von
der
Garnrolle
in
die
Spulervorspannung
102
ziehen, nach
rechts
führen
und
einige
Mate
in
Pfeil
richtung
urn
die
Spule
wickeln.
Dann
den
Ful3anlasser
betatigen
und
spulen.
1st
die
Spule
volt,
bloibt
sie
stehen.
Die
voile
Spule
nach
links
drücken,
abnehmen
und
den
Faden
abschneiden.
Bobbin
winding
Switch
on
master
switch.
Pull
thread
from
thread
reel
into
thread
retainer
102,
lead
to
the
right
and
wind
a
few
times
around the
bobbin
in
the
direc
tion
of
the
arrow.
Then
actuate
the
foot
control
and
wind
the
bobbin.
The bobbin
stops
as soon
as
it
is
full.
Push
the
full
bobbin
to
the
left,
remove
it
and
cut
off
the thread.
Bobinage
Tourner
l’interrupteur
general.
Tirer
le
fil
de
Ia
bobine
dans
Ia
préten
sion
102
du
dévidoir,
le
coucher
a
droite
et
lenrouler
de
quelques
tours,
dans
le
sens
de
Ia
flèche,
sur
Ia
canette.
Agir
sur
Ia
pedale
du
rheostat
et
bobiner. Des
que
Ia
canette
est
pleine,
le
dévidoir
s’arréte.
Pousser
Ia
canette
vers
Ia
gauche,
Ia
reti
rer et
couper
le
fib.

4
U
N4
Nähwerk
elnschalten:
Handrad
festhal
ten
und
Scheibe
106
nach
hinten
drehen.
Dann
Handrad
nach
vorne
drehen,
bis
es
_________
—
einrastet.
Engaging
the
sewing
mechanism:
Hold
the hand
wheel
firmly
and
turn disk
106
toward
the
back,
then
turn
the
hand
wheel
forward
again
until
it
snaps
in.
Embrayage
du
mécanisme:
Retenir
le
volant
et
tourner
le
disque
106
vers
i’arrière.
Tourner
le
volant
vers
l’avant
jusqu’a
ce
qu’il
senclenche.
lnserimento meccanismo
di
cucito:
tenere
fermo
il
volantino
e
girare
ii
disco
106
verso
dietro.
Girare
guindi
II
volantino
—
in
avanti
finché
sinnesta.
11’
_________________________________________________________________
Spule
einlegen
N
(Faden
nach
hinten).
Den
Faden
in
den
Schlitz
0
und
bis
zur
Offnung
P
ziehen.
Inserting
the
bobbin
(N),
with
the
thread
unreeling
tod
the
back.
_
Mise
en place de
Ia
canette
(N),
le
fil
so
déroulant
vers
larrière.
Tirer
le
fil
par
Ia
fente
0
jusqu’à
I’ouverture
P.
Inserimento
della
spolina
N
(ii
capo
del
fib
va
rivolto
verso
dietro).
Introdurre
1
fib
nella
fessura
0,
quindi
tirare
fino
all’apertura
P.

4
Unterfadenspannung
prUfen:
Kapsel
leicht
ruckartig
aufwartsbewegen.
Sie
muB
stufenweise
niedersinken.
(Einstell
schraube
N
nach
links
drehen
=
loser,
nach
rechts
drehen
=
fester).
Checking
the
bobbin
thread
tension:
With
a
brief,
sharp
upward
movement
of
your
hand,
the
bobbin
must gradually
slip
downwards.
(Turn
screw
N
counter-clock
wise
for
a
weaker tension,
or
clockwise
for
a
tighter
tension.)
Tension
du
fil
de
canette:
Laisser
pendre
Ia
canette
garnie
au
fil
de
Ia
canette.
Elle
dolt
descendre
graduelle
ment
quand
on
imprime
a
Ia
main
de
legeres
saccades
ascendantes.
Rotation
de
Ia
vis
N
vers
Ia
gauche:
reduction de
Ia
tension;
rotation
vers
Ia
droite:
renforcement.
Controllo
della
tensione
inferiore:
Tirare
Ia
capsula
con leggeri
colpetti
verso
I’alto.
Deve
abbassarsi
gradatamente
(girando
Ia
vite
di
regolaggio
N
a
sinistra
si
allenta,
verso
destra
si
rinforza).
Spulenkapsel
einsetzen:
•
Hauptschalter
125
ausschalten.
Klappe
0
anheben
und
die
Kapsel
bis
zum
Anschlag
auf
Stift P
schieben.
Aus
schnitt
Q
mul3
dabei
nach oben
zeigen.
Inserting
the
bobbin
case:
•
Switch
of
f
master
switch
125.
Raise
latch
0
and push
the
bobbin
case
onto
stud
P
as
far
as
it
will
go,
making
sure
cutout
Q
points
upwards.
Mise
en
place
de
a
boite
a
canette:
•
Tourner I’interrupter
general
125
sur
‘Arrêt’..
Relever
le
loquet
0
et
glisser
Ia
boite
a
canette,
l’ouverture
Q
en
haut,
a
fond
sur
le
tourillon
P.
Come
inserire
Ia
capsula
della
spolina:
•
Disinserire
l’interruttore
principale
125.
Sollevare
il
chiusino
0
e
inserire
Ia
cap
sula
fino
aIl’arresto
sul
perno
P.
L’aper
tura
Q
deve
essere
rivolta
verso
l’alto,

4
Obertaden
einlegen:
•
Hauptschalter
125
ausschalten.
Nadel
und
Fadenhebel
101
müssen
oben
stehen.
Nähfu8
anho
ben.
Den
Faden
von
der
Garnrolle
in
die
Spulervorspannung,
durch
die
Offnung
N,
den
Schlitz
0,
hinter
das
Fuhrungs
stuck
P,
nach
oben
in
den
Schlitz
0,
durch
den
Fadenhebel
101,
zurück
durch
den
Schlitz
Q,
hinter
die
Fuhrung
A
und
in
die
rechte Fadenfuhrung
S
am
Nadel
halter ziehen.
Upper
threading:
•
Switch
off
master
switch
125.
Both
needle
and
take-up
lever
must
be
in
the
“up”
position.
Raise
sew
ing
foot.
Pull
thread
from
spool
and
draw
it
into
the
bobbin
tension
stud,
through
opening
N,
slot
0,
behind
guiding
piece
P,
upwards
through
slot
0.
through
take-up
lever
101.
back through
slot
Q.
behind
guide
A
and then
into
the
right
thread
guide
S
on
the
needle
holder.
Enfilage
de
I’aiguille:
•
Tourner
l’interrupteur
général
125
sur
‘Arrêt.
L’aiguille
et
le
levier
releveur de
fil
doi
vent
so
trouver
en position
haute.
Lever
to
pied
presseur.
Tirer
le
fit
de
Ia
bobine
dans
a
pretension
du dévidoir,
par
les
fentes
N
et
0,
derriere
le
guide-fit
P.
Remonter
dans
Ia
fente
Q,
par
le
rele
veur de
f
ii
101,
redescendre
par a
fente
0
et
passer
derriere
le
guide-fil
A
et
dans
to
guide-fil
droit
S
du
pince-aiguilte.
lnserimento
del
fib
superiore:
•
Disiri
serire
I’interruttore
principale
125.
Ago
e
leva
tendifilo
devono
essere
in
alto.
Levare
1
piedino.
Portare
il
fib
dat
rocchetto
nella
tensione
detlo
spolatore,
attraverso
‘aper
tura
N,
nella
fessura
0,
dietro
Ia
guida
P,
verso
l’atto
nella
fessura
Q,
nella leva
tendifilo
101,
di
ritorno
attraverso
Ia
fes
sura
Q,
dietro
Ia
guida
A
e
nel
guidafilo
S
a
destra
dell’ago.
4
Den
Oberfaden
von
vorn
nach
hinten
durch
das
Nadelöhr
fädeln.
Thread
the
needle
from
front
to
back.
Enfiler
le
fil
d’aiguille
do
‘avant
en
arriè
re
par
le
chas
d’aiguille.
lnfilare
it
fib
superiore
dat
davanti
verso
dietro
attraverso
Ia
cruna
dell’ago.
9

Untertaden
herautholen:
Obertaden
fest
halten.
Handrad
nach
vorn
drehen
und
einen
Stich
nähen
bis Nadel
und
Faden
hebel
wieder
oben
stehen.
Mit
dem
Ober
faden den
Uriterfaden
nach
oben ziehen.
Drawing
up
the
bobbin
thread:
Hold
the
needle
thread
taut.
Turn
the
hand
wheel
towards
you
and sew
astitch
until
both
needle
and take-up
lever
are
up.
Pull
out
the
bobbin
thread
by
means
of
the
needle
thread.
Remontée
du
fil
inférieur:
Tendre
lege
rement
le
fil
daiguille.
Tourner
le
volant
vers avant
et
coudre
un
point
jusqu’à
ce
que
l’aiguille
et
le
releveur
do
hi
se
trouvent
a
nouveau
en
position
haute.
Remonter
le
fil
de
canette
a
‘aide
du
f
ii
daiguille.
Far
salire
it
fib
inferiore:
Tenere
fermo
1
fib
superiore.
Girare
ii
volantino
in
avanti
e
cucire
un
punto
finché
ago
e
eva
tendifilo
siano
di
nuovo
in
posizione
nut
re
con
lb
fib
superiore
II
fib
Ober-
und
Unterfaden nach
rechts
unter
den
Nähful3
legen
(etwa
10
cm).
Place
both
threads
towards the
right
under
the sewing
foot,
(approx
10
cm).
Coucher
les
deux
fibs
vers
b’arnere
a
droite
sous
be
pied
presseur.
Los
laisser
dépasser
d’environ
10cm.
Porre
i
fill
superiore
ed
inferiore
sotto
II
piedino,
(circa
10
cm).
Verschbub3klappe
119
schlieb3en.
Close
free-arm
cover
119.
Fermer
be
capot
119.
4
4
Chiudere
be
sportebbo
119.

4
11
Nàhfläche,
wie
der
Pfeil
zeigt,
an die
Maschine
schieben.
Push
work
support
against
the
machine,
as
shown
by
the
arrow.
Placer
a
boite
de
rangement
contre
Ia
machine, comme
le
montre
Ia
flèche.
Applicare
ii
piano
variabile
alla
macchina,
come
indicato
dalla freccia.
Hauptschalter ausschalten.
Stoff
unter
den
NähfuB
legen.
•
Switch
off
master
switch
125.
Place
fabric
under
the sewing
foot.
•
Tourner
I’interrupteur
gOnéral
125
sur
rArrêt’.
Placer
du
tissu
sous
le
pied
presseur.
•
Disinserire
I’interruttore
principale
125.
\orre
Ia
stoffa
sotto
ii
piedino.
4
Beim
Einlegen extrem dicker Stofflagen
Hebel
113
häher
anheben.
To
insert
extra-thick
fabric
plies
raise
lever
113.
Pour
les
tissus
très
epais,
lever
davantage
le
levier
113.
In
caso
di
spessori
di
stoff
a
estre
mamente
grossi
aizare
ulteriormente
Ia
leva
113.
4
Hauptschalter einschalten.
Stoffdrückerhebel
113
senken.
Switch
on
master
switch.
Lower
presser
bar
lifter
113.
Tourner
l’interrupteur
general.
Descendre
le
levier
113.
Inserire
l’interruttore
principale.
Abbassare
Ia
leva
premistoffa
113.

Anlasser
niedertreten.
Je
tiefer
man
drückt,
urn
so
schneuer
näht
die
Pfaff.
Operating
the
foot
control:
The
more
you
press
down
the
pedal,
the
faster
the
machine
runs.
Abaisser
Ia
pedale
du
rheostat.
Plus
a
pédale
sera
abaissée,
plus
Ia
Pfaff
coudra
vite.
Premere
ii
reostato:
Piü
a
fondo
Si
preme
ii
pedale,
piü
veloce
cucirà
Ia
Pfaff”
Oberfadenspannung
112
N
=
Einstellmarkierung.
Needle
thread tension
112
N
=
Setting
mark.
Tension
du
fil
d’alguille
112
N
=
repere
de réglage.
Tensione
superiore
112
N
=
marcatura
per
Ia
regolazione.
Checking
the
needle
thread tension
The
normal
setting
is
between
3
and
5.
The
higher
the
number, the tighter the
tension.
To
check
the
tension,
set
the
machine
at
a
wide
zigzag
stitch.
Sew
a
short
seam.
The
threads
should
interlock
in
the
middle
of
the
material.
/
Fadenspannung
uberprUfen
Die
normale
Einstellung
liegt
im
Bereich
von
3—5.
Je
höher
die
Zahl, je
fester
die
Spannung.
Die
Uberprufung
wird
mit
einem
breiten
Zickzackstich
vorgenom
men.
Eine
kurze
Naht
nähen.
Die
Faden
verknotung
soil
in
der
Mitte
der
Stofflagen
liegen.

4
t
Tensions
des
Ills
Position
de
reglage
normale
entre
3
et
5.
Tension
dautant
plus forte
que
le
chiffre
est
grand.
Contrôler
a
l’aide
dun
point
zigzag
large.
Coudre
quelques
points.
Les
Ills
doivent
se
nouer
dans
l’épais
seur
des
tissus.
Controuo
della
tensione
del
fib
La
tensione
normale
si
trova
nel
settore
da
3—5.
Piü
alto
ii
numero,
piU
forte
sara
Ia
tonsione.
II
controllo
viene
fatto
con
lo
zig-zag
piU
largo.
Cucire
una
breve
cucitura. L’annodamento
del
fiii
dove
avvenire
al
centro
dello
spessore
del
materiale.
1l
I
4
Stotfdrückerhebel
113
hochstellen.
Stoff
nach
hinten
herausnehmen.
Raise
presser
bar
lifter
113.
Remove
the
fabric
by
pulling
it
toward
the
back.
Relever
le
levier
113.
Degager
le
tissu
vers
l’arrière.
Alzare
Ia
leva
alzapiedino
113.
Togliere
Ia
stoffa
verso
dietro.
4
Fadenabschneider
N.
Fâden einlegen
und
nach
unten
ziehen.
Thread
cutter
N.
Draw
the
threads
into
the
slot
and
pull
them
downwards.
Coupe-Ill
N.
Coucher
los
hIs
dans
a
fento at
les
tirer
vers
Ia
bas.
Tagblafblo
N.
Inserire
i
fili
e
tirarli
verso
II
basso.

Stichlange einstellen
Die
Zahien
auf
dem
Stichlangen-Ein
steller
107
geben
die
Stichlänge
in
mm
an.
Der
Einstellbereich
1st
0
bis
6
mm.
Die
gewunschte
Stichlänge
wird
an die
Einstellmarkierung
N
gedreht.
Die
Abbildung
0
unten
zeigt
die
Einstel
I
lung
des
Stichlangen-Einstellers
zum
Nähen der
rot
abgebildeten
Stretchstiche
auf
den
Tasten.
Regulating the
stitch
length
L.__—
The
numbers
on
stitch length
control
107
indicate
the
stitch length
in
milli
-.
.
meters.
The
stitch
length
range
is
0
to
\
6
mm.
Turn
the
control
to
set
the
\
number
indicating
the
stitch length
at
:Obottom,
shows
how to
set
the
\
\
j
stitch
length control
for
sewing
stretch
stitches
(red
stitch
symbols
on
push
but
\\
\\
tons).
\\
\
\\\
\
\\ \
Réglage
de
Ia
longueur
du
point
Les
chiffres
sur
le
disque
107
indiquent
\
\
Ia
longueur
du
point
en
mm.
Celle-ci
est
\\
\
ii
-
reglable
entre
0
et
6
mm.
La
Iongueur
\
\
jJL..
de
point
choisie
est
indiquée
face
au
\\
\
repére
N.
.._\..\
—
L’illustration
0
(en
bas)
montre
le
L
réglage
du
regle-point pour
a
couture
_.zzEEEEEZEZZZZZZ
des
points
éiastiques marques
en
rouge
—
I\
\\\
\
EE___-
\
\\
Regolazione
della
lunghezza
del
punto
\
\_
I
numeri
sul
bottone
regolatore
della
\\
\
\
lunghezza
del
punto
107
corrispondono
‘\\
\
\
_—
alla
lunghezza
del
punto
in
mm.
La
rego
\\
lazione
si
estende
da
0
a
6
mm.
La
\\\
\
1
\
Iunghezza
del
punto
desiderata
si
regola
\\
\
I
‘
sulla
marcatura
N.
\\
\
\
\
\
La
figura
0
sotto
mostra
Ia
regolazione
\\
\
\
del
bottone
regolatore
per
cucire
i
punti
flexi
(stretch)
raffigurati
in
rosso
sui
tasti.

RUckwärtsnähen
Die
Taste
123
niederdrücken. Solange
die
Taste
gedrückt
wird,
näht
die
Maschine
rückwärts.
Reverse
sewing
Press
button
123.
As
long
as
you hold
this
button
the
machine
sews
back
wards.
Couture
en
marche
arrière
Abaisser
Ia
touche
123.
La
machine
coud
en
arrière
aussi
longtemps que
a
touche
est
maintenue
en
bas.
La
cucitura
indietro
Premere
ii
tasto
123.
Finchè
II
tasto
rimane premuto
Ia
macchina
cuce
indietro.
J
15

4
4
Some
safety
rules
a)
Take
care
to
avoid
injury to
your
fingers
by
the
needle
during sewing.
b)
Make
sure
you
unplug the
power
cord
whenever
you
have
to
leave
the
machine
or
want
to
clean
it,
oil
it
or
change
mechanical
and
accessory
parts.
C)
Be
sure
to
use
only
a15-watt
light
bulb
in
the sewing
lamp.
Safety
rules
for
United Kingdom
see
page
36.
Norme
dl
sicurezza
per macchine per
cucire per uso
famiglia
secondo
DIN
57700
parte
28
o
lEG
335
parte
28
a)
In
virtU
del
movimento
alternativo
delI’ago,
I’utonte
deve
prestare
suffi
ciente attenziono
e
tenere
constante
mente
d’occhio
il
punto
di
lavoro.
b)
Nel
cambiare
ago,
piedino,
spolina
e
placca
d’ago, nelle interruzioni
non
custodite
del lavoro e
durante
i
lavor
di
manutenzione
si
dove
disinserire
I
corrente
della
macchina
togliendo
Ia
spina
dalla
presa
a
muro.
c)
La
potenza massima consentita
per
Ia
lampadina
è
di
15
Watt.
Slcherheitshinweise
für
Haushaltnähmaschinen
nach
DIN
57700
Tell
28
bzw.
lEG
335
Tell
28
a)
Der
Benutzer
hat
wegen der
auf-
und
abgehenden
Nadel
genugend
Vor
sicht
walton
zu
lassen
und
die
Näh
stelle
bei
der
Arbeit
standig
zu
beobachten.
b)
Beim
Verlassen
der Maschine,
bei
Wartungsarbeiten
oder
beim
Wech
seln
von
mechanischen
Teilen
odor
Zubehör,
ist
die
Maschine durch
Her
ausziehen des
Netzsteckers
aus der
Steckdose
vom
Netz
zu
trennen.
c)
Die
maximal
zulassige
Leistung
der
Lampe
betragt
15
Watt.
4
Mesures
de
sécurité
a)
Toujours
faire
preuve
do
prudence
et
continuellement
surveiller
10
travail.
b)
Toujours
débrancher
Ia
machine
du
secteur
avant
de
quitter
Ia
machine,
avant
les
travaux
d’entretien
et
en
cas
de
remplacement
de
pièces
mécaniques
ou
d’accessoires.
c)
Puissance
maximale
admissible
do
l’ampoule:
15
Watts.

A,
B,
C
Knopflochtasten
Die
Taste
B
1st
gleichzeitig
die
Aus
schaittaste
zum
LOsen
der getippten
Tasten
und
linke
Stichlage
(siehe
Seite
25).
D
Zickzackstich
2
mm
E
Zickzackstich
3,5
mm
F
Zickzackstich
5
mm
G
Geradstich
M
Elasticstich
In
der Programmtabelle
auf
den Seiten
78—79
sind
die
Stiche
und
Stichkombina
tionen
mit
Hinweisen
für
ihre
Verwen
dung
angegeben.
Die
Buchstaben
der
Tasten
ihrer
Maschine bestimmen
die
Programme
und
Kombinationen,
welche
genaht
wer
den
kännen.
A,
B,
C;
Buttons
for
buttonholing
Button
B
is
also
used
as
clearing
button
for
releasing
the
pushed
buttons
and
for
setting
the
left
needle
position
(see
page
25).
D
2-mm
zigzag
stitch
E
3.5-mm
zigzag
stitch
F
5-mm
zigzag
stitch
G
Straight
stitch
M
Elastic stitch
All
stitches
and
stitch
combinations
are
listed
in
the
stitch
program
chart
on
pages
80—81.
This
chart
also
contains
possible
applications.
The
letters
of
the
buttons
on
your
machine determine
the
programs
and
combinations
that
can
be sewn.
4
4
Tipptasten
(Modelle
ohne Stretchstiche)
Die
verschiedenen
Modelle
haben
eine
unterschiedliche
Anzahl
von
Tipptasten
und
Programmen.
Finger-tip
controls
(models
without
stretch
stitches)
The
various models have
differing
num
bers
of
finger-tip
controls
and
programs.
1
Table of contents
Other Pfaff Sewing Machine manuals

Pfaff
Pfaff creative 7570 User manual

Pfaff
Pfaff quilt ambition 2.0 User manual

Pfaff
Pfaff Cover style 4850 User manual

Pfaff
Pfaff CREATIVE 4.0 - User manual

Pfaff
Pfaff 481 User manual

Pfaff
Pfaff 337 Guide

Pfaff
Pfaff tipmatic tiptronic 1151 User manual

Pfaff
Pfaff select 1540 User manual

Pfaff
Pfaff Creative Vision User manual

Pfaff
Pfaff 939 User manual

Pfaff
Pfaff 5463 User manual

Pfaff
Pfaff 463 User manual

Pfaff
Pfaff 2571ME PREMIUM Manual

Pfaff
Pfaff ClassicStyle 1525 User manual

Pfaff
Pfaff CREATIVE 4.0 - User manual

Pfaff
Pfaff synchrotronic 1229 User manual

Pfaff
Pfaff Creative Vision User manual

Pfaff
Pfaff 245 User manual

Pfaff
Pfaff creative sensation pro User manual

Pfaff
Pfaff creative 3.0 User manual