manuals.online logo
Brands
  1. Home
  2. •
  3. Brands
  4. •
  5. Pfister
  6. •
  7. Plumbing Product
  8. •
  9. Pfister Sonterra F-WL8-SNP User manual

Pfister Sonterra F-WL8-SNP User manual

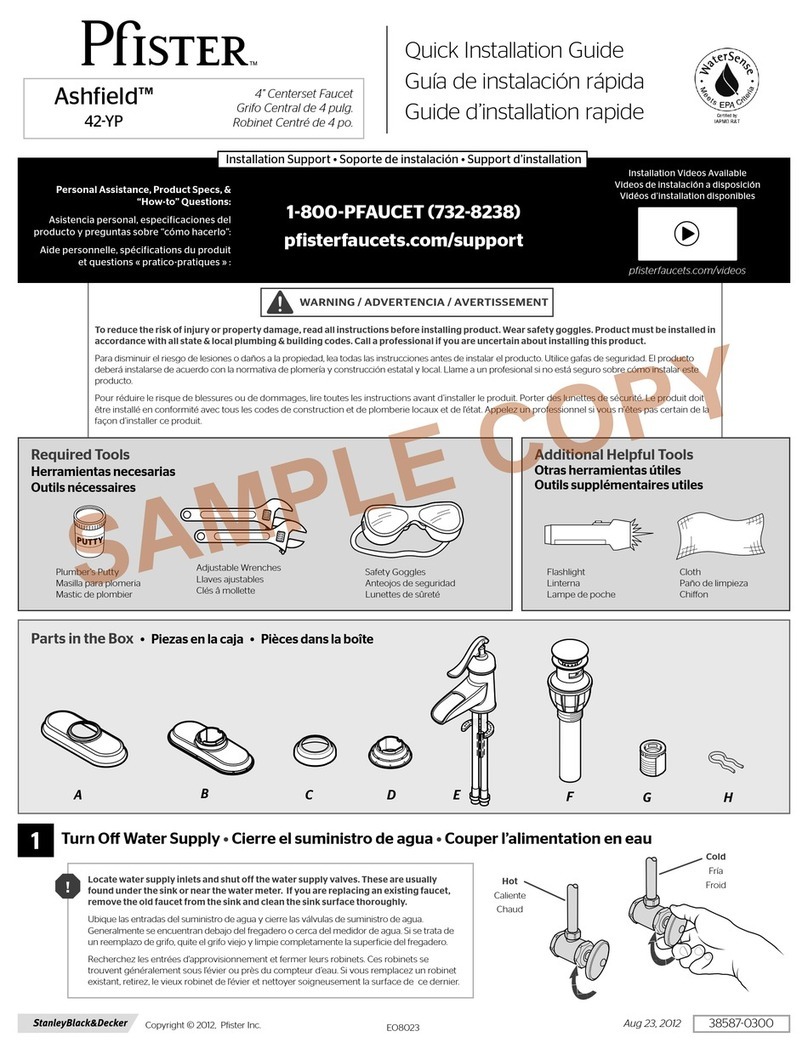
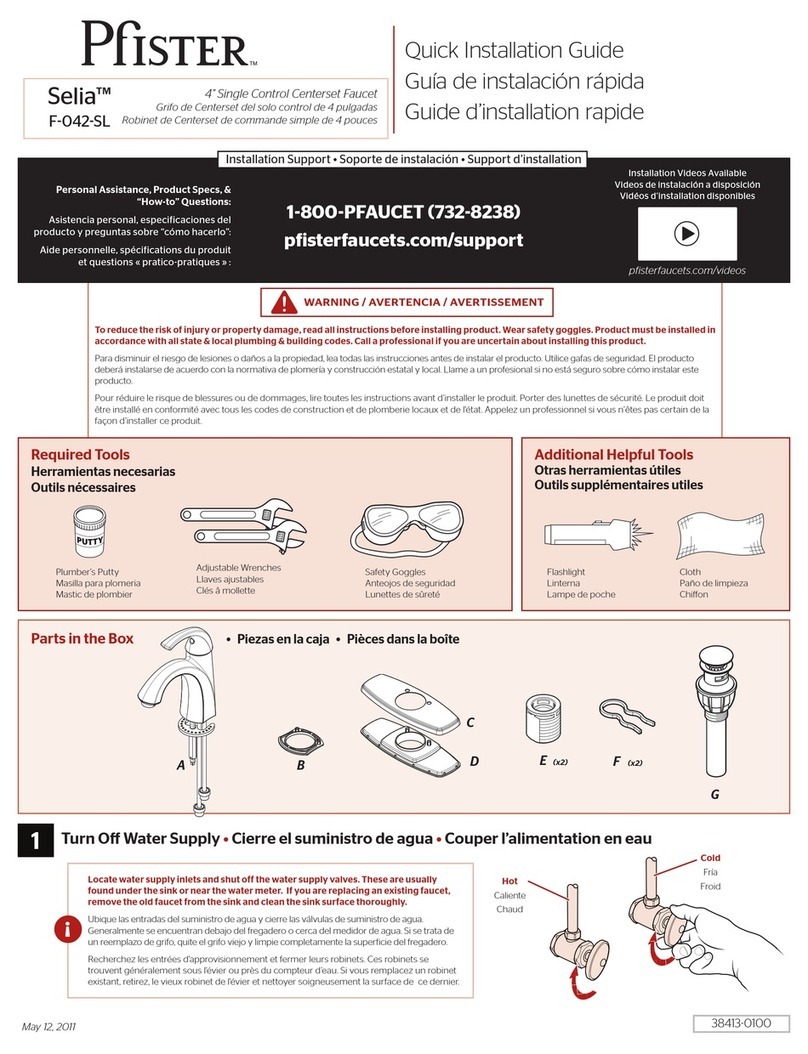
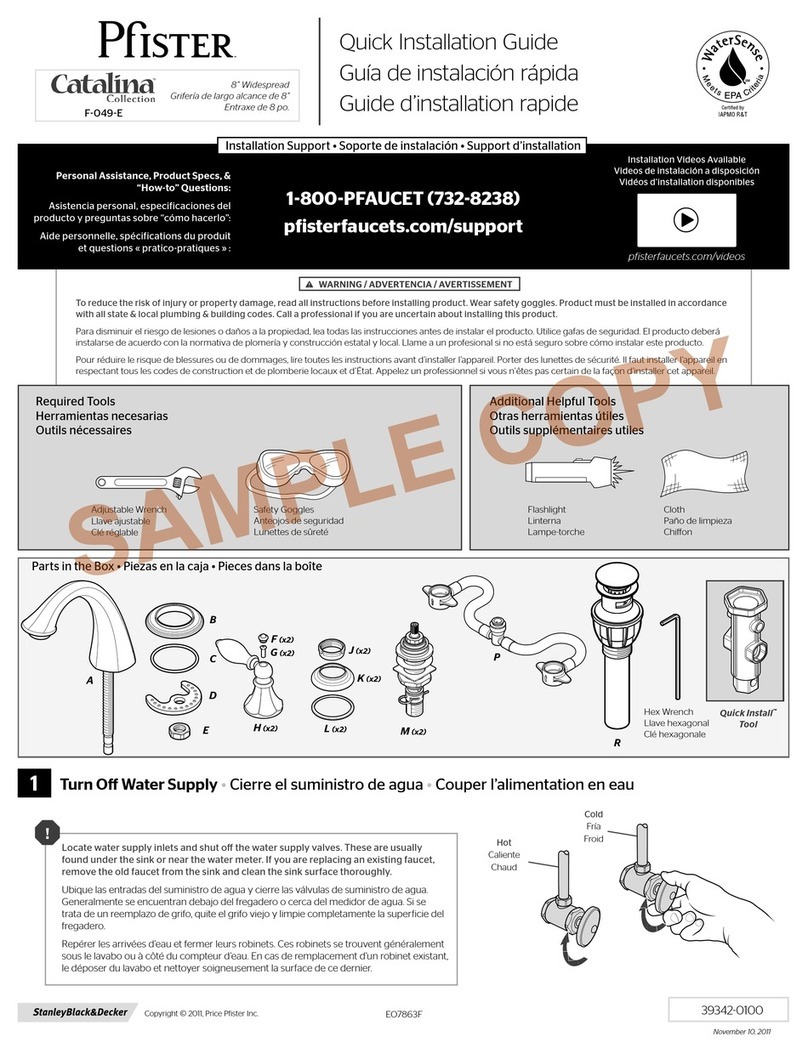
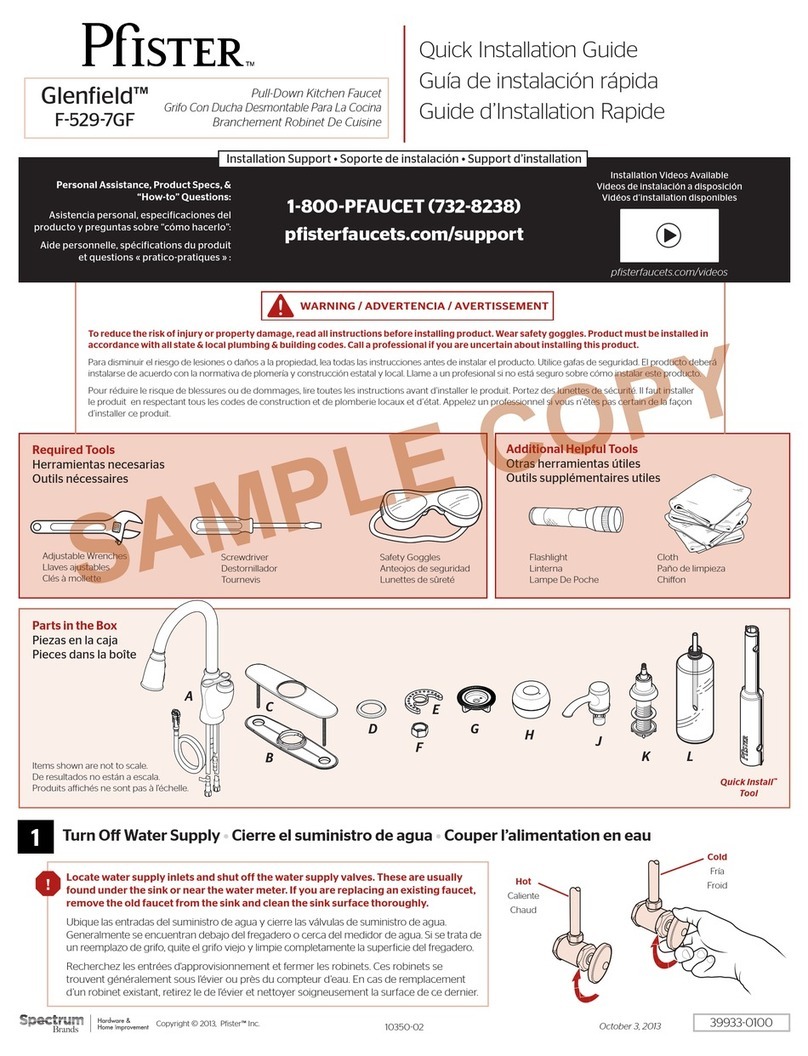
To reduce the risk of injury or property damage, read all instructions before installing product. Wear safety goggles. Product must be installed in accordance
with all state & local plumbing & building codes. Call a professional if you are uncertain about installing this product.
Para disminuir el riesgo de lesiones o daños a la propiedad, lea todas las instrucciones antes de instalar el producto. Utilice gafas de seguridad. El producto deberá
instalarse de acuerdo con la normativa de plomería y construcción estatal y local. Llame a un profesional si no está seguro sobre cómo instalar este producto.
Pour réduire le risque de blessures ou de dommages, lire toutes les instructions avant d’installer l’appareil. Porter des lunettes de sécurité. Il faut installer l’appareil en
respectant tous les codes de construction et de plomberie locaux et d’État. Appelez un professionnel si vous n’êtes pas certain de la façon d’installer cet appareil.
WARNING / ADVERTENCIA / AVERTISSEMENT

Required Tools
Herramientas necesarias
Outils nécessaires
Additional Helpful Tools
Otras herramientas útiles
Outils supplémentaires utiles
Flashlight
Linterna
Lampe-torche
Cloth
Paño de limpieza
Chion
Safety Goggles
Anteojos de seguridad
Lunettes de sûreté
Turn O Water Supply Cierre el suministro de agua 
Locate water supply inlets and shut o the water supply valves. These are usually
found under the sink or near the water meter. If you are replacing an existing faucet,
remove the old faucet from the sink and clean the sink surface thoroughly.
Ubique las entradas del suministro de agua y cierre las válvulas de suministro de agua.
Generalmente se encuentran debajo del fregadero o cerca del medidor de agua. Si se
trata de un reemplazo de grifo, quite el grifo viejo y limpie completamente la supericie del
fregadero.
Repérer les arrivées d’eau et fermer leurs robinets. Ces robinets se trouvent généralement
sous le lavabo ou à côté du compteur d’eau. En cas de remplacement d’un robinet existant,
le déposer du lavabo et nettoyer soigneusement la surface de ce dernier.
1
Quick Install™
Tool
Copyright © 2012, Pister Inc. November 30, 2012
Quick Installation Guide
Guía de instalación rápida
Guide d’installation rapide
8” Widespread
Grifería de largo alcance de 8”
Entraxe de 8 po.
Personal Assistance, Product Specs, &
“How-to” Questions:
Asistencia personal, especiicaciones del

Aide personnelle, spéciications du produit

1800PFAUCET (7328238)
pisterfaucets.com/support
Adjustable Wrenches
Llaves ajustables
Clés à mollette
Phillips Screwdriver
Destornillador de estrella
Tournevis Phillips
Installation Videos Available


pisterfaucets.com/videos

414940100
Hot
Caliente
Chaud
Cold
Fría
Froid
EO8020K
Sonterra™
FWL8SNP
A
E
D
H
C
G (x2)
B (x2)
F (x2)
SAMPLE COPY
2
Prepare & Install Valve Bodies
Prepare e instale los cuerpos de la válvula

2
Hot & Cold
Caliente y fría
Chaud et froid
x2
2C
2B
2D
Red (Hot)
Rojo (caliente)
Rouge (chaud) Blue (Cold)
Azul (fría)
Bleu (froid)
Save for Step 2D.
Reserve para el paso 2D.
Sauf pour l’étape 2D.
Closed
Cerrado
Fermé
Closed
Cerrado
Fermé
Discard
Descarte
Écart
2A
Before inal tightening, be sure that both handles rotate correctly. As shown.
Antes del apriete inal, asegúrese de que ambas manijas giren correctamente. Tal como se muestra.
Avant le serrage inal, soyez sûr que les deux poignées basculent correctement. Comme démontré.
DO NOT use handles to tighten
valve.
No utilice las manijas para apretar la
válvula.
N’utilisez pas les poignées pour
serrer la valve.
Disassemble Valves
Desensamble las válvulas
Démontez les valves
Valve Installation
Instalación de las válvulas
Installation de valves
x4
Phillips Screwdriver
Destornillador de estrella
Tournevis Phillips
Firmly hand tighten.
Firmemente apriete a mano.
Fermement serrer à la main.
B (x2)
B3
B1
B2
B1
B3
B2
B3
B1
B2
F
F (x2)
F
3
Install Handles & Spout
Instale las manijas y el surtidor

3
Quick Install™Tool
Bumps face up.
Topa cara arriba.
Cogne récepteur.
3A 3B
Quick Install ™
Tool
AE
D
E
D
A
4
Install Hose
Instale la manguera

4
No Tools Required for This Step
No se necesitan herramientas para este paso
Aucun outil n’est nécessaire pour cette étape
Hot & Cold
Caliente y fría
Chaud et froid
x2
4A
4B
C
C
IMPORTANT: DO NOT damage
ORings.
 NO dañe las juntas
tóricas.
 NE PAS endommager
les joints toriques.
Check to see if the connection is secure by
pulling down the center connector avoiding
the green cap. If it does not pull o the
receiving tube, connection is secure.
Compruebe para ver si la conexión es segura
tirando abajo del conectador de centro que
evita el casquillo verde. Si no arranca el tubo de
recepción, la conexión es segura.
riiez pour voir si le raccordement est bloqué par
la traction en bas du connecteur central évitant le
chapeau vert. S’il ne retire pas le tube de réception,
le raccordement est bloqué
5
Connect Water Supply Lines
Conecte las tuberías de suministro de agua

5
Water Supply Lines not included. Please consult manufacturer and/or its instructions for the correct method of installation of supply lines &
ittings.
IMPORTANT: Incorrect application of supply lines and ittings may result in the failure or leak of the supply lines and itting.
Las tuberías de suministro de agua no están incluidas. Consulte por favor el fabricante y/o sus instrucciones para el método correcto de
instalación de líneas de suministro y de guarniciones.
 El uso incorrecto de líneas de suministro y de guarniciones puede dar lugar a la falta o al escape de las líneas de suministro y de la
guarnición.
 Veuillez consulter le fabricant et/ou ses instructions pour la méthode correcte d’installation des
canalisations et des garnitures d’alimentation.
 L’application incorrecte des canalisations et des garnitures d’alimentation peut avoir comme conséquence l’échec ou la fuite des
canalisations et de l’ajustage de précision d’alimentation.
5B
Hot
Caliente
Chaud
Cold
Fría
Froid
Water supply line
línea de suministro del
agua
ligne d'approvisionne-
ment en eau
Adjustable Wrenches
Llaves ajustables
Clés à mollette
5A
Hot & Cold
Caliente y fría
Chaud et froid
x2
Firmly push up to engage
and turn clockwise.
Empuje irmemente hasta
enganchan y dan vuelta a la
derecha.
Poussez fermement jusqu’à
s’engagent et tournent à
droite.
H (x2)
G
G
6
6A 6C
6D
6B
6E
Disassemble Pop-Up
Desensamble el cuerpo de drenaje
Démontez le corps de drainage
Save Components.
Reserve los componen-
tes.
Conservez les compo-
sants.
Connect to Drain
Conexión al
desagüe
Branchez au
drainage
Prepare & Install Push & Seal™Drain
Prepare y instale cuerpo de drenaje Push & Seal™
Préparez & installez le corps de drainage Push & Seal™
No Tools Required for This Step
No se necesitan herramientas para este paso
Pas d'outil nécessaire pour cette étape
PUSH TO ACTIVATE
EMPUJE PARA ACTIVAR
POUSSEZ POUR ACTIVER
6
Align logo to sink
Alinee la insignia con el
fregadero
Alignez le logo sur
l'évier
Partially thread
drain body to sink.
Rosque parcialmente
el cuerpo de drenaje
en el fregadero.
Filetez partiellement
le corps de drainage
dans l'évier.
Drain
Desagüe
Drainage
-LOGO-
Firmly hand tighten nut
(H3).
La mano aprieta irmemente
la tuerca (H3).
Fermement la main serrent
l’écrou (H3).
Do not use plumber’s
putty. It may damage
seal.
No utilice la masilla del
fontanero. Puede dañar
el sello.
N’employez pas le mastic
du plombier. Il peut
endommager le joint.
H
H1
H
H2
H3
H2
H3
7
Turn On Water & Conirm Proper Installation


Flush the Faucet
Enjuague el grifo

7
8
Check for leaks above and below the sink.
Revise si hay fugas encima y debajo del fregadero
Assurez-vous qu’il n’y a pas de fuite au dessus ou au dessous
du lavabo
8A 8C
15
sec
Remove Aerator
Retire el aereador
Retirez l'aérateur
Reinstall Aerator
Reinstale el aereador
Réinstallez l'aérateur
Hand Tighten
Apriete con la mano
Serrez manuellement
Allow hot & cold water to run for at least 15 seconds
each.
Deje correr el agua caliente y fría durante al menos 15
segundos cada una.
Laissez couler de l’eau chaude et de l’eau froide pendant au
moins 15 secondes chacune.
7A
8B
Cold
Fría
Froid
Hot
Caliente
Chaud
Open Slowly
Abra lentamente
Ouvrez lentement
For Additional Installation Help:


1800PFAUCET (7328238)
pisterfaucets.com
SAMPLE COPY

Other Pfister Plumbing Product manuals

Pfister Solo LF029-4SL User manual

Pfister

Pfister Solo LF029-4SL User manual

Pfister Pasadena F-529-PDSL User manual

Pfister

Pfister Pasadena F-529-PDSL User manual

Pfister Lita GT-529-ELC Operating and safety instructions

Pfister

Pfister Lita GT-529-ELC Operating and safety instructions

Pfister Courant 8P8-WS2-COS User manual

Pfister

Pfister Courant 8P8-WS2-COS User manual

Pfister Ashfield 49-YW User manual

Pfister

Pfister Ashfield 49-YW User manual

Pfister EAlea GT529-EA User manual

Pfister

Pfister EAlea GT529-EA User manual

Pfister Ashfield RT6 806 Series User manual

Pfister

Pfister Ashfield RT6 806 Series User manual

Pfister Rancho LF-048-RCH User manual

Pfister

Pfister Rancho LF-048-RCH User manual

Pfister KENZO 16 Series User manual

Pfister

Pfister KENZO 16 Series User manual

Pfister Mystique 529 Series User manual

Pfister

Pfister Mystique 529 Series User manual

Pfister Modern R89-040 User manual

Pfister

Pfister Modern R89-040 User manual

Pfister Portland 48 Series User manual

Pfister

Pfister Portland 48 Series User manual

Pfister Hanover 529 Series User manual

Pfister

Pfister Hanover 529 Series User manual

Pfister Lita GT529-EL User manual

Pfister

Pfister Lita GT529-EL User manual

Pfister Marielle LG532 Series User manual
Pfister

Pfister Marielle LG532 Series User manual

Pfister Pfirst Series LJ142 Series User manual

Pfister

Pfister Pfirst Series LJ142 Series User manual

Pfister Avalon LF-49 Series User manual

Pfister

Pfister Avalon LF-49 Series User manual

Pfister 931-132 User manual

Pfister

Pfister 931-132 User manual

Pfister Ashfield G89-XYP User manual

Pfister

Pfister Ashfield G89-XYP User manual

Pfister Pfirst Series User manual

Pfister

Pfister Pfirst Series User manual
Pfister Bacci 8P5-BA User manual

Pfister

Pfister Bacci 8P5-BA User manual

Pfister Avalon LF-49 Series User manual

Pfister

Pfister Avalon LF-49 Series User manual

Pfister Zanna F-529-7ZN3 User manual

Pfister

Pfister Zanna F-529-7ZN3 User manual

Pfister Port Haven GT31-TD User manual

Pfister

Pfister Port Haven GT31-TD User manual

Popular Plumbing Product manuals by other brands

Bradley Express SS-2N/BIR3/STD Installation

Bradley

Bradley Express SS-2N/BIR3/STD Installation

VIGO Olus VG05001 manual

VIGO

VIGO Olus VG05001 manual

Sanela SLU 91NDB Instructions for use

Sanela

Sanela SLU 91NDB Instructions for use

Fortis 8412900 SCALA manual

Fortis

Fortis 8412900 SCALA manual

BELLOSTA aperio 2705/S Installation instruction

BELLOSTA

BELLOSTA aperio 2705/S Installation instruction

Sloan Optima EBF-550 Repair Parts and Maintenance Guide

Sloan

Sloan Optima EBF-550 Repair Parts and Maintenance Guide

GRB mixers intimixer progressive instructions

GRB mixers

GRB mixers intimixer progressive instructions

Sanela SLU 36B Instructions for use

Sanela

Sanela SLU 36B Instructions for use

Grohe Atrio 19 395 quick start guide

Grohe

Grohe Atrio 19 395 quick start guide

Sanela intra SLU 31N Instructions for use

Sanela

Sanela intra SLU 31N Instructions for use

baliv KBS-20.80 manual

baliv

baliv KBS-20.80 manual

B DUTCH RVS KRANEN BD700.000028 installation guide

B DUTCH

B DUTCH RVS KRANEN BD700.000028 installation guide

SUMERAIN S1248CW installation guide

SUMERAIN

SUMERAIN S1248CW installation guide

newform 67603E instructions

newform

newform 67603E instructions

Glacier bay 462EC-03101 Installation and care guide

Glacier bay

Glacier bay 462EC-03101 Installation and care guide

American Standard Florwell 7741.000 Specification sheet

American Standard

American Standard Florwell 7741.000 Specification sheet

Tulikivi kuura 2 installation manual

Tulikivi

Tulikivi kuura 2 installation manual

American Standard FloWise 3073.216 Specification sheet

American Standard

American Standard FloWise 3073.216 Specification sheet

manuals.online logo
manuals.online logoBrands
  • About & Mission
  • Contact us
  • Privacy Policy
  • Terms and Conditions

Copyright 2025 Manuals.Online. All Rights Reserved.