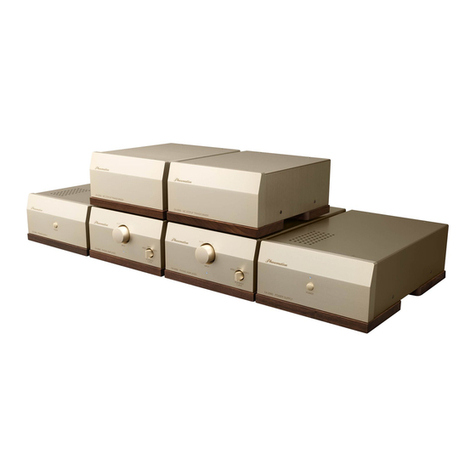
Phasemation EA-1000 User manual

Owner’s Manual
EA-1000
PHONO AMPLIFIER


3
Table of Contents
Safety Instructions...................................................................................................4
Usage Cautions.......................................................................................................5
Care of Equipment...................................................................................................5
Names and Functions..................................................................................6, 7, 8, 9
Connections...........................................................................................................10
Trouble Shooting Guide..........................................................................................11
User Support.......................................................................................................12
Specifications.........................................................................................................12
Thank you for purchasing Phasemation product.
Read your Owner’s Manual thoroughly for proper operation before starting to
use your equipment.
Please keep your Owner’s Manual with caution.

4
Safety Instructions
WARNINGS
CAUTIONS
Before starting
to use
In this owner’s manual and on the product, various pictures are used
to show our customers how to use Phasemation EA-1000 safely and
properly in order to avoid the loss of customer’s assets and to protect
our customers from harm.
Do not use the
equipment being
broken.
Never remodel the
equipment.
Never install the
equipment near
water.
Never put an object
filled with water on
the equipment.
Never put an object
inside the equipment.
Cautions of
Installation
Places which are not
suitable for
installation
Connection
In case of using the equipment in an abnormal
state, such as seeing smoke, having strange
smell and hearing unusual sounds or noise, this
can result in a risk of fire or electric shock. If
such an abnormal state occurs, turn the power
switch off, and endure to disconnect the AC plug
from the outlet. After no smoke is confirmed, ask
dealer for the repair.
Do not disassemble the equipment or do not
remodel it. This can result in a risk of fire.
Do not use the equipment in the bathroom. This
can result in a risk of fire or electric shock.
The equipment is designed for using indoors.
Do not expose the equipment to water. This can
result in a risk of failures, fire and electric shock.
Do not put a vase, flower pot, glass or any
object filled with skin lotion, chemical or water,
or small metal object on the equipment. In case
the liquids are spilled or the small objects fall
inside the equipment, this can result in a risk of
fire or electric shock.
If a foreign object has fallen inside the
equipment, turn the amplifier’s power switch off,
and contact the dealer. To keep using the
equipment can result in a risk of fire and electric
shock.
Do not install the equipment in the humid or
dusty environment. This can result in a risk of
fire or electric shock.
When connecting with other audio equipment or
a television set, read the manual of equipment,
turn the power switch off, and connect according
to the instructions.
Do not install the equipment on the unstable
tables or unstable places. In case the equipment
falls, it can result in a risk of injury of customers.
Pay attention to the wiring of the cord so that a
foot is not caught, or the person can stumble or
the equipment can fall, which is so dangerous.
When moving the equipment, turn the power
switch off, and endure to disconnect the power
plug from the outlet and remove the connecting
cord. The cord can be damaged and this can
result in a risk of fire and electric shock.

5
Installation place
Useable AC power supply voltage and frequencies
Repair
Handling of AC power cable
Usage Cautions
Care of Equipment
Note
In order to use the equipment for a long time, follow the instructions
shown in below:
Do not install this equipment near a heat source such as direct sun light, a stove and so on.
Do not use this equipment at a poorly-ventilated, humid or dusty place.
Do not install this equipment at an unstable place such as slope or vibrating place.
Do not install this equipment near the window where the equipment can be exposed to rain.
Do not install this equipment in high humidity environment.
Avoid using this equipment on equipment generating heat such as an amplifier.
Keep this equipment away from a power supply transformer or motor of other equipment.
AC 100V power supply must be supplied.
The equipment operates normally in the both areas of 50Hz and 60Hz power supply frequen-
cies.
Do not touch the AC power cable with the wet hands.
Do not pull the cable strongly or do not bend the cable. The cable can be damaged and can
result in a risk of fire and electric shock.
Use the AC power cable of the accessories.
If the equipment is covered with dust or dirt, clean it with a soft cloth.
If the equipment is covered with heavy dust, put a very thin mild detergent on a soft cloth.
Wring the cloth and wipe off the dust and dirt. Then, clean with a dry soft cloth.
Never use chemical agents such as thinner, naphtha and alcohol when cleaning it.
If any of them is attached to the equipment, the silk printing can be flaked or the surface can
lose metal luster.
In the case of the equipment failure, consult the dealer.
Avoid covering the equipment with the cloth or installing it in enclosed space because
radiation and air convection from the chassis surface can be hindered.
To prevent external sound pressure, grit and dust from entering the equipment,
inspiratory/exhaust ports to radiate the heat are not arranged against the equipment
consciously. Radiating the heat from the equipment is realized by cooling with air convec-
tion in the chassis and with radiation and air convection from the chassis having high
thermal conductivity.

6
Names and Functions
(1) POWER switch
The power supply can be turned on or off by pressing the POWER switch.
(2) POWER indicator
The POWER indicator lights up blue when the power supply is supplied.
(3) DC OUT
The DC power supply is supplied from two connectors to the L and R Phono Equalizer
units through two DC power junction cables of accessories. L and R are not assigned
to two connectors.
(4) AC IN
Connect the AC power cable of accessories to the AC INLET of the Power Supply Unit,
and plug it in an outlet.
(5) PLAYBACK CURVE switch
The playback equalizer curve can be selected with this switch.
The respective Phono Equalizer Unit has four built-in playback equalizer curves.
You can switch it to the selection matching the type of your record.
• STEREO: RIAA curve for playing a stereo LP record
• MONO 1: Curve 1 for playing a Monaural LP record
(For DECCA label and so on: FFRR)
• MONO 2: Curve 2 for playing a Monaural LP record
(For Columbia label and so on)
• 78S: Curve for playing a 78 rpm SP record
Power Supply Unit
Front Panel (Power Supply) Rear Panel (Power Supply)
Phono Equalizer Units
Front Panel (Phono Equalizer)
HIGH MMMONO 1
MONO 2
MC 278S
STEREO
PLAYBACK CURVE MC IMPEDANCE
LOW MC 1
INPUT
EA-1000 PHONO AMPLIFIER
* The L and R Phono Equalizer Units have
the same front panel.
POWER DC OUT AC IN FUSE 3A
PS
E
KYODO DENSHI ENG CO.,LTD.
MADE IN JAPAN
MODEL PS-1000
100V 50/60Hz 40W
(1) (2) (3)
(5) (6) (7) (8)
(4)

7
(6) POWER indicator
The POWER indicator lights up blue when the power supply is supplied.
(7) MC IMPEDANCE switch
You can switch it to the selection matching the impedance of MC cartridge.
• Low: MC cartridge impedance: 100 ohms or less
• High: MC cartridge impedance: 100 ohms or more
(8) INPUT switch
You can switch it to the desired input terminal selection.
• MC1: Input terminal for MC cartridge: RCA (Unbalance)/XLR(Balance), selectable
• MC2: Input terminal for MC cartridge: Only RCA (Unbalance)
• MM: Input terminal for MM cartridge: RCA (Unbalance)
Playback Equalizer Curve Settings
Curve Turnover/Low limit Roll off
STEREO 500Hz/50Hz(+20dB) 75μs-2120Hz(–13.75dB at 10kHz)
MONO 1 500Hz/125Hz(+12 to12.5dB) 50μs-3000Hz(–10.5dB at 10kHz)
MONO 2 500Hz/100Hz(+14dB) 100μs-1590Hz(–16dB at 10kHz)
78S 500Hz/50Hz(+20dB) –6dB at 10kHz
Caution
When operating the respective switches, a noise is heard; so, before switching them,
turn the power of this equipment to OFF or decrease volume of the connected
amplifier.
STEREO
MONO 1
MONO 2
78S
10000010000100010010
dB
Frequency
Playback Equalizer Curve
25.00
20.00
15.00
10.00
5.00
0.00
–5.00
–10.00
–15.00
–20.00
–25.00

8
(9) MC INPUT 1, 2 (RCA) terminals
These are the input terminals for MC cartridge (RCA).
(10) MC1 RCA/XLR switch
You can select either RCA (Unbalance) or XLR (Balance) matching the terminal of
phono cable connected to MC1.
(11) MC1 INPUT (XLR) terminal
When the phono cable to be connected is the balance type (XLR), connect them to this
input terminal.
(12) MM INPUT terminal
This is the input terminals for MM cartridge (RCA).
(13) OUTPUT (RCA) terminal
This is the output terminal of unbalance equalizer output (RCA); so, you can connect a
cord to an RCA input terminal specified to the line level (150 to 250 mV) such as an
AUX terminal of pre-amplifier.
(14) OUTPUT (XLR) terminal
This is the output terminal of unbalance equalizer output (XLR); so, you can connect a
cord to an XLR input terminal specified to the line level (150 to 250 mV) such as an
AUX terminal of pre-amplifier.
Rear Panel (Left Phono Equalizer) Rear Panel (Right Phono Equalizer)
GND
XLRRCA
MC INPUT OUTPUT
DC IN
1
MM INPUT
2
3
1 2
NEUTRIK
PUSH
3
21MADE IN JAPAN
MODEL EA-1000
KYODO DENSHI ENG CO.,LTD.
MADE IN JAPAN
MODEL EA-1000
KYODO DENSHI ENG CO.,LTD.
DC IN
OUTPUT MC INPUT
1
XLR RCA
GND
2
MM INPUT
3
NEUTRIK
PUSH
3
2
1
21
Do not connect between this terminal and a phono input terminal of pre-amplifier
having phono amplifier circuit, or the audio tone is distorted by the large input level.
Caution
If the MC1 RCA/XLR switch is switched to XLR when connecting a cable to the MC1
RCA terminal, a hum noise and so on can be heard in some audio system.
Caution
(12)(9) (15) (14)
(13)(11)(10)
(16)(12) (9)(15)(14)
(13) (11) (10)
(16)

9
(15) GND terminal
Connect an earth cable from analogue disc player to one GND terminal of two GNDs of
L and R.
(16) DC IN connector
Connect the DC power junction cable of accessories between this DIN Connector and
the Power equipment.
Not to connect between L and R GNDs is recommended; however, define whether you
connect between them so as to match your audio system, or not.
Note
The XLR terminal is adopted as an unbalance terminal of OUTPUT for this product.
Pin assignment is as follows: pin-1: GND, pin-2: HOT and pin-3: GND.
Pin assignment of some power amplifier may be assigned as follows: pin-1: GND,
pin-2: COLD and pin-3: HOT. In this condition, the output signal is reproduced in the
opposite phase of the input signal.
To play it in the proper phase, exchange wirings of pin-2 and pin-3 at one end of
balance cable before connecting the XLR terminal.
Note
GND
HOT
GND

10
Connections
AUX INPUT
RIGHT LEFT
Long slot
Side assigning
the circle
Circle
A circle is assigned on the one side of the plug of
AC power cable so that better quality sound is
reproduced by matching the power supply polarity
with other equipment.
This polarity may be different because of house
wiring for outlet or because of power supply
condition; however, generally the side assigning
the circle should be inserted to the long slot of the
outlet.
Plugging the plug of AC power cable in an outlet
GND
XLRRCA
MC INPUT OUTPUT
DC IN
1
MM INPUT
2
3
1 2
NEUTRIK
PUSH
3
21MADE IN JAPAN
MODEL EA-1000
KYODO DENSHI ENG CO.,LTD.
MADE IN JAPAN
MODEL EA-1000
KYODO DENSHI ENG CO.,LTD.
DC IN
OUTPUT MC INPUT
1
XLR RCA
GND
2
MM INPUT
3
NEUTRIK
PUSH
3
2
1
21
DC OUT AC IN FUSE 3A
PS
E
KYODO DENSHI ENG CO.,LTD.
MADE IN JAPAN
MODEL PS-1000
100V 50/60Hz 40W
AC Power Cable of Accessories
Pre-amplifier
Analogue Disc Player
Earth Cable

11
Trouble Shooting Guide
Trouble Causes Measures
The power is not
supplied.
In case the equipment does not operate properly, check out the followings.
If it does not operate properly even after checking the advised points, endure to
disconnect the AC plug from the outlet and then contact the dealer.
The sound is not
heard.
Hum noise is
heard.
Sound is not
heard immediately
after turning the
power on.
Sound is
distorted.
When operating
the switches, the
click noise is
heard.
The plug of AC power cable is
not plugged in completely.
The audio wires are not plugged
in completely.
The OUTPUT terminals of this
equipment are connected to the
input terminals for a phono
amplifier on the panel of the
pre-amplifier.
An MM cartridge is used, but the
INPUT switch is set to MC1 or
MC2.
Some click tone is generated
because of switch principle.
The vacuum tubes are worked in
the equipment.
Sound is not outputted until the
circuits become stable operation.
The audio wires are not plugged
in completely.
The earth cable from the
analogue disc player is not
connected.
A power supply transformer or
motor in other equipment is
installed near this equipment.
Insert the plug of AC cable into an
outlet firmly.
Firmly insert the outlet of AC
power cable into the AC inlet of
Power equipment.
Insert the audio wires completely.
Set the INPUT switch to MM.
Before operating the switches, turn
the power of this equipment to
OFF or decrease volume of the
connected amplifier.
After turning the power supply to
ON, please wait one minute.
Insert the audio wires completely.
Connect the earth cable com-
pletely.
Place this equipment apart from
the power supply transformer or
motor of other equipment.
Connect them to line level input
terminals (such as AUX) of
pre-amplifier.
(1)
(2)

12
Specifications
User Support
As for the unclear matters with regard to the after service, please contact the dealer.
The appearance and specifications of this equipment are subject to change without notice in order
to improve it.
Accessories: AC power cable (x1), DC power junction cable (x2)
Product
Cartridge type
Input sensitivity
Input impedance
Gain
Equivalent input noise
Maximum input voltage
Rated output voltage
Deviation from RIAA curve
Output impedance
Channel separation
Power consumption
Dimensions (mm)
Weight
Three Chassis MM/MC Phono Amplifier with CR Equlizer
200 mV (1 kHz)
±0.3 dB (20Hz to 20kHz)
750 ohms
100 dB or more (for MM/MC)
40W (100VAC, 50 to 60 Hz)
Phono Equalizer Units: W210 x H103 x D347
Power Supply Unit: W210 × H103 × D333
Phono Equalizer Units: 4.5 kg (x2)
Power Supply Unit: 7 kg
MM
2.3 mV
47k ohms or less
39 dB
–115 dB
250 mV
MC: High
0.22 mV
10 ohms or more
59 dB
–135 dB
25 mV
MC: Low
0.09 mV
10 ohms or less
67 dB
–143 dB
11 mV


Kyodo Denshi Engineering Co., Ltd.
Ikebe-cho 4900-1 Tsuzuki-ku Yokohama-shi Kanagawa 224-0053 Japan
TEL 045-934-5234
FAX 045-934-7576
E-mail [email protected]
URL http://www.phasemation.com
is the original audio brand of Kyodo Denshi Engineering Co., Ltd.
Table of contents
Other Phasemation Amplifier manuals

Phasemation
Phasemation EA-300 User manual

Phasemation
Phasemation MA-1000 User manual

Phasemation
Phasemation EPA-007 Series User manual

Phasemation
Phasemation EA-500 User manual

Phasemation
Phasemation EA-350 User manual

Phasemation
Phasemation CM-1000 CONTROL MEISTER User manual

Phasemation
Phasemation EA-2000 User manual

Phasemation
Phasemation CA-1000 User manual