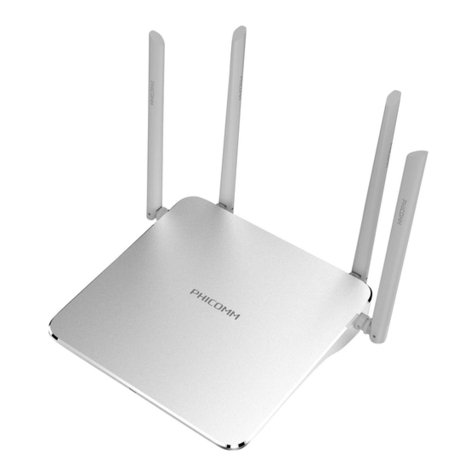
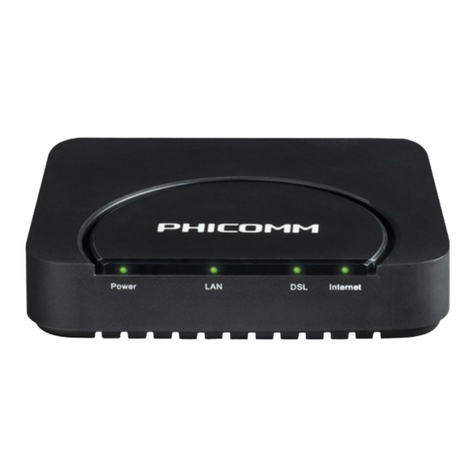
PHICOMM FD-224 User manual

ADSL2/2+ Modem Router
FD-224
User Manual
User Manual / V2.0

2
Copyright Statement
PHICOMM is the registered trademark of Shanghai Feixun Communication Co., Ltd. Other
trademark or trade name mentioned herein are the trademark or registered trademark of the
company. Copyright of the whole product as integration, including its accessories and software,
belongs to Shanghai Feixun Communication Co., Ltd. Without the permission of Shanghai
Feixun Communication Co., Ltd., individual or party is not allowed to copy, plagiarize, imitate or
translate it into other languages.
All the photos and product specifications mentioned in this manual are for references only, as
the upgrading of software and hardware, there will be changes. And if there are changes,
PHICOMM is not responsible for informing in advance. If you want to know more information
about our products, please visit our website at www.phicomm.com.

i
Table of Contents
ADSL2/2+ Modem Router
www.phicomm.com
CONTENTS
Chapter 1: Introduction
..............................................1
Product Overview...............................................................................................1
Main Features.......................................................................................................1
Chapter 2: Hardware Installation
...................................2
Front Panel............................................................................................................2
Rear Panel ..............................................................................................................3
Physical Connection ..........................................................................................4
Chapter 3: Quick Installation
........................................6
Configure Your PC..............................................................................................6
Install Your Modem Router.......................................................................... 14
Chapter 4: Software Configuration
............................... 18
Quick Start.......................................................................................................... 18
Interface Setup ................................................................................................. 18
Internet.................................................................................................................................... 19
LAN............................................................................................................................................ 25
Advanced Setup............................................................................................... 26
Firewall .................................................................................................................................... 27
Routing.................................................................................................................................... 27
NAT............................................................................................................................................ 28

ii
Table of Contents
ADSL2/2+ Modem Router
www.phicomm.com
QoS............................................................................................................................................ 31
VLAN......................................................................................................................................... 33
ADSL ......................................................................................................................................... 35
Access Management ...................................................................................... 35
ACL............................................................................................................................................ 36
Filter.......................................................................................................................................... 37
SNMP........................................................................................................................................ 38
UPnP ......................................................................................................................................... 38
DDNS........................................................................................................................................ 39
CWMP....................................................................................................................................... 40
Maintenance...................................................................................................... 40
Administration...................................................................................................................... 41
Time Zone............................................................................................................................... 41
Firmware ................................................................................................................................. 43
SysRestart ............................................................................................................................... 44
Diagnostics............................................................................................................................. 45
Status.................................................................................................................... 45
Device Info ............................................................................................................................. 46
System Log............................................................................................................................. 47
Statistics .................................................................................................................................. 47
Help....................................................................................................................... 48

iii
Table of Contents
ADSL2/2+ Modem Router
www.phicomm.com
Chapter 5: Specification
............................................ 49
Appendix A: Troubleshooting
..................................... 50
Appendix B: Certification
.......................................... 52
FCC Statement.................................................................................................. 52
CE Mark Warning ............................................................................................. 53
Appendix C: Glossary
................................................ 54

ADSL2/2+ Modem Router
www.phicomm.com
1
Chapter 1: Introduction
Product Overview
Thank you for choosing PHICOMM FD-224 ADSL2/2+ Modem Router. This product is designed to
provide a simple and cost-effective ADSL internet connection for a private Ethernet network. It is
connected to network devices via standard Ethernet ports. The ADSL connection is made using
ordinary telephone line with standard connectors. Multiple workstations can be networked to
internet using a single Digital Subscriber Line (DSL) and single global IP address.
Quick Start of the Web based Setup Wizard is supplied and friendly help messages are provided
for the configuration. Network and Router management is done through the Web based Setup
Wizard which can be accessed through local Ethernet using any web browser.
ADSL FD-224 supports full-rate ADSL2/2+ connectivity conforming to the ITU and ANSI
specifications. In addition to the basic DMT physical layer functions, the ADSL2/2+ PHY support
dual latency ADSL2/2+ framing (fast and interleaved) and the I.432 ATM Physical Layer.
Main Features
Provides 1 RJ11 DSL Port, 4 RJ45 LAN ports
Up to 24Mbps downstream speed
Reach of 6.5km from your ISP DSLAM
Supports Build-in PPPoE
DHCP Server/Relay/Client, UPnP, DDNS
NAT, Static routing ,and DMZ host
QoS prioritization based on IP type of service
Easy Setup Assistant provides quick & hassle free installation
Supports web management
Supports firmware upgrade
Supports flow statistics
Built-in firewall supporting IP/Mac address filtering
Built-in DHCP server

ADSL2/2+ Modem Router
www.phicomm.com
2
Chapter 2: Hardware Installation
Front Panel
The front panel of the ADSL2/2+ Modem Router includes one power indicator and three
function indicators, as explained in table below:
LED Status Description
Power
On Power is on
Off Power is off
LAN(1-4)
On There is a successful connection on the Ethernet port
Off There is no connection on the Ethernet port or the connection is abnormal
Blinking Data is being transferred over the Ethernet port
DSL
On The Modem Router is synchronized
Blinking The Modem Router is synchronizing
Internet
Green A successful PPP connection has been built
Off The DSL port is linked down or the Modem Router works in Bridge mode
Red The PPP connection failed to be established

ADSL2/2+ Modem Router
www.phicomm.com
3
Chapter 2: Hardware Installation
Rear Panel
The rear panel of the ADSL2/2+ Modem Router includes 1 DSL port, 4 LAN ports, 1 ON/OFF
button, 1 PWR connector, 1 RST button, as explained in table below:
Interface/Button Function
DSL Connect to the Modem port of splitter or directly to the wall jack
LAN(1-4) Connect to your network devices
ON/OFF Turn on/off the power of ADSL2/2+ Modem Router
PWR Connect with a power adapter
RST Restore to factory default settings by pressing and holding for 5 seconds

ADSL2/2+ Modem Router
www.phicomm.com
4
Chapter 2: Hardware Installation
Physical Connection
Before installing the device, please make sure your broadband service provided by your ISP is
available. If there is any problem, please contact your ISP. You need to connect the device to the
phone jack, the power outlet, and your computer or network. Before cable connection, turn off
the power supply and keep your hands dry. You can follow the steps below to install it.
Step 1: Connect the ADSL Line.
Method one: Plug one end of the twisted-pair ADSL line into the DSL port on the rear panel of
FD-224, and insert the other end into the wall socket.
Method two: You can use a separate splitter. External splitter can divide data and voice, and then
you can access the Internet and make calls at the same time. The external splitter has three
ports:
• LINE: Connect to the wall jack.
• PHONE: Connect to the phone sets.
• MODEM: Connect to the DSL port of FD-224. Plug one end of the twisted-pair ADSL line into
the DSL port on the rear panel of FD-224. Connect the other end to the Modem port of the
external splitter.
Step 2: Connect the Ethernet cable. Attach one end of a network cable to your computer’s
Ethernet port or a regular hub/switch port, and the other end to the LAN port on FD-224.
Step 3: Attach the power adapter. Connect the AC power adapter to the PWR connector on the
rear of the device and plug in the adapter to a wall outlet or power extension.
Step 4: Turn on FD-224 and power on the computers and LAN devices.
Note:
If you currently use a modem, disconnect it, the Modem Router will replace your old
modem.
After the physical connection please check whether the LEDs of the Modem Router
display normally as the diagram below describes.

ADSL2/2+ Modem Router
www.phicomm.com
5
Chapter 2: Hardware Installation

ADSL2/2+ Modem Router
www.phicomm.com
6
Chapter 3: Quick Installation
Configure Your PC
After you directly connect your PC to FD-224 or to a Hub/Switch which has connected to this
Modem Router, we suggest you set your computer to obtain the IP address automatically.
1) Click Start > Control Panel.
For Windows XP/2000

ADSL2/2+ Modem Router
www.phicomm.com
7
Chapter 3: Quick Installation
2) Select and double click Network Connections.
3) Right click Local Area Connection and then select Properties.

ADSL2/2+ Modem Router
www.phicomm.com
8
Chapter 3: Quick Installation
4) Select Internet Protocol (TCP/IP) and click Properties.
5) Select Obtain an IP address automatically and Obtain DNS server address automatically.
Then click OK.

ADSL2/2+ Modem Router
www.phicomm.com
9
Chapter 3: Quick Installation
6) Run the Ping command in the command prompt to verify the network connection. Click
Start menu on your desktop, select Run tab, type cmd in the field.

ADSL2/2+ Modem Router
www.phicomm.com
10
Chapter 3: Quick Installation
7) Then type ping 192.168.1.1, press Enter.
If the screen looks like the following, you have succeeded
For Windows Vista/7:
1) Click Start>Control Panel.

ADSL2/2+ Modem Router
www.phicomm.com
11
Chapter 3: Quick Installation
2) Click Network and Internet.
3) Click Network and Sharing Center.

ADSL2/2+ Modem Router
www.phicomm.com
12
Chapter 3: Quick Installation
4) Go to Change Adapter Settings (win7)/Manage Network Connections (Vista).
5) Right click Local Area Connection, choose Properties.

ADSL2/2+ Modem Router
www.phicomm.com
13
Chapter 3: Quick Installation
6) Select Internet Protocol Version 4 (TCP/IPv4) and click Properties.
7) Select Obtain an IP address automatically and Obtain DNS server address automatically.
Then click OK.
Note: After your computer is configured successfully, go to the next section to configure the
Modem Router via web. Otherwise, refer to the question 1 in Troubleshooting section to reset
the modem.

ADSL2/2+ Modem Router
www.phicomm.com
14
Chapter 3: Quick Installation
Install Your Modem Router
To configure the device, you can either run the Resource CD or the Web based Setup Wizard. For
first-time installation we recommend running the Resource CD, follow the step-by-step
instructions to finish the installation. After the initial configuration is done, you can login to the
Web based Setup Wizard to configure do some additional settings. Here we introduce how to
set it up via Web based Setup Wizard.
Step 1: Open your web browser, in the address bar, type in 192.168.1.1
Step 2: You are prompt to enter the Username/Password (preset as admin/admin) which you
can found on the label at the bottom of your router, and then click OK.
Step 3: Go to Quick Start tab, and then click RUN WIZARD.

ADSL2/2+ Modem Router
www.phicomm.com
15
Chapter 3: Quick Installation
Step 4: Click NEXT.
Step 5: If you want to change the login password, put in the new password in this page.
Otherwise just leave it blank, and then click NEXT.
Step 6: Choose your time zone, and then click NEXT.
Table of contents
Other PHICOMM Network Router manuals
Popular Network Router manuals by other brands

ZyXEL Communications
ZyXEL Communications Prestige P660RU-T1 Brochure & specs

Cisco
Cisco WRT310N user guide

Renkus-Heinz
Renkus-Heinz X310 TSC Operation manual

red lion
red lion EL228 quick start guide

Enterasys
Enterasys X-Pedition XSR-1805 datasheet

ZyXEL Communications
ZyXEL Communications Prestige 650HW Read me first