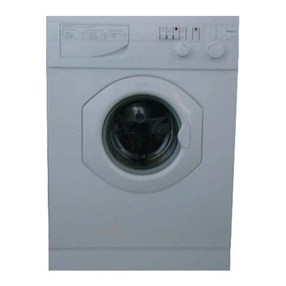
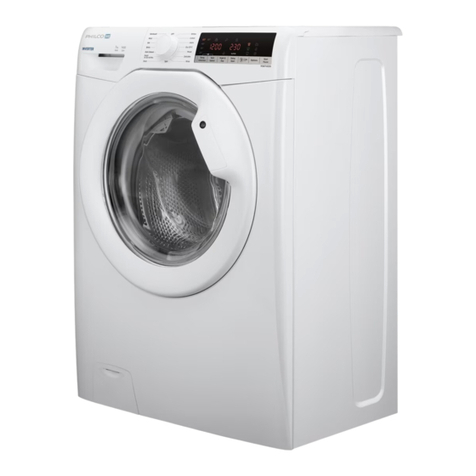
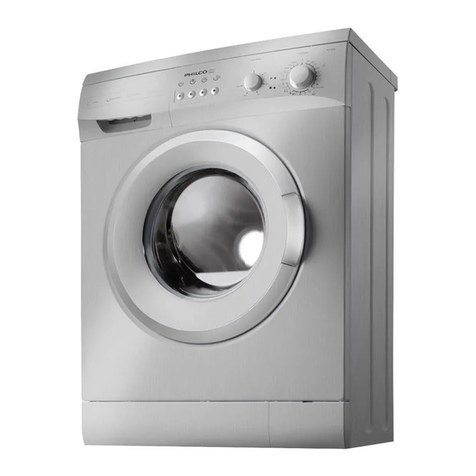
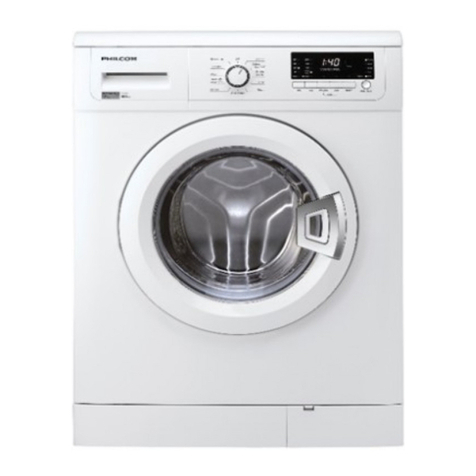
Philco WMB 1253TX Manual

WW
WWMM
MMBB
BB
11
1122
2255
5533
33TT
TTXX
XX
dd
ddii
iirr
rree
eecc
cctt
ttii
iioo
oonn
nnss
ss
ff
ffoo
oorr
rr
uu
uuss
ssee
ee
WASHINGMACHINE
¶§YNTHPIO
OO
OO¢¢
¢¢HH
HH°°
°°II
IIEE
EE™™
™™
XX
XXPP
PPHH
HH™™
™™EE
EEøø
øø™™
™™

dd
ddii
iirr
rree
eecc
cctt
ttii
iioo
oonn
nnss
ss
ff
ffoo
oorr
rr
uu
uuss
ssee
ee
22
22
This machine complies with
following norms
82/499/CEE (radio interference)
73/23/CEE
89/336/CEE (electromagnetic compatible)
IMPORTANT
This machine is equipped with an electronic Auto
Balance Control device (ABC) that allows high
speed spin only with well distributed loads.
An unbalanced load would in fact damage the ma-
chine seriously.
Before the spin cycle starts, the ABC system makes
the drum turn a few times clockwise and anti-clockwi-
se to distribute the laundry within the drum uniformly.
It may happen that these rotations are not enough to
distribute the weight inside the drum (bath-robes or
sheets combined with small garments may form the
characteristic “ball” enveloping the smaller garments
inside).
Under these circumstances the following may take
place:
– the ABC system “accepts” the unbalance, but re-
duces the spin speed. In the case, the garments
will be damper than usual.
–the ABC system considers the unbalance above
the acceptability threshold and does not allow
spinning. In this case, take the garments out of
the machine, unravel them, put them back into the
machine and turn the programme knob to a spin
cycle.
In both cases the machine is not faulty, on the con-
trary it has one of the most advanced devices pro-
tecting it against breakage, vibrations, sliding on the
floor and other serious damages.

cc
ccoo
oonn
nntt
ttee
eenn
nntt
ttss
ss
33
33
IMPORTANT WARNINGS: please read before proceeding! page 44
44
INSTALLATION page 55
55
•how to install the washing machine
•how to remove the transit brackets
•how to level the washing machine
WATER CONNECTIONS page 66
66
•how to connect the water pipe
•how to connect the water supply pipe
ELECTRICAL CONNECTIONS page 77
77
•warnings
•earth plug
THE WASHING MACHINE CONTROLS page 88
88
•how to switch the washing machine on and off
•the control panel
HOW TO LOAD THE WASHING MACHINE page 11
1100
00
•how to load the laundry
•the laundry weight
DETERGENTS AND SOFTENERS page 11
1111
11
•the detergent dispenser
•how to choose and to dose the detergent
•how to add softeners
THE WASHING PROGRAMMES page 11
1122
22
•programmes chart
•the international textile care labelling codes
•energy -saving programmes
•useful suggestions
PRACTICAL GUIDE: HOW TO USE THE WASHING MACHINE page 11
1155
55
•washing
•wool washing
•rinses and spin
•spin only
CARE AND CLEANING OF THE WASHING MACHINE page 11
1166
66
•how to clean the washing machine
•how to clean the waste filter
•how to clean to water load filters
•how to clean the detergent dispenser
•indications for rooms exposed to frost
What to do if… page 11
1188
88
Recommendations page 11
1199
99

!
!
ii
iimm
mmpp
ppoo
oorr
rrtt
ttaa
aann
nntt
tt
ww
wwaa
aarr
rrnn
nnii
iinn
nngg
ggss
ss
44
44
Attention! In order to reduce the risk of damage to
persons or to the machine, please follow these
instructions carefully:
1. Read carefully the instructions before using the machine.
2. Make sure that the transit brackets and bolts have been
removed before starting the machine. Serious damage can
occur in case the brackets are not removed (see instruc-
tions on page 5).
3. Only wash in the machine fabrics carrying on the care la-
bel MACHINE WASHABLE (see chart on page 13).
4. Do not wash in the machine fabrics previously treated with
petrol, solvents or any other flammable substances that
could cause fumes, which may burn and explode.
5. Do not overload the machine. See chart on page 12 for
load suggestions.
6. Make sure that the pockets of the garments to be washed
are empty. Remember to fasten the zipper.
7. Do not allow children to play near the machine. An adult
should be present on that occasion.
8. Do not install the machine in the open.
9. Do not repair the machine unless the intervention is spe-
cified in this guide.
10.An authorised Technical Assistance Centre should carry
out maintenance.
11.Always unplug the machine and turn off the water supply
after each washing cycle.
12.Do not touch the machine with wet or moist hands and
feet.
13.If the floor is covered with moquette, ensure that this does
not obstruct the opening at the base of the machine. This
would reduce or stop the airflow that is needed for cooling
your machine.
14.Clean the filters periodically.
15.Make sure that the plug can be easily reached once the
machine is installed and ready for normal use.
In order to obtain better
results from your wash-
ing machine, we recom-
mend reading carefully
the instructions that are
contained in this guide.
Before installing the
machine, we suggest to
follow carefully the un-
packing instructions.
Should you need fur-
ther information, please
call the nearest Assis-
tance Centre.

ii
iinn
nnss
sstt
ttaa
aall
llll
llaa
aatt
ttii
iioo
oonn
nn
55
55
A B
C
D
• Howtoremovethetransitbrackets
Remove back panel screws and lift panel clear
(Fig. A).
ATTENTION: at this moment only, and not be-
fore, remove the transit brackets unscrewing
from inside and from outside the bolts (Fig. B).
(Please keep the transit brackets and the screws
for any future transportation or repositioning of the
washing machine; above-mentioned operations
will have to be carried out in reverse order).
Re-assemble back panel with the proper fixing screws.
Close the holes on the cabinet with the plugs (supplied
in the accessories bag) (Fig. C)
•Howtoinstallthewashingmachine
Install the washing machine near to the washbasin or to
the bathtub or in a separate room used as a laundry
room.
The floor must be horizontal and levelled.
Leave at least 5 cm free on each side of the washing
machine.
•Howtolevelthewashingmachine
After choosing the place where the machine will be def-
initely located, the machine should be levelled to pre-
vent vibration.
To do this, you just need to adjust the height of the feet
by loosening the lock nuts. Once the machine has been
perfectly levelled, be sure to tighten the feet lock nuts
(Fig. D).

ww
wwaa
aatt
ttee
eerr
rr
cc
ccoo
oonn
nnnn
nnee
eecc
cctt
ttii
iioo
oonn
nn
66
66
•Howtoconnectthewastepipe
Care must be taken not to bend or obstruct the pipe in
any way. The water outlet of this pipe must be fitted at
least 60 cm. from the floor.
C
•Howtoconnectthewatersupplypipe
The washing machine has been designed so that it can be
connected both to the hot and cold water supplies (energy
saving).
If you wish to connect it to the cold water supply only, the spe-
cial coupling pipe "F" which is supplied with the machine ac-
cessories must be used. Follow directions in Fig. A.
Attention! When fitting the coupling pipe "F" remember to in-
sert the sealing gaskets found in the machine accessories.
If, on the other hand, you wish to connect the machine to the
hot water supply, you will need a second input pipe for the
hot water which must be connected to the red solenoid valve
(Fig. B). This may be obtained from your retailer..
The water pressure must be:
Min. 50000 Pa (0,5 bar)
Max 1000000 Pa (10 bar).
A
B

!
!
ee
eell
llee
eecc
cctt
ttrr
rrtt
ttii
iicc
ccaa
aall
ll
cc
ccoo
oonn
nnnn
nnee
eecc
cctt
ttii
iioo
oonn
nn
77
77
WARNINGS: the warranty will not be valid in case of any modifi-
cation to the cable coupling supplied by the factory or any irregu-
lar electrical connection, any electrical, mechanical or hydraulic
modification to the machine: under these circumstances the facto-
ry and the dealer will be raised from any responsibility.
•Electricalinput230V~ 50Hz
Fuse: see information on label
Cable 1,5 m.
We suggest to ask qualified personnel to install the
washing machine; installation will have to be done in
compliance with EEC norms 11 11 NR. 47 (norms for
electrical installation for buildings).
The counter, the protection valves, the supply line and
the socket must be suitable to support the maximum
load of the washing machine, that is shown on the iden-
tification plate on the back of the machine.
Before inserting the plug in the socket, make sure that
the tension and frequency values shown on the identi-
fication plate correspond to the ones of the electrical in-
stallation.
Please also check that the socket connects properly
with the plug; do not use potential dividers or adapters
to connect the plug to the socket. In case the socket is
not suitable to the plug, substitute the socket with a suit-
able homologated one.
•Earthplug
The electric installation must
be earthed in compliance with
the country norms

tt
tthh
hhee
ee
ww
wwaa
aass
sshh
hhii
iinn
nngg
gg
mm
mmaa
aacc
cchh
hhii
iinn
nnee
ee
cc
ccoo
oonn
nntt
ttrr
rroo
ooll
llss
ss
88
88
ON/OFF button
Press this button to start the selected washing programme.
When the button is pressed, the red light below the but-
ton switches on.
•Howto switchthewashingmachineonandoff
Rinse hold button
With delicate washing cycles 9 - 10 - 11 - 12,
the washing machine will stop after having
filled with water of the last rinse. To complete
the programme, just turn the programme knob
once.
If you want delicate washing cycles without any
stop, press this button.
Extra level button
Press this button to increase amount of water
for rinsing. This is particularly useful in the
presence of hard water.
Do not press this button, however, if you wish
the machine to perform economy rinses.
Wash 90°C button
By pressing this button, washing programmes
1 and 2 will be done at 90°C. We suggest to
use this programme only with particularly dirty
laundry.
Thecontrolpanel
Door button and light
To open, press the button when the green light above it is
on, or when the machine is disconnected.

tt
tthh
hhee
ee
ww
wwaa
aass
sshh
hhii
iinn
nngg
gg
mm
mmaa
aacc
cchh
hhii
iinn
nnee
ee
cc
ccoo
oonn
nntt
ttrr
rroo
ooll
llss
ss
99
99
Programme knob
This knob must always be turned clockwise and always when the ON/OFF
button is in the OFF position.
The programme knob is divided in three sections:
Cotton 1 max pre-wash + long wash
and *2 40°- 60°long wash - economy wash
linen 330°- 60°medium wash
430°- 40°short wash
5 rinses
6 softener
7 long spin
Special 830°- 60°pre-wash + long delicate wash
synthetic *9 40°- 60°long delicate wash
delicate 10 30°- 50°medium delicate wash
fabrics 11 30°- 40°short delicate wash
12 delicate rinses
13 delicate spin
Wool 14 30°- 40°very delicate short wash
*Wash programmes in accordance with norms IEC 456 at 60°C (5.5 kg)
Temperature knob
This knob is used to choose the washing temperature for each washing pro-
gramme.
Temperatures can be selected in the following way:
cotton fabrics from 60°C to max
economic cycles from 40°to 60°C
delicat fabrics from 30°to 60°C
If you wish to make a cold wash, turn the knob on position ❄.
Attention! Get used to turning the temperature knob to position ❄ate
the end of each washing programme. This habit will avoid starting a new
programme with a wrong temperature.
Door
ATTENTION! The washing ma-
chine contains a safety device which
makes it impossible to start the mo-
tor when the door is open or to
open the door before the end of the
washing cycle.
The orange light above the door
button will be on when the door is
properly closed.
The door can only be opened at the
end of cycle and when the light
change to green.
The door may also be opened by
pressing ON/OFF button wait-
ing 90 seconds and the pressing
door open button.
Adjustable spin speed
control knob
This knob can be set to choose the
final spin speed from low r.p.m.
to max r.p.m. If a lower spin
speed is chosen for the final spin,
then the preceeding spin speeds
will be autolatically adjusted ac-
cordingly.
Please note that it the spin speed
knob is set to the position then
no spin programme will be car-
ried out.

hh
hhoo
ooww
ww
tt
ttoo
oo
ll
lloo
ooaa
aadd
dd
tt
tthh
hhee
ee
mm
mmaa
aacc
cchh
hhii
iinn
nnee
ee
11
1100
00
•Howtoloadthelaundryintothedrum
•Unfold the garments
•Put the garments into the drum without pressing them;
•Remember of the suggested load for each washing pro-
gramme
When possible, observe the suggested load dimensions:
this will allow saving energy.
An excessive load in the drum may damage the wash-
ing results and causes creases. When possible, wash gar-
ments with different measures together, i.e. sheets, under-
wear, handkerchiefs, etc.: this strengthen the washing effect
and the laundry is better balanced during the spin cycle.
The following chart gives some indication on the weight of
dry laundry (average values).
•Thelaundryweight(approx.)
Maximum load:
Programmes 1 –2 –3 –4 –5 –6 –7: Kg. 6
Programmes 8 - 9 –10 –11 –12 –13: Kg. 2.5
Programme 14: Kg. 1
An excessive load can damage the washing result.
Bed linen (cotton)
Duvet cover 800
Lower sheet 600
Pillow case 200
Upper sheet 600
A complete bed 1600
Table linen
Medium table cloth (cotton) 400
Large table cloth (linen) 1000
Napkin (linen) 80
Ladies wear
Blouse 100
Cotton outfit 250
Panty 120
Brief 50
Bra-slip 150
Night shirt 180
Pyjama 450
Handkerchief 15
Overall 400
Men’s wear
Shirt (cotton) 250
Shirt (mixed fibres) 200
Sleeveless vest 120
Brief 50
Long underpants 250
Pyjama 480
Night-shir 400
Handkerchief 25
Overall 600
Household laundry
Duster 100
Towel 120
Bath towel 800
Bath-robe 1200
The weight is expressed in grams

dd
ddee
eett
ttee
eerr
rrgg
ggee
eenn
nntt
tt
aa
aann
nndd
dd
ss
ssoo
ooff
fftt
ttee
eenn
nnee
eerr
rrss
ss
11
1111
11
•Howtochoosethedetergent
Use only detergents suitable for machine washing.
You can find:
•washing powders for all types of soil and fabrics
•washing liquid, more suitable for low temperature pro-
grammes without pre-wash (max. 60°;)
•delicate detergents for certain garments, such as drip/dry
clothes (up to 60°C) and wool.
On the detergent packaging you will find the indication of the
main components, i.e. bleaches, enzymes, etc. Choose the
detergent according to the type of laundry and soil.
Do not pour into the machine bleaching products con-
taining chlorine: they could damage the synthetic mate-
rial and the rubber parts of the machine.
CB
A
Hardness
level
1 soft 0 - 7°0 - 12°
7 - 14°12 - 25°
14 - 21°25 - 37°
over 21°over 37°
2 medium
3 hard
4 very hard
Water
characteristics dH fH
Ask the water supply Company for the hardness level of the water in your area
Water hardness
•Amountofdetergent
•dispenser Afor the pre-wash detergent
•dispenser Bfor the main wash detergent
•dispenser Cfor liquid softeners
The total amount of detergent to be used for the pre-wash
and main wash is shown on the detergent packaging, based
on the hardness level.
The amount of detergent depends on:
–water hardness
–type of fabric
–degree of soil of the laundry
•Amountofliquiddetergent
Liquid detergents have to be used, according to
manufacturers’directions, only with temperatures
up to 60°C. When using liquid detergents, it is nor-
mally possible to avoid the pre-wash; therefore the
manufacturers’directions on the amount of deter-
gent to use are normally referred to the main wash
only.
•Howtoaddsofteners
Softeners make the laundry softer and reduce the
static in synthetic fibres. Softeners can be used, for
example, for sponge-clothes, knitwear, curtains,
etc.
•Pour the softener in dispenser C, according to
manufacturer’s directions.
The softener will automatically get into the machine
during the last rinse. At the end of the washing pro-
gramme, a left over of water remains in dispenser
C. This is used to dilute softeners which may be
too thick or concentrated. If more water than normal
remains in dispenser C, this means that the emp-
tying device is blocked interrupting the suction ef-
fect of the device. Cleaning instructions are give on
page 17.
Never pour in the dispenser softeners and starch
together, as this could block the overflow system.

tt
tthh
hhee
ee
ww
wwaa
aass
sshh
hhii
iinn
nngg
gg
pp
pprr
rroo
oogg
ggrr
rraa
aamm
mmmm
mmee
eess
ss
11
1122
22
CB
A
* Washing programmes in accordance with norms IEC 456 at 60°C (5.5 kg)
FIBRE LAUNDRY SOIL
DEGREE WASHINGCYCLE PROGR. TEMPER. SPIN DETERG. WASH
LOAD
white verysoiled pre-wash+
longwash 160°-max YES A-B-C 2÷6kg
white normally
soiled economywash 260°-max YES B-C 2÷6kg
fastcoloured normally
soiled mediumwash 340°-60°YES B-C 2÷6kg
delicatecolours lightly
soiled shortwash 430°-40°YES B-C 2÷6kg
colours
andwhite 5YES C 2÷6kg
colours
andwhite
rinse
6YES C 2÷6kg
colours
andwhite
softener
7YES 2÷6kglongspin
8YES 2.5kg
specialfabrics normally
soiled longdelicatewash 940°-60°YES B-C
specialfabrics verysoiled pre-wash+
longdelicatewash 30°-60°A- B -C
2.5kg
synthetic
delicatefibres normally
soiled energy-savingwash 10 30°-50°YES/NO B-C 2.5kg
delicatefibres normally
soiled shortdelicatewash 11 30°-40°YES/NO B-C 2.5kg
synthetic
delicatefibres delicaterinse 12 YES/NO C 2.5kg
synthetic
delicatefibres shortspin 13 YES 2.5kg
purewool normally
soiled shortwash
verydelicate 14 30°-40°YES/NO A-C 1kg
curtains normally
soiled shortwash
verydelicate 14 ❄YES/NO A-C 1kg
WOOL
CURTAINS
COTTON
AND
LINEN
SPECIAL
SYNTHETIC
DELICATE
FIBRES
*
*
•Programmeschart

cc
ccaa
aarr
rree
ee
ll
llaa
aabb
bbee
eell
llss
ss
oo
oonn
nn
yy
yyoo
oouu
uurr
rr
gg
ggaa
aarr
rrmm
mmee
eenn
nntt
ttss
ss
11
1133
33
•Internationaltextilecarelabellingcodes
Material/Machine code Instructions and wash Example of application
Long wash
in cotton cycle Hot (50°C) or boil hand wash
Spin or wring Cotton or linen garments without special fi-
nishes
Long wash
in cotton cycle Hot (50°C) hand wash
Spin or wring Cotton, linen or viscose garments without
special finishes with colours fast at 60°C
Medium wash
in synthetic cycle Hot hand wash, cold rinse, short
spin or drip dry
Polyester/cotton blends, nylon, polyester,
cotton and viscose garments with special
finishes; acrylic/cotton blends
Medium wash
in cotton cycle Warm hand wash
Spin or wring Cotton, linen or viscose with colours fast at
40°C (not at 60°C)
Medium wash
in synthetic cycle Warm hand wash, cold rinse,
short spin, no hand wring Acrylics, acetate or triacetate, including
wool blends; polyester/wool blends
Short wash
in wool cycle Warm hand wash, no rub, no
spin, no hand wring Wool, wool blends, silk
Hand wash only
See garment chart
No machine wash,
no hand wash
N.B.The terms "Long, medium and short
wash" refer to washing time and toss-
ing levels

11
1144
44
!
!
tt
tthh
hhee
ee
ww
wwaa
aass
sshh
hhii
iinn
nngg
gg
pp
pprr
rroo
oogg
ggrr
rraa
aamm
mmmm
mmee
eess
ss
Never treat garments
chemically in this
machine!
•Energy-savingprogrammes
If the laundry is only slightly soiled and does not need the
bleaching effect of high temperatures, a lower temperature
in the energy-saving section can be chosen.
Some examples of energy-saving:
60°C instead of 90°C = 30% energy saving
40°C instead of 60°C = 30% energy saving
It is often possible to avoid the pre-wash. In this case pour the
total amount of detergent in dispenser B.
For heavily stained laundry (tea, coffee, cocoa, sauce, fruit,
etc.) it is always recommended to use the basic programme.
Only if detergents are completely exploited will the cleaning
effect be enough to remove the stains from the laundry.
•Operationofthewashingmachine
withoutsurveillance
In spite of the greatest care in manufacturing and the use of
the best materials for making this washing machine, small
accidents may occur such as a pipe leaking water. If possi-
ble, use the machine without surveillance only if the room
where the machine is installed has a floor drain (drain well).
•Usefulsuggestions
•Water-soluble stains, but hard to remove, should be treat-
ed with detergent or washing paste before being machine-
washed.
•No-water soluble stains should be treated as follows:
Pen stains should be gently treated with a cloth soaked in
methylated spirits.
To remove wax, cover the stain with blotting paper and then
iron.
Resins, greases and creams should be treated with petrol
and then washed.
Tar stains should be rubbed with butter; leave it for a while
and then wash.
Blood, milk and egg stains should be soaked in cold water
and washed with enzymatic detergent at 50°- 60°C, ac-
cording to fabrics.
Fruit, coffee and red wine stains normally disappear after
several washes.
For particularly difficult stains, ask the cleaner’s advice.

hh
hhoo
ooww
ww
tt
ttoo
oo
uu
uuss
ssee
ee
tt
tthh
hhee
ee
ww
wwaa
aass
sshh
hhii
iinn
nngg
gg
mm
mmaa
aacc
cchh
hhii
iinn
nnee
ee
11
1155
55
•Washing
11. Make sure that the machine is plugged in to the elec-
tricity supply.
12. Turn on the cold water tap (or hot and cold).
13. Load the machine and close the door.
14. Put the detergent and additive into the appropriate com-
partments.
15. Turn the temperature control knob (B) to the wash
temperature required.
16. Select the required spin speed by turning the (C) ad-
justable spin speed control knob.
17. Press the extra level button (F) (if wished).
18. Press the rinse hold button (G) (if wished)
19. Select the required programme by turning the (A) pro-
gramme selector knob.
10. Press the ON/OFF button (D) to start the cycle..
•Woolwashing
Your machine has a special programme for washing pure
wool.
We recommend that you do not wash more than 1 Kg of wool
(dry weight) at a time.
To carry out this cycle proceed as following:
1. Load the machine.
2. Turn the temperature control knob (B) onto 30°/40°C.
3. Turn the programme selector knob (A) onto programme
14 (wool).
4. Press the ON/OFF button (D).
•Rinsesandspin
Garments which have been washed by hand can be rinsed
and spun in the washing machine. In this case select the pro-
gramme «Normal or delicate rinses»(5 or 12), according to
the type of clothes you have washed, with knob (A).
Remember, also, to add fabric softener to the appropriate
compartment and select the required spin speed by turning
the (C) adjustable spin speed control knob.
•Spinonly
If you wish to use only the spin proceed as follows:
1. Place the laundry in the cylinder.
2. Select the spin programme (7 or 13) by turning pro-
gramme selector knob (A).
3. Select the required spin speed by turning the (C) ad-
justable spin speed control knob.
4. Press the ON/OFF button (D).
E
F
D
BA
GC
H

cc
ccaa
aarr
rree
ee
aa
aann
nndd
dd
cc
ccll
llee
eeaa
aann
nnii
iinn
nngg
gg
11
1166
66
•Howtocleanthewashingmachine
The drum is made of stainless steel. Ferrous water or foreign
bodies in the laundry, such as nails or staples, could cause
rust stains. In this case clean the drum with very thin glass pa-
per. To avoid limestone stains, increase the amount of de-
tergent and if necessary add to the main washing a decalci-
fying detergent. Use decalcifying products containing acids
only if expressly allowed by manufacturers.
The cabinet and the door can be cleaned with warm soapy
water or with a delicate non-abrasive detergent, and dried
with a soft cloth. For safety reasons, never spray the ma-
chine with a water spout.
Do not use abrasive detergents and solvents to clean the
knobs, the control panel and any other parts in synthet-
ic material, as they may scratch and damage the surface.
Important! When cleaning the washing machine, always un-
plug it.
•Howtocleanthewastefilter
The washing machine is equipped with a special filter that
holds larger residues which may block the drain (coins, but-
tons, etc.), allowing thus to collect them easily.
The filter must be cleaned periodically.
In the unlikely event of having to examine the filter to collect
foreign objects, first comply with the safety rules and re-
member to unplug the machine and to empty the water in-
side the machine.
To remove the filter, open the service hatch by pressing on
the left hand side. Turn the filter cap anti-clockwise and pull.
When removing the filter, some water may come out. Clean
the filter, insert it back in its position and turn the cap clock-
wise. Make sure that it is tightly closed.
!
!
Attention! In case of
frequent washing of
sponge-clothes, the
filter must be cleaned
more often.
•Indicationforrooms
exposedtofrost
If the washing machine has been in-
stalled in a room exposed to frost (for ex-
ample, the garage), follow these indica-
tions in case of posseble frost:
•empty residual water in the washing
machine;
•empty the waste pipe;
•unscrew the water supply pipe and
empty it.
In case some water freezes, melt the ice
by pouring some litres of boiling water in
the detergent dispenser.

cc
ccaa
aarr
rree
ee
aa
aann
nndd
dd
cc
ccll
llee
eeaa
aann
nnii
iinn
nngg
gg
11
1177
77
•Howtocleanthewaterinletfiltres
The washing machine is equipped with filters that protect the
water supply valves:
•the filters are placed in the water supply union of the mag-
netic valve.
•Whattodo
•Close the water tap.
•Unscrew the water supply pipe fitting, rotating it anti-clock-
wise.
•Clench the filter synthetic clip with flat nose pliers and re-
move the filter.
•Rinse the filter under running water, keeping the clip turned
downwards. If necessary, dip it in vinegar. To remove pos-
sible dirt residues, thread a pin delicately through the small
filter holes.
•The water supply pipe is subject to a great deal of pressure
during the machine functioning. Check it carefully: should it
have tiny cuts or similar damages on its surface, substitute
it. In case of substitution, only use pipes with bursting
pressure of at least 60 bar.
•Insert the filter back in its position, with the grip facing out-
wards.
•Tighten the pipe to the electrovalve and turn the water tap
on. Should some water leak, tighten the ring nut.
•We suggest calling a Technical Assistance Centre, in case
you find it difficult to follow the above-mentioned procedure.
•Howtocleanthedetergentdispenser
The larger residues must be removed from the dispenser es-
pecially in case of low water pressure and detergents and
softeners that tend to encrust the walls.
Remove the dispenser and clean it with hot water.

ww
wwhh
hhaa
aatt
tt
tt
ttoo
oo
dd
ddoo
oo
ii
iiff
ff
……
……
11
1188
88
•Excessivelather
The problem of excessive lather can be eliminated adding
products that do not lather. In order to avoid this problem
since the beginning, please follow these few suggestions:
•Use detergents suitable for machine washing and for rele-
vant temperatures only.
•Always remember the hardness level of the water when
dosing the detergent.
•Reduce the amount of detergent when the laundry is not
very soiled or with smaller laundry loads.
•Rinse well any laundry previously soaked in detergent.
•Thewashingmachineoscillatesduring
soinning
This may happen if the machine has not been levelled prop-
erly on all four feet.
•Adjust the feet height as described on page 5 (how to lev-
el the washing machine).
Very elastic wooden floors, beyond increasing the noise lev-
el during spinning, prevent the machine from resting proper-
ly on all four feet.
•Screw a 3 - 5 cm. thick wooden board to the floor
•Do not position the machine in the middle of the room but
in a corner.
•Laundryisnotspunasusual
•Laundry is not sufficiently distributed in the cylinder. Repeat
cycle 8or 13.
Should you have any other problem, we suggest to check following items, before calling
the Technical Assistance:
1. Make sure that the machine is plugged and that there is power.
2. Check that fuses and main switches are working properly.
3. Make sure that the water taps are turned on.
4. Make sure that the water supply pipe and the waste pipe are not clogged.
5. Check that all steps to start the washing cycle have been followed properly.
6. Check that the lid is closed. Remember that a safety system does not allow the machine to start when the lid
is open.
7. Remember that at the beginning of the washing cycle, water does not pass through the detergent dispenser:
this takes place after about 90 seconds.
8. Check that the machine is not overloaded. In this case the motor protection intervenes and stops the machine
(it will be enough to remove some garments).
9. If the machine stops with water, it is possible that you have chosen a delicate washing cycle, which includes
the STOP (delicate cycles). Turn the programme knob.
10. If the machine does not start after you have checked out all what above-mentioned, do not hesitate to call the
Technical Assistance.

rr
rree
eecc
ccoo
oomm
mmmm
mmee
eenn
nndd
ddaa
aatt
ttii
iioo
oonn
nnss
ss
11
1199
99
1 - Adults should use your Philco washing machine only. Do
not allow children to play with the door or with the control pan-
el of the washing machine.
2 - Do not overload the machine. Check on the weight chart
on page 10 and do not exceed the maximum load suggest-
ed for each washing programme.
3 - Read the care labels on your garments and follow the
washing instructions written on them. Check on chart on page
13.
4 - Do not wash in the machine fabrics previously treated with
petrol, solvents or any other flammable substances that could
cause fumes, which may burn and explode.
5 - Make sure that the pockets of the garments to be washed
are empty. Remember to fasten the zipper. Do not wash gar-
ments that may have any part with enamel coating.
6 - Small garments such as laces, straps, socks, etc. should
be placed inside a washing bag: if loose they could get be-
tween the drum and the inner cylinder.
7 - Always unplug the machine and turn off the water supply
after each washing cycle.
8 - Leave the door slightly open when the machine is not in
use: this will lengthen the life of the door gasket.
9 - If the floor is covered with a carpet or thick moquette, en-
sure that this does not restrict the base of the machine. This
would prevent a correct airflow that is needed for cooling the
machine.
10 - Certain components of the washing machine, such as
the top panel and the door, can become warmer during cer-
tain washing cycles. Do not allow children near the machine
while it is operating.
11 - Should you need the intervention of a qualified person,
call only Philco authorised Technical Assistance Centres and
use only original spare parts. Do not try to repair the machine
or to substitute parts: this would make the warranty useless
and could be very risky for your own safety.
The manufacturer reserves the right to make any changes to the machine or to
the components of this model deemed necessary for technical and/or commer-
cial reasons, without informing the public.

22
2200
00
OO
OO¢¢
¢¢HH
HH°°
°°II
IIEE
EE™™
™™
XX
XXPP
PPHH
HH™™
™™EE
EEøø
øø™™
™™
TÔ Ï˘ÓÙ‹ÚÈÔ ·˘Ùfi¤¯ÂÈ Î·Ù·Û΢·ÛÙ›
Û‡Ìʈӷ Ì ÙÔ˘˜ ηÓÔÓÈÛÌÔ‡˜
82/ 499/E.E. (Ú·‰ÈÔ·ÚÂÌ‚ÔϤ˜)
73/23/E.E.
89/336/E.E. (ËÏÂÎÙÚÔÌ·ÁÓËÙÈ΋ Û˘Ì‚·ÙfiÙËÙ·)
§∂π∆√Àƒ°π∞ ª∏Ã∞¡π™ª√À ∞µC
H Û˘Û΢‹ ·˘Ù‹ Â›Ó·È ÂÊԉȷṲ̂ÓË Ì ̛· ËÏÂÎÙÚÔÓÈ΋ ‰È¿-
Ù·ÍË ·ÛÊ·Ï›·˜ (Auto Balancing Control Device-ABC) Ë
ÔÔ›· ÂÈÙÚ¤ÂÈ ÙÔ ÛÙ‡„ÈÌÔ Û ˘„ËϤ˜ ÛÙÚÔʤ˜ ÌfiÓÔÓ
fiÙ·Ó ÙÔ ÊÔÚÙ›Ô ÙˆÓ ÚÔ‡¯ˆÓ Â›Ó·È ÌÔÈÚ·Ṳ̂ÓÔ ÛˆÛÙ¿.
M ÙË ‰È¿Ù·ÍË ABC ÙÔ Ù‡Ì·ÓÔ ÚÈÓ ·fiÙÔ ÛÙ‡„ÈÌÔ
ÂÚÈÛÙÚ¤ÊÂÙ·È ÌÂÚÈΤ˜ ÊÔÚ¤˜ ‰ÂÍÈ¿ Î·È ÌÂÚÈΤ˜ ·ÚÈÛÙÂÚ¿
¤ÙÛÈ, ÒÛÙ ӷ ηٷÓÂÌËı› ÙÔ ÊÔÚÙ›Ô ÙˆÓ ÚÔ‡¯ˆÓ
ÔÌÔÈfiÌÔÚÊ·.
™Â ÌÂÚÈΤ˜ fï˜ ÂÚÈÙÒÛÂȘ (fiÙ·Ó .¯. ¤Ó· ÌÂÁ¿ÏÔ
ÌÔ˘ÚÓÔ‡˙È ‹ ÌÂÁ¿Ï· ÛÂÓÙfiÓÈ· Û¯ËÌ·Ù›ÛÔ˘Ó Ì›· "̿Ϸ")
ÔÈ ÈÔ ¿Óˆ ÂÚÈÛÙÚÔʤ˜ ‰ÂÓ Â›Ó·È Û ı¤ÛË Ó· ÌÔÈÚ¿ÛÔ˘Ó
ÔÌÔÈfiÌÔÚÊ· Ù· ÚÔ‡¯·.
™ÙȘ ÂÚÈÙÒÛÂȘ ·˘Ù¤˜ Û˘Ì‚·›ÓÔ˘Ó Ù· ·Ú·Î¿Ùˆ :
ñH ‰È¿Ù·ÍË ABC "·Ô‰¤¯ÂÙ·È" ÙÔ ·ÓÔÌÔÈfiÌÔÚÊÔ ÊÔÚÙ›Ô
·ÏÏ¿ ÌÂÈÒÓÂÈ ÙȘ ÛÙÚÔʤ˜ ÛÙ˘„›Ì·ÙÔ˜. ™ÙËÓ ÂÚ›ÙˆÛË
·˘Ù‹ Ù· ÚÔ‡¯· ı· Â›Ó·È ÈÔ ˘ÁÚ¿ ·fifiÙÈ Û˘Ó‹ıˆ˜.
ñH ‰È¿Ù·ÍË ABC "‰ÂÓ ·Ô‰¤¯ÂÙ·È" ÙÔ ·ÓÔÌÔÈfiÌÔÚÊÔ ÊÔÚ-
Ù›Ô fiÙ·Ó Ë ·ÓÔÌÔÈÔÌÔÚÊ›· Â›Ó·È ˘ÂÚ‚ÔÏÈ΋ Î·È ‰ÂÓ ÂÈ-
ÙÚ¤ÂÈ Î·ıfiÏÔ˘ÙÔ ÛÙ‡„ÈÌÔ. ™ÙËÓ ÂÚ›ÙˆÛË ·˘Ù‹ ‚Á¿Ï-
Ù ¤Íˆ Ù· ÚÔ‡¯·, ·Ó·Î·Ù·Ó¤ÌÂÙ¤ Ù·, Í·Ó·‚¿ÏÙ ٷ ̤۷
Î·È ‚¿ÏÙ ÙÔ ÚfiÁÚ·ÌÌ· ÛÙ˘„›Ì·ÙÔ˜.
K·È ÛÙȘ ‰‡Ô ÈÔ ¿Óˆ ÂÚÈÙÒÛÂȘ ·˘Ùfi‰ÂÓ ·ÔÙÂÏ›
ÌÂÈÔÓ¤ÎÙËÌ· Ù˘ Û˘Û΢‹˜ ·ÏÏ¿ ·ÓÙÈı¤Ùˆ˜ ¤Ó· Ôχ
Ù¯ÓÔÏÔÁÈο ÚÔËÁ̤ÓÔ ¯·Ú·ÎÙËÚÈÛÙÈÎfiÙÔ ÔÔ›Ô
ÚÔÛٷهÂÈ ÙË Û˘Û΢‹ ·fi˙ËÌȤ˜ fiˆ˜ Î·È ·fi
ÎÚ·‰·ÛÌÔ‡˜, ÔÏ›ÛıËÛË Ù˘ Û˘Û΢‹˜ ÛÙÔ ¿ÙˆÌ· Î.Ï..
Table of contents
Other Philco Washer manuals

Philco
Philco PLD 1473 F User manual

Philco
Philco PLD 126 D QTL User manual

Philco
Philco PTL7100P User manual

Philco
Philco PTL 8610 User manual

Philco
Philco PTL7100PEX User manual

Philco
Philco PLD 127 D QTL User manual

Philco
Philco PLDS 106 DG User manual

Philco
Philco PL 151 User manual

Philco
Philco PLD 1061M User manual

Philco
Philco PWM 15 PL User manual

Philco
Philco PSW 71200 User manual

Philco
Philco PTL7120PEX User manual

Philco
Philco PLD 14840 User manual

Philco
Philco PLD 1271 User manual

Philco
Philco PLD 106 E User manual

Philco
Philco PWM 641 User manual

Philco
Philco PLWD 16170 Crown User manual

Philco
Philco PLDI 127 BTL KING User manual

Philco
Philco PSW81400V User manual

Philco
Philco PLA 1483W User manual