manuals.online logo
Brands
  1. Home
  2. •
  3. Brands
  4. •
  5. Philips
  6. •
  7. Rice Cooker
  8. •
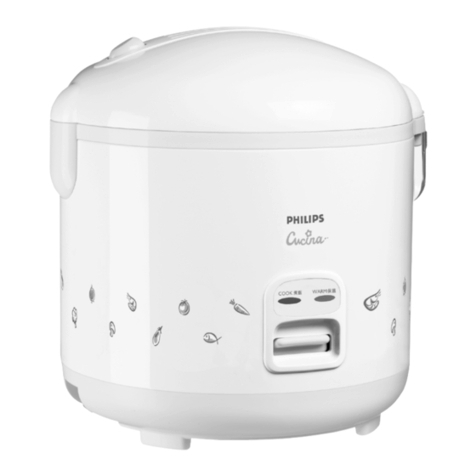
  9. Philips HD4718 User manual

Philips HD4718 User manual

Rice cooker
HD4718, HD4715, HD4711
2
3
1
4
ENGLISH 6
BAHASA MELAYU 10
TI”NG VI◊T 15
 20
24
HD4718, HD4715, HD4711
General description (fig. 1)
ALid handle
BGlass lid
CSteam tray
DWater level indication
EInner pot
FMain body
GKeep warm light
HCook light
IControl lever
JHeating element
KMeasuring cup
LRice scoop
MSide handle
NMains cord connection
OMains cord
Important
Read these instructions for use carefully before using the appliance and save them for future
reference.
◗Check if the voltage indicated on the appliance corresponds to the local mains voltage before
you connect the appliance.
◗Only connect the appliance to an earthed wall socket.Always ensure the plug is inserted
firmly into the wall socket.
◗If the mains cord is damaged, it must be replaced by Philips, a service centre authorised by
Philips or similarly qualified persons in order to avoid a hazard.
◗Never use any accessories or parts from other manufacturers or which have not been
specifically advised by Philips.Your guarantee will become invalid if such accessories or parts
have been used.
◗Only use the rice scoop provided.Avoid using sharp utensils.
◗Never immerse the housing of the rice cooker in water, nor rinse it under the tap.
◗Do not expose the rice cooker to high temperatures, nor place it onto a working or still hot
stove or cooker.
◗Make sure the heating element, the magnetic switch and the outside of the inner pot are
clean and dry before switching the rice cooker on.
◗Do not switch the rice cooker on without having inserted the inner pot.
◗Always unplug the rice cooker and let it cool down before cleaning it.
◗Do not place the inner pot directly over an open fire to cook rice.
◗Do not cover the steam vent and the lid while the rice cooker is operating.
◗Keep the appliance out of the reach of children. Do not let the mains cord hang over the
edge of the table or worktop on which the appliance is standing.
◗This appliance is intended for household use only. If the appliance is used improperly or for
professional or semiprofessional purposes or if it is used in a way that is not in accordance
with the instructions for use, the guarantee will become invalid and Philips will not accept
liability for any damage caused.
◗Place the rice cooker on a stable, horizontal and level surface.
◗The accessible surfaces may become hot when the appliance is operating.
◗Do not plug the appliance in or switch on the mains with wet hands.
◗Beware of hot steam coming out of the steam vent during cooking or out of the rice cooker
when you open the lid.
◗Always unplug the appliance after use.
◗Do not lift and move the rice cooker by its handle while it is operating.
ENGLISH6
Before first use
Remove the sheet between the inner pot and the heating element.
1Clean the parts of the rice cooker thoroughly before using the appliance for the first time
(see chapter 'Cleaning'). Make sure all parts are completely dry before you start using the
appliance.
Using the appliance
Cooking rice
1Measure the rice using the measuring cup provided.
Each cup of uncooked rice normally gives 2 bowls of cooked rice. Do not exceed the quantities
indicated on the inside of the inner pot. 1 cup of rice is approx. 180ml.
2Wash the rice thoroughly.
Use a separate container to wash the rice to avoid damaging the surface of the inner pot.
3Put the pre-washed rice in the inner pot.
4Add water to the level indicated on the scale inside the inner pot that corresponds to the
number of cups of rice used.Then smooth the rice surface.
For instance, if you cook 4 cups of rice, add water up to the 4-cup level indicated on the scale.
◗HD4711 (fig. 2).
◗HD4715 (fig. 3).
◗HD4718 (fig. 4).
BThe level marked inside the inner pot is just an indication; you can always adjust the water level for
different types of rice and your own preference.
5Put the inner pot in the rice cooker. Check if the inner pot is in proper contact with the
heating element (fig. 5).
Make sure that the outside of the inner pot is dry and clean and that there is no foreign residue on
the heating element or the magnetic switch.
6Put the lid on the rice cooker, put the plug in the wall socket and switch on the mains.
◗The keep warm light goes on to indicate that the appliance is on (fig. 6).
7Press the control lever down to start the cooking process (fig. 7).
◗The cook light goes on (fig. 8).
If you fail to press down the control lever the keep-warm light stays on.
8When the cooking process is finished, the cook light goes out and the keep-warm light goes on
to indicate that the rice cooker has automatically switched to the keep-warm mode (fig. 6).
9Open the lid and stir the rice to loosen it (fig. 9).
For the best results, do this just after the rice cooker has switched to keep-warm mode.Then close
the lid firmly. Stirring the rice allows excess steam to escape.This will give fluffier rice.
10 To end the cooking process or the keep-warm mode, pull up the control lever, switch off the
mains and remove the mains plug from the wall socket.
ENGLISH 7
Quantity of rice (cups)
1-5
2-10
5-15
Volume/L
1.0
1.8
2.8
Menu
HD4711
HD4715
HD4718
Steaming
1Measure 3 cups of water with the measuring cup and pour it into the inner pot.
The amount of water varies according to the quantity of food being steamed.
It will take approx. 8 minutes for 3 cups of water to come to the boil.
2Put the food to be steamed on a plate or in the steam tray.
To ensure even steaming, the food should be spread out evenly and should not be piled up.
3Put the steam tray in the inner pot (fig. 10).
When you combine steaming and rice cooking, make sure you measure out an amount of rice that
leaves enough room for the steam tray.The steamed food will be ready when the rice cooking
process is finished.
4If you are using a separate plate, put it in the steam tray.
5Close the lid firmly.
6Follow steps 6, 7 and 8 in the section 'Cooking rice'
The steaming time varies according to the quantity of food being steamed.
When the steaming process is finished, the cook light goes out and the keep-warm light goes on to
indicate that the appliance has automatically switched to the keep-warm mode.
7To end the cooking process or the keep-warm mode, pull up the control lever, switch off the
mains and remove the mains plug from the wall socket.
8Open the lid and carefully remove the steamed food from the plate or steam tray. Use a
kitchen glove or a cloth, as the plate and the steam tray will be very hot.
Beware of the hot steam.
Keeping warm
This mode allows you to keep your rice warm for a longer period of time.
◗When the cooking process is finished, the rice cooker automatically switches to the keep-
warm mode.The cook light goes out and the keep-warm light goes on.
We advise you to keep rice warm for not more than 5 hours so as to preserve its taste.
The keep-warm mode will not switch off automatically.
To end the keep-warm mode switch off the mains and unplug the appliance.
Cleaning
Unplug the rice cooker before starting to clean it.
Wait until the rice cooker has cooled down sufficiently before cleaning it.
To protect the surface of the inner pot, do not:
- use the inner pot for washing dishes;
- put vinegar into the pot.
1Take the steam tray and the inner pot out of the body of the appliance.
2Clean the lid, inner pot, steam tray and rice scoop with a sponge or a cloth in hot water with
some washing-up liquid.
Do not use abrasive cleaning agents, scourers or metal utensils to clean the inner pot as these
will damage the surface of the inner pot.
ENGLISH8
3Use only a damp cloth to wipe the outside and inside of the body of the rice cooker.
Never immerse the body of the rice cooker in water, nor rinse it under the tap.Wipe the heating
element with a dry cloth.
Environment
◗Do not throw the appliance away with the normal household waste at the end of its life, but
hand it in at an official collection point for recycling. By doing this you will help to preserve
the environment (fig. 11).
Guarantee & service
If you need information or if you have a problem, please visit the Philips website at www.philips.com
or contact the Philips Customer Care Centre in your country (you will find its phone number in the
worldwide guarantee leaflet). If there is no Customer Care Centre in your country, turn to your
local Philips dealer or contact the Service Department of Philips Domestic Appliances and Personal
Care BV.
Troubleshooting
If your rice cooker does not function properly or if the cooking quality is insufficient, consult the
table below. If you are unable to solve the problem, please contact the Philips Customer Care
Centre in your country.
ENGLISH 9
Solution
Check if the rice cooker is connected to
the mains and if the plug is inserted firmly
into the wall socket.
Take the appliance to your Philips dealer or
a service centre authorised by Philips.
Take the appliance to your Philips dealer or
a service centre authorised by Philips.
Add water according to the scale on the
inside of the inner pot (see chapter 'Using
the appliance').
You have failed to press the control lever
down.
Make sure that there is no foreign residue
on the heating element.
Take the appliance to your Philips dealer or
a service centre authorised by Philips.
Add water according to the scale on the
inside of the inner pot (see chapter 'Using
the appliance').
Rinse the rice until water runs clear.
Take the appliance to your Philips dealer or
a service centre authorised by Philips.
Distribute the food evenly and do not
steam too much food at one time.
Possible cause
There is a connection problem.
The light is defective.
Not enough water has been
added.
The cooking process has not
started.
The inner pot is not properly in
contact with the heating
element.
The heating element is
damaged.
Not enough or too much water
has been added.
The rice has not been rinsed
well.
The temperature control is
defective.
There is too much food in the
steam tray.
Problem
The cook light does not go on.
The keep-warm light does not
go on when the cooking
process is finished.
The rice is not cooked.
The rice is too hard or too soft.
The rice is scorched.
The rice cooker does not
automatically switch to keep-
warm mode.
The food has not been
steamed properly.
Gambaran umum (gamb. 1)
ATangkai tudung
BTudung kaca
CDulang kukus
DPenunjuk aras air
EPeriuk dalam
FJasad utama
GLampu simpan panas
HLampu masak
ITuil kawalan
JPlat pemanas
KCawan penyukat
LSenduk nasi
MTangkai sisi
NSambungan kord sesalur kuasa
OKord sesalur kuasa
Penting
Baca arahan penggunaan ini dengan teliti sebelum menggunakan perkakas dan simpan untuk rujukan
di masa depan.
◗Periksa sama ada voltan yang ditunjukkan pada perkakas sepadan dengan voltan sesalur
setempat sebelum anda menyambungkan perkakas.
◗Sambungkan perkakas hanya dengan soket dinding terbumi. Sentiasa pastikan plag dimasukkan
dengan rapi ke dalam soket.
◗Jika kord sesalur rosak, ia mesti digantikan oleh Philips, pusat servis yang dibenarkan oleh
Philips atau pihak-pihak yang telah diluluskan bagi mengelakkan bahaya.
◗Jangan guna sebarang aksesori atau alat ganti dari pembuat lain yang tidak dinasihati khas oleh
Philips. Jaminan anda akan menjadi tidak sah jika aksesori atau alat ganti sedemikian telah pun
digunakan.
◗Gunakan hanya senduk nasi yang disediakan. Elakkan menggunakan perkakas yang tajam.
◗Jangan tenggelamkan perumah pemasak nasi di dalam air atau membilasnya di bawah pili air.
◗Jangan dedahkan pemasak nasi pada suhu yang tinggi, atau letakkannya di atas pemanas atau
dapur yang sedang berfungsi atau masih panas.
◗Pastikan plat pemanas, suis magnet dan bahagian luar periuk dalam bersih dan kering sebelum
menghidupkan periuk pemasak nasi.
◗Jangan hidupkan periuk pemasak nasi tanpa memasukkan periuk dalam.
◗Cabutkan plag periuk pemasak nasi dan biarkan sehingga sejuk setiap kali sebelum
membersihkannya.
◗Jangan letakkan periuk dalam terus di atas api terbuka untuk memasak nasi.
◗Jangan tutup bolong stim semasa periuk pemasak nasi sedang beroperasi.
◗Jauhkan perkakas daripada capaian kanak-kanak. Jangan biarkan kord sesalur kuasa tergantung
melepasi pinggir meja atau permukaan kerja tempat perkakas disimpan.
◗Perkakas ini hanya untuk kegunaan rumah sahaja. Jika perkakas digunakan dengan tidak betul
atau bagi tujuan profesional atau (separa) profesional atau penggunaannya tidak selaras
dengan arahan penggunaan, jaminan akan terbatal dan Philips tidak akan menerima
tanggungjawab terhadap apa-apa kerosakan yang menjadi akibat.
◗Letakkan periuk pemasak nasi pada permukaan yang stabil, mendatar dan rata.
◗Permukaan yang dapat dicapai mungkin menjadi panas apabila perkakas beroperasi.
◗Jangan pasang plag perkakas atau hidupkan sesalur kuasa dengan tangan yang basah.
◗Berhati-hati dengan stim panas yang keluar dari bolong stim semasa memasak atau yang
keluar dari periuk pemasak nasi semasa anda membuka tudungnya.
BAHASA MELAYU10
◗Sentiasa cabut perkakas setiap kali selepas digunakan.
◗Jangan angkat dan pindahkan periuk pemasak nasi dengan tangkainya semasa ia sedang beroperasi.
Sebelum penggunaan pertama
Keluarkan alas di antara periuk dalam dan plat pemanas.
1Bersihkan bahagian berasingan periuk pemasak nasi dengan sempurna sebelum menggunakan
perkakas pada kali pertama (lihat bab 'Membersihkan'). Pastikan semua bahagiannya betul-
betul kering sebelum anda mula menggunakan perkakas.
Menggunakan perkakas
Memasak nasi
1Ukur beras menggunakan cawan penyukat yang disediakan.
Setiap cawan beras biasanya memberikan 2 mangkuk nasi. Jangan lebihi kuantiti yang ditunjukkan
pada permukaan dalam periuk dalam. 1cawan nasi adalah kira-kira 180ml.
2Basuh beras dengan sempurna.
Gunakan bekas lain untuk membasuh beras supaya permukaan periuk dalam tidak rosak.
3Tuangkan beras yang sudah dibasuh ke dalam periuk dalam.
4Tambahkan air sehingga aras yang ditunjukkan pada skala di dalam periuk, yang sepadan
dengan bilangan cawan beras yang digunakan. Kemudian ratakan permukaan beras.
Contohnya, jika anda memasak 4 cawan beras, tambahkan air sehingga aras 4 cawan yang
ditunjukkan pada skala.
◗HD4711 (gamb. 2).
◗HD4715 (gamb. 3).
◗HD4718 (gamb. 4).
BAras yang ditandakan di dalam periuk hanyalah panduan; anda boleh melaraskan aras air bagi jenis
beras yang berlainan ataupun mengikut cita rasa anda.
5Masukkan periuk dalam ke dalam periuk pemasak nasi. Periksa sama ada periuk dalam dan
plat pemanas besentuhan dengan baik pada satu sama lain (gamb. 5).
Pastikan bahagian luar periuk kering dan bersih, dan tiada sisa asing pada plat pemanas atau suis
magnet.
6Tutup tudung periuk pemasak nasi, pasangkan plag di dalam soket dinding dan hidupkan
sesalur kuasa.
◗Lampu masak menyala untuk menunjukkan bahawa perkakas telah dihidupkan (gamb. 6).
7Tekan turun tuil kawalan untuk memulakan proses memasak (gamb. 7).
◗Lampu masak menyala (gamb. 8).
Jika anda gagal untuk menekan ke bawah tuil kawalan, lampu simpan panas akan terus menyala.
BAHASA MELAYU 11
Kuantiti beras (cawan)
1-5
2-10
5-15
Isipadu/L
1.0
1.8
2.8
Menu
HD4711
HD4715
HD4718
8Apabila proses memasak telah selesai, lampu masak akan padam dan lampu simpan panas akan
menyala untuk menunjukkan bahawa periuk pemasak nasi telah beralih ke mod simpan panas
secara automatik (gamb. 6).
9Buka tudung dan kacau nasi agar rata (gamb. 9).
Untuk hasil terbaik, lakukan sebaik saja periuk pemasak nasi beralih ke mod simpan panas. Kemudian
tutup tudung dengan rapi. Mengacau nasi membolehkan stim keluar. Ini akan menjadikan nasi lebih
lembut.
10 Untuk menamatkan proses memasak atau mod simpan panas, tarik ke atas tuil kawalan,
matikan sesalur kuasa dan cabut plag sesalur kuasa dari soket dinding.
Mengukus
1Sukat 3 cawan air dengan cawan penyukat dan tuangkannya ke dalam pot dalam.
Junlah air berbeza-beza menurut kuantiti makanan yang sedang dikukus.
Ia akan mengambil kira-kira 8 minit untuk 3 cawan air mendidih.
2Letakkan makanan yang hendak dikukus di atas pinggan atau dulang kukus.
Untuk memastikan pengukusan yang sekata, makanan hendaklah diratakan dengan sekata dan tidak
dilonggokkan.
3Letak dulang kukus di dalam periuk dalam (gamb. 10).
Apabila anda menggabungkan pengukusan dan pemasakan nasi, pastikan anda menyukat jumlah
beras agar memberi ruang secukupnya untuk dulang kukus. Makanan yang dikukus akan siap apabila
proses memasak nasi selesai.
4Jika anda menggunakan pinggan yang berasingan, masukkannya ke dalam dulang kukus.
5Tutup dengan tudung periuk dengan rapi.
6Ikuti langkah 6, 7 dan 8 dalam bahagian 'Memasak nasi'
Masa pengukusan berbeza menurut kuantiti makanan yang sedang dikukus.
Apabila proses pengukusan telah selesai, lampu masak akan padam dan lampu simpan panas akan
menyala untuk menunjukkan bahawa periuk pemasak nasi telah beralih ke mod simpan panas secara
automatik.
7Untuk menamatkan proses memasak atau mod simpan panas, tarik ke atas tuil kawalan,
matikan sesalur kuasa dan cabut plag sesalur kuasa dari soket dinding.
8Bukakan tudung dan keluarkan makanan kukus dengan teliti dari pinggan atau dulang kukus.
Gunakan sarung tangan ketuhar atau kain, kerana pinggan dan dulang kukus pada ketika ini
sangat panas.
Hati-hati terhadap stim panas.
Menyimpan panas
Mod ini membolehkan anda menyimpan panas nasi anda untuk tempoh yang lebih panjang.
◗Apabila proses memasak selesai, periuk pemasak nasi akan beralih ke fungsi simpan panas
secara automatik. Lampu masak akan padam dan lampu simpan panas menyala.
Anda dinasihati agar menyimpan nasi panas selama tidak lebih daripada 5 jam untuk mengekalkan
rasanya.
Mod simpan panas tidak akan mati secara automatik.
Untuk menamatkan mod simpan panas matikan sesalur kuasa dan cabut plag perkakas.
BAHASA MELAYU12
Pembersihan
Cabutkan plag perkakas setiap kali sebelum anda mula membersihkannya.
Tunggu sehingga periuk pemasak nasi telah sejuk secukupnya sebelum membersihkannya.
Untuk melindungi permukaan periuk dalam, jangan:
- atau membasuh pinggan;
- tuangkan cuka ke dalam periuk.
1Angkat keluar dulang kukus dan periuk dalam dari perkakas.
2Bersihkan tudung, periuk dalam, dulang kukus dan senduk nasi dengan span atau kain di dalam
air panas dengan sedikit cecair pencuci.
Jangan gunakan agen pembersih yang melelas, kain penyental atau alatan logam untuk
membersihkan periuk dalam kerana ini akan merosakkan permukaan periuk dalam.
3Gunakan hanya kain yang lembap untuk mengesat permukaan luar dan dalam jasad utama
periuk pemasak nasi.
Jangan sekali-kali tenggelamkan jasad periuk pemasak nasi di dalam air, atau membilasnya di bawah
pili air. Kesat plat pemanas dengan kain kering.
Alam sekitar
◗Jangan buang perkakas bersama sampah rumah pada akhir hayatnya, tetapi bawanya ke pusat
pungutan rasmi untuk dikitar semula. Dengan melakukan sedemikian anda akan membentu
memelihara alam sekitar (gamb. 11).
Jaminan dan servis
Jika anda memerlukan maklumat atau menghadapi masalah, sila kunjungi laman web Philips di
www.philips.com atau hubungi Pusat Layanan Pelanggan Philips di negara anda (anda boleh
mendapatkan nombor telefonnya di dalam risalah jaminan sedunia). Jika tiada Pusat Layanan
Pelanggan di negara anda, hubungi wakil pengedar Philips tempatan atau Jabatan Servis Syarikat
Perkakas Domestik dan Penjagaan Diri Philips.
BAHASA MELAYU 13
BAHASA MELAYU14
Menyelesaikan masalah
Jika periuk pemasak nasi tidak berfungsi dengan betul atau jika mutu masakan tidak baik, rujuk jadual
di bawah. Jika anda tidak dapat menyelesaikan masalahnya, sila hubungi Pusat Penjagaan Pelanggan
Philips di negara anda.
Penyelesaian
Periksa sama ada periuk pemasak nasi
bersambung dengan sesalur dan sama ada
plag dimasukkan dengan rapi ke dalam
soket dinding.
Bawa perkakas ke penjual Philips anda atau
pusat servis yang disahkan oleh Philips.
Bawa perkakas ke penjual Philips anda atau
pusat servis yang disahkan oleh Philips.
Tambahkan air mengikut skala di dalam
periuk dalam (lihat bab 'Menggunakan
perkakas').
Anda tidak menekan tuil kawalan ke bawah.
Pastikan tiada sisa asing pada plat pemanas.
Bawa perkakas ke penjual Philips anda atau
pusat servis yang disahkan oleh Philips.
Tambahkan air mengikut skala di dalam
periuk dalam (lihat bab 'Menggunakan
perkakas').
Basuh beras sehingga air yang mengalir
bersih.
Bawa perkakas ke penjual Philips anda atau
pusat servis yang disahkan oleh Philips.
Ratakan makanan dan jangan kukus terlalu
banyak makanan dengan serentak.
Kemungkinan punca
Terdapat masalah sambungan.
Lampu rosak.
Lampu rosak.
Air yang dimasukkan tidak
mencukupi.
Proses memasak belum lagi
bermula.
Periuk dalam dan plat pemanas
tidak bersentuhan dengan baik
pada satu sama lain.
Plat pemanas rosak.
Tidak cukup atau terlebih air
telah dimasukkan.
Beras tidak dibasuh dengan
betul.
Kawalan suhu rosak.
Terdapat terlalu banyak
makanan di dalam dulang kukus.
Masalah
Lampu masak tidak menyala.
Lampu simpan panas tidak
menyala apabila proses
memasak selesai.
Nasi masih mentah.
Nasi terlalu keras atau terlalu
lembut.
Nasinya hangus.
Periuk pemasak nasi tidak secara
automatik beralih ke mod
simpan panas..
Makanan belum lagi dikukus
dengan betul.
TI”NG VI◊T 15
M£ tÖ t©ng quÄt (hùnh 1)
ATay nám náp n®i
BNáp thu tinh
CKhay håp
DChü bÄo m∏c n∑≠c
EN®i trong
FThÇn chúnh
GÙín hÇm
HÙín nåu
IC n Ûiòu khiôn
JB´ phên lÅm n°ng
KChën l∑Æng gÜo
LThùa m≤c c¨m
MTay nám bìn
NCám Ûiõn
ODÇy Ûiõn
L∑u Ω
Xin Û¶c kø nhªng h∑≠ng dèn s∫ d∂ng nÅy tr∑≠c khi s∫ d∂ng mÄy vÅ cåt giª Ûô tiõn tham khÖo sau nÅy.
◗Kiôm tra xem Ûiõn Äp ghi trìn mÄy c° t∑¨ng ∏ng v≠i Ûiõn Äp ngu®n n¨i s∫ d ng tr∑≠c khi
bÜn nßi mÄy vÅo ngu®n Ûiõn.
◗Chü nßi thiót b† nÅy vÅo © cám Ûiõn c° dÇy tióp Ûåt. Lu£n ÛÖm bÖo ràng phúch cám Û∑±c cám
chãt vÅo © Ûiõn.
◗Nóu dÇy Ûiõn b† h∑ h•ng, bÜn nìn thay dÇy Ûiõn tÜi trung tÇm bÖo hÅnh cµa Philips hoãc cÄc
trung tÇm bÖo hÅnh do Philips µy quyòn hoãc nhªng n¨i c° khÖ nÑng vÅ trùnh Û´ t∑¨ng
Û∑¨ng Ûô trÅnh gÇy nguy hiôm.
◗Kh£ng s∫ d ng båt c∏ ph kiõn hay b´ phên nÅo cµa nhªng nhÅ sÖn xuåt khÄc mÅ kh£ng c° sº
chü dèn c thô cµa Philips. BÖo hÅnh sî måt hiõu lºc nóu s∫ d ng cÄc b´ phên hay ph kiõn nÅy.
◗Chü s∫ d ng thùa m≤c c¨m Ûi kím.TrÄnh s∫ d ng nhªng d ng c sác.
◗Kh£ng nh≤ng phçn v• cµa n®i vÅo trong n∑≠c, hay r∫a d∑≠i v¢i n∑≠c.
◗Kh£ng Ûô n®i d∑≠i nhiõt Û´ cao, hay Ûãt n®i lìn bóp hay d ng c nåu khÄc Ûang Ûun hoãc vèn
c¢n n°ng.
◗ÙÖm bÖo b´ phên lÅm n°ng, c£ng tác tπ vÅ phçn bìn ngoÅi cµa n®i trong Û∑±c r∫a sÜch vÅ
lau kh£ tr∑≠c khi bêt n®i c¨m Ûiõn.
◗Kh£ng bêt n®i c¨m Ûiõn lìn khi ch∑a Ûãt n®i trong vÅo.
◗Lu£n r≤t phúch cám cµa n®i c¨m Ûiõn ra vÅ Ûô cho n®i ngu´i Ûi tr∑≠c khi lau ch≥i.
◗Kh£ng Ûãt n®i trong trºc tióp lìn ng¶n l∫a Ûô nåu c¨m.
◗Kh£ng che l™ thoÄt h¨i n∑≠c vÅ náp trong khi n®i c¨m Ûiõn Ûang hoÜt Û´ng.
◗Ùô thiót b† ngoÅi tçm tay trï em. Kh£ng Ûô dÇy Ûiõn ngu®n treo l¨ l∫ng ngang cÜnh bÅn hay
mãt bóp n¨i Ûãt thiót b† nÅy.
◗Thiót b† nÅy chü d≥ng cho m c Ûúch gia d ng. Nóu thiót b† nÅy b† s∫ d ng kh£ng Û≤ng cÄch hay
d≥ng cho nhªng m c Ûúch hÅnh nghò chuyìn hay bÄn chuyìn nghiõp hoãc nóu thiót b† nÅy b†
s∫ d ng kh£ng Û≤ng h∑≠ng dèn, viõc bÖo hÅnh sî trØ nìn v£ hiõu vÅ Philips sî kh£ng ch†u
trÄch nhiõm cho båt c∏ h∑ h•ng nÅo gÇy ra.
◗Ùãt n®i c¨m Ûiõn nÅy trìn m´t mãt phâng nàm ngang,vªng chác vÅ bàng phâng.
◗Nhªng b´ phên c° thô tióp x≤c cµa thiót b† nÅy c° thô trØ nìn råt n°ng khi thiót b† Ûang
hoÜt Û´ng.
◗Kh£ng cám Ûiõn thiót b† hay bêt c£ng tác chúnh v≠i tay c¢n ∑≠t.
◗Cén thên v≠i h¨i n∑≠c thoÄt ra tπ l™ thoÄt h¨i n∑≠c trong khi nåu hoãc h¨i n∑≠c trºc tióp
tπ trong n®i khi mØ náp.
◗Lu£n r≤t phúch cám Ûiõn cµa mÄy ra sau khi s∫ d ng.
◗Kh£ng nhåc vÅ di chuyôn n®i c¨m Ûiõn trong khi n®i c¨m Ûang hoÜt Û´ng.
TI”NG VI◊T16
Tr∑≠c khi ∫ d∂ng lçn Ûçu
ThÄo tåm giªa n®i trong vÅ b´ phên lÅm n°ng.
1LÅm sÜch kø tåt cÖ cÄc b´ phên cµa n®i c¨m Ûiõn tr∑≠c khi s∫ d ng thiót b† nÅy lçn Ûçu tiìn
(xem ch∑¨ng 'CÄch lÅm sÜch'). ÙÖm bÖo ràng tåt cÖ cÄc b´ phên phÖi kh£ hoÅn toÅn tr∑≠c
khi bát Ûçu s∫ d ng thiót b†.
CÄch ∫ d∂ng mÄy
CÄch nåu c¨m
1L∑Æng gÜo Ûô nåu c¨m bàng cÄch s∫ d ng chën l∑Æng gÜo cåp kím.
Th£ng th∑Æng m™i chën l∑Æng gÜo c° thô cho ra 2 bÄt c¨m. Kh£ng nåu nhiòu h¨n nhªng sß l∑±ng
Û∑±c ghi Ø trong n®i. 1 chën l∑Æng gÜo c° thô túch khoÖng 180ml.
2Vo gÜo thêt sÜch.
S∫ d∂ng m´t Û® Ûºng khÄc Ûô vo gÜo nhàm trÄnh lÅm h∑ h•ng bò mãt cµa n®i trong.
3Cho gÜo ÛÉ vo sÜch vÅo n®i trong.
4Cho n∑≠c vÅo Ûón m∏c n∑≠c h∑≠ng dèn trìn thang phÇn chia cÄc m∏c n∑≠c Ø n®i trong,
ch¶n m∏c n∑≠c t∑¨ng ∏ng v≠i sß l∑±ng chën gÜo s∫ d ng. Sau Û° lÅm cho bò mãt gÜo trong
n®i bàng Ûòu.
Vú d∂, nóu bÜn nåu 4 chën gÜo, cho n∑≠c vÅo Ûón m∏c n∑≠c sß 4 trìn thang phÇn chia cÄc m∏c
n∑≠c.
◗HD4711 (hùnh 2).
◗HD4715 (hùnh 3).
◗HD4718 (hùnh 4).
BM∏c n∑≠c Û∑±c ÛÄnh dåu Ø n®i trong nÅy chü lÅ m´t m∏c n∑≠c chü bÄo tham khÖo bÜn lu£n lu£n c°
thô Ûiòu chünh m∏c n∑≠c cho thúch h±p v≠i cÄc loÜi gÜo khÄc nhau vÅ theo sØ thúch cµa riìng bÜn.
5Ùãt n®i trong vÅo n®i c¨m Ûiõn. Kiôm tra xem n®i trong c° tióp x≤c tßt v≠i b´ phên lÅm
n°ng cµa thiót b† (hùnh 5).
ÙÖm bÖo ràng mãt ngoÅi cµa n®i trong kh£ rÄo vÅ sÜch sî vÅ kh£ng c° vêt gù hay cÄu cãn bÄm dúnh
trìn bò mãt b´ phên lÅm n°ng hay trìn c£ng tác t∫.
6Ùêy náp n®i lÜi, cám phúch cám vÅo © Ûiõn vÅ bêt c£ng tác chúnh cµa n®i c¨m Ûiõn.
◗Ùín hÇm n°ng chÄy sÄng cho biót thiót b† ÛÉ Û∑±c cåp Ûiõn (hùnh 6).
7Ãn cçn Ûiòu khiôn xußng Ûô bát Ûçu quÄ trùnh nåu (hùnh 7).
◗Ùín bÄo nåu c¨m (cook) bêt sÄng (hùnh 8).
Nóu kh£ng ån c n Ûiòu khiôn xußng Ûín hÇm n°ng sî tióp t∂c sÄng.
8Khi nåu xong c¨m, Ûín nåu c¨m sî tát vÅ Ûín hÇm n°ng bêt Ûô bÄo ràng n®i nåu c¨m ÛÉ tº
Û´ng chuyôn sang chó Û´ hÇm n°ng (hùnh 6).
L∑±ng gÜo (chën)
1-5
2-10
5-15
Thô túch/L
1,0
1,8
2,8
Menu
HD4711
HD4715
HD4718
TI”NG VI◊T 17
9MØ náp vÅ ÛÖo lìn Ûô lÅm t¨i c¨m (hùnh 9).
Ùô c° kót quÖ tßt nhåt, thºc hiõn b∑≠c nÅy ngay sau khi n®i c¨m Ûiõn chuyôn sang chó Û´ hÇm
n°ng. Sau Û° Ûêy náp n®i lÜi. ÙÖo c¨m cho phëp h¨i n∑≠c c¢n thπa thoÄt ra ngoÅi. LÅm nh∑ vêy
c¨m sî xßp h¨n.
10 Ùô ngπng quÄ trùnh nåu c¨m hoãc chó Û´ hÇm n°ng, gÜt cçn Ûiòu khiôn lìn, tát c£ng tác
chúnh, vÅ r≤t phúch cám ra kh•i © Ûiõn.
Håp th∏c Ñn
1Ù© l∑±ng n∑≠c bàng 3 chën l∑Æng vÅo n®i trong.
L∑±ng n∑≠c c° thô thay Û©i t≥y thu´c vÅo l∑±ng th∏c Ñn c n håp.
Sî måt khoÖng 8 ph≤t Ûô Ûun s£i 3 chën n∑≠c.
2Cho th∏c Ñn cçn håp lìn m´t cÄi Ûûa hay cho vÅo trong khay håp th∏c Ñn.
Ùô ÛÖm bÖo h¨i n°ng phÇn b© Ûòu, th∏c Ñn c n Û∑±c trÖi ra vÅ kh£ng nìn Ûãt ch®ng lìn nhau.
3Ùãt khay håp vÅo n®i trong (hùnh 10).
Khi kót h±p cÖ håp vÅ nåu c¨m, ÛÖm bÖo ràng bÜn Ûo l∑±ng gÜo vπa Ûô c° ch™ cho khay håp.Th∏c
Ñn Û∑±c håp sî sn sÅng Ûô d≥ng khi nåu xong c¨m.
4Nóu bÜn s∫ d ng Ûûa riìng, Ûãt Ûûa vÅo trong khay håp th∏c Ñn.
5Ù°ng chãt náp n®i lÜi.
6Thºc hiõn theo cÄc b∑≠c 6, 7 vÅ 8 trong m c 'CÄch nåu c¨m'
ThÆi gian håp t≥y thu´c vÅo l∑±ng th∏c Ñn c n håp.
Khi håp xong, Ûín nåu c¨m sî tát vÅ Ûín giª åm sî bêt Ûô bÄo ràng thiót b† ÛÉ tº Û´ng chuyôn sang
chó Û´ giª åm.
7Ùô ngπng quÄ trùnh nåu c¨m hoãc chó Û´ giª åm, gÜt cçn Ûiòu khiôn lìn, tát c£ng tác chúnh,
vÅ r≤t phúch cám ra kh•i © Ûiõn.
8MØ náp n®i ra vÅ cén thên låy th∏c Ñn ÛÉ håp ra kh•i Ûûa hay khay håp th∏c Ñn. S∫ d ng gÑng
tay nhÅ bóp hoãc khÑn vù Ûûa hay khay håp th∏c Ñn sî råt n°ng.
HÉy cén thên v≠i h¨i n∑≠c n°ng.
HÇm n°ng
Chó Û´ nÅy cho phëp bÜn giª åm c¨m trong m´t khoÖng thÆi gian dÅi.
◗Khi nåu xong c¨m, n®i c¨m sî tº Û´ng chuyôn sang chó Û´ hÇm n°ng. Ùín nåu c¨m sî tát
vÅ Ûín hÇm n°ng bêt sÄng.
Ch≤ng t£i khuyìn bÜn kh£ng nìn Ûô chó Û´ hÇm n°ng c¨m quÄ 5 tióng Ûô giª c¨m Û∑±c ngon.
Chó Û´ hÇm n°ng sî kh£ng tº Û´ng tát.
Ùô ngπng chó Û´ hÇm n°ng, tát c£ng tác chúnh vÅ r≤t phúch cám cµa thiót b† ra kh•i ngu®n Ûiõn.
Võ inh mÄy
R≤t phúch cám cµa n®i c¨m Ûiõn ra kh•i © cám Ûiõn tr∑≠c khi lÅm sÜch n®i.
ChÆ cho t≠i khi n®i c¨m Ûiõn Ûµ ngu´i tr∑≠c khi lÅm sÜch.
Ùô bÖo võ bò mãt cµa n®i trong, kh£ng:
- s∫ d∂ng n®i trong Ûô r∫a chën;
- Û© giåm vÅo n®i
TI”NG VI◊T18
1Låy khay håp vÅ n®i trong ra kh•i thÇn chúnh cµa thiót b†.
2Lau ch≥i sÜch náp, n®i trong vÅ thùa c¨m bàng mióng xßp hoãc giï lau trong n∑≠c n°ng s∫
d ng n∑≠c r∫a chën.
Kh£ng s∫ d ng nhªng chåt lÅm sÜch c° túnh Ñn m¢n, mÄy r∫a chën hay d ng c kim loÜi Ûô lÅm
sÜch n®i trong vù nhªng th∏ nÅy sî lÅm h•ng bò mãt cµa n®i trong.
3Chü s∫ d ng vÖi thåm n∑≠c Ûô lau sÜch bìn ngoÅi vÅ bìn trong phçn thÇn chúnh cµa n®i c¨m
Ûiõn.
Kh£ng nh≤ng thÇn chúnh cµa n®i c¨m Ûiõn vÅo n∑≠c, hay r∫a d∑≠i v¢i n∑≠c. Lau b´ phên lÅm
n°ng bàng vÖi kh£.
M£i tr∑Æng
◗Kh£ng v∏t mÄy pha cÅ phì c≥ng chung v≠i chåt thÖi gia Ûùnh th£ng th∑Æng khi ngπng s∫
d ng n°. HÉy Û∑a n° Ûón Ûiôm thu nhãt chúnh th∏c Ûô tÄi chó. LÅm nh∑ thó, bÜn ÛÉ g°p phçn
bÖo võ m£i tr∑Æng (hùnh 11).
BÖo hÅnh & d†ch v∂
Nóu bÜn c n biót th£ng tin hay gãp tr∂c trãc, vui l¢ng vÅo website cµa Philips tÜi www.philips.com
hoãc liìn hõ Trung TÇm ChÑm S°c KhÄch HÅng cµa Philips Ø n∑≠c bÜn (bÜn sî tùm thåy sß Ûiõn
thoÜi cµa Trung tÇm trong tÆ bÖo hÅnh kháp thó gi≠i). Nóu kh£ng c° Trung TÇm ChÑm S°c KhÄch
HÅng nÅo Ø n∑≠c bÜn, vui l¢ng liìn hõ ÛÜi lΩ Philips Û†a ph∑¨ng bÜn hay Ph¢ng D†ch V∂ cµa Philips
Domestic Appliances and Personal Care BV.
TI”NG VI◊T 19
CÄch khác ph∂c º cß
Nóu n®i c¨m Ûiõn kh£ng hoÜt Û´ng bùnh th∑Æng hoãc chåt l∑±ng nåu kh£ng tßt, hÉy tham khÖo
bÖng sau ÛÇy. Nóu bÜn kh£ng thô giÖi quyót Û∑±c vån Ûò, vui l¢ng liìn hõ v≠i Trung TÇm ChÑm S°c
KhÄch HÅng cµa Philips trong n∑≠c cµa bÜn.
GiÖi phÄp
Kiôm tra xem n®i c¨m ÛÉ Û∑±c nßi v≠i
ngu®n Ûiõn vÅ phúch cám ÛÉ Û∑±c cám chãt
vÅo © Ûiõn ch∑a.
Mang thiót b† Ûón ÛÜi lΩ Philips cµa bÜn
hoãc trung tÇm d†ch v∂ Û∑±c µy quyòn bØi
Philips.
Mang thiót b† Ûón ÛÜi lΩ Philips cµa bÜn
hoãc trung tÇm d†ch v∂ Û∑±c µy quyòn bØi
Philips.
Cho thìm n∑≠c theo thang phÇn chia cÄc
m∏c n∑≠c Ø n®i trong (xem ch∑¨ng 'CÄch
s∫ d∂ng thiót b†').
BÜn quìn kh£ng ån c n Ûiòu khiôn xußng.
ÙÖm bÖo ràng kh£ng c° vêt lÜ trìn b´
phên lÅm n°ng.
Mang thiót b† Ûón ÛÜi lΩ Philips cµa bÜn
hoãc trung tÇm d†ch v∂ Û∑±c µy quyòn bØi
Philips.
Cho thìm n∑≠c theo thang phÇn chia cÄc
m∏c n∑≠c Ø n®i trong (xem ch∑¨ng 'CÄch
s∫ d∂ng thiót b†').
R∫a sÜch gÜo Ûón khi n∑≠c vo gÜo trong
hoÅn toÅn.
Mang thiót b† Ûón ÛÜi lΩ Philips cµa bÜn
hoãc trung tÇm d†ch v∂ Û∑±c µy quyòn bØi
Philips.
TrÖi Ûòu th∏c Ñn ra vÅ kh£ng håp quÄ nhiòu
th∏c Ñn c≥ng m´t l≤c.
Nguyìn nhÇn c° thô
C° vån Ûò vò dÇy nßi hay phúch
cám Ûiõn.
Ùín bÄo b† tr∂c trãc.
Kh£ng c° Ûµ n∑≠c.
QuÄ trùnh nåu kh£ng bát Û u.
N®i trong kh£ng tióp x≤c tßt
v≠i b´ phên lÅm n°ng.
B´ phên lÅm n°ng b† h∑ h•ng.
S∫ d∂ng kh£ng Ûµ hoãc quÄ
nhiòu n∑≠c.
GÜo ch∑a Û∑±c vo sÜch tßt.
B´ Ûiòu khiôn nhiõt Û´ b† h∑
h•ng.
C° quÄ nhiòu th∏c Ñn trong
khay håp.
Vån Ûò
Ùín bÄo nåu c¨m kh£ng bêt
sÄng.
Ùín hÇm n°ng kh£ng bêt sÄng
khi quÄ trùnh nåu kót th≤c.
C¨m kh£ng chún.
C¨m quÄ c∏ng hoãc quÄ nhÉo.
C¨m b† khët.
N®i nåu c¨m kh£ng tº Û´ng
chuyôn sang chó Û´ hÇm n°ng.
Th∏c Ñn kh£ng Û∑±c håp Û≤ng
cÄch.
ü ( 1)
A
B
Cü
Dü
E
F
Gü
Hü
Iü 
Jü
K 
L 
M
N ü
Oü

 
◗ü
◗üü ü
◗üü üü 
 
◗ü  ü 
ü
◗  
◗
◗ü 
◗ ü üü ü
◗ü ü
◗ ü
◗
◗
◗ ü
◗   
 üü ü
◗
◗  
◗üü
◗
◗
◗


11ü  ( 'ü') 
20

Other manuals for HD4718

1

This manual suits for next models

2

Other Philips Rice Cooker manuals

Philips HD4768/00 User manual

Philips

Philips HD4768/00 User manual

Philips HD4766 User manual

Philips

Philips HD4766 User manual

Philips HD3118 User manual

Philips

Philips HD3118 User manual

Philips HD3132 User manual

Philips

Philips HD3132 User manual

Philips HD3132 User manual

Philips

Philips HD3132 User manual

Philips HD3026 User manual

Philips

Philips HD3026 User manual

Philips HD4754/00 User manual

Philips

Philips HD4754/00 User manual

Philips HD4535 User manual

Philips

Philips HD4535 User manual

Philips Grain Master Quick guide

Philips

Philips Grain Master Quick guide

Philips HD4718 User manual

Philips

Philips HD4718 User manual

Philips HD4779/77 User manual

Philips

Philips HD4779/77 User manual

Philips HD3037/03 User manual

Philips

Philips HD3037/03 User manual

Philips HD4702/80 User manual

Philips

Philips HD4702/80 User manual

Philips HD3011 User manual

Philips

Philips HD3011 User manual

Philips HD4568 User manual

Philips

Philips HD4568 User manual

Philips HD4760/00 User manual

Philips

Philips HD4760/00 User manual

Philips HD4768/00 User manual

Philips

Philips HD4768/00 User manual

Philips HD4763/00 Technical manual

Philips

Philips HD4763/00 Technical manual

Philips HD3036 User manual

Philips

Philips HD3036 User manual

Philips HD3033 User manual

Philips

Philips HD3033 User manual

Philips HD4718/00 User manual

Philips

Philips HD4718/00 User manual

Philips HD3131 User manual

Philips

Philips HD3131 User manual

Philips HD3011 User manual

Philips

Philips HD3011 User manual

Philips HD4746/06 User manual

Philips

Philips HD4746/06 User manual

Popular Rice Cooker manuals by other brands

Kambrook Rice Master KRC410BSS Instruction booklet

Kambrook

Kambrook Rice Master KRC410BSS Instruction booklet

Beper 90.550 use instructions

Beper

Beper 90.550 use instructions

Panasonic SR-ZE185 operating instructions

Panasonic

Panasonic SR-ZE185 operating instructions

National SR-MM10N Service manual

National

National SR-MM10N Service manual

Zojirushi NP-KAC10 operating instructions

Zojirushi

Zojirushi NP-KAC10 operating instructions

Sunhouse SHD8135 Manual instruction

Sunhouse

Sunhouse SHD8135 Manual instruction

Zojirushi NS-PC10 operating instructions

Zojirushi

Zojirushi NS-PC10 operating instructions

Panasonic SR-G06 Service manual

Panasonic

Panasonic SR-G06 Service manual

Panasonic SR-W18HSN Operating operating manual

Panasonic

Panasonic SR-W18HSN Operating operating manual

Oster CKSTRC1700W instruction manual

Oster

Oster CKSTRC1700W instruction manual

Commercial Pro CPRC25 instruction manual

Commercial Pro

Commercial Pro CPRC25 instruction manual

Zojirushi NRC-10 operating instructions

Zojirushi

Zojirushi NRC-10 operating instructions

SEVERIN RK 2425 Instructions for use

SEVERIN

SEVERIN RK 2425 Instructions for use

Breville Risotto Plus BRC600XL Instruction booklet

Breville

Breville Risotto Plus BRC600XL Instruction booklet

Panasonic SR-G06G Service manual

Panasonic

Panasonic SR-G06G Service manual

White-Westinghouse WRA3000 owner's manual

White-Westinghouse

White-Westinghouse WRA3000 owner's manual

National SR-LA10N operating instructions

National

National SR-LA10N operating instructions

Aroma ARC-1030SB instruction manual

Aroma

Aroma ARC-1030SB instruction manual

manuals.online logo
manuals.online logoBrands
  • About & Mission
  • Contact us
  • Privacy Policy
  • Terms and Conditions

Copyright 2025 Manuals.Online. All Rights Reserved.