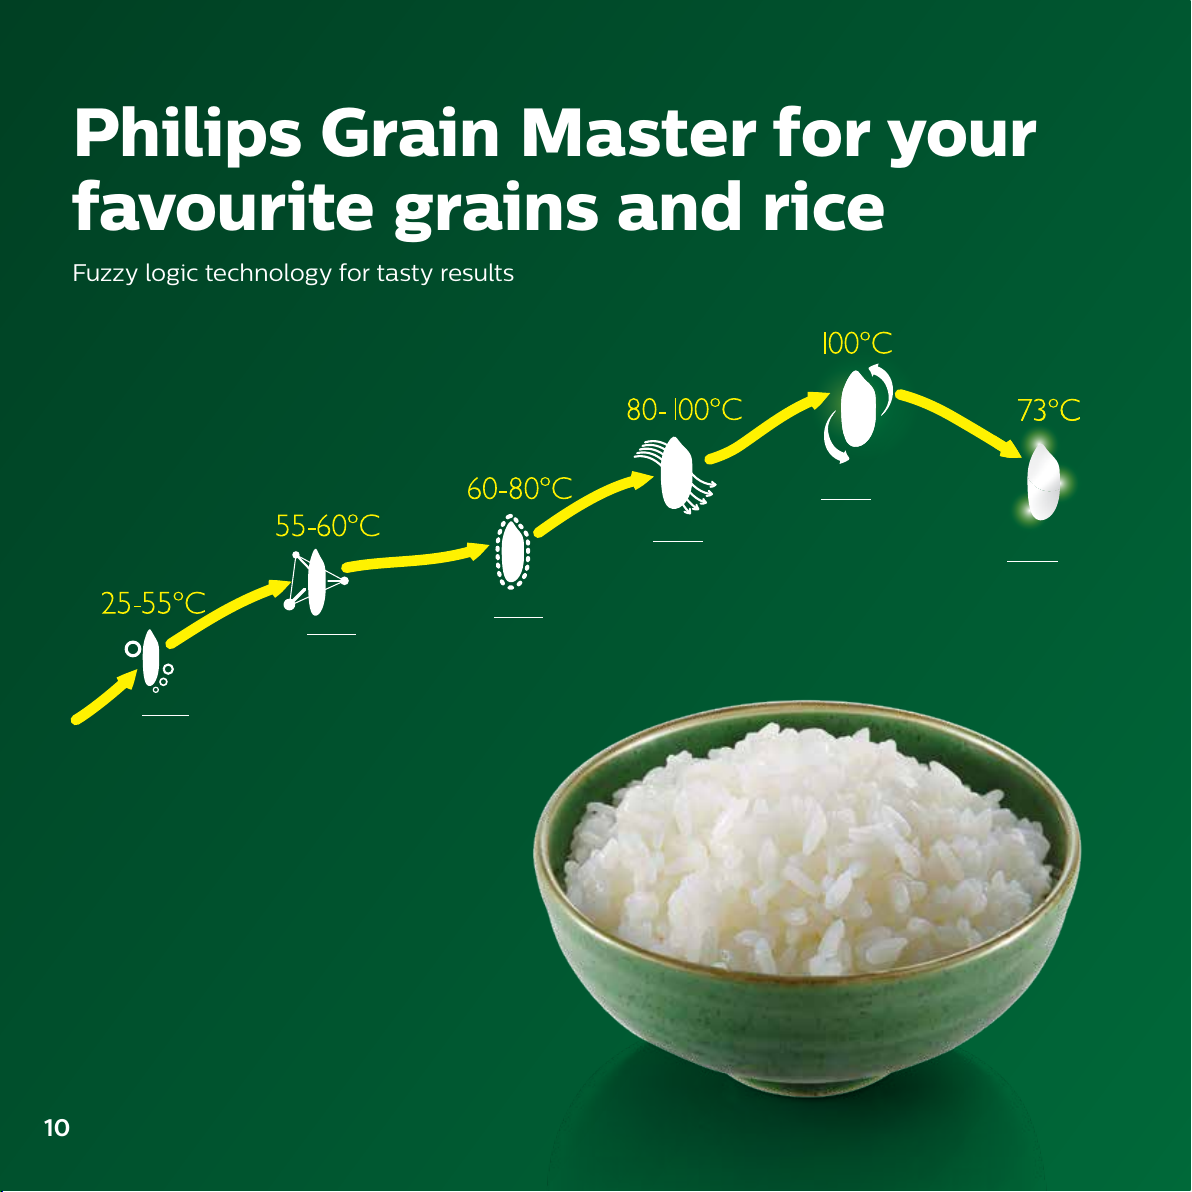
Using Philips Grain Master
Cooking rice
Cooking
function
Estimated
cooking time
Adjustable
cooking time Preset time
Quick cook 25 minutes / 1-24 hours
Standard cook 45 minutes / 1-24 hours
Quinoa 45 minutes / 1-24 hours
Lentils 45 minutes / 1-24 hours
You can cook rice using the Quick cook, Standard cook, Quinoa, or
Lentils function.
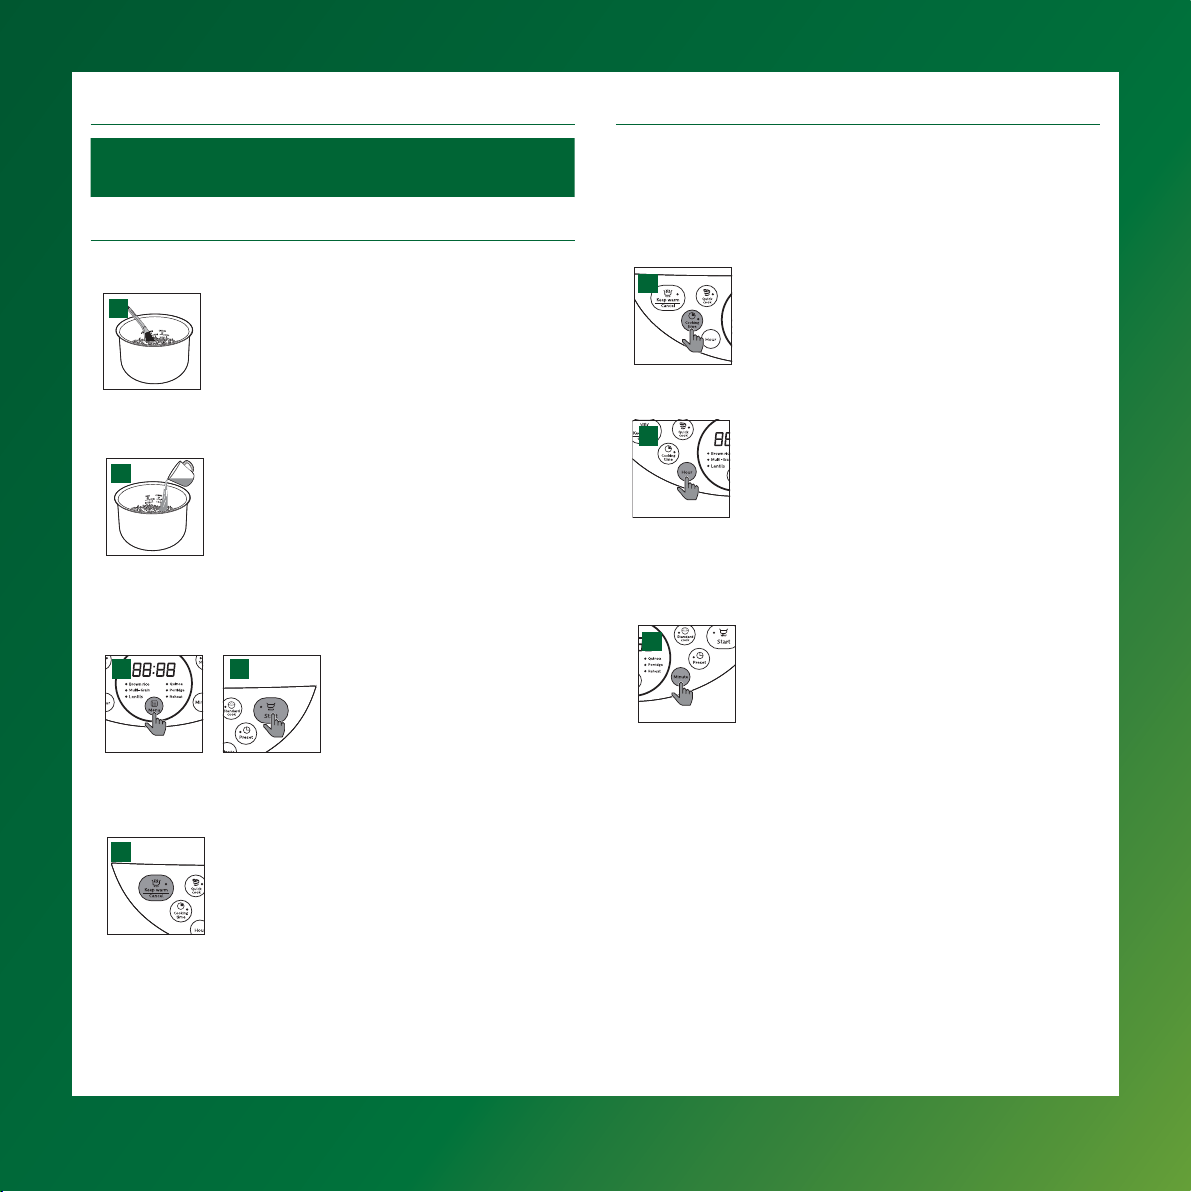
1. Measure rice using the measuring cup provided.
2. Rinse rice, and put the washed rice in the inner pot .
3. Add water to the level indicated on the scale inside the inner pot that
corresponds to the number of cups of rice used. Then smooth the rice
surface. For instance, if you cook 4 cups of rice, add water up to the
4-cup level indicated on the scale.
4. Wipe o water outside of the inner pot and put it into the appliance.
Note: Make sure that the outside of the inner pot is dry and clean, and
that there is no foreign residue on the inside of the appliance.
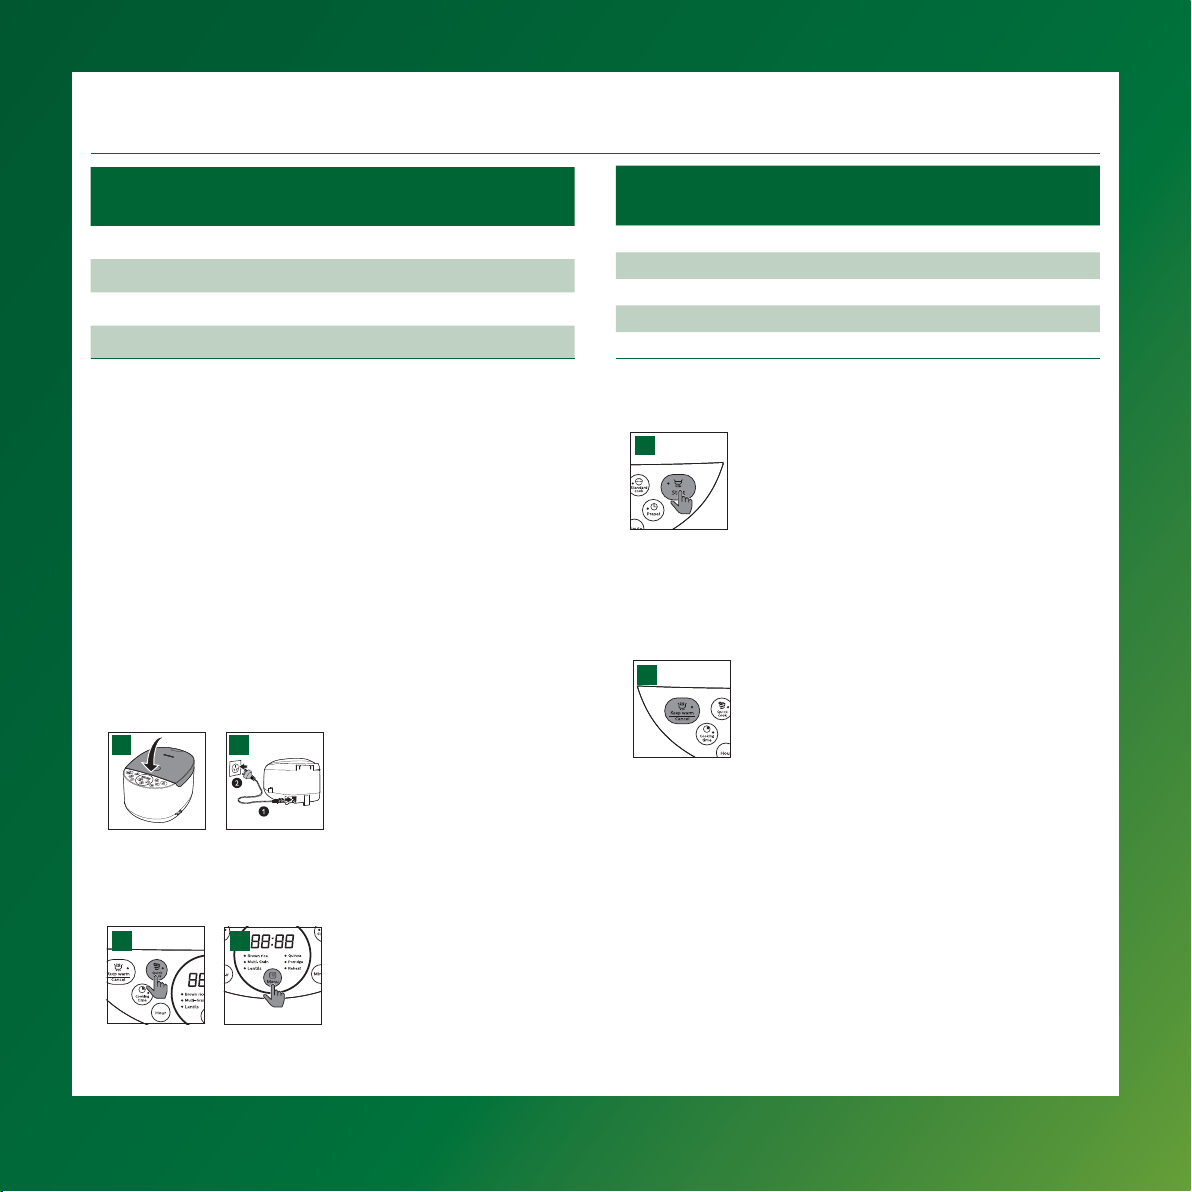
5. Close the lid (g. A), and put the plug in the power socket (g. B), and
switch on the appliance.
A B
6. Press the quick cook (Quick cook) or standard cook
(Standard cook) button (g. C), or select the quinoa (Quinoa) or lentils
(Lentils) function by pressing the menu button (Menu) (g. D).
C D
7. Press the start button (Start) to start cooking (g. E).
E
8. When the cooking is nished, you will hear 4 beeps and the selected
cooking function light will be o.
9. The Philips Grain Master will be in keep-warm mode automatically.
The keep-warm indicator lights up (g. F).
F
Note:
· If the voltage is unstable in the area you live, it is possible that the
Grain Master will overflow.
· After the cooking is finished, stir the rice and loosen it immediately to
release excessive moisture for fluy rice.
· Depending on the cooking conditions, the bottom portion of the rice
may become slightly browned.
· Please stir rice after cooking, and you are recommended to consume
it the night after cooking for best nutrition and best taste. If you would
like to keep the rice for longer, it is best to keep the rice in a sealed
plastic container and keep it in the refrigerator and reheat it to avoid
nutrient loss.
Type of rice
Cooking
program
suggested
Number of
measuring cups
Corresponding
inner pot water
mark
Jasmine rice Standard cook 2 2 cup mark (rice)
Long grain Standard cook 2 2 cup mark (rice)
Sushi rice Standard cook 2 2 cup mark (rice)
Medium grain Standard cook 2 2 cup mark (rice)
Rice & Quinoa Quinoa 2 2 cup mark (rice)
5