manuals.online logo
Brands
  1. Home
  2. •
  3. Brands
  4. •
  5. Philips
  6. •
  7. TV
  8. •
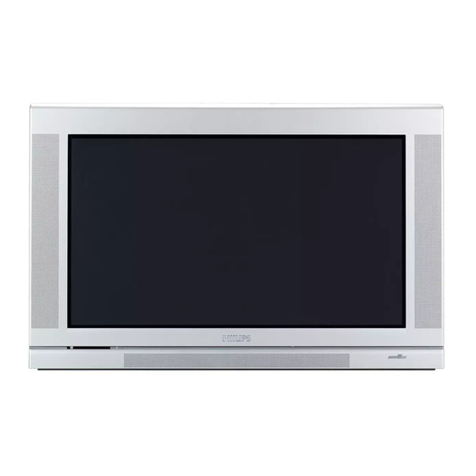
  9. Philips 50PF7320A/37 User manual

Philips 50PF7320A/37 User manual

Other manuals for 50PF7320A/37

3

This manual suits for next models

4

Other Philips TV manuals

Philips 21PT1663 User manual

Philips

Philips 21PT1663 User manual

Philips 24PHT4304 User manual

Philips

Philips 24PHT4304 User manual

Philips 14CE1000 User manual

Philips

Philips 14CE1000 User manual

Philips 29PT6447 User manual

Philips

Philips 29PT6447 User manual

Philips 21PT2252 User manual

Philips

Philips 21PT2252 User manual

Philips 25PT9001 User manual

Philips

Philips 25PT9001 User manual

Philips 28PT7128/12 User manual

Philips

Philips 28PT7128/12 User manual

Philips 14GR2320 User manual

Philips

Philips 14GR2320 User manual

Philips 24ST2200 User manual

Philips

Philips 24ST2200 User manual

Philips 32PW9523 - annexe 1 User manual

Philips

Philips 32PW9523 - annexe 1 User manual

Philips Signage Solutions 50BDL3050Q User manual

Philips

Philips Signage Solutions 50BDL3050Q User manual

Philips 29PT8659/12 User manual

Philips

Philips 29PT8659/12 User manual

Philips PW9513 User manual

Philips

Philips PW9513 User manual

Philips 46pdl8908s User manual

Philips

Philips 46pdl8908s User manual

Philips 14GR1221 User manual

Philips

Philips 14GR1221 User manual

Philips 32PF9968 User manual

Philips

Philips 32PF9968 User manual

Philips 47PFL6057K/12 User manual

Philips

Philips 47PFL6057K/12 User manual

Philips 32PFL3205H/12 User manual

Philips

Philips 32PFL3205H/12 User manual

Philips 65PFT6520/12 User manual

Philips

Philips 65PFT6520/12 User manual

Philips 5813 series User manual

Philips

Philips 5813 series User manual

Philips Cineos 32PF9967D/10 User manual

Philips

Philips Cineos 32PF9967D/10 User manual

Philips TPS2.1E LA User manual

Philips

Philips TPS2.1E LA User manual

Philips 32PFL5604/77 User manual

Philips

Philips 32PFL5604/77 User manual

Philips 43PUS8505/12 User manual

Philips

Philips 43PUS8505/12 User manual

Popular TV manuals by other brands

IKEA UPPLEVA user manual

IKEA

IKEA UPPLEVA user manual

Toshiba 19A20 Service manual

Toshiba

Toshiba 19A20 Service manual

Sony XBR-100Z9D reference guide

Sony

Sony XBR-100Z9D reference guide

Sony Trinitron KV-HR36M90 Service manual

Sony

Sony Trinitron KV-HR36M90 Service manual

JVC AV-14AG16 instructions

JVC

JVC AV-14AG16 instructions

Loewe Table Stand Reference 55 user guide

Loewe

Loewe Table Stand Reference 55 user guide

Panasonic Genus TX-G10 operating instructions

Panasonic

Panasonic Genus TX-G10 operating instructions

Samsung LN26C350D1D Service manual

Samsung

Samsung LN26C350D1D Service manual

BBK LT1516D Service manual

BBK

BBK LT1516D Service manual

Samsung 55S9 B Series Quick setup guide

Samsung

Samsung 55S9 B Series Quick setup guide

Sharp LC-40FI5012E user manual

Sharp

Sharp LC-40FI5012E user manual

Evervue BN185 Operation manual

Evervue

Evervue BN185 Operation manual

North State TV2GO user guide

North State

North State TV2GO user guide

Toshiba CX35F70 owner's manual

Toshiba

Toshiba CX35F70 owner's manual

Magnavox PS1980 owner's manual

Magnavox

Magnavox PS1980 owner's manual

Panasonic QuintrixF TX-29AS1D operating instructions

Panasonic

Panasonic QuintrixF TX-29AS1D operating instructions

Samsung 4 Series Quick setup guide

Samsung

Samsung 4 Series Quick setup guide

Panasonic TX-21FG20R Service manual

Panasonic

Panasonic TX-21FG20R Service manual

manuals.online logo
manuals.online logoBrands
  • About & Mission
  • Contact us
  • Privacy Policy
  • Terms and Conditions

Copyright 2025 Manuals.Online. All Rights Reserved.

Registering your model with PHILtPSmakes you eligible for all of the valuable benefits
listed below,so don't miss out. Complete and return your Product Registration Card at
once to ensure:
PHILIPS
Congratulations on your purchase, and welcome to The
"family,"
Dear PH|L|PS product owner:
Thank you for your confidence in PHILIPS.You've selected one
of the best-built, best-backed products available today.We'll do
everything in our power to keep you happy with your
purchase for many years to come.
As a member of the PHJLIPS"family_' you're entitled to
protection by one of the most comprehensive warranties and
outstanding service networks in the industry.
What's more, your purchase guarantees you'll receive all the
information and special offers for which you qualify, plus easy
access to accessories from our convenient home shopping
network.
Most importantly, you can count on our uncompromising
commitment to your total satisfaction.
All of this is our way of saying welcome -and thanks for
investing in a PHILIPS product.
P.S. To get the most from your PHlUPS purchase, be
sure to complete and return your Product
Registration Card at once.
Know these
safety symbols
CAUTION: TOREDUCE THE RISK OF ELECTRICSHOCK, DO NOT
REMC_/ECC_/ER {ORBACI(}. NO USER-$ERVICEAELE PARTS
INSIDE. REFERSERVICING TO OUALIFIEOSERVICE PERSOMNEL
This "bolt of lightning" indicates
uninsuhted material within your unit
may cause an electrical shock. For the safety
of everyone in your household, please do not
remove product covering.
The "exclamation point" calls attention
to features for which you should read
the enclosed literature closely to prevent
operating and maintenance problems.
WARNmNG:To reduce the risk of fire or
electric shock, this apparatus should not be
exposed to rain or moisture and obiects
filled with liquids, such as vases, should not
be placed on this apparatus.
CAUTION: To prevent electric shock,
match wide blade of plug to wide slot, fully
insert.
ATTENTION : Pour 6viter les chocs
_lectriques, introduire la lame la plus large de
h fiche dans h borne correspondante de la
prise et pousser ]usqu'au fond.
For Customer Use
Enter below the Serial No., which is
located on the rear of the cabinet. Retain
this information for future reference.
Model No.
Serial No.
IMPORTANT SAFETY INSTRUCTIONS
Read before operating equipment
1, Read these instructions,
2. Keep these instructions.
3. Heed all warnings.
4. Follow all instructions.
5, Do not use this apparatus near waten
6. Clean only with a dry cloth.
7. Do not block any of the ventilation openings. Install in
accordance with the manufacturers instructions.
8. Do not install near any heat sources such as radiators, heat
registers, stoves, or other apparatus (including amplifiers) that
produce heat.
9. Do not defeat the safety purpose of the polarized or
grounding°type plug. A polarized plug has two blades with one
wider than the other. A grounding type plug has two blades
and third grounding prong.The wide blade or third prong are
provided for your safety.When the provided plug does not fit
into your outlet, consult an electrician for replacement of the
obsolete oudet.
10.Protect the power cord from being walked on or pinched
particularly at plugs, convenience receptacles, and the point
where they exit from the apparatus.
11.Only use attachments/accessories specified by the
manufacturer
12. Use only with a cart, stand, tripod, bracket, or table
specified by the manufacturer; or sold with the
apparatus.When a cart is used, use caution when moving the
cardapparatus combination to avoid injury from tip-over:
13.Unplug this apparatus during lighming storms or when unused
for long periods of time.
14.Refer all servicing to qualified service personnel Servicing is
required when the apparatus has been damaged in any way,
such as power=supply cord or plug is damaged, liquid has been
spilled or objects have fallen into apparatus, the apparatus has
been exposed to rain or moisture, does not operate normally,
or has been dropped.
IS.This product may contain lead or mercury. Disposal of these
materials may be regulated due to environmental
considerations. For disposal or recycling information, please
contact your Iocal authorities or the Electronic Industries
Alliance: www.eiae.org.
16.Damage Requiring Service -The appliance should be
serviced by qualified service personnel when:
A. The power supply cord or the plug has been damaged; or
B. Objects have fallen, or liquid has been spilled into the
appliance; or
C. The appliance has been exposed to rain; or
D. The appliance does not appear to operate normally or
exhibits a marked change in performance; or
E. The appliance has been dropped, or the enclosure damaged.
17.Tilt/Stability -Alltelevisions must comply with
recommended international global safety standards for tilt and
stability properties of its cabinets design.
• Do not compromise these design standards by applying
excessive pull force to the front, or top, of the cabinet
which could ultimately overturn the product.
Also, do not endanger yourself, or children, by placing
electronic equipment/toys on the top of the cabinet. Such
items could unsuspectingly fall from the top of the set and
cause product damage and/or personal injury.
18.Wall or Ceiling Mounting -The appliance should be
mounted to a wail or ceiling only as recommended by the
manufacturer_
19.Power Lines -An outdoor antenna should be located away
from pow, er lines.
20.Outdoor Antenna Grounding -[f an outside antenna is
connected to the receiver, be sure the antenna system is
grounded so as to provide some protection against voltage
surges and built up static charges.
Section 810 of the National Electric Code, ANSI/NFPA No.
70-1984, provides information with respect to proper
grounding of the mats and supporting structure grounding of
the lead-in wire to an antenna-discharge unit, size of grounding
connectors, location of antenna-discharge unit, connection to
grounding electrodes and requirements for the grounding
electrode. See Figure below_
21.Objects and Liquid Entry -Care should be taken so that
objects do not fall and liquids are not spilled into the
enclosure through openings,
a) VVarning:To reduce the risk of fire or electric shock, this
apparatus should not be exposed to rain or moisture and
obiects filled with liquids, such as vases should not be placed
on this apparatus,
22.Battery Usage CAUTION -To prevent battery leakage that
may result in bodily injury, property damage, or damage to the
unit:
• Install all batteries correctly, with + and -alignment as
marked on the unit.
• Do not mix batteries (old and new or carbon and alkaline,
etc,)
Remove batteries when the unit is not used for" a long time.
EXANPLE OF ANTENNA GROUNDING AS PER NATIONAL ELECTRICAL CODE (NEC)
ELECTRIC SERVICE EQUIPHENT * ".................POWER SERVICE GROUNDING ELECTRODE SYSTEH
(NEC ART 250, PARTH)
Note to the CATV system installer: this reminder is provided to call the CATV system installer's attention to Ardcle 820-40 of the NEC that provides guidelines for
proper grounding and in particular: specifies that the cable ground shall be corlrlected to the grounding system of the building as close to the point of cable entry as practical.
_End o[ life directives
Philipsis payng a lot of attend0n to pmdudng
envimnmennrlly f;_iendlyin _reen #_colareas.
Yournew -fVconnrins materials which can be
recycled and reused.At the end of i*,slife
specialized companies con d_smantiethe
discorded TVto concen*,ra_ethe reusable
materials and to minimize the amount of
materials to be dssposedof[
Please ensure you dispose of your old TV
accordsngto local regulations.
Contents
Digital Cable TV ............................................ 7
Preparation ................................................ 2
Use of the remote control BC4345 ............................. 5
Buttons on the right of theTV ................................. 8
My Content ................................................ 8
To use the menus ........................................... 9
Introduction 9
How to navigate through the Settings menus 9
Demo ..................................................... 9
Installation ................................................ 10
Select the menu language 10
Store TV channels 10
VVea!<channel installation 11
Software upgrade 11
Setup menu ............................................... 12
Preferences 12
Source 16
Clock 17
CahleCAIID applications ..................................... 18
TM menu ................................................. 19
Picture menu 19
Sound menu 21
Featuresmenu 22
Channels menu 23
Multimedia browser ........................................ 26
Viewing content from a USB device 26
bluMmedia Browser menu 27
Connect Accessory Devices .................................. 2g
Recorder (vcr:dvd+rw) 29
Recorder and other A/V devices 30
Recorder and cable box with RF output 31
Satellite Receiver /cable box with AV outputs 32
Recorder" and Satellite Receiver /cable box with AV outputs 32
DVD Player or other accessory digital source devices 33
HDMI (High Definition blultimedia Interface) connectors 34
Digital Surround receiver" 34
Side connections ........................................... 35
Becord with your recorder ................................... 36
Record aTV program 36
Record a program from monitor out 36
To select connected devices .................................. 36
Audio- and video equipment buttons ........................... 32
Before Calling Service ....................................... 38
Tips ..................................................... 39
Annex I - Philips TV software upgrade with portaHe memory ...... 40
Annex 2: Phlllps TV Slideshow Format with background music ...... 42
Annex 3 - PhilipsTV - USB .................................. 44
YournewTVisprovidedwithaspecial slot called a CableCARD TM which
means that you do not need a separate set top box to receive digital cable
SDTV and HDTV programs. However it is still possible to connect a set top
box to your T_(
The CaNeCARD, which vvJJJbe available from your" cable system operator; is
designed only for that particular digital cableTV system, ff you need to get
digital cable TV from a different system, simple swap your old CableCARD for a
new one,
Cable systems can provide a wide range of digital TV programs and even
specialized digital audio channels,
Cable TV systems can offer many local-interest channels you won't see off-air
or from asatellite broadcast.
Examples include local school and community access channels.
CableCARD TM is a tr_Tdetnark of Cable ?_dev_sion
Laboratories Irlc,
CabIeCARDTM *
A CableCARD is aremovable card distributed by cane companies, that is
inserted into the CabIeCARD slot at the bottom of your television.
CabIeCARD allows you to tune digital and high definition scrambled or
encrypted cable channels through the cable antenna. Consult your cable
company on the availability of Cab[eCARD.The CabJeCARD is required to
receive premium digital TV channds and services (where available) through the
cabJe_
A CabIeCARD functionality inchJdes conditional access and copy protection_
See settings menu, CableCARD applications, p. 18.
Note: Do not insert a PCMCIA cord into the CableCARD slot.
Do not insert the power plug in a wall socket before aH connections are
made.
Place theTV on a solid surface or place theTV on the supplied stand. For
the mounting instructions of the stand, see the Quick Start Guide leaflet
supplied.
For ventilation, leave at least 4" to 6" free all around the T_,( Do not place
theTV on a carpet.To prevent any unsafe situations, no naked flame
sources, such as lighted candles, should be placed in the vicinit)s
Avoid heat, direct sunlight and exposure to rain or water.The equipment
shall not be exposed to dripping or splashing.
Mounting theTV on the wall
This TV provides theVESA mounting interface (not supplied) and isVESA
compatible with the 4 suppliedVESA studs to be inserted in the back of the
TV
Caution: Installing theTV requires special skill that should only be
performed by qualified personneLYou should not attempt to do the work
yourself, Philips bears no responsibility for improper mounting or mounting
that results in accident or injury.
Hake sure that the wall mount is being fixed securely enough so that it
meets safety standards.
CABLE
CABLE/ANTENNA
CABLE /ANTENNA
"lr"
r
TO TV @OUTPUT
OUT J
STB
STB
@Basic connections to theTV
Your integrated digitM TV automatically decodes and displays the four basic
DTV picture resolution standards.
-SDTV (Standard Definition TV) are broadcast as 480i (480dine interlaced)
or 480p (480dine progressive scan) video,
- HDTV (High-Definition TV) are broadcast either in the 1080i or 720p
formats, always with a widescreen picture.
Note: Progressive scan video (p) is more like that you see in amovie theater:
Images are much morn distinct and free of flicker, and motion is smoothen
Next to analog NTSC broadcast reception, your TV has an integrated High
Definition TV tuner which receives, decodes and displays terrestrial ATSC
and unscrambled cable (QAN) signMs.
HDTV quailD, is only reproduced when a broadcaster or cable provider"
broadcasts HDTV signals.
Note:Ask your bmad_"aster or cable box provider to transmit/enable HD content
to your home, and possibly upgrade to a CableCarff for the @cription of liD
£J_onals.
There are 2 w_ys to get HDTV content:
=via cable,
= via antenna,
Note: This dnawing is used wherever you can connect cable or antenna,
oCabmeTV
Connect the cable TV signal to the CABLE/ANTENNA 75 g2_lr_ lack at
the bottom of theT_( See page 10 for" details on usingAutoprogram to
store channels in theTV% memory.
Note: this connection will supply stereo sound to the TV if it is being broadcast by
the station you am watching,
=Cabme box with RF IN/OUT
Connect the incoming cableTV signal to the cable iN iack (IO on the
back of the cable box.
" Connect a coaxial cable (not supphed) from the TOTV lack on the
back of the came box to the CABLE/ANTENNA 7B S__IP iack@ at
the bottom of the T_{
Note:Your cable box may have a di_emnt label for the TO TVjack, such as
OUTPUT or OUT.
"Set the OUTPUT CH switch (_ of the cable box to CH 3 or 4
(whichever is correct for your cable box), then tune theTV to the
corresponding channel.
Once tuned, change channels at the cable box, not the Tb(
Note: This connection will not supply stereo sound to the TV The reason is that
the RF output on a cable box labeled TO TV, OUT or OUTPUT for example
will not send astereo si_onalto the tuner (VHF/UHF) input on aTV
=Cabme box with A/V outputs
Connect the incoming cabJeTV signal C) to a signal splitter (not
supplied).The signal splitter enables you to avoid having to use the TO
TV jack on the back of the cane box, This iack will not supply stereo
sound to the T%{
Note:Your cable box may have a di_emnt label for the TO TVjack, such as
OUTPUT or OUT.
"Connect a coaxial cable (not supplied) to a connector" on the signal
splitter and to the CABLE/ANTENNA 75 £2 "T lack (_ on the T_(
* Connect another" coaxial cable (not supplied) to a connector on the
signal splitter and to the came IN iack (_) on the back of the cable
box_
" Connect A/V cables (not supplied) to the VIDEO and AUDIO L and R
outputs on the back of the cable box and to the AV2 video (labeled
VIDEO) and AUDIO (labeled L and R) iacks 4(0 on the back of the TS(
, To view programs from your cable box, first press the AV+ button on
the remote controk
. Press the cursor down or up buttons until the AV2 signal source is
selected.
. Press the OK button to confirm your selection.The AV2 input source
becomes current for the viewing of cane TV programs through your
cable box.
Note; If your cable box Audio/_deo outputs will not supply video and stereo
audio to the ;r_ you will need to make the connection shown above in the
example "Cable box with RF INIOUT',
CABLE
CABLE/ANTENNA _P
- Cabme box with S-Video, component video (YPbPr) or HDMm
connectors
See Cormect Accessory Devices, p. 31-32.
=Antenna
Via antenna you can watch whatever DTV programs being broadcast in
your area for free.
If you're not sure what HDTV programming is available in your area,
contact your local content provider or your local electronics store
retailer.
Broadcasters are in the middle of a transition from analog to digital T_,(
This means that a given broadcaster will have two channels on the air, one
analog and one digital
Connect the incoming antenna signal to the CABLE/ANTENNA 75 _ _lr"
lack at the bottom of the T'v{ See page 10 for details on using
Autoprogram to store channels in theTV's memory.
Note: This connection will supply stereo sound to the TV if it is being broadcast
by the station you am watching,
Direct Broadcast Satellite (DBS)
Satellite systems offer many of the same premium channels as cable
systems, and often at a lower price.To get these channds, you'll need to
install a small dish antenna outside.
There are 2 main DBS systems: DirecTV & DishNetwork.These systems
require separate, proprietary set top receiver boxes to decode their
signals and send them to your digital TV set.These boxes may include a
digital TV tuner for off=air DTV broadcasts.
Satellite broadcasters also provide major local channels, depending on the
market in which you live.
DBS also provides service in areas not covered by cable because they are
in rural areas or other areas not passed by a cable line.
DBS also allows you to watch pay=per-view events.
O Before installing your TV or before hanging it on the wall, connect all your
accessory devices. See p. 28.
O Refer" to the bottom of the set for" the correct operation voltage, Insert the
power cord in the wall socket.
Consult your local dealer if your mains supply is different.To prevent
damaging the mains (AC) cord which could cause a fire or electric shock,
do not place theTV on the cord.
O Remote controk
Insert the 2 batteries supplied (Type R6=I,SV). Be sure the (+) and (=) ends
of the batteries line up correctly (inside of case is marked.)
The batteries supplied do not contain the heavy metals mer_ury and cadmium.
Please check on how to dispose of exhausted bakeries- according to local
regulations,
O Turn theTV on:
Press the power switch (4) at the right side of the T'v(
An indicator on the front of the TV lights up,
Press the ÷CH/PAGE- buttons or the POWER button on the remote
control
Note: For most buttons pressing a button once will activate d'_efunction. Pressing a second tree will de activate it.
When a button enables multiple options, a small list will be shown. Press repeatedly to select tl'le next item in the list.The list will be removed
automatically a_er 6 seconds or press OK to remove immediatel)4
AttentiomThis remote control can not be programmed to work accessory devices.
CBL TV VCR AUX
CLOCK on/off
Time display (for max. 10 minutes)
Color buttons
When functions attached to the color"
buttons, the color buttons are shown
on screen.
!_,A MY CONTENT
Press to display the Ply Content menu
on or off_ see p. 8.
OK _to activate a setting
to display the list of channels stored
(according to the selection made in
the Installation mode (Antenna or
CaNe), p. 10.
starts playing content in the Home
Pluldmedia Browser applicadom p. 27.
MENU Settings menu on/off, see p. 10.
VOL Volume
Press + or - to adjust the volume.
::MUTE
Interrupt the sound or restore it.
A/CHPress to alternate between the
currendy viewed channel and the
previously viewed channel.
O
U
®OG
JKL
G ®,G
!
i
® G O............
menus,
Note; If necessary, you con adjust d'le
picture position to the center of the screen
with the cursor keys,
PIP HDPll Dual screen/PIP See p. 12.
To watch a broadcast and a HDPll
source simukaneously.
CH/PAGE ChanneJ selection
-To browse through theTV channels or
sources stored in the preferred
channel list (see p. 2B).
To select between Antenna or Cable
TV channels, first make your selection
in the Settings menu, see, p. 10.
Note: _ou don't have to star:* the
installation again once you have seamhed
for and stored the available TV channels.
AV+ Press this button repeatedly to
select AVl, AV2, AV3, HDMII, HDPII1,
SIDE or TV when in TV mode,
according to where you connected the
accessory devices (p. 33).
- Type the dash (-) for digital channels.
INFO
-Display information: Press to display
(when available) information about the
selected TV channel and program or
accessory device.
_;,!!_ !i!_;_!il _ _
s_.,,,,*k4
FORMAT
Press this button to summon a/st of ava/abJe display forma_s (depending on
_he receiving signaJ).This le_s you choose the display format of your
preference.
Press this button repeatedly to sdect another picture format:Automatic_
Super Zoom_ 4:3_ Movie expand 14:9_ Movie expand 16:9, 16:9 subtitJe_
Wide screen.
Automatic S_perzoom 4:3 Movleexpand14:9
...................b-/d
Movie ex_)?4rJd ] _:g J _9 sUbtJ(C_ Wide s(;reen
Automatic makes the picture filI the screen as much as possible.
Super zoom removes the blad< bars on the sides of 4:3 programs with
minimaJ distortion,
When in Movie expand 14:9, Movie expand 16:9 or Super zoom picture
format, you can make subtitles visible wi_h the cursor up/down.
Note: Wlth lid sources not all screen _ormc_tswill be avail_bM
FAVORITES
_,_D:_ ViEw To dispJay a list of aJl channels marked as favorite (incl. subchannels),
/_ *_/ To add or remove a channd in the favorite/st of TV channels.
?
t
pS,._ _=_.........._ _ Audio and Video equipmen_ buttons. See p, 34.
'®® 1f- . u=med,a rowserfunc,,ona, u, ons.Seep. .
®-=°==-©""!_'_ _ nofunc=on
......... /
ABphanumeric buttons on the remote controm
The alphanumeric buttons on the remote control can be used to enter
digits and text.
HuJd<ap entry can be used to enter alphanumeric information when
necessarT:
The characters displayed are dependent on the language selected in the
Installation menu. See p. 10.
Text is entered similar" to the method used for" entering text messages on a
cdiular phone_
When a letter or number has been entered, the cursor automatically
advances to the next character position after" the specified time out or by
pressing the cursor right.
1
2
3
4
5
6
7
8
9
0
<space> _1 <space> 1 (etc.)
a b c A B C 2 a b c (etc.)
d e f D E F 3 d e f (etc,)
,_ h i G H I 4 g h i (etc.)
i k J ] K L 5 ) k J (etc.)
m n o I"1 N 0 6 m n o (etc.)
Lq r s P @ R S 7 p q r s (etc.)
tu v T U V 8 t u v (etc.)
w x yz "W X Y Z 9 w x yZ (etc,)
•@ 0. @ 0 (etc.)
Also the cursor up/down can be used to enter alphanumeric information.
When finished, press the OK button to confirm the entr}s
Hove to the left panel.
RC CURSOR UP a b c d ...ABCD...123...0<space> _.@
RC CURSOR DOWN @ ._ <space>0987...ZYX...zyx...cba
MENU + _RO_M/CHANNEL - @ _OWE_
Should your remote be lost or broken you can still change some of the basic
settings with the buttons on the right side of your T_v(
Press the power switch (_ to switch the TV on.
Press:
the +VOLUME - button to adiust the volume;
the + PROGRAM/CHANNEL - buttons to select theTV channels or sources.
The MENU button can be used to summon the Settings menu without the
romote control.
Use;
the +VOLUME - buttons and the + PROGRAM/CHANNEL -buttons to
select menu items [n the directions as shown;
• the MENU button to confirm your selection.
Note:
Wf_en activated via tFe MENU button on the ri_'_,tside of tf,e TV,only ExJ_ lets you
dismiss the menu.
Navigate to Exit and press the MENU button.
The My Content menu (and the underlying Multimedia browser) is intended to
contain all content_ services, applications you are interested to consume.
Press the Od_ button to activate.
Press the cursor up/down to move the highlight up and down in the list of
menu items.
Press the cursor right to go deeper into the structure.
_Television:
TV channels leading to the list of TV channels; the {eft pane[ win contain
the analog channel numbers, the one-part channel numbers and the major
channd numbers in case of two-part digitat channds.The right panel will
contain the available subchannels associated with the major channel that is
currently highlighted on the left panel. If there are no subchanneJs
associated with the currently selected channel in the left panel the right
panel will remain empty
Multimedia
Contains the locally connected devices on which content (pictures, audio
files) is stored. See HuJtimed[a browser, p. 26,