DIGITAL CONNECTION
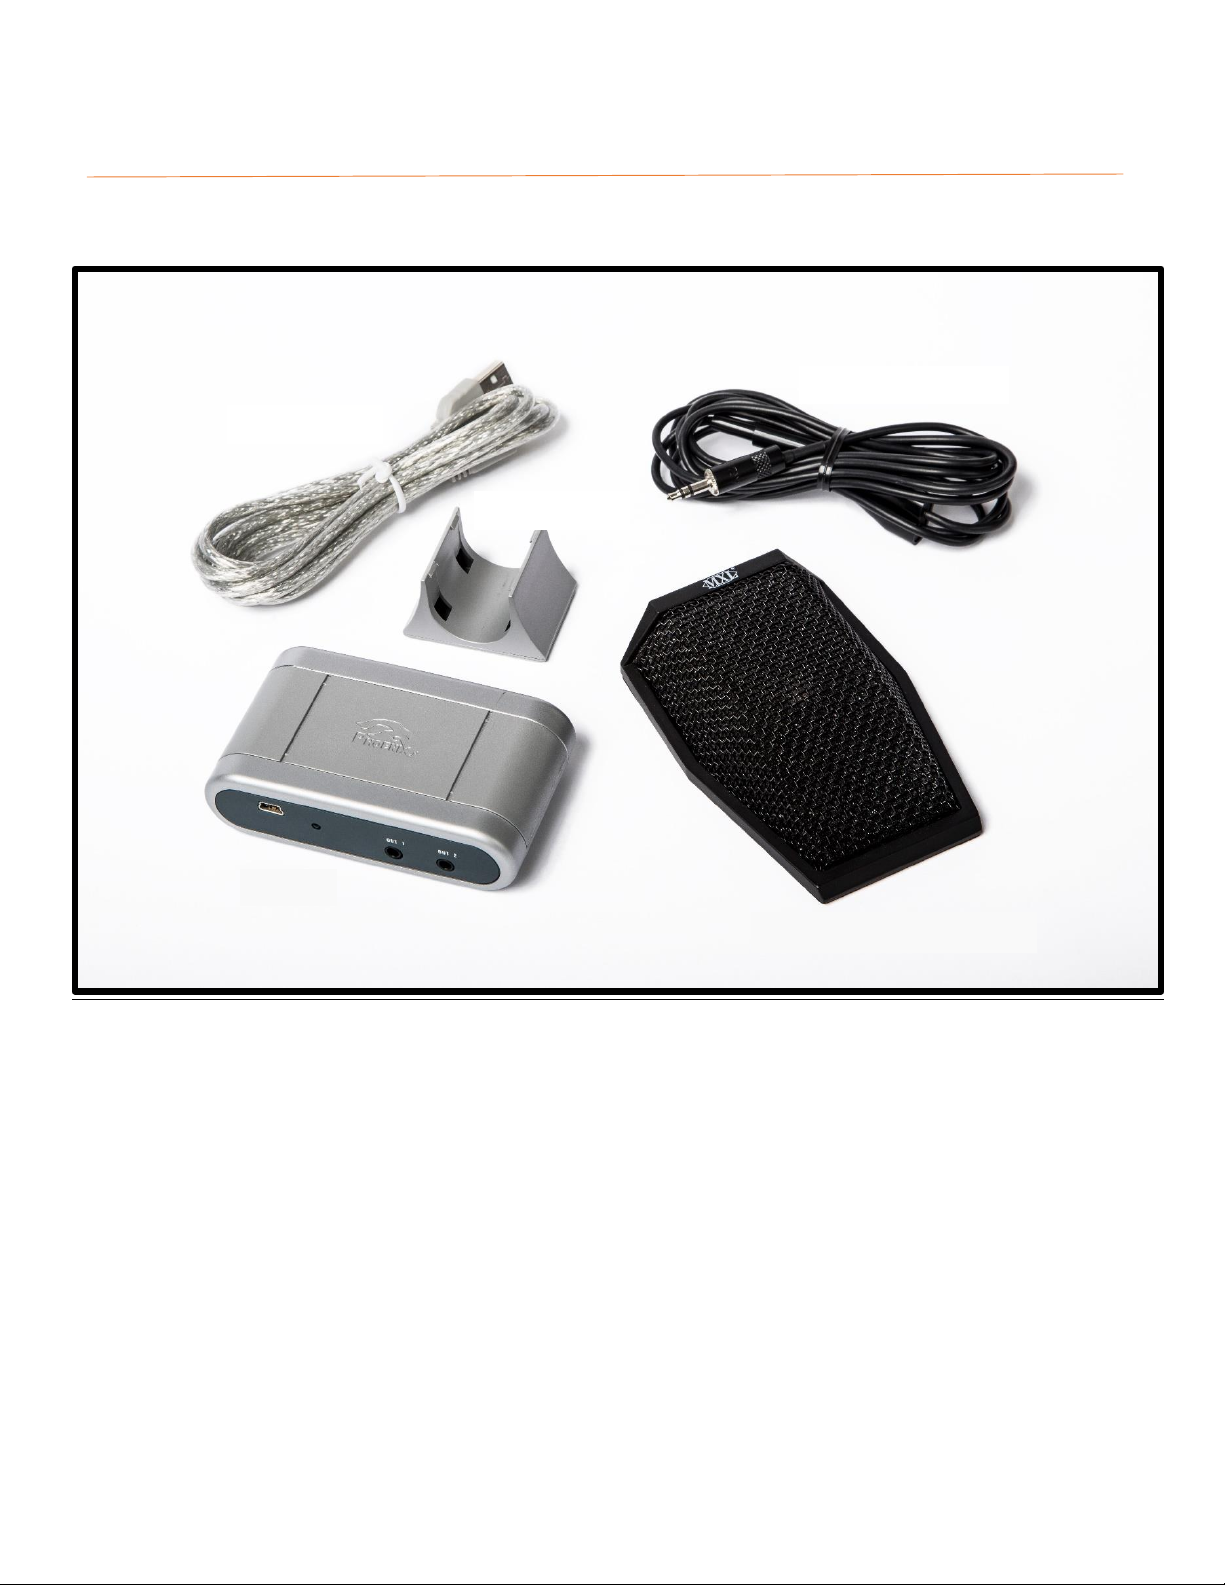
STEP 1: CONNECTING THE MXL MICROHPONE TO THE MT107
Locate the MXL microphone provided and connect the 3.5mm jack to the back of the MXL microphone. Next, connect
other end of this cable to the IN1 slot on the MT107.
STEP 2: CONNECTING YOUR COMPUTER OR A/V PROCESSING UNIT TO THE USB SLOT
Simply plug in the USB cable provided by Phoenix Audio Technologies to the USB slot on the MT107 and the computer
or A/V Processing Unit. The micro-USB side of the USB cable connects to the MT107. The regular USB side connects to
any desired USB slot on your computer A/V processing unit.
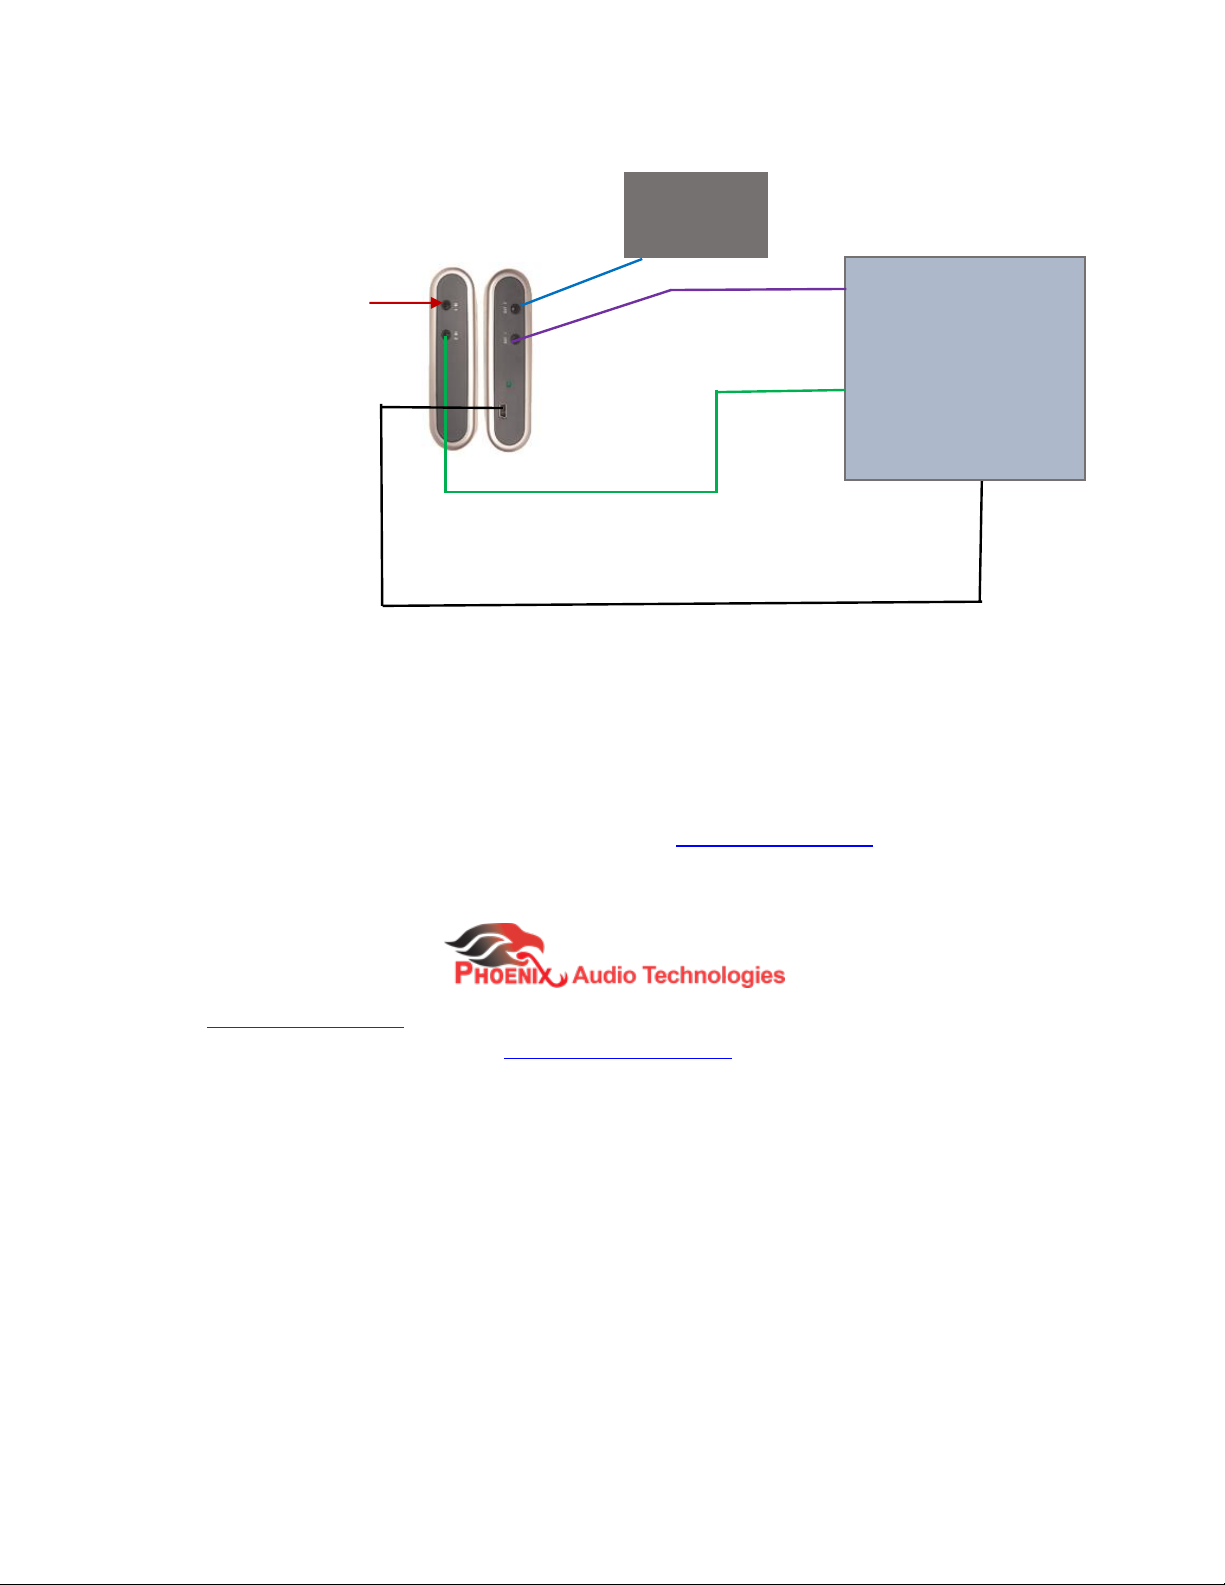
STEP 3: CONNECTING THE INCOMING AUDIO FROM FAR-END TO YOUR SPEAKERS OR AMPLIFIER
If connecting to a computer: The incoming audio from the far-end is relayed through the OUT2 slot. Connect your
amplifier or speakers to this slot by plugging in the 3.5mm jack end of the cable connected to your amplifier or external
speakers to the OUT2 slot of the MT107. OUT2 slot must be connected to external speakers.
If connecting to an A/V device that is connected to a T.V via HDMI: The OUT2 slot does not require a connection.
STEP 4: CONNECTING THE REFERENCE AUDIO TO THE MT107 (optional for a Computer Connection. Mandatory for
Video Conferencing devices connected to a T.V)
Computer Connection: Connect your systems loud speakers (audio out) relevant to the audio that needs to be canceled
into IN2 via a 3.5mm jack.
A/V System connected to a T.V via HDMI: Connect the T.V Audio Output to the IN2 slot of the MT107. (Refer to figure
below) (Note: If a Headset jack is present on your T.V, you can connect it to the MT107 with the provided audio cable.
If the T.V Audio Output jack is anything other than a digital 3.5mm stereo jack, an appropriate audio cable or converter
must be purchased separately.
CONNECTING TO A VIDEO CONFERENCING DEVICE
IN2= T.V Audio Out (via 3.5mm audio
cable, might require a RCA converter)
Note: The OUT1 & OUT2 connections are not required