Steelcase RoomWizard II User manual

Information in this document is subject to change without notice. Reproduction
in any manner without written permission of Steelcase Corporation is forbidden.
Steelcase Corporation reserves the right to make changes in product
design, or detail, and to discontinue any product or material without notice.
RoomWizard is a trademark of Steelcase, Inc. All other registered trademarks
and trademarks used herein are the property of their respective owners.
Order number 10-0003133
©2010 Steelcase Inc.
All rights reserved.

2RoomWizard | INSTALLATION MANUAL

3
INSTALLATION MANUAL | RoomWizard
Schedule meetings faster and easier
with RoomWizard®
.
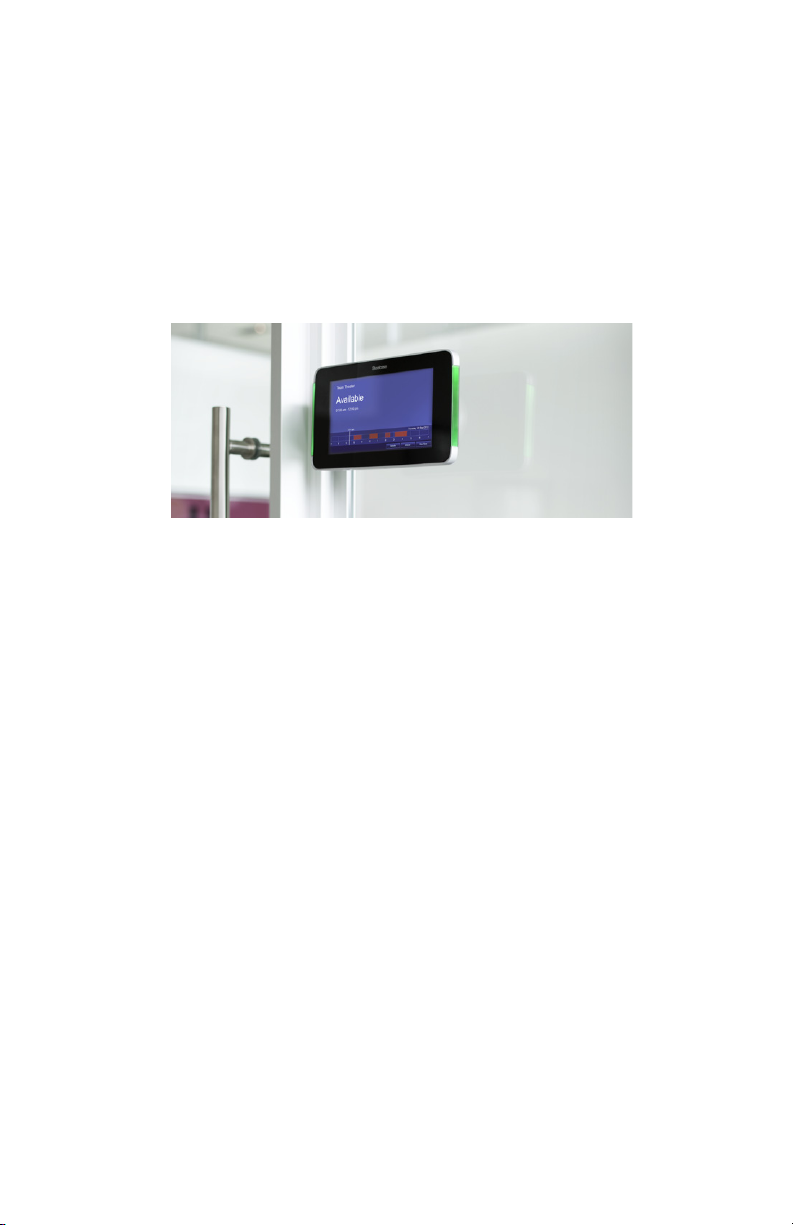
The RoomWizard is an interactive touch-screen device mounted near
a meeting room entrance or open group area. It’s a web-based room
reservation system you can access from any computer on the web.
RoomWizards are easy to install and maintain.
• A Power-over-Ethernet (PoE) network cable powers each
RoomWizard. A traditional AC power source is not needed.
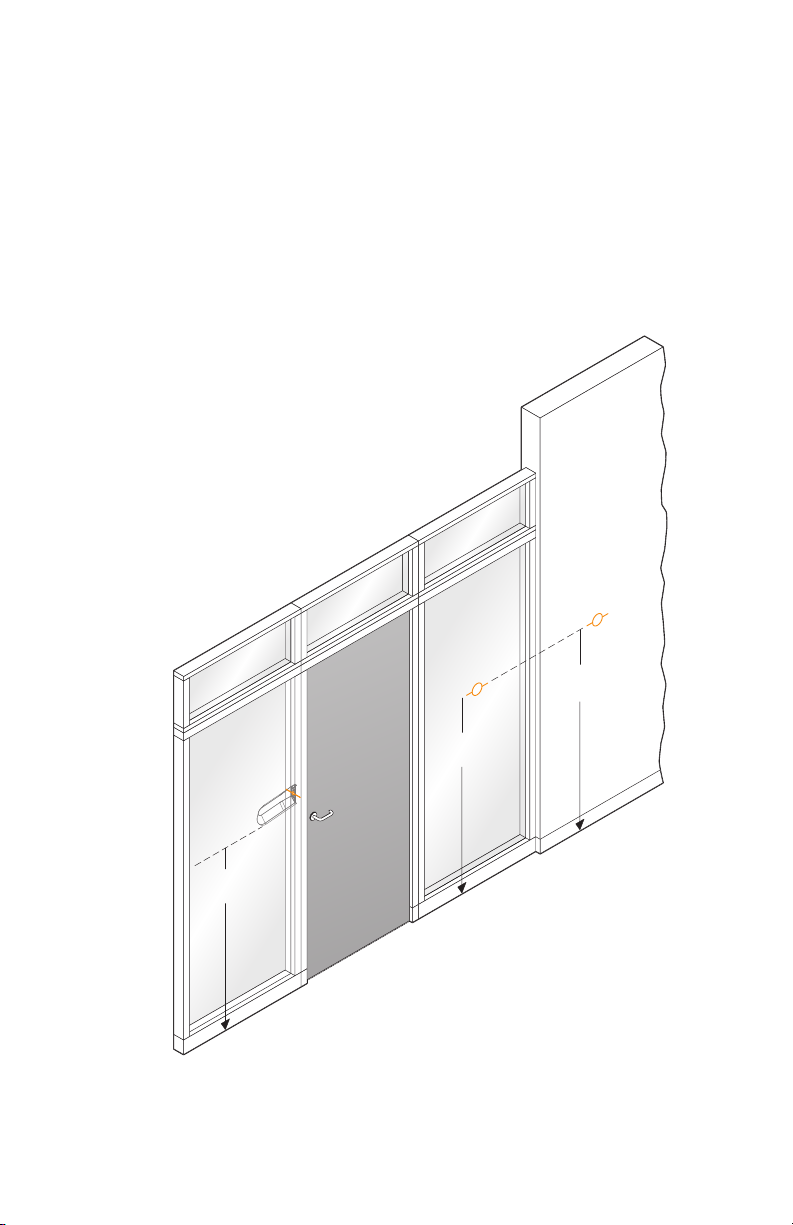
• RoomWizards may be mounted on drywall, concrete, brick, glass,
doorframes, or furniture.
• The touch screen may be cleaned with common cleaners.
• RoomWizards may be secured with industry-standard locks or
screws.
RoomWizard web pages simplify administration.
• Update room names, times, and amenities.
• Use the software to troubleshoot problems.
• Implement changes and new features across groups of
RoomWizards.
ABOUT THIS MANUAL
This manual describes how to install and mount a RoomWizard
using the components provided. It also lists the tools you will need to
perform the installation.
This guide provides basic instructions for mounting a RoomWizard
with standard mounting, glass mounting, or universal bracket
mounting.
WELCOME

4RoomWizard | INSTALLATION MANUAL
PREPARING TO INSTALL
POWER AND DATA REQUIREMENTS
• Each RoomWizard requires a Power-over-Ethernet (PoE) 802.11af/t
switch or a network connection with a Power Injector.
• 10baseT or 100baseT Ethernet
• A web browser is required to access the web-based room
reservation system.
PLANNING CABLE ROUTING
Plan routing for the PoE cable before installing each RoomWizard.
MOUNTING
Three mounting options are available:
• Standard mounting for mounting a RoomWizard to drywall,
concrete, or brick.
• Glass mounting for mounting a RoomWizard directly onto glass.
• Universal bracket mounting for attaching a RoomWizard to an
adjacent doorframe or other extrusion or to a piece of furniture.
HOW TO INSTALL

5
INSTALLATION MANUAL | RoomWizard
RECOMMENDED ROOMWIZARD INSTALLATION HEIGHTS
ADA Accessibility Guidelines require that the highest point
of interaction not exceed 54 inches (137cm). For RoomWizard,
this highest point of interaction is the top edge of the touch
screen. These installation instructions meet this 54-inch (137cm)
target height.
51
1
/
4
" (130cm)
to floor
Universal Bracket
Installation
Glass-Mount
Installation
Drywall-Mount
Installation
503/4" (129cm)
to floor
52" (132cm)
to floor

6RoomWizard | INSTALLATION MANUAL
TOOLS AND EQUIPMENT YOU WILL NEED
Measuring tape
Level
Pencil
Ethernet cable,
Category 5 or 6 with
Power over Ethernet
#2 Phillips head
screwdriver or drill bit
Power drill or driver
1" (25mm) hole saw
(drywall mount only)
¼" (6mm) bit
(drywall mount only)
3
/
8
" (10mm) bit
(glass mount only)
½" or
5
/
8
"
(13mm or 16mm) bit
(universal mount only)
5
/
16
" (8mm) bit
universal mount only)
10mm wrench
(universal mount only)
DRYWALL MOUNTING
These instructions guide you through installing a RoomWizard on
drywall. If installing on some other surface, such as concrete or
brick, use these instructions as a guideline, but install appropriate
anchors to secure the RoomWizard to the wall.
Recessed mounting is possible, if you consider the following:
• Allow approximately 5 inches (13cm) of clearance above the unit for
removal of the RoomWizard from the mounting bracket.
• Allow a minimum of 2 inches (5cm) on both sides and the bottom
of the RoomWizard for proper ventilation.
INCLUDED IN DRYWALL-MOUNT KIT
• 1 mounting puck
• 4 drywall anchors and screws
• 1 RoomWizard unit
• 2 mounting screws

7
INSTALLATION MANUAL | RoomWizard
DRYWALL MOUNTING STEPS
1 Drill a hole 1 inch (25mm) in diameter 52 inches (132cm) above the
oor.
52" (132cm)
to floor
1"
2 Route the PoE network cable through the wall to the hole.
3 Center and level the mounting puck over the hole using the level.
4 Mark the locations of the four wall anchors using the mounting puck
as a template.
5 Remove the mounting puck and pre-drill four holes at the marked
locations using a ¼-inch (6mm) drill bit.

8RoomWizard | INSTALLATION MANUAL
6 Using a #2 Phillips head screwdriver, slowly screw the four wall
anchors into the pre-drilled holes.
7 Align the mounting puck over the four wall anchors and fasten it to
the wall using the four provided screws.
8 Draw the PoE network cable through the mounting puck and insert
it into the back of the RoomWizard. The RoomWizard will power on
once an active network cable is connected to the unit.
9 Using a #2 Phillips head screwdriver, attach the RoomWizard to the
mounting puck using the two provided screws.

9
INSTALLATION MANUAL | RoomWizard
GLASS MOUNTING
These instructions guide you through installing a RoomWizard
directly to glass. The PoE cable can be routed inside an adjacent
doorframe or other extrusion. Mount the RoomWizard within 18
inches (45cm) of the frame if you wish to use the included mesh
cable manager to disguise the cable.
INCLUDED IN GLASS-MOUNT KIT
• 1 alcohol cleaning pad
• 1 glass mounting disk
• 1 mounting puck
• 4 puck attachment screws
• 1 mesh cable manager
• 1 RoomWizard unit
• 2 mounting screws
• 1 glass mount cover
GLASS MOUNTING STEPS
1 Clean both sides of the glass where you wish to mount the
RoomWizard using the provided glass cleaning cloth. The location
should be 51¼ inches (130cm) above the oor and, if you wish to
use the provided mesh cable manager, within 18 inches (45cm) of an
adjacent extrusion.
51
1
/
4
" (130cm)
to floor
Maximum 18" (45cm)
to extrusion
ALCOHOL
PREP PAD

10 RoomWizard | INSTALLATION MANUAL
2 Remove the paper backing from the adhesive on the back of the
mounting disk. Center and level the bottom of the mounting disk
51¼ inches (130cm) above the oor using the level.
3 Attach the mounting puck to the mounting disk using the four
provided screws and a #2 Phillips head screwdriver.
4 If routing the PoE cable through an adjacent extrusion:
• Drill a 3
/8-inch (10mm) hole into the extrusion.
• Route the PoE cable through the 3
/8-inch hole and the mesh cable
manager.
5 Draw the PoE network cable through the mounting puck and
insert it into the back of the RoomWizard. If using the mesh cable
manager, tuck the cable manager into the housing on the back of
the RoomWizard. The RoomWizard will power on once an active
network cable is connected to the unit.
6 Using a #2 Phillips head screwdriver, attach the RoomWizard to the
mounting puck using the two provided screws. Use the level to level
the RoomWizard before tightening the screws.

11
INSTALLATION MANUAL | RoomWizard
7 Align and attach the glass-mount cover to the inside glass surface to
hide the adhesive on the back of the mounting disk.
UNIVERSAL MOUNTING
These instructions guide you through installing a universal mounting
bracket. The RoomWizard is then attached to the bracket. This
method may be used if you wish to attach the RoomWizard to a
doorframe or other extrusion.
INCLUDED IN UNIVERSAL-MOUNT KIT
• 1 universal mounting bracket
• 2 T-anchors and nuts
• 2 T-anchor washers
• 4 bracket spacers
• 1 universal mounting bracket cover

12 RoomWizard | INSTALLATION MANUAL
• 1 mounting puck
• 4 puck attachment screws
• 1 RoomWizard unit
• 2 mounting screws
UNIVERSAL BRACKET MOUNTING STEPS
1 Position the universal mounting bracket over the extrusion with the
bottom of the bracket 50¾ inches (129cm) above the oor.
2 Mark the locations of the three holes using the mounting bracket as
a template.
50
3
/
4
" (129cm)
to floor
3 Drill a hole in the top and bottom marked locations using the
5
/16-inch (8mm) drill bit.
4 Drill a hole in the center marked location using the ½- or 5
/8-inch
(13mm or 16mm) drill bit.

13
INSTALLATION MANUAL | RoomWizard
5 Route the PoE cable through the extrusion and out through the
center hole.
6 Route the PoE cable through the center hole on the backside of the
universal mounting bracket, and position the bracket over the hole.
7 Attach the mounting bracket to the extrusion using the provided
T-anchors in the top and bottom holes in the bracket. Tighten the
nuts on the T-anchors using a 10mm wrench. Use the provided
T-anchor spacers if the extrusion is thin.
8 Route the PoE cable through the mounting bracket cover.

14 RoomWizard | INSTALLATION MANUAL
9 Attach the cover and the mounting puck to the bracket using the
four provided screws and a #2 Phillips head screwdriver.
10 Route the PoE network cable though the mounting puck and insert it
into the RoomWizard. The RoomWizard will power on once an active
network cable is connected to the unit.

15
INSTALLATION MANUAL | RoomWizard
11 Using a #2 Phillips head screwdriver, attach the RoomWizard to the
mounting puck using the two provided screws. Use the level to level
the RoomWizard before tightening the screws.

16 RoomWizard | INSTALLATION MANUAL
In most installations, RoomWizard installation is now complete.
Depending on your installation, you may need to complete
additional steps.
SECURING A ROOMWIZARD
Each RoomWizard includes a Kensington Security Slot (K-slot or
Kensington Lock) to accept a Kensington or similar brand security
cable and lock. If desired, insert your cable locking device into the
slot on the bottom of the RoomWizard.
For additional security, tamper-resistent or security screws may
be used to attach the RoomWizard to the mounting puck. Use
M3.5-0.6 screws.
SUPPORTING THE VISUALLY IMPAIRED
A RoomWizard can accommodate a Braille sticker indicating the
name of the room on the aluminum frame below the touch screen.
For more information on how to create and apply Braille stickers,
email Steelcase technical support at techsupport@steelcase.com.
COMPLETING INSTALLATION

17
INSTALLATION MANUAL | RoomWizard
In the USA and Canada, contact Steelcase USA Technical Support:
• Phone: 1.800.334.4922 (24-hour support Monday through Friday)
• Email: techsupport@steelcase.com
• URL: www.steelcase.com
Outside North America, contact Steelcase Europe/Asia Technical Support:
• Phone: +33 3 88 13 36 36 (Support available in English, French,
German, and Spanish, Monday through Friday, 7:00 to
19:00 US Central Standard Time.)
• Fax: +32 (0)89 32 31 31
• Email: business.center@steelcase.com
• URL: www.steelcase.com
TECHNICAL SUPPORT
Other manuals for RoomWizard II
4
Table of contents
Other Steelcase Conference System manuals
Popular Conference System manuals by other brands

NEUTRIK
NEUTRIK NPPA-TT-PT Series instruction manual

Jabbla
Jabbla Allora manual

Taiden
Taiden HCS-4800 Series Installation and operating manual

TeachLogic
TeachLogic Forum 232 installation manual

Asus
Asus Chromebox for meetings for the large room user guide

Polycom
Polycom MGC+100 ReadiConvene Getting started guide

Avaya
Avaya scopia elite 6000 series Administrator's guide

Polycom
Polycom RealPresence Group Series user guide

Polycom
Polycom Real-Time Media Conferencing Platform RMX... Getting started guide

Metro Audio Systems
Metro Audio Systems MA-2100 user guide

Yealink
Yealink MeetingEye 400 quick start guide

Panasonic
Panasonic KX-NS500 Programming manual