Phonetone Helloway PTE-A70 User manual

1/6
HellowayTM
PTE-A70
In-Building Signal Booster
User Manual

2/6
SAFTY WARNING
WARNING:
The human user’s body should always be separated from the antenna
of the equipment by at least 25cm (10〞).
Do not remove the covers during working.
Do not try to repair or replace any components inside of the
equipment. Alteration or abuse of the equipment or other components will
void this product’s warranty, and could be dangerous to the user.
PACKAGE CONTENTS sddg
1 2
1. 1x PTE-A70 Booster with N Female connectors.
2. AC Power Adaptor.
3. Screws Mounting Kits.
4. User manual (this document)
INSTALLATION PROCEDURES
NOTE:
This wireless amplifier can be used for home, office, apartment and all other
applicable area. Do not place the equipment in direct sunlight or in an area that
has abrupt temperature and humidity changes.
The whole Kit includes everything you need to enhance coverage within your area.
Installation of the Repeater is very easy and takes minutes. Just mount the outdoor
antenna and connect to the booster input connector. At the output of the Repeater
connect the indoor coverage antenna then plug-in the power supply, you'll enjoy
enhanced coverage service in your home or office. For best performance the external
aerial should be mounted in the location with the strongest signal strength. The effective
coverage area of the unit depends on the input signal provided from this antenna.

3/6
1. Prepare a location. Place or Fix the equipment on a sturdy, and the surface in a
well-ventilated area, makes sure that the air vents are not blocked.
2. Connect the Inside Antenna: The indoor antenna is intended for indoors use
only. Remove the cap from the Amplifier connector marked with CELLULAR
PHONE. Screw the indoor antenna in to the CELLULAR PHONE connector and
make sure to tighten it.
3. Connect the Outside Antenna: The outdoor antenna is for outdoor use only.
Select an outside mounting location. For best performance, try to keep the antenna
on top of the location. The outside antenna should be located in an area with at least
a 30” radius clear of obstructions, and other radiating elements. Remove the cap
from the Amplifier connector marked with OUTSIDE ANTENNA. Screw the outside
antenna in to the OUTSIDE ANTENNA connector and make sure to tighten it.
NOTE:
Keep the separation distance between the inside and outside antennas at
least 20 feet apart.
The outside antenna must be mounted with a separation distance of at
least 3 feet from any of the other occupants or nearby persons and must not
be co-located or operating in conjunction with any other antenna or amplifier.
Antenna gain is 3dBi(Max.).
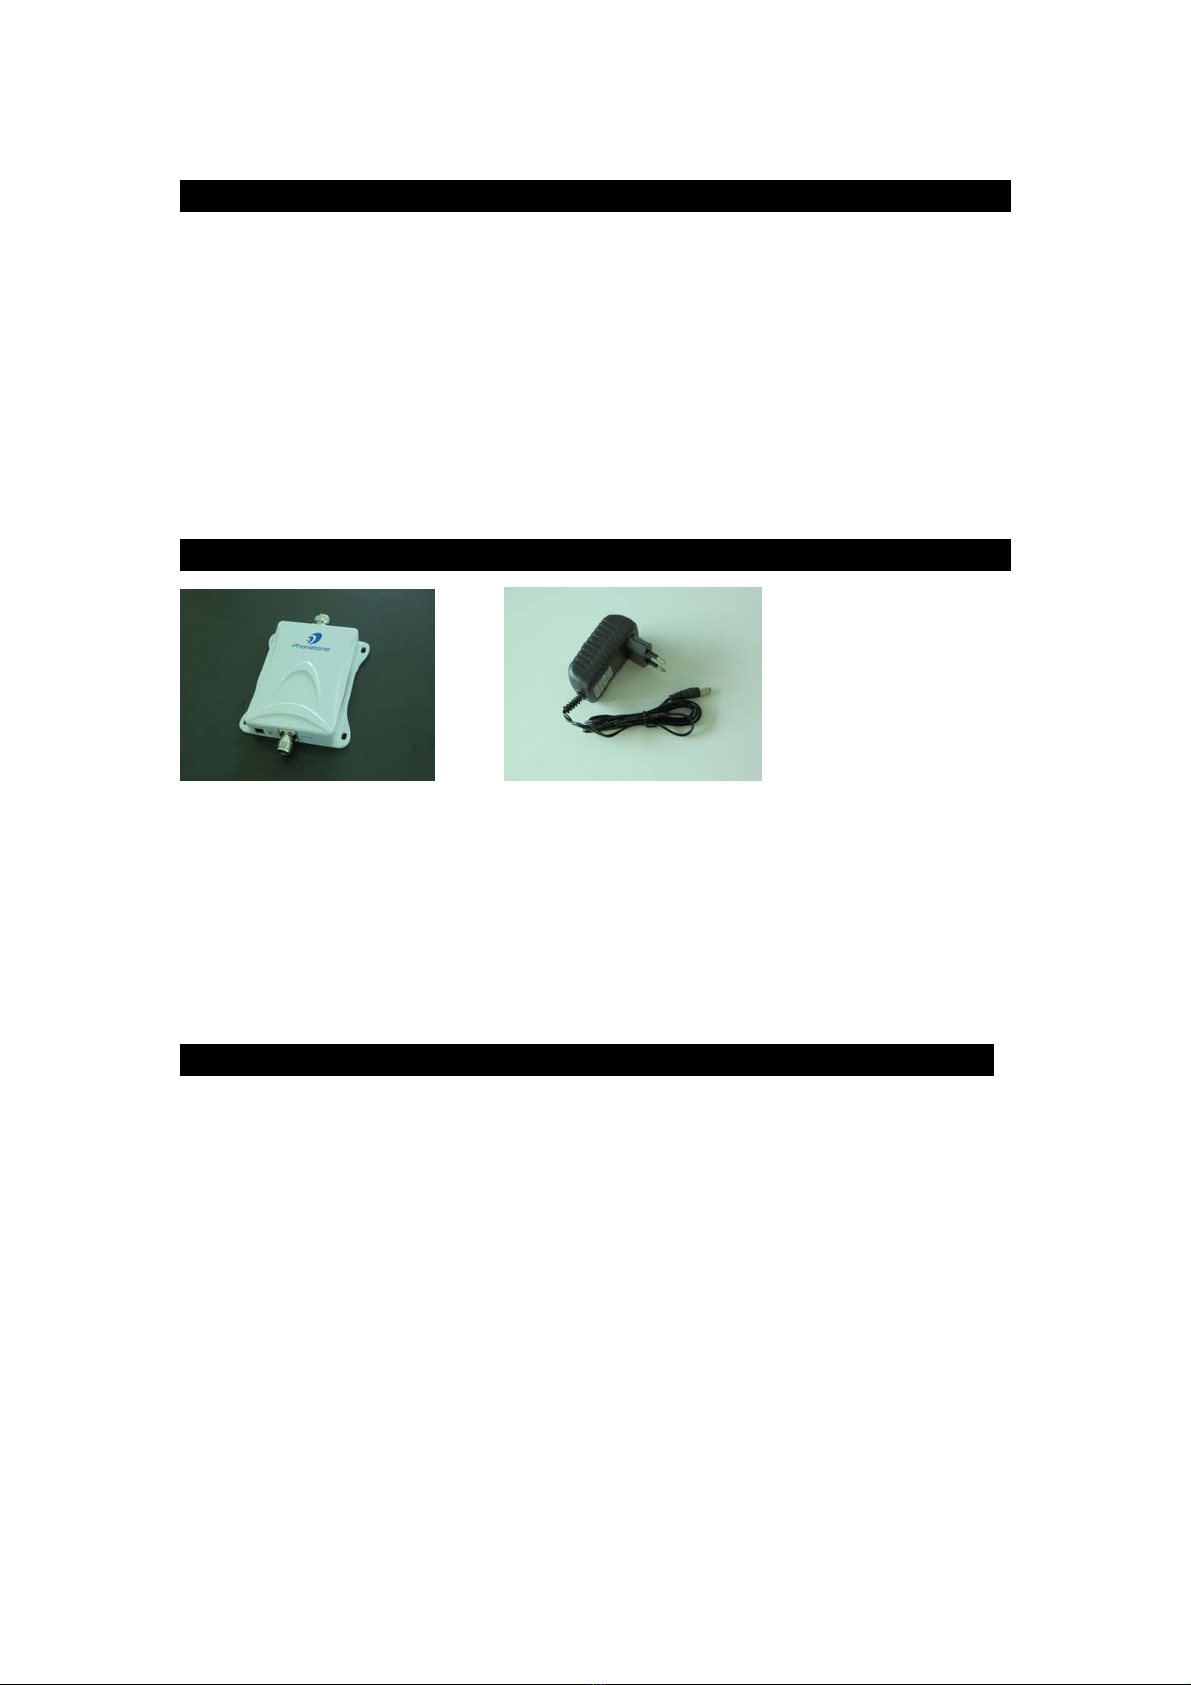
4. Connect the Power Cord: 1) Connect the power cord to the power connect on
the top end of the amplifier marked with DC 6V, 2) connect the other end of the
power cord to a grounded alternating current (AC) outlet. Also, if the Power Cord is
connected to a power strip, make sure that the power strip is switched on. 3) The
LED light is green, indicating that theAmplifier is ready to use.
NOTE:
To prevent damage to the Amplifier, before plugging in the Amplifier to a DC/AC
power outlet, make sure that all of the connections (ANTENA to AMPLIFIER) to the
Amplifier are tight and secure.
WARNING:
The input voltage for the Amplifier is 6V~24V DC. DO NOT use this Amplifier with
a regular power supply that NOT range in 6V~24 V . otherwise, it will be damaged
and the user may also be injured.

4/6
(Optional)
1. Mounting the Amplifier with Velcro:
You can leave the Amplifier on top of a flat surface or use the enclosed Velcro straps to
mount the Amplifier. There are two Velcro strips (hook-and-loop pairs) in the box for
mounting the amplifier.
Determine the location where your Amplifier will be placed. Clean the intended surface
and allow it to dry. Peel the protective paper from the back of the hook sides of the
Velcro. Press the adhesive side of the Velcro strips into place on the bottom of the
Amplifier, one strip on each end. Wait 5 minutes for the adhesive to set before
attaching the loop side of the Velcro to the hook side. The adhesive bond will reach its
maximum strength after 24 hours.
With both of the Velcro loop and hook pieces attached to the back of the Amplifier, peel
the protective paper off of the back of the loop strips. Press the entire Amplifier into its
mounting place. Wait 5 minutes for the adhesive to set. Make sure the Amplifier is
firmly seated. To remove the Amplifier, rotate it across the Velcro – do not pull the
Amplifier or cables.
STARTING THE AMPLFIER
The signal is received by the outside antenna from the cell tower, then amplified and
transmitted to your phone through the inside antenna. When the phone transmits, the
signal is received by the inside antenna, then amplified and transmitted to the cell tower
through the outside antenna.
Now you are ready to make and receive cell phone calls with powerful signal
amplification! Note that it is normal for the Amplifier’s case to be warm during
operation.
Press any cell phone key to refresh its communication with the base station. If your
signal is weak, having this Amplifier installed and operating properly will give you a large
increase in the signal strength and quality. The change in the signal strength can be
seen on the visual display of your cell phone, and heard on your receiver or headset. To
see the difference, try operating your phone in an area that is known to have weak cell
phone signals. You will be amazed at the dramatic difference the PHONETONE Signal
Amplifier provides!
TROUBLESHOOTING AND SUPPORT

5/6
During using your Amplifier, if the Amplifier interferes with your radio or other electronic
device, move theAmplifier further away from those devices, you might be able to solve it
yourself.
If necessary,please contact your local dealer or send e-mail to our support team by the
following methods:
E-mail: support@phonetone-tech.com
If you want to know about Phonetone Company and products for more information,
please visit at: www.phonetone-tech.com
WARRANTY
Warranty information applicable to your Amplifier
Warranty Period: 2 year.
Type of Warranty Service: Customer Replaceable Unit and Customer Carry-In or
Mail-In Service.
Phonetone Company is not responsible for Shipping Cost.
For Warranty service consult the telephone list at www.phonetone-tech.com/contact us.
What this Warranty Covers
Phonetone warrants that each Machine 1) is free from defects in materials and
workmanship and 2) conforms to Phonetone's Official Published Specifications which
are available on request.
The warranty period for the Machine starts on the original date of installation. The date
on your invoice or sales receipt is the date of installation unless Phonetone or your
reseller informs you otherwise, unless Phonetone Ltd. specifies otherwise.
This warranty does not cover the following:
Failure resulting from misuse, accident, modification, unsuitable physical or operating
environment, or improper maintenance by you;
The warranty is voided by removal or alteration of identification labels on the Machine or
its parts.
Copyright Information
© 2012 Copyright Phonetone Technology (Shenzhen) Co., Ltd.
The information contained in this document is subject to change without notice.

6/6
Edition 2, 9/2012
Table of contents
Other Phonetone Extender manuals

Phonetone
Phonetone PTE-CP65 User manual

Phonetone
Phonetone AN-CP65 User manual

Phonetone
Phonetone PTE-C980D User manual

Phonetone
Phonetone PTE-L60A User manual

Phonetone
Phonetone PTE-C70 User manual

Phonetone
Phonetone PTE-NC980D User manual

Phonetone
Phonetone HELLOWAY PTE-P70 User manual

Phonetone
Phonetone PTE-C980D User manual
Popular Extender manuals by other brands

Altronix
Altronix AL602ULADAJ installation guide

NEXTIVITY
NEXTIVITY Cel-Fi QUATRA RED Installation and user guide

controlair
controlair T-6100 Installation, operation and maintenance instructions

SmoothTalker
SmoothTalker Mobile CX6 4G LTE user manual

Telecast
Telecast THOR-HE-KIT user manual

AVGear
AVGear AVG-HD400DSC user manual