manuals.online logo
Brands
  1. Home
  2. •
  3. Brands
  4. •
  5. Phonocar
  6. •
  7. Air Compressor
  8. •
  9. Phonocar 04993 User manual

Phonocar 04993 User manual

IT
EN
FR
DE
ES
MINI COMPRESSORE CON BATTERIA RICARICABILE, DISPLAY, TORCIA E
ADATTATORI PER PNEUMATICI E PICCOLI GONFIABILI
MINI COMPRESSOR WITH RECHARGEABLE BATTERY, DISPLAY, TORCH AND
ADAPTERS FOR TYRES AND SMALL INFLATABLE DEVICES
MINI COMPRESSEUR AVEC BATTERIE RECHARGEABLE, AFFICHEUR, TORCHE ET
ADAPTATEURS POUR PNEUS ET PETITS GONFLABLES
MINI-KOMPRESSOR MIT AKKU, DISPLAY, LED- TASCHENLAMPE UND ADAPTERN
FÜR REIFEN UND KLEINE AUFBLASGERÄT
MINI COMPRESOR CON BATERÍA RECARGABLE, DISPLAY, LINTERNA Y
ADAPTADORES PARA NEUMÁTICOS Y PEQUEÑOS OBJETOS HINCHABLES
phonocar.it
04993
MANUALE ISTRUZIONI / INSTRUCTIONS MANUAL / NOTICE D’UTILISATION /
BEDIENUNGSANLEITUNG / MANUAL DE INSTRUCCIONES
IT / EN / FR / DE / ES
04993
2
IT LEGGERE ATTENTAMENTE IL PRESENTE MANUALE
ISTRUZIONI PRIMA DELL’UTILIZZO.
AVVERTENZE
1. Tenere il dispositivo lontano dalla portata dei bambini.
2. Leggere e comprendere tutte le informazioni sulla sicurezza prima
di utilizzare il dispositivo.
3. Controllare attentamente il dispositivo prima di utilizzarlo e non
utilizzarlo se presenta anomalie.
4. Questo dispositivo non è adatto per pneumatici ad alta capacità.
5. Utilizzare il dispositivo in un’area sicura.
6. Utilizzare il dispositivo in ambiente asciutto e pulito. L’intrusione
di fango e/o polvere può danneggiarlo.
7. Non utilizzare il dispositivo in ambienti con sostanze infiammabili
e/o esplosivi.
8. Non rompere il tubo dell’aria e mantenere il flusso d’aria libero.
9. Mentre il dispositivo è in funzione l’operatore non deve
allontanarsi e deve controllare l’operazione di gonfiaggio per evitare
una eccessiva pressione (soprattutto se non viene utilizzato con uno
dei quattro programmi preimpostati).
10. Non utilizzare il dispositivo per più di 10 minuti. Dopo 10 minuti
di utilizzo, spegnere il dispositivo e aspettare che si raffreddi prima
di riaccenderlo (almeno 5/10 minuti).
11. Se il dispositivo emette un rumore anomalo e/o si surriscalda
il tubo dell’aria (in seguito ad un tempo troppo lungo di utilizzo)
spegnerlo e attendere almeno 10 minuti prima di usarlo
nuovamente.
12. Non utilizzare il dispositivo se la batteria e/o altre parti
presentano rigonfiamenti.
13. Per ricaricare la batteria utilizzare solo caricabatterie standard
certificati.
14. Il dispositivo non è impermeabile e non può essere messo a
contatto con liquidi.
15. Non smontare, urtare, comprimere o gettare nel fuoco il
dispositivo.
16. Tenere il dispositivo in ambienti con temperatura compresa
tra -10°/+60° C. Temperature eccessivamente fredde o calde
potrebbero danneggiare la batteria.
17. Non esporre la batteria al sole e/o al fuoco.
18. Non utilizzare batterie danneggiate e/o modificate.
19. Per preservare la batteria utilizzare il dispositivo e/o ricaricarlo
almeno una volta ogni 3 mesi.
20. Non buttare la batteria nei rifiuti domestici. Smaltire il
dispositivo secondo le normative locali vigenti.
ATTENZIONE!
SELEZIONARE SEMPRE LA CORRETTA PRESSIONE DEGLI
PNEUMATICI IN BASE ALL’AUTOMOBILE E ALLA PRESSIONE
CONSIGLIATA DAL PRODUTTORE
1. La corretta pressione degli pneumatici è importante per la
sicurezza stradale. È pericoloso gonfiare troppo o troppo poco gli
pneumatici.
2. Assicurarsi di scegliere la corretta unità di misura (bar) prima di
iniziare a gonfiare gli pneumatici.
EN READ THIS INSTRUCTION MANUAL CAREFULLY
BEFORE USE.
WARNINGS
1. Keep the device out of the reach of children.
2. Read carefully all safety information before using the device.
3. Check the device carefully before use and do not use it if it is
faulty.
4. This device is not suitable for high-capacity tyres.
5. Use the device in a safe area.
6. Use the device in a dry and clean environment. Mud and/or dust
can damage it.
7. Do not use the device in an environment with flammable and/or
explosives.
8. Do not break the air hose and keep the air flow free.
9. While the device is working the operator must not move away
and must monitor the inflation operation to avoid excessive pressure
(especially if not used with one of the four preset programmes).
10. After 10 minutes of use, switch the device off and wait for it to
cool down before switching it on again (at least 5/10 minutes).
11. If the device makes an abnormal noise and/or overheats the air
tube (after too long a time of use) switch it off and wait at least 10
minutes before using it again.
12. Do not use the device if the battery and/or other parts swell.
13. Use only certified standard chargers to recharge the battery.
14. The device is not waterproof and cannot come into contact with
liquids.
15. Do not disassemble, bump, compress or throw the device into
the fire.
16. Keep the device in environments with a temperature range
between -10°/+60° C. Excessively cold or hot temperatures may
damage the battery.
17. Do not expose the battery to sunlight and/or fire.
18. Do not use damaged and/or modified batteries.
IT / EN / FR / DE / ES 04993
3
19. To preserve the battery, use the device and/or recharge it at least
once every 3 months.
20. Do not throw the battery in the household waste. Dispose of the
device according to local regulations.
WARNING!
ALWAYS SELECT THE CORRECT TYRE PRESSURE
ACCORDING TO THE CAR AND THE PRESSURE
RECOMMENDED BY THE MANUFACTURER
1. The correct tyre pressure is important for road safety. It is
dangerous to overinflate or underinflate tyres.
2. Be sure to choose the correct unit of measurement (bar) before
starting to inflate the tyres.
FR LIRE ATTENTIVEMENT LA NOTICE D’UTILISATION
AVANT L’USAGE
RECOMMANDATIONS
1. Tenir le dispositif à loin des enfants
2. Lire scrupuleusement toutes les informations de sécurité avant
d’utiliser le dispositif.
3. Contrôler attentivement le dispositif avant l’utilisation. Ne pas
l’utiliser s’il présente des anomalies.
4. Ce dispositif est déconseillé pour les pneus à haute capacité.
5. Utiliser le dispositif dans une zone sûre
6. Utiliser le dispositif en lieu sec et propre. L’introduction de la boue
et/ou poussière pourrait l’endommager.
7. Ne pas utiliser le dispositif dans des endroits ayant des substances
inflammables et/ou explosives.
8. Ne pas casser le tuyau de l’air et laisser libre le flux d’air.
9. Ne pas s’éloigner du dispositif durant le fonctionnement;
l’opération de gonglement doit être controlée pour éviter une
pression excessive (surtout en cas de non utilisation de l’un des
quatre programmes pré-réglés).
10. Ne pas utiliser l’appareil pendant plus de 10 minutes. Après 10
minutes d’utilisation, l’éteindre et attendre le refroidissement avant
de le rallumer (5/10 minutes)
11. Si le dispositif fait un bruit anormal et / ou le tuyau de l’air
surchauffe (suite à un temps d’utilisation trop long), l’éteindre et
attendre au moins 10 minutes avant de l’utiliser de nouveau.
12. Ne pas utiliser l’appareil si la batterie et/ou les autres parties sont
gonglées.
13. Recharger la batterie uniquement avec des chargeurs standards
certifiés
14. Cet appareil n’est pas imperméable, donc éviter de le mettre en
contact avec des liquides.
15. Ne pas démonter, cogner, compresser ou jetter l’appareil dans
le feu.
16. Garder l’appareil dans un endroit ayant la température entre
-10° / +60°C. Les températures très froides ou trop chaudes
pourraient endommager la batterie.
17. Ne pas exposer la batterie au soleil et/ou au feu
18. Ne pas utiliser la batterie endommagée et/ou modifiée
19. Pour conserver la batterie, utiliser l’appareil et/ou recharger la
batterie au moins une fois tous les 3 mois.
20. Ne pas jetter la batterie dans la poubelle classique. Disposer de
l’appareil selon les normes locales en vigueur.
ATTENTION!
TOUJOURS CHOISIR LA BONNE PRESSION DES PNEUS EN
FONCTION DU VÉHICULE ET DE LA PRESSION CONSEILLÉE PAR LE
PRODUCTEUR.
1. La pression correcte des pneus est importante pour la sécurité
routière. Trop gonfler ou moins gonfler les pneus est dangéreux.
2. Vérifier le choix de l’unité de mesure correcte (bar) avant de
commencer à gonfler les pneus.
DE LESEN SIE DIESE BEDIENUNGSANLEITUNG VOR DEM
GEBRAUCH SORGFÄLTIG DURCH.
WARNUNGEN
1. Bewahren Sie das Gerät außerhalb der Reichweite von Kindern
auf.
2. Lesen und Sie alle Sicherheitshinweise sorgfältig durch , bevor Sie
das Gerät benutzen.
3. Überprüfen Sie das Gerät vor der Verwendung sorgfältig und
verwenden Sie es nicht, wenn es defekt ist.
4. Dieses Gerät ist nicht für Reifen mit hoher Tragfähigkeit geeignet.
5. Verwenden Sie das Gerät in einem sicheren Bereich.
6. Verwenden Sie das Gerät in einer trockenen und sauberen
Umgebung. Das Eindringen von von Schlamm und/oder Staub kann
das Gerät beschädigen.
7. Verwenden Sie das Gerät nicht in einer Umgebung mit
entflammbaren und/oder Sprengstoff.
8. Brechen Sie den Luftschlauch nicht ab und halten Sie den
Luftstrom frei.
9. Während des Betriebs des Geräts muss der Bediener den ganzen
Aufblasvorgang überwachen, um zu vermeiden übermäßiger
IT / EN / FR / DE / ES
04993
4
Druck (vor allem, wenn es nicht mit einem der vier voreingestellten
Programme verwdendet wird).
10. Verwenden Sie das Gerät nicht länger als 10 Minuten. Nach 10
Minuten schalten Sie das Gerät aus und warten Sie, bis es abgekühlt
ist, bevor Sie es wieder einschalten (mindestens 5/10 Minuten).
11. Wenn das Gerät ungewöhnliche Geräusche macht und/oder sich
überhitzt der Luftschlauch (nach zu langem Gebrauch) schalten Sie
es aus und warten Sie mindestens 10 Minuten, bevor Sie es wieder
benutzen. wieder.
12. Verwenden Sie das Gerät nicht, wenn der Akku und/oder andere
Teile schwellen.
13. Verwenden Sie zum Aufladen des Akkus nur zertifizierte
Standardladegeräte.
14. Das Gerät ist nicht wasserdicht und kann nicht in Kontakt mit
Flüssigkeiten.
15. Das Gerät nicht demontieren, anstoßen, zusammendrücken oder
ins Feuer werfen.
16. Halten Sie das Gerät in Umgebungen mit einem
Temperaturbereich zwischen -10°/+60° C. Übermäßig kalte oder
heiße Temperaturen können die Batterie beschädigen.
17. Setzen Sie die Batterie nicht dem Sonnenlicht und/oder Feuer
aus.
18. Verwenden Sie keine beschädigten und/oder modifizierten
Batterien.
19. Um den Akku zu schonen, verwenden Sie das Gerät und/oder
laden Sie es auf mindestens einmal alle 3 Monate.
20. Werfen Sie die Batterie nicht in den Hausmüll. Entsorgen Sie die
Gerät entsprechend den örtlichen Vorschriften.
VORSICHT!
WÄHLEN SIE IMMER DEN RICHTIGEN REIFENDRUCK
ENTSPRECHEND DEM FAHRZEUG UND DEM VOM HERSTELLER
EMPFOHLENEN DRUCK
1. Der richtige Reifendruck ist wichtig für
Sicherheit im Straßenverkehr. Es ist gefährlich, zu viel oder zu wenig
Luft in den Reifen zu lassen.
2. Vergewissern Sie sich, dass Sie die richtige Maßeinheit (bar)
gewählt haben, bevor Sie mit dem Aufpumpen der Reifen beginnen.
ES LEER ATENTAMENTE ESTE MANUAL DE
INSTRUCCIONES ANTES DE UTILIZAR.
ADVERTENCIAS
1. Mantenga el dispositivo alejado del alcance de los niños.
2. Leer y comprender toda la información de seguridad antes
de utilizar el dispositivo.
3. Compruebe cuidadosamente el dispositivo antes de usarlo y no
utilizarlo si presenta anomalías.
4. Este dispositivo no es adecuado para neumáticos de alta
capacidad.
5. Utilizar el dispositivo en un área segura.
6. Utilizar el dispositivo en un ambiente seco y limpio. La entrada
de barro y/o polvo puede dañarlo.
7. No utilizar el dispositivo en ambientes con sustancias inflamables
y/o explosivas.
8. No dañar el tubo de aire, mantener libre el flujo de aire.
9. Mientras que el dispositivo esté en funcionamiento, el operador
no deberá
alejarse y controlar la operación de inflado para evitar
una presión excesiva (especialmente si no se utiliza con uno
de los cuatro programas preestablecidos).
10. No utilizar el dispositivo durante más de 10 minutos. Después de
10 minutos
de uso, apague el dispositivo y espere a que se enfríe antes de volver
a encenderlo (por lo menos 5/10 minutos).
11. Si el dispositivo emite un ruido anormal y/o se sobre calienta
el tubo de aire (después de un tiempo de uso demasiado largo)
Apagarlo y esperar al menos 10 minutos antes de usarlo
nuevamente.
12. No utilizar el dispositivo si la batería y/u otras partes
presentan protuberancias.
13. Para recargar la batería utilizar solo cargadores estándar
certificados.
14. El dispositivo no es impermeable y no se puede poner a
contacto con líquidos.
15. No desmontar, golpear, comprimir ni prender fuego el
dispositivo.
16. Mantenga el dispositivo en ambientes con temperatura incluida
entre -10°/+60° C. Temperaturas excesivamente frías o calientes
podrían dañar la batería.
17. No exponga la batería al sol y/o al fuego.
18. No utilizar baterías dañadas y/o modificadas.
19. Para conservar la batería utilizar el dispositivo y/o recargarlo
al menos una vez cada tres meses.
20. No tire la batería a la basura doméstica. Deseche el
dispositivo de acuerdo con las regulaciones locales vigentes.
ATENCIÓN!
SELECCIONAR SIEMPRE LA PRESIÓN CORRECTA DE LOS
IT / EN / FR / DE / ES 04993
5
NEUMÁTICOS SEGÚN EL AUTOMÓVIL Y LA PRESIÓN
RECOMENDADA POR EL FABRICANTE
1. La presión correcta de los neumáticos es importante para la
seguridad vial. Es peligroso inflar demasiado o demasiado poco los
neumáticos.
2. Asegúrese de elegir la unidad de medida correcta (bar) antes de
empezar a inflar los neumáticos.
IT / EN / FR / DE / ES
04993
6
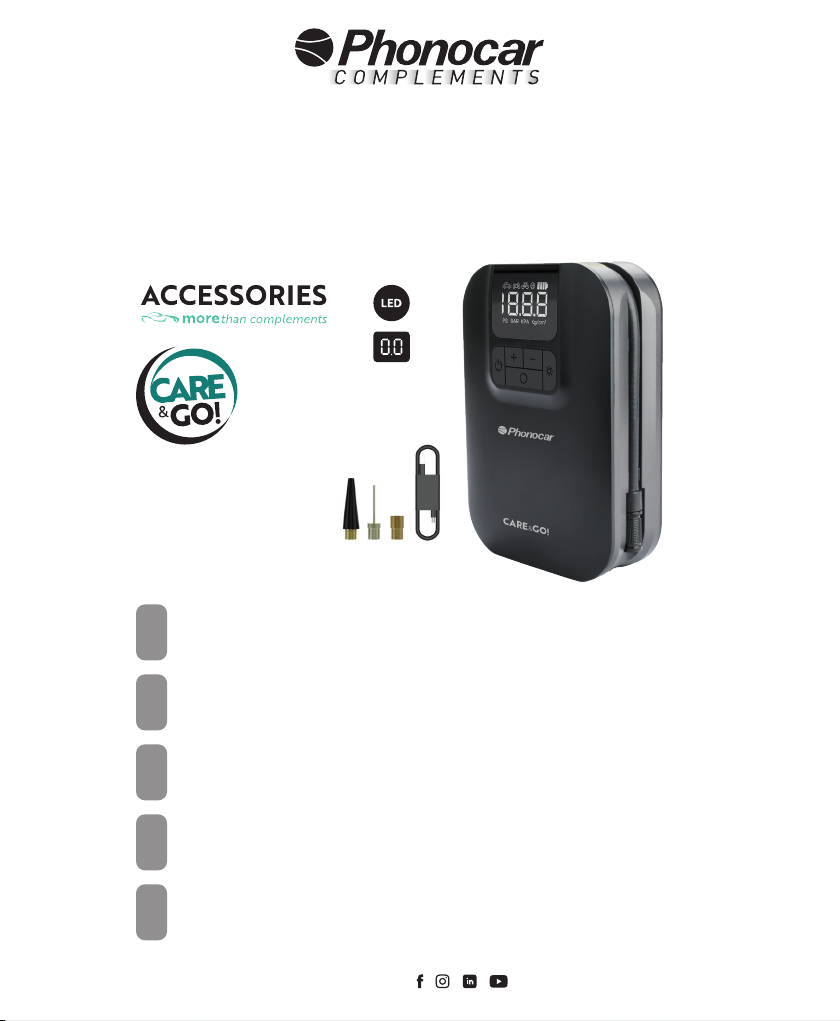
IT MINI COMPRESSORE PORTATILE CON BATTERIA
RICARICABILE, DISPLAY, TORCIA LED E ADATTATORI PER
PNEUMATICI (auto, moto e biciclette) e piccoli gonfiabili
(palloni, materassini, ecc.).
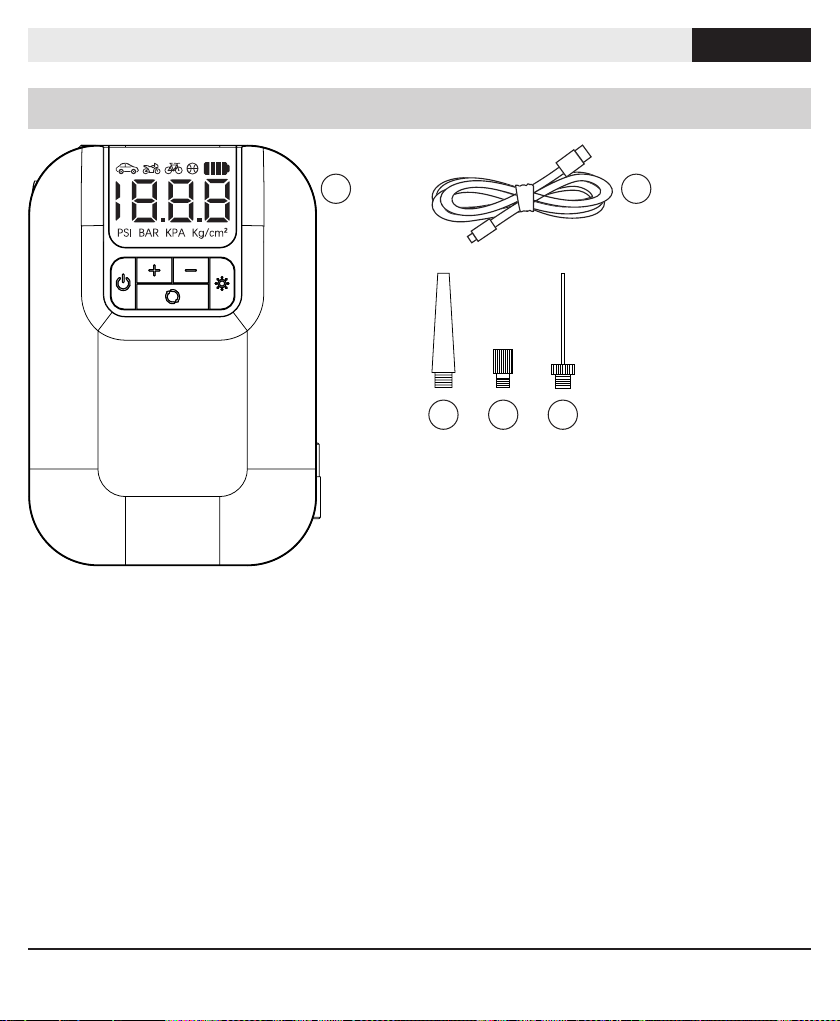
• 4 programmi con valori preimpostati:
AUTO, MOTO, BICI e PALLONI.
• Display digitale.
• Torcia a LED.
• Ricarica con cavo USB TypeC (5V 2A).
CARATTERISTICHE TECNICHE:
Pressione di gonfiaggio: 8 bar.
Pressione misurata: 0,2/10,3 Bar.
Batteria: 5000mAh/3.7V/18,5 wh.
Temperatura di esercizio: 0/35°C.
Alimentazione: 5V 2A.
Dimensioni: 152x104x46 mm.
EN PORTABLE MINI COMPRESSOR WITH RECHARGEABLE
BATTERY, DISPLAY, LED TORCH AND ADAPTERS FOR TYRES
(CARS, MOTORBIKES AND BICYCLES) AND SMALL INFLATABLE
DEVICES (BALLS, AIRBEDS, ETC.).
• 4 programs with preset values:
CARS, MOTORBIKES, BICYCLES AND BALLOONS.
• Digital display.
• LED torch.
• Charging with USB TypeC cable (5V 2A).
TECHNICAL FEATURES:
Inflation pressure: 8 Bar.
Measured pressure: 0.2/10.3 Bar.
Battery: 5000mAh/3.7V/18.5 wh.
Operating temperature: 0/35°C.
Power supply: 5V 2A.
Dimensions: 152x104x46 mm.
FR MINI COMPRESSEUR PORTABLE AVEC BATTERIE
RECHARGEABLE, AFFICHEUR, TORCHE à LED ET ADAPTATEURS
POUR LES PNEUS (VÉHICULES, MOTO ET BICYCLETTES) ET LES
PETITS GONFLABLES (BALLONS, MATELAS, ETC.).
• 4 programmes avec des valeurs préréglées:
véhicules, Moto, Vélos et ballons.
• Afficheur numérique.
• Torche à LED.
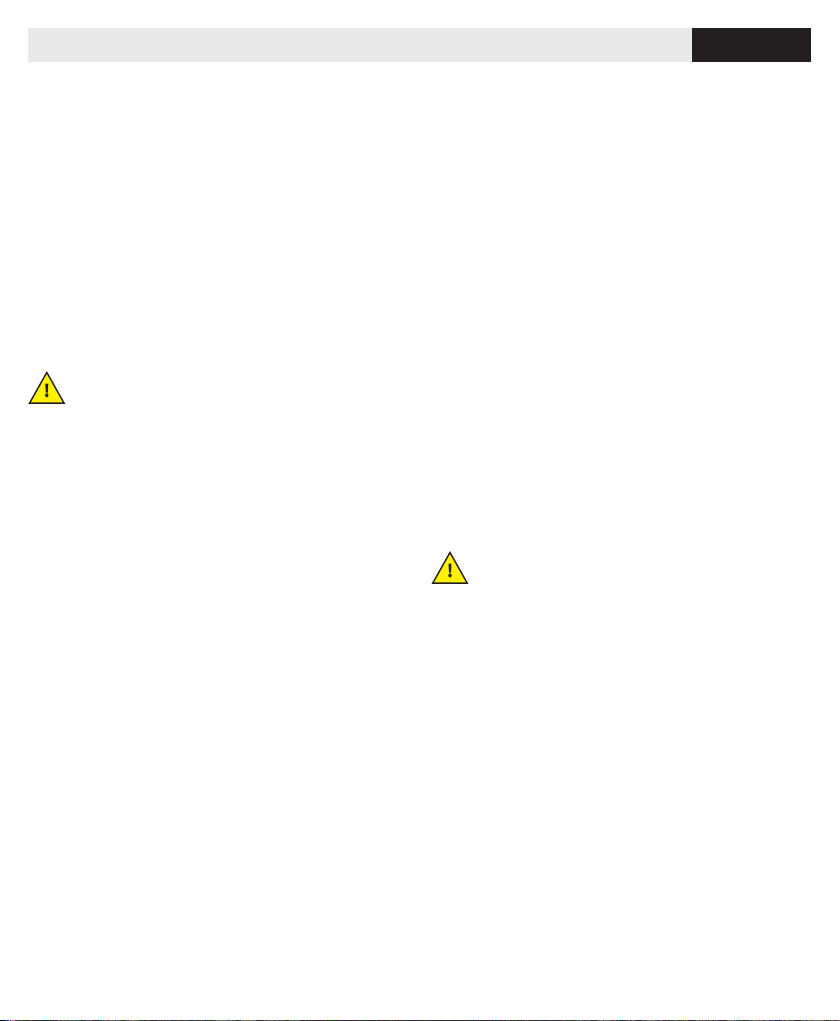
1 IT INFORMAZIONI E CARATTERISTICHE TECNICHE / EN INFORMATION AND TECHNICAL DATA / FR INFORMATIONS ET
CARACTÉRISTIQUES TECHNIQUES / DE INFORMATIONEN UND TECHNISCHE DATEN / ES INFORMACIÓN Y DATOS TÉCNICOS
• Charge avec câble USB TypeC (5V 2A).
CARACTÉRISTIQUES TECHNIQUES:
Pression de gonflement: 8 Bar.
Pression mesurée: 0,2/10,3 Bar.
Batterie: 5000mAh/3.7V/18,5 wh.
Température de fonctionnement: 0/35°C.
Alimentation: 5V 2A.
Dimensions: 152x104x46 mm.
DE TRAGBARER MINI-KOMPRESSOR MIT AKKU, DISPLAY,
LED-TASCHENLAMPE UND ADAPTERN FÜR REIFEN (AUTOS,
MOTORRÄDER, FAHRRÄDER) UND KLEINE AUFBLASGERÄTE
(Luftballons, Luftmatratzen, usw.).
• 4 Programme mit voreingestellten Werten:
AUTOS, MOTORRÄDER, FAHRRÄDER.
• Digitale Anzeige.
• LED-Taschenlampe.
• Aufladen mit USB TypC Kabel (5V 2A).
TECHNISCHE DATEN:
Aufpumpdruck: 8 Bar.
Gemessener Druck: 0,2/10,3 Bar.
Akku: 5000mAh/3.7V/18.5 wh.
Betriebstemperatur: 0/35°C.
Stromversorgung: 5V 2A.
Abmessungen: 152x104x46 mm.
ES MINI COMPRESOR PORTÁTIL CON BATERÍA RECARGABLE,
PANTALLA, LINTERNA LED Y ADAPTADORES PARA NEUMÁTICOS
(coches, motos y bicicletas) y pequeños inflables (globos,
colchonetas, etc.).
• 4 programas con valores preestablecidos:
COCHES, MOTOS, BICICLETAS Y PELOTAS.
• Pantalla digital.
• Linterna de LED.
• Recarga batería mediante cable USB Type C (5V 2A).
CARACTERÍSTICAS TÉCNICAS:
Presión de inflado: 8 Bar.
Presión medida: 0,2/10,3 Bar.
Batería: 5000mAh/3.7V/18,5 wh.
Temperatura de funcionamiento: 0/35°C.
Alimentación: 5V 2A.
Tamaño: 152x104x46 mm.
IT / EN / FR / DE / ES 04993
7
2 ITCONTENUTODELLACONFEZIONE/ENSUPPLIED/FRCONTENUDELABOITE/DEIMLIEFERUMFANGENTHALTEN/ESCONTENIDO
DEL ENVASE
1 2
3 4 5
IT
(1) COMPRESSORE
(2) CAVO PER LA RICARICA USB
(3) UGELLO PER PNEUMATICI DA MOTO
(4) UGELLO PER PNEUMATICI DA BICICLETTA
(5) UGELLO AD AGO PER PALLONI E PICCOLI GONFIABILI
EN
(1) COMPRESSOR
(2) USB CHARGING CABLE
(3) NOZZLE FOR MOTORBIKE TYRES
(4) NOZZLE FOR BICYCLE TYRES
(5) NEEDLE NOZZLE FOR BALLOONS
FR
(1) COMPRESSEUR
(2) CÂBLE POUR CHARGE USB
(3) BUSE POUR PNEUS DES MOTOS
(4) BUSE POUR PNEUS DES VÉLOS
(5) BUSE À AIGUILLE POUR LES BALLONS
DE
(1) KOMPRESSOR
(2) USB-LADEKABEL
(3) MOTORRADREIFENDÜSE
(4) FAHRRADREIFENDÜSE
(5) NADELDÜSE FÜR LUFTBALLONS UND KLEINE AUFBLASGERÄTE
ES
(1) COMPRESOR
(2) CABLE DE CARGA USB
(3) BOQUILLA PARA NEUMÁTICOS DE MOTO
(4) BOQUILLA PARA NEUMÁTICOS DE BICICLETA
(5) BOQUILLA DE AGUJA PARA PELOTAS Y PEQUEÑOS INFLABLES
IT / EN / FR / DE / ES
04993
8
3 IT TASTI E PANNELLO / EN BUTTONS AND PANEL / FR TOUCHES ET PANNEAU / DE TASTEN UND PANEL / ES TECLAS Y PANEL
IT COMPRESSORE
(6) DISPLAY
(7) TORCIA A LED
(8) INGRESSO TYPEC PER RICARICA
(9) TUBO DELL’ARIA
DISPLAY E TASTI
(10) TASTO ACCENSIONE/SPEGNIMENTO (ON/OFF)
(11) TASTO ACCENSIONE/SPEGNIMENTO TORCIA LED
(12) TASTO SELEZIONE FUNZIONE
7
82
6 9
(13) TASTO PRESSIONE +
(14) TASTO PRESSIONE -
(15) ICONE PNEUMATICO AUTO, PNEUMATICO MOTO, PNEUMATICO
BICICLETTA, PALLONI
(16) VALORE DELLA PRESSIONE
(17) UNITÀ DI MISURA
(18) ICONA LIVELLO BATTERIA
10
16
17
12
13 14
11
15 18
IT / EN / FR / DE / ES 04993
9
EN COMPRESSOR
(6) DISPLAY
(7) LED TORCH
(8) TYPEC INLET FOR CHARGING
(9) AIR TUBE
DISPLAY AND BUTTONS
(10) ON/OFF BUTTON
(11) LED TORCH ON/OFF BUTTON
(12) FUNCTION SELECTION BUTTON
(13) PRESS + BUTTON
(14) PRESS - BUTTON
(15) CAR TYRE, MOTORBIKE TYRE, BIKE TYRE BALLOON
(16) PRESSURE VALUE
(17) UNIT OF MEASUREMENT
(18) BATTERY LEVEL ICON
FR COMPRESSEUR
(6) AFFICHEUR
(7) TORCHE à LED
(8) ENTRÉE TYPEC POUR RECHARGE
(9) TUYAU DE L’AIR
AFFICHEUR ET BOUTONS
(10) BOUTON ALLUMAGE/EXTINCTION (ON/OFF)
(11) BOUTON ALLUMAGE / EXTINCTION TORCHE LED
(12) BOUTON SÉLECTION FONCTION
(13) BOUTON PRESSION +
(14) BOUTON PRESSION -
(15) ICÔNE PNEUS VÉHICULES, PNEUS MOTOS, PNEUS VÉLOS ,
BALLONS
(16) VALEUR DE LA PRESSION
(17) UNITÉ DE MESURE
(18) ICÔNE NIVEAU DE LA BATTERIE
DE KOMPRESSOR
(6) ANZEIGE
(7) LED-TASCHENLAMPE
(8) TYPC-EINGANG ZUM AUFLADEN
(9) LUFTSCHLAUCH
DISPLAY UND TASTEN
(10) EIN/AUS-TASTE
(11) LED-TASCHENLAMPE EIN/AUS-TASTE
(12) FUNKTIONSWAHLTASTE
(13) TASTE “DRÜCKEN +”
(14) TASTE “DRÜCKEN -”
(15) SYMBOLE FÜR AUTOREIFEN, MOTORRADREIFEN,
FAHRRADREIFEN, LUFTBALLONS
(16) DRUCKWERT
(17) MASSEINHEIT
(18) SYMBOL FÜR DEN BATTERIESTAND
ES COMPRESOR
(6) DISPLAY
(7) LINTERNA DE LED
(8) ENTRADA TIPO C PARA RECARGAR
(9) TUBO DE AIRE
DISPLAY Y TECLAS
(10) INTERRUPTOR ENCENDIDO/APAGADO (ON/OFF)
(11) INTERRUPTOR ENCENDIDO/APAGADO DE LA LINTERNA LED
(12) TECLA SELECCIÓN DE LA FUNCIÓN
(13) TECLA DE PRESIÓN +
(14) TECLA DE PRESIÓN -
(15) ICONOS NEUMÁTICOS DE AUTOMÓVILES, NEUMÁTICOS DE MOTO,
NEUMÁTICOS DE BICICLETA, PELOTAS
(16) VALOR DE LA PRESIÓN
(17) UNIDAD DE MEDIDA
(18) ICONO NIVEL BATERÍA
IT / EN / FR / DE / ES
04993
10
4 IT UTILIZZO / EN USE / FR UTILISATION / DE NUTZUNG / ES USO
IT
ACCENSIONE/SPEGNIMENTO
Premere il tasto accensione (2) per due secondi per accendere e/o
spegnere il compressore.
Il compressore si spegne automaticamente dopo 90 secondi di
inutilizzo.
GONFIARE UN PNEUMATICO O UN PALLONE
Estrarre il tubo dell’aria dall’alloggiamento e, se necessario,
installare l’ugello adeguato (3, 4, 5).
Accendere il compressore.
Il compressore ha 4 valori preimpostati di pressione, modificabili,
per ogni oggetto da gonfiare: pneumatici auto, pneumatici moto,
pneumatici bicicletta, palloni/piccoli gonfiabili.
Premere il tasto selezione funzione (12) fino a selezionare il tipo di
oggetto da gonfiare identificato dalla relativa icona illuminata (15).
Se necessario modificare il valore preimpostato di pressione
utilizzando i tasti + (13) e - (14).
Per selezionare l’unità di misura della pressione (PSI, BAR, KPA,
KG/cm2) tenere premuto per 2 secondi il tasto funzione (12) fino
a quando inizia a lampeggiare l’unità di misura impostata; per
modificarla premere il tasto funzione (12) fino a selezionare l’unità
di misura che si vuole impostare.
Una volta impostato il valore di pressione desiderato e verificata
l’unità di misura (17), premere il tasto accensione (10) per iniziare
a gonfiare.
Il compressore si fermerà automaticamente una volta raggiunta la
pressione impostata.
Spegnere il compressore e riporre il tubo dell’aria nell’apposito
alloggiamento.
Valori massimi di gonfiaggio espressi in Bar:
pneumatici da auto = 3.5 bar
pneumatici da moto = 3.0 bar.
Assicurarsi di non superare questi valori!
TORCIA LED
La torcia LED può essere utilizzata sia a compressore acceso che a
compressore spento.
Premere il tasto accensione torcia (11) per accendere e spegnere la
torcia LED.
BATTERIA
L’icona livello batteria (18) è composta da quattro celle che si
illuminano/spengono per indicare il livello della batteria:
- 4 celle illuminate = batteria carica al 100%
- 2 celle illuminate = batteria carica al 50%
- 1 cella illuminata e lampeggiante = batteria con carica residua 5%.
Per ricaricare la batteria collegare il cavo (2) all’ingresso TypeC (8)
posto sul lato del compressore.
Durante la ricarica le celle dell’icona lampeggiano progressivamente.
Quando la batteria è carica le quattro celle dell’icona rimangono
tutte illuminate.
EN
ON/0FF
Press the power button (2) for two seconds to switch the compressor
on and/or off.
The compressor automatically switches off after 90 seconds
of inactivity.
HOW TO INFLATE A TYRE OR BALLOON
Pull the air hose out of the and, if necessary install the appropriate
nozzle (3, 4, 5).
Switch on the compressor.
The compressor has 4 preset pressure values, which can be changed,
for each object to be inflated: car tyres motorbike tyres, bicycle tyres,
balloons/small inflatables.
IT / EN / FR / DE / ES 04993
11
Press the function selection button (12) until the type of object to be
inflated - identified by its illuminated icon - (15) is selected.
If necessary change the preset pressure value
using the + (13) and - (14) keys.
To select the unit of measurement of the pressure (PSI, BAR, KPA,
KG/cm2) keep the function key (12) pressed for 2 seconds until
the set unit of measurement starts to flash. To modify it, press the
function key (12) until the unit of measurement you wish to set is
selected.
Once you have set the desired pressure value and checked the unit of
measurement (17), press the key ON (10) to start inflating.
The compressor will automatically stop once the set pressure is
reached. Switch off the compressor and put back the air hose.
Maximum inflation values in bar:
car tyres = 3.5 bar
motorbike tyres = 3.0 bar.
Make sure not to exceed these values!
LED TORCH
The LED torch can be used both with the compressor on
or with the compressor off.
Press the torch switch (11) to switch the LED torch on and off.
BATTERY
The battery level icon (18) consists of four cells that will illuminated/
extinguished to indicate the battery level:
- 4 cells illuminated = battery 100% full
- 2 cells illuminated = 50% battery charge
- 1 cell illuminated and flashing = battery with
remaining charge 5%.
To recharge the battery connect the cable (2) to the TypeC input (8)
on the side of the compressor.
During recharging the icon cells will flash progressively.
When the battery is charged the four cells of the icon all remain
illuminated.
FR
ALLUMAGE/EXTINCTION
Faire pression sur le bouton d’allumage (2) pendant 2 secondes pour
allumer et /ou éteindre le compresseur.
Le compresseur s’éteind automatiquement après 90 secondes de
non utilisation.
GONFLER UN PNEU OU UN BALLON
Enlever le tuyau de l’air de son compartiment, et si nécessaire
installer la buse adéquate (3,4,5).
Allumer le compresseur.
Le compresseur a 4 valeurs de pression pré-réglées,. Celles-ci sont
modifiables en fonction des objets à gonfler: pneus véhicules, pneus
motos, pneus vélos, ballons/petits objets gonflables.
Faire pression sur le bouton sélection fonction (12) jusqu’au choix de
l’objet à gonfler. Celui-ci est identifiable via l’icône correspondante
éclairée (15).
En cas de nécessité, modifier la valeur de pression pré-réglée via les
boutonss +(13) et -(14).
Pour la sélection de l’unité de mesure de la pression (PSI, BAR, KPA,
KG/cm2), faire pression pendant 2 secondes sur le bouton fonction
(12) jusqu’au clignotement de l’unité de mesure paramétrée. Pour la
modifier, appuyer le bouton fonction (12) jusqu’au clignotement de
l’unité de mesure à paramétrer.
Dès que la valeur de la pression désirée est paramétrée et l’unité
de mesure (17) est correcte, appuyer le bouton allumage (10) pour
gonfler.
Le compresseur s’arrêtera automatiquement dès que la pression
paramétrée est atteinte.
Éteindre le compresseur et ranger le tuyau de l’air dans son
compartiment.
Valeur maximale de gonflement en Bar:
Pneus véhicules = 3,5 bar
Pneus motos = 3,0 bar
Faire attention pour ne pas dépasser ces valeurs!
TORCHE LED
La torche LED peut être utilisée avec le compresseur allumé ou
éteint.
Appuyer le bouton allumage torche (11) pour allumer et éteindre la
torche LED.
BATTERIE
L’icône du niveau de la batterie (18) est constituée de quattre cages
qui s’éclairent /s’éteignent pour indiquer le niveau de la batterie:
- 4 cages éclairées = batterie pleine à 100%
- 2 cages éclairées = batterie pleine à 50%
- 1 cage éclairée et clignotante = batterie avec autonomie restante
de 5%.
Pour recharger la batterie, brancher le câble (2) à l’entrée TypeC (8)
qui se trouve sur le côté du compresseur.
IT / EN / FR / DE / ES
04993
12
Pendant la recharge, les cages de l’icône clignotent progressivement.
Lorsque la batterie est pleine, les quatre cages de l’icône restent
éclairées.
DE
EIN/AUS
Drücken Sie die Einschalttaste (2) zwei Sekunden lang, um
den Kompressor ein- und/oder ausschalten.
Der Kompressor schaltet sich nach 90 Sekunden Nichtbenutzung
automatisch ab.
AUFBLASEN EINES REIFENS ODER BALLONS
Ziehen Sie den Luftschlauch aus und montieren Sie ggf. die
entsprechende Düse (3, 4, 5).
Schalten Sie den Kompressor ein.
Der Kompressor verfügt über 4 voreingestellte Druckwerte, die für
jedes aufzupumpende Gerät geändert werden können: Autoreifen,
Motorradreifen, Fahrradreifen, Luftballons/kleine Aufblasgeräte
Drücken Sie die Funktionswahltaste (12), bis das aufzublasende
Gerät, das durch das leuchtende Symbol (15) gekennzeichnet ist,
ausgewählt ist.
Ändern Sie bei Bedarf den voreingestellten Druckwert mit den
Tasten + (13) und - (14).
Um die Maßeinheit des Drucks (PSI, BAR, KPA, KG/cm2)
auszuwählen, halten Sie die Funktionstaste (12) 2 Sekunden lang
gedrückt, bis die eingestellte Maßeinheit zu blinken beginnt; um
sie zu ändern, drücken Sie die Funktionstaste (12), bis die von Ihnen
gewünschte Maßeinheit ausgewählt ist.
Nachdem Sie den gewünschten Druckwert eingestellt und die
Maßeinheit (17) überprüft haben, drücken Sie die (10), um das
Aufpumpen zu starten.
Der Kompressor schaltet sich automatisch ab, sobald der eingestellte
Druck erreicht ist.
Maximale Inflationswerte ausgedrückt in Bar:
Autoreifen = 3,5 bar
Motorradreifen = 3,0 bar.
Achten Sie darauf, diese Werte nicht zu überschreiten!
LED-TASCHENLAMPE
Die LED-Taschenlampe kann sowohl bei eingeschaltetem
Kompressor als auch bei ausgeschaltetem Kompressor verwendet
werden.
Drücken Sie die Einschalttaste der Taschenlampe (11), um die LED-
Taschenlampe ein- und auszuschalten.
BATTERIE
Das Batteriestandssymbol (18) besteht aus vier Zellen, die
aufleuchten/erlischen, um den Batteriestand anzuzeigen:
- 4 leuchtende Zellen = Batterie 100% voll
- 2 leuchtende Zellen = Batterie 50% voll
- 1 leuchtende blinkende Zelle = Batterie mit 5% Restladung.
Zum Aufladen der Batterie schließen Sie das Kabel (2) an den TypC-
Eingang (8), der sich an der Seite des Kompressors befindet.
Während des Ladevorgangs blinken die Zellen des Symbols nach
und nach.
Wenn der Akku geladen wird, bleiben die vier Zellen des Symbols
alle beleuchtet.
ES
ENCENDIDO/APAGADO
Pulsar el botón de encendido (2) durante dos segundos para
encender y/o apagar el compresor.
El compresor se apaga automáticamente después de 90 segundos
de inactividad.
INFLAR UN NEUMÁTICO O UNA PELOTA
Saque el tubo de aire de la carcasa y si es necesario,
instalar la boquilla adecuada (3, 4, 5).
Encienda el compresor de aire.
El compresor tiene 4 valores de presión preestablecidos,
modificables, para cada objeto a inflar: neumáticos de automóvil,
neumáticos de moto, neumáticos de bicicleta, pelotas/pequeños
inflables.
Pulse la tecla de selección de función (12) hasta que seleccione el
Tipo de objeto que se va a inflar identificado por su icono iluminada
(15).
Si es necesario, cambie el valor preestablecido de presión utilizando
las teclas + (13) y - (14).
Para seleccionar la unidad de presión (PSI, BAR, KPA, KG/cm2)
mantener pulsada la tecla de función durante 2 segundos (12) hasta
que la unidad de medida comience a parpadear establecida; para
cambiarla, pulse la tecla de función (12) hasta que seleccione la
unidad de medida que desea establecer.
IT / EN / FR / DE / ES 04993
13
Una vez establecido el valor de presión deseado y verificada la
unidad de medida (17), pulse la tecla de encendido (10) para
comenzar a inflar.
El compresor parará automáticamente una vez Se ha alcanzado la
presión fijada.
Apague el compresor y guarde la manguera de aire en el lugar
adecuado.
Valores máximos de inflado expresados en bar:
neumáticos de coche = 3.5 bar
neumáticos de motocicleta = 3,0 bar.
Asegúrese de no superar estos valores!
LINTERNA led
La linterna led se puede utilizar tanto con el compresor encendido
que con el compresor apagado.
Pulse el botón de encendido de la linterna (11) para encender y
Apague la linterna led.
BATERÍA
El icono de nivel de batería (18) se compone de cuatro celdas que se
iluminarán/apagarán para indicar el nivel de la batería:
- 4 celdas iluminadas = 100% de batería cargada
- 2 celdas iluminadas = 50% de batería cargada
- 1 célula iluminada y parpadeante = batería cargada
5% restante.
Para cargar la batería, conecte el cable (2) a la entrada Type C (8)
colocado en el lado del compresor.
Durante la carga, las celdas del icono parpadean progresivamente.
Cuando la batería está cargada se mantienen encendidos los 4 leds
de carga
IT / EN / FR / DE / ES
04993
14
IT
- Il dispositivo non si ferma quando raggiunge il valore
impostato
1. Controllare che il valore impostato e l’unità di misura siano
corretti.
Valori massimi di gonfiaggio espressi in Bar:
pneumatici da auto = 3.5Bar
pneumatici da moto = 3.0Bar.
Assicurarsi di non superare questi valori!
2. Ripetere la procedura seguendo attentamente le istruzioni.
- Il display è impreciso o non leggibile
Verificare di aver collegato il compressore al pneumatico/pallone in
modo corretto.
Ripetere l’operazione e assicurarsi che sullo schermo venga
visualizzata la pressione attuale del pneumatico/pallone prima di
iniziare il gonfiaggio.
- Il dispositivo si accende ma non è in grado di gonfiare
Verificare che il tipo di ugello sia adatto al pneumatico/pallone che
si sta gonfiando.
Verificare che l'ugello sia collegato correttamente al pneumatico/
pallone.
EN
- The device does not stop when it reaches the set value.
1. Check that the set value and unit of measurement are correct.
Maximum inflation values in Bar:
car tyres = 3.5Bar
motorbike tyres = 3.0Bar.
Make sure not to exceed these values!
2. Repeat the procedure carefully following the instructions.
- The display is inaccurate or not legible.
Check that you have connected the compressor to the tyre/balloon
correctly.
Repeat the operation and ensure that the
current tyre/balloon pressure is displayed on the screen before start
inflating.
- The device switches on but is unable to inflate
Check that the type of nozzle is suitable for the tyre/balloon that
being inflated.
Check that the nozzle is correctly connected to the tyre/balloon.
balloon.
FR
- Le dispositif ne s’éteind pas lorsqu’il atteind la valeur
paramétrée.
1. Contrôler que la valeur paramétrée et l’unité de mesure soient
correctes.
Valeurs maximales de gonflement en Bar:
Pneus pour véhicules = 3,5 Bar
Pneus pour motos = 3,0 Bar
Faire attention pour ne pas dépasser ces valeurs!
2. Recommencer la procédure en suivant scrupuleusement les
instructions.
- L’afficheur n’est pas précis et est illisible
Se rassurer d’avoir correctement branché le compresseur au pneu/
ballon avant de commencer à gonfler.
- Le dispositif s’allume mais ne gonfle pas
Se rassurer que la buse utilisé soit compatible avec le pneu/ballon
à gonfler.
Vérifier le correct branchement de la buse au pneu/ballon.
DE
- Das Gerät stoppt nicht, wenn es den eingestellten Wert
erreicht.
1. Prüfen Sie, ob der eingestellte Wert und die Maßeinheit richti
sind.
Maximale Inflationswerte in Bar:
Autoreifen = 3,5Bar
Motorradreifen = 3,0Bar.
Achten Sie darauf, diese Werte nicht zu überschreiten!
2. Wiederholen Sie den Vorgang sorgfältig unter Beachtung der
Anweisungen.
- Die Anzeige ist ungenau oder nicht lesbar
Überprüfen Sie, ob Sie den Kompressor richtig an den Reifen/Ballon
angeschlossen haben.
Wiederholen Sie den Vorgang und vergewissern Sie sich, dass der
aktuelle Reifen-/Ballondruck auf dem Bildschirm angezeigt wird,
bevor Sie mit dem Aufblasen beginnen.
- Das Gerät schaltet sich ein, lässt sich aber nicht aufpumpen
Prüfen Sie, ob der Düsentyp für den Reifen/Ballon geeignet ist, der
aufgeblasen werden.
Prüfen Sie, ob die Düse richtig mit dem Reifen/Ballon angeschlossen
ist.
4 IT
FAQ
/ EN
FAQ
/ FR
FAQ
/ DE
FAQ
/ ES
FAQ
IT / EN / FR / DE / ES 04993
15
ES
- El dispositivo no se detiene cuando alcanza el valor
establecido
1. Comprobar que el valor fijado y la unidad de medida son correctos.
Valores máximos de inflado expresados en bar:
neumáticos de coche = 3.5Bar
neumáticos para motocicletas = 3.0Bar.
Asegúrese de no superar estos valores!
2. Repita el procedimiento siguiendo cuidadosamente las
instrucciones.
- La pantalla es imprecisa o no es legible
Comprobar que el compresor está conectado al neumático/pelota de
forma correcta.
Repetir la operación y asegúrese que en la pantalla se muestre la
presión actual del neumático/pelota antes de empezar a inflar.
- el dispositivo se enciende pero no es capaz de inflar
Comprobar que el tipo de boquilla utilizado sea el correcto para el
neumático/pelota que se desea inflar.
Compruebe que la boquilla esté correctamente conectada al
neumático/pelota.
Il prodotto non deve essere smaltito con i riuti domestici.
Per ulteriori informazioni consultare il sito www.phonocar.it
This product must NOT be treated as a domestic waste.
For further information, please read homepage www.phonocar.it
04993 30/06/2022
Phonocar S.p.A. Via F.lli Cervi, 167/C · 42124 Reggio Emilia (Italy)
Tel. +39 0522 941621 · Fax +39 0522 1602093 · info@phonocar.it
phonocar.it
IT ATTENZIONE
Tutte le immagini sono inserite a scopo illustrativo.
Phonocar S.p.A. si riserva il diritto di apportare variazioni ai prodotti anche senza preavviso.
Eventuali modifiche ai prodotti sono da considerarsi migliorative e non influiscono sulla loro funzionalità.
Tutti i marchi citati e i loghi riprodotti appartengono ai legittimi proprietari e sono stati indicati a solo scopo informativo.
EN ATTENTION
All images are included for illustrative purposes only.
Phonocar S.p.A. reserves the right to make changes to the products even without notice.
Any changes to the products are to be considered improvements and do not affect their functionality.
All mentioned trademarks and reproduced logos belong to their legitimate owners and have been indicated for information purposes only.
FR ATTENTION
Toutes les images insérées sont uniquement pour des finalités illustratives.
Phonocar S.p.A. se réserve le droit d’apporter toute sorte de modification, même sans préavis.
Toutes les éventuelles modifications sur les produits sont considérées des améliorations et n’affectent en aucun cas leur correcte fonctionnement.
Toutes les marques mentionnées et les lieux reproduits appartiennent à leurs propriétaires légitimes.
L’indication est uniquement à titre d’information.
DE HINWEIS
Alle Bilder sind nur zu Illustrationszwecken angegeben.
Phonocar S.p.A. behält sich das Recht vor, auch ohne Vorankündigung Änderungen an den Produkten vorzunehmen.
Jede Art von Änderungen an den Produkten sind als Verbesserungen zu betrachten und beeinträchtigen nicht deren Funktionalität.
Alle erwähnten Markenzeichen und Handelsnamen gehören ihren rechtmäßigen Eigentümern und wurden nur zu Informationszwecken angegeben.
ES ATENCIÓN
Todas las imágenes se incluyen exclusivamente con fines ilustrativos.
Phonocar S.p.A. se reserva el derecho de modificar los productos sin previo aviso.
Los cambios en los productos deben considerarse mejoras y no afectan a su funcionalidad.
Todas las marcas mencionadas y los logotipos reproducidos pertenecen a los legítimos propietarios y han sido indicados a título meramente informativo.

Popular Air Compressor manuals by other brands

Hulk HP00P001S1 instruction manual

Hulk

Hulk HP00P001S1 instruction manual

Stealth SAQ-1234 Operator's manual

Stealth

Stealth SAQ-1234 Operator's manual

DeWalt DXCMLA1983054 instruction manual

DeWalt

DeWalt DXCMLA1983054 instruction manual

Fini Advandced F2G2PAK Operator's manual

Fini

Fini Advandced F2G2PAK Operator's manual

Beta 1555/QS Instructions for use

Beta

Beta 1555/QS Instructions for use

Clarke SHHHAIR 50/24 Operation & maintenance instructions

Clarke

Clarke SHHHAIR 50/24 Operation & maintenance instructions

Ryobi RC-2050NV Owner's operating manual

Ryobi

Ryobi RC-2050NV Owner's operating manual

Chicago Pneumatic CPVS 20 Product description

Chicago Pneumatic

Chicago Pneumatic CPVS 20 Product description

Emerson VSG & VSSG Software manual

Emerson

Emerson VSG & VSSG Software manual

Atlas Copco XA146 Dd instruction manual

Atlas Copco

Atlas Copco XA146 Dd instruction manual

BISSETT BF-MC0070 user manual

BISSETT

BISSETT BF-MC0070 user manual

Aerotec 780-90-400V Instructions for use manual

Aerotec

Aerotec 780-90-400V Instructions for use manual

Sullivan-Palatek 75UDG Operating and parts manual

Sullivan-Palatek

Sullivan-Palatek 75UDG Operating and parts manual

Porter-Cable CPFAC2040P instruction manual

Porter-Cable

Porter-Cable CPFAC2040P instruction manual

Joy TWISTAIR III Operator's manual

Joy

Joy TWISTAIR III Operator's manual

Gardner Denver L23 Original Operating and Service Manual

Gardner Denver

Gardner Denver L23 Original Operating and Service Manual

Power Craft PCC 210/8/24 operating instructions

Power Craft

Power Craft PCC 210/8/24 operating instructions

Scheppach HM100TC Translation of original instruction manual

Scheppach

Scheppach HM100TC Translation of original instruction manual

manuals.online logo
manuals.online logoBrands
  • About & Mission
  • Contact us
  • Privacy Policy
  • Terms and Conditions

Copyright 2025 Manuals.Online. All Rights Reserved.