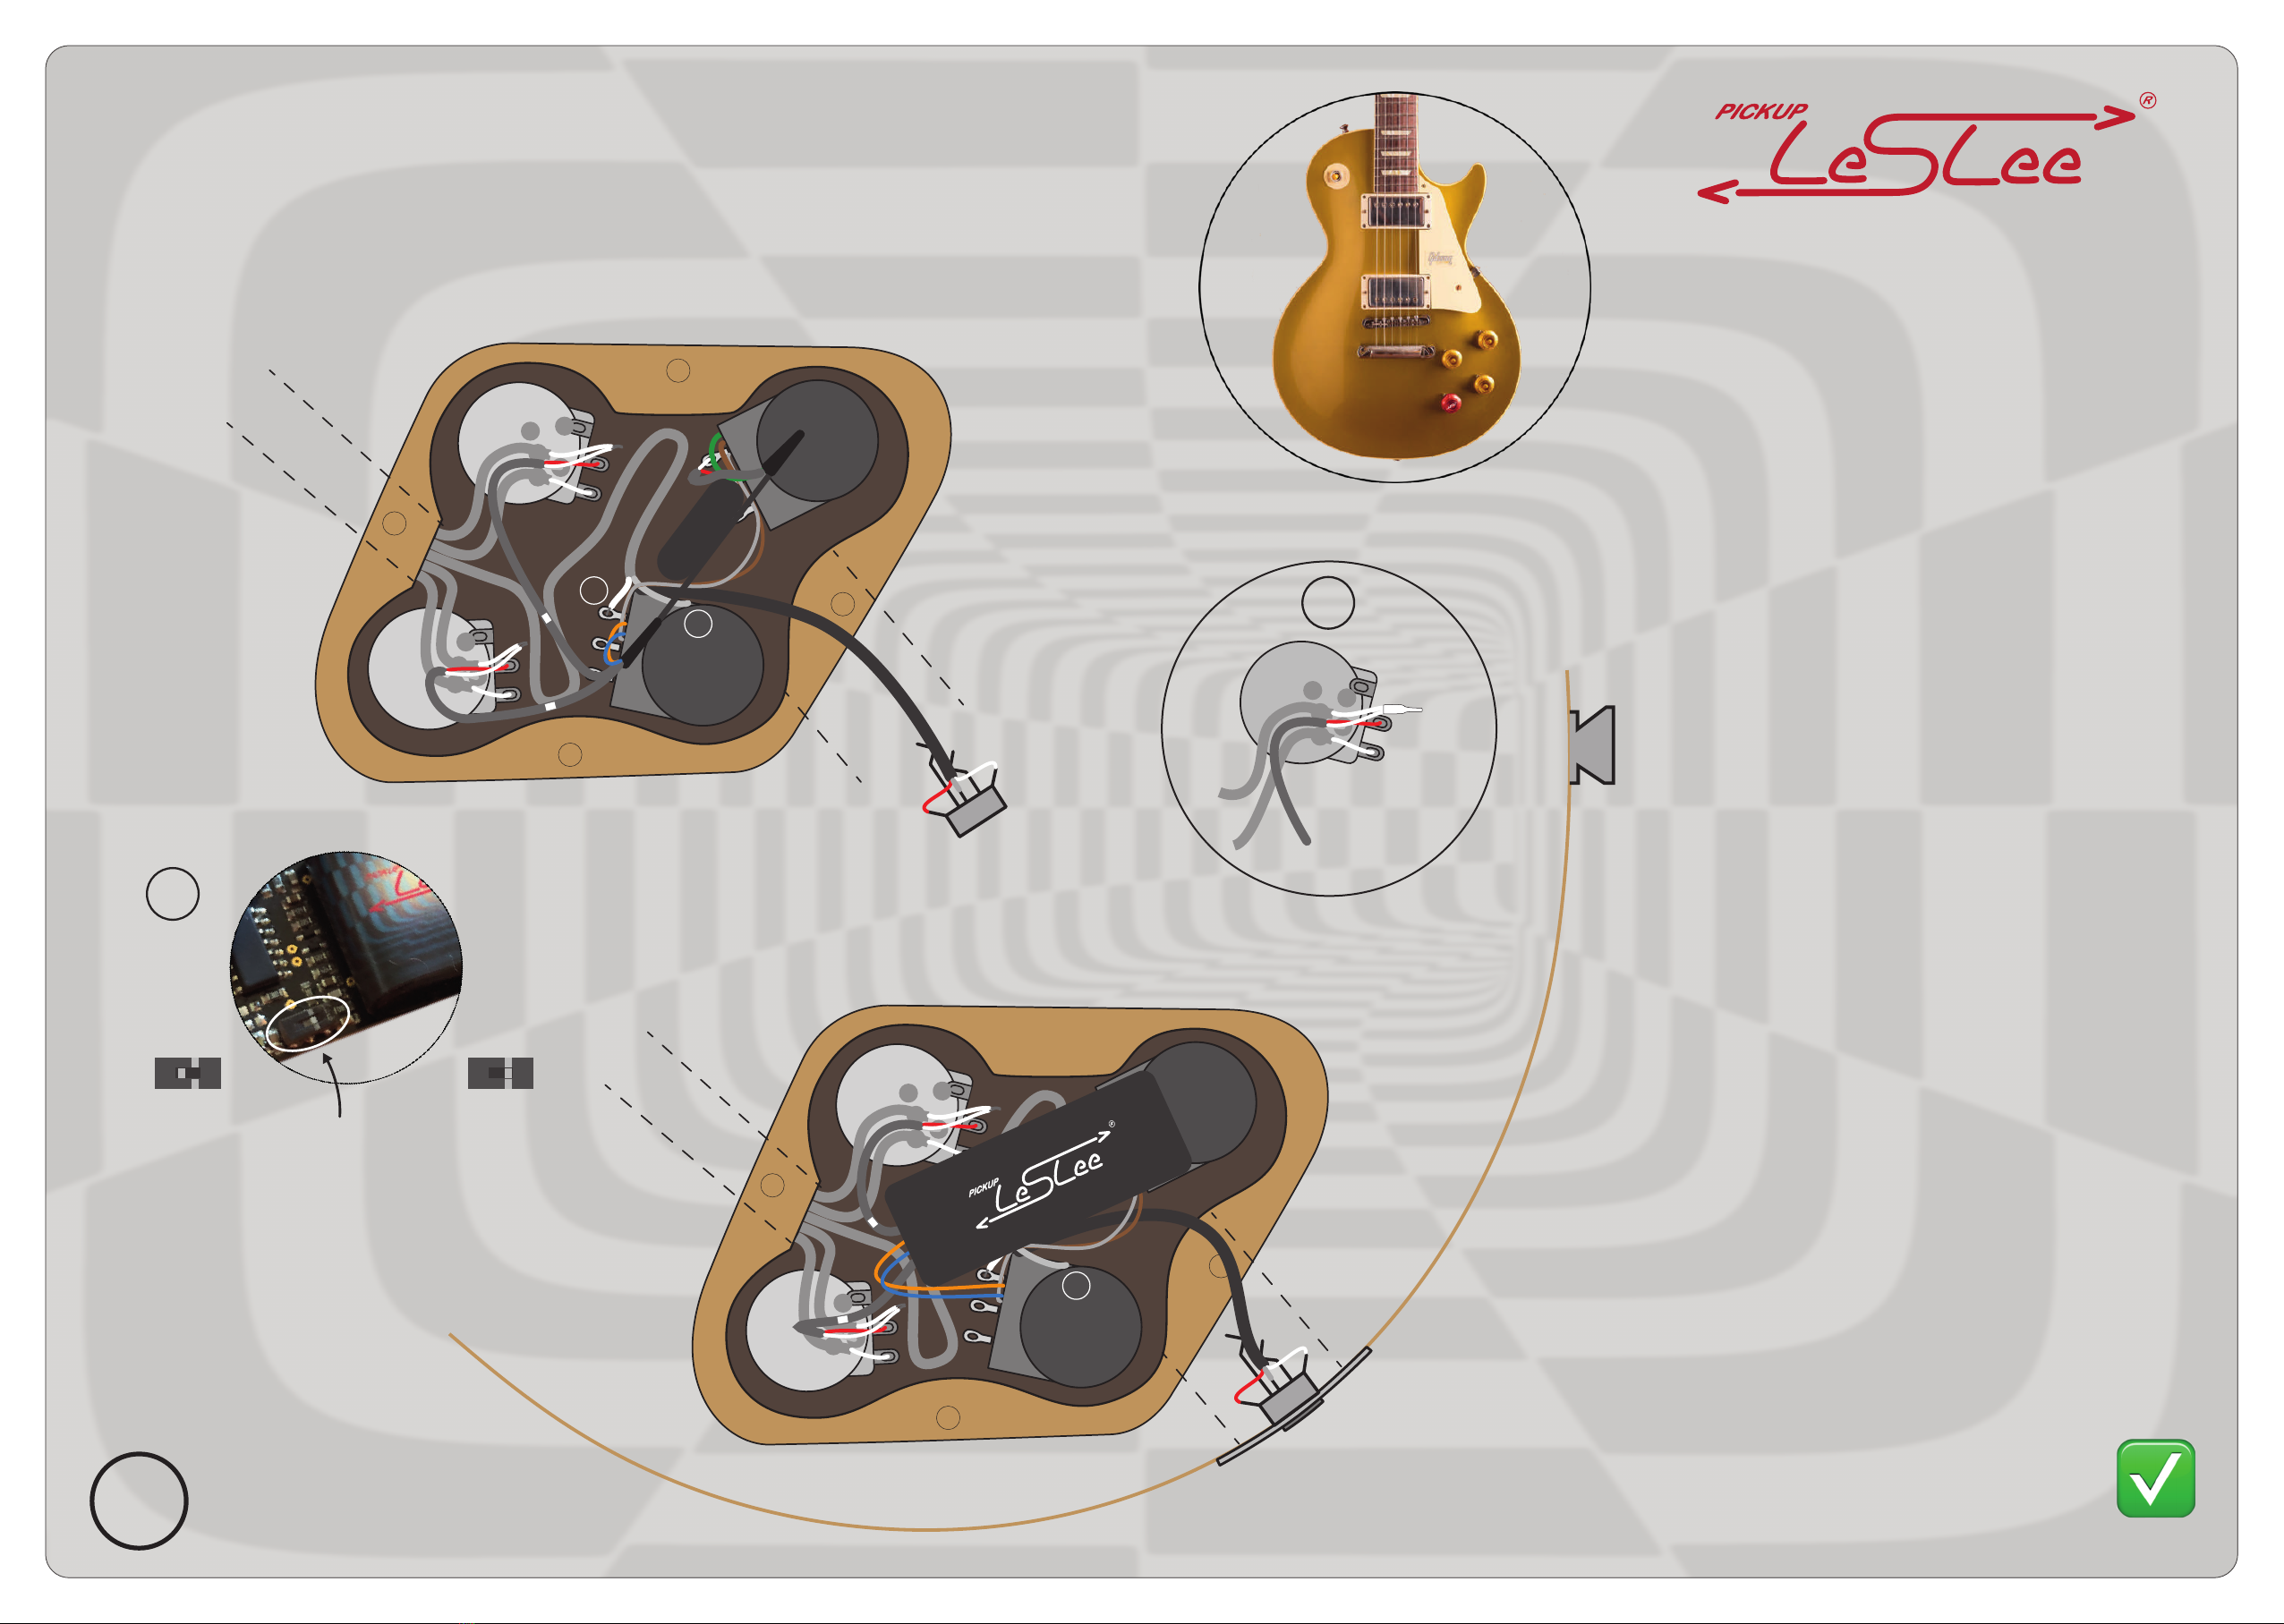
Page two guides you through the steps of installing Pickup LesLee® into the stripped control cavity. The unit
comes with all components wired to simply be mounted. Those are the stereo output jack and the new master tone
pot and the speed pot. The wires for inputs and return signals of the pickups will need to be connected to the right
lugs and wires. Please follow the step-by-step guide on the right side of this page to proceed with the installation.
2
installation manual • Les Paul®
1. Start with threading the output jack into its channel
and set the two pots of the LesLee unit into their holes
with the motherboard facing upward and towards the
hooked up. Mount the jack onto the jack plate and
screw the plate back onto the body.
2. Flip the guitar upwards on its side and make sure to have
the two pots positioned as shown in the illustration. Now
mount the pots to the body with their washers and nuts,
then lay it back down on its face.
3. Next we solder the shield of the original output cable
(toggle out) to the casing of the new master tone pot
and the hot wire to the upper lug of the tone pot. At
the casing you already see the shield of the new output
cable, so just add the shield to the same solder spot.
Also try to zig-zag the excess length of the toggle-out
wire across the cavity as shown in the drawing.
4. The unit comes with two double-pole shielded cables. One
is gonna be connected to the neck volume pot and one
to the bridge volume pot. The cables are marked with
little stickers “N” for neck and “B” for bridge.
5. The shield is soldered
to the casing of the neck volume pot. Then solder the
red wire to the middle lug of the pot and the white wire
to the disconnected wire that goes to the toggle switch.
Use the small piece of white shrink hose that comes with
the unit (in the accessory bag) and shrink it onto the
soldered connection with a few strokes of the side of
your soldering iron. (see picture 5)
6. Repeat the same procedure with the cable marked
“B” at the bridge volume pot.
7. On the motherboard switch the tiny maintenance switch
to ON. To do so flip the board upward a bit towards the
centre of the guitar body and use a pin or ball pen to
move the slider on the switch to ON. (see picture 7)
8.
and screw the cover back on.
to the user manual to start using Pickup LesLee®.
©1995-2022 Pickup LesLee® Pascal Stoffels - All rights reserved. All guitar names, models and shapes are property of their respective owners and are for identification purposes only.
neck
volume
bridge
vol
from PU
from PU
to toggle
to toggle
toggle out
toggle out
3.
3.
neck
volume
bridge
vol
from PU
from PU
to toggle
to toggle
toggle out
toggle out
3.
3.
5.
7.
You find the maintenance switch near the bottom of the
motherboard to the left of the supercap. You can use
a pin or ballpen to switch it from OFF to ON.
Remember to always switch it OFF whenever you
work on the wiring in the future.
OFF ON
from PU
from LesLee
shrink hose
to toggle
N
B
N
B


