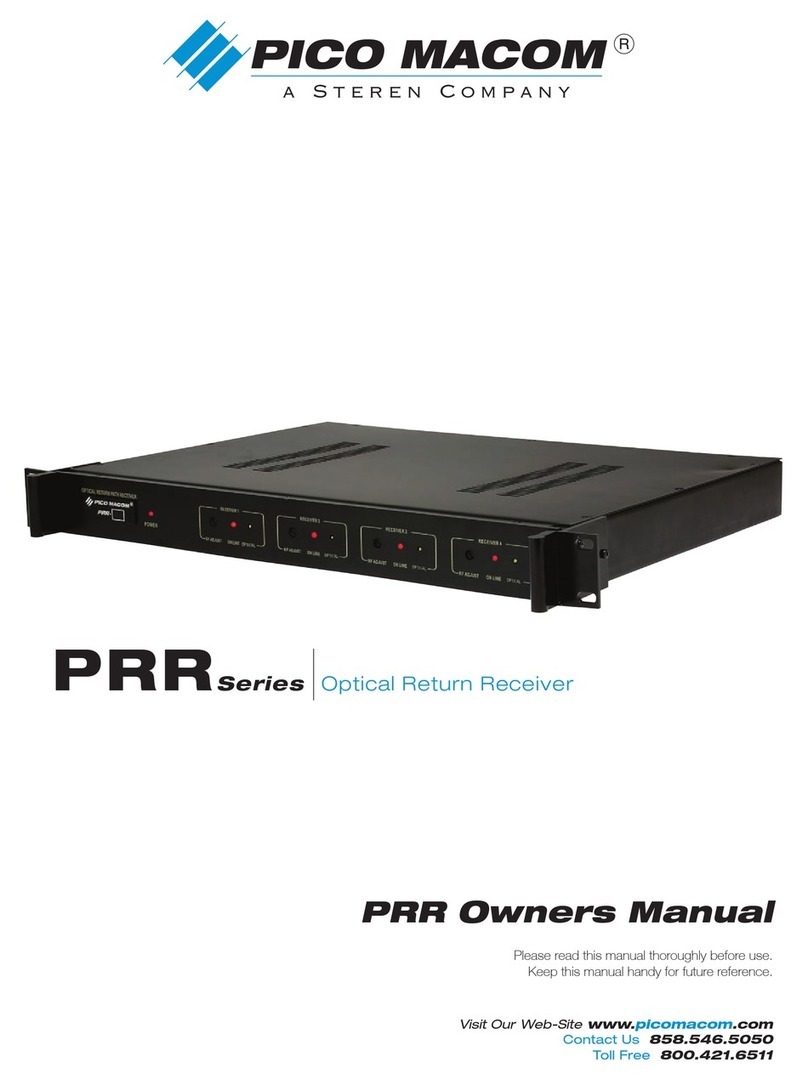
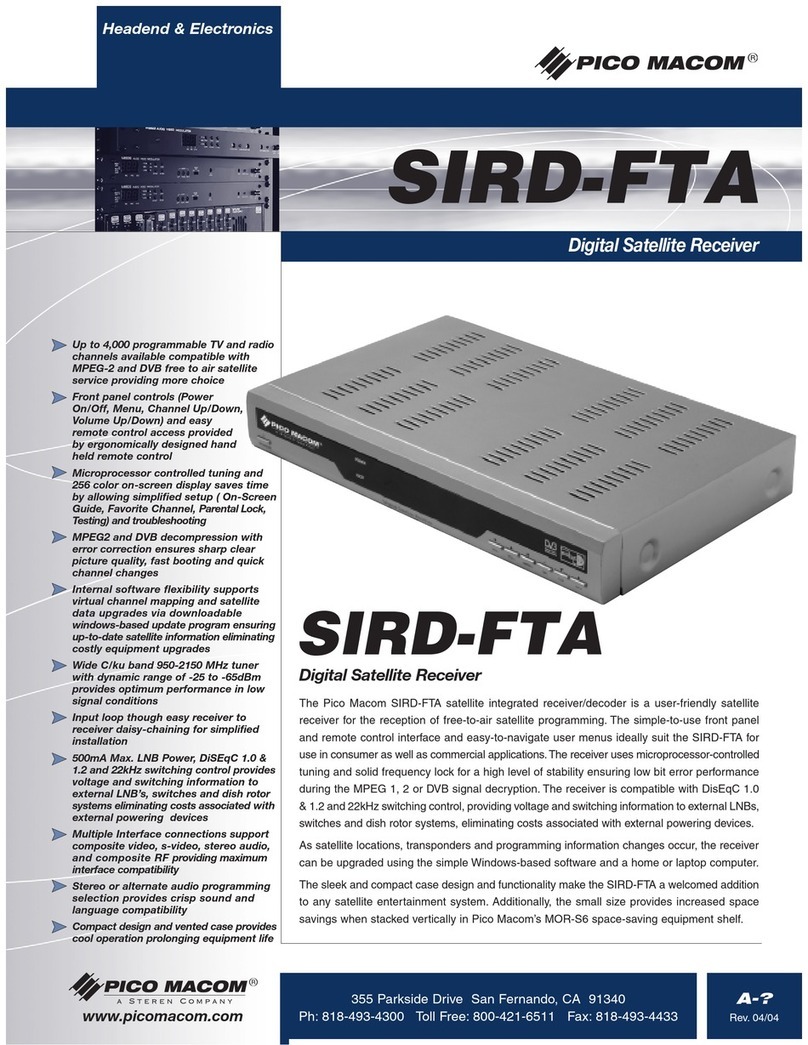
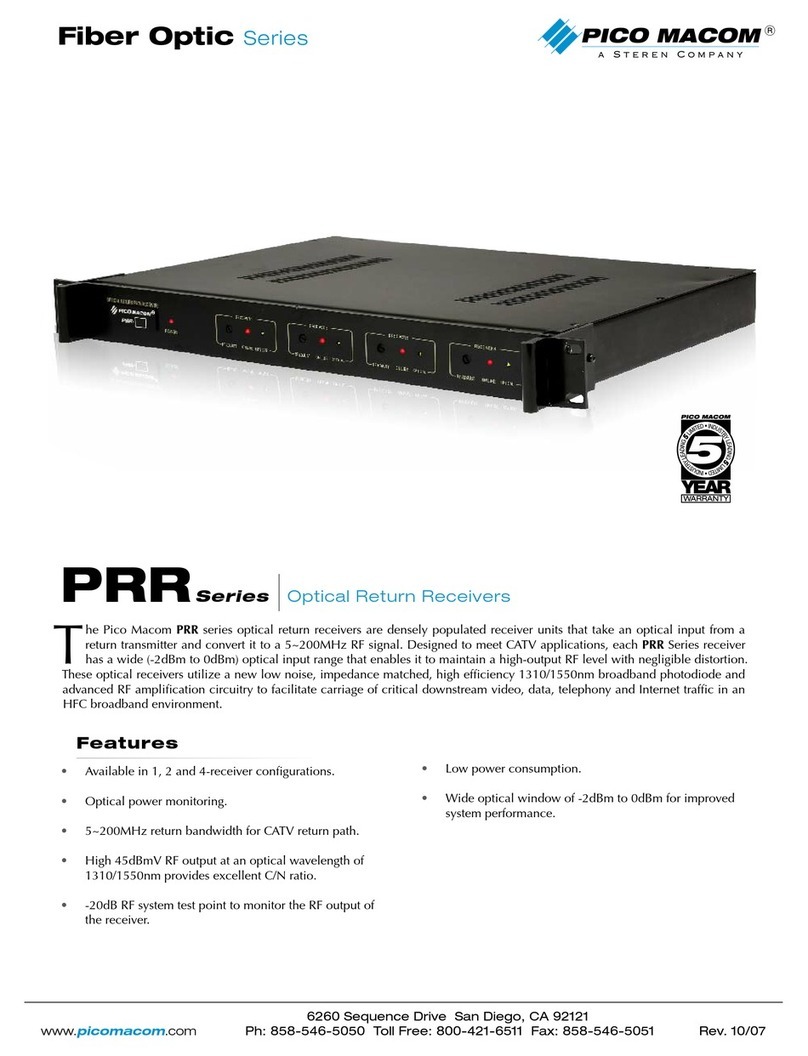
Pico Macom SIRD-FTA-2 User manual

SIRD-FTA Free-to-Air Digital Satellite Receiver
SIRD-FTA-2 Owners Manual
PICO MACOM
Please read this manual thoroughly before use.
Keep this manual handy for future reference.
P O W E R
L O C K
VOL- VOL+ ME N U OK CH- CH+
P O W E R
L O C K
VOL- VOL+ ME N U OK CH- CH+
SIRD-FTA-2
SIRD-FTA-2
Free-to-Air Digital Satellite Receiver
Visit Our Website www.picomacom.com
Contact Us 858.546.5050
Toll Free 800.421.6511

2CONTACT US TOLL FREE 800-421-6511
www.picomacom.com
PICO MACOM
SIRD-FTA-2
Product Inspection
Inspect the equipment for shipping damage. Should any damage be discovered, immediately file a claim with the carrier.
Important Safety Instructions
To ensure proper installation and operation, take a moment to read this guide before proceeding with the installation. If you
have any questions or comments about the SIRD-FTA-2 - Free-to Air Digital Satellite Receiver, please contact your dealer
or have him contact the PICO MACOM Service Center at this phone number: 800-421-6511.
Pico Macom
SIRD-FTA-2 - Free-to-Air Digital Satellite Receiver
OWNERS MANUAL
The lightning flash with arrowhead symbol, within an equilateral
triangle, is intended to alert the user to the presence of uninsu-
lated “dangerous voltage” within the product’s enclosure that
may be of sufficient magnitude to constitute a risk of electric
shock to persons.
The exclamation point within an equilateral triangle is intended
to alert the user to the presence of important operating and
maintenance (servicing) instructions in the literature
accompanying the appliance.
WARNING: TO REDUCE THE RISK OF FIRE OR ELECTRIC SHOCK, DO NOT EXPOSE THIS APPLIANCE
TO RAIN OR MOISTURE. DO NOT OPEN THE CABINET.
REFER SERVICING TO QUALIFIED PERSONNEL ONLY.
CAUTION: TO PREVENT ELECTRIC SHOCK, DO NOT USE THIS (POLARIZED) PLUG WITH AN
EXTENSION CORD RECEPTACLE OR OTHER OUTLET UNLESS THE BLADES CAN BE
FULLY INSERTED TO PREVENT BLADE EXPOSURE.
ATTENCION: POUR PREVENIR LES CHOCS ELECTRIQUES, NE PAS UTILISER CETTE FICHE POLARISEE
AVEC UN PROLONGATEUR, UNE PRISE DE COURANT OU UNE AUTRE SORTIE DE COURANT,
SAUF SI LES LAMES PEUVENT ETRE INSEREES A FOND SANS EN LAISSER AUCUNE PARTIE A
DECOUVERT.
1. Read Instructions: All safety and operating instructions
should be read before the appliance is operated.
2. Retain Instructions: The safety and operating
instructions should be retained for future reference.
3. Heed Warnings: All warnings on the appliance
should be adhered to.
4. Follow Instructions: All operating and user instructions
should be followed.
5. Cleaning: Unplug this appliance from the wall outlet
before cleaning. Use a damp cloth for cleaning.
Do not use liquid cleaners or aerosol cleansers.
6. Do Not Use Attachments: Use of attachments not
recommended by the manufacturer may cause hazards.
7. Water and Moisture: Do not use this product near
water for example, near a bathtub, washbowl, kitchen sink,
laundry tub, in a wet basement, or near a swimming
pool and the like.
8. Accessories: Do not place this product on an unstable cart,
stand, tripod, bracket, or table. The product may fall,
causing serious injury to a child or adult, and serious
damage to the appliance.
9. Elevated Operating Ambient: If installed in a closed or
multi-unit rack assembly, the operating ambient
temperature of the rack environment may be greater
than room ambient. Therefore, consideration should be
given to installing the equipment in an environment
compatible with the maximum ambient temperature
50°C.
10. Reduced Air Flow: Installation of the equipment in a
rack should be such that the amount of air flow required
for safe operation of the equipment is not compromised.
11. Mechanical Loading: Mounting of the equipment in the
rack should be such that a hazardous condition is not
achieved due to uneven mechanical loading.
12. Circuit Overloading: Consideration should be given to
the connection of the equipment to the supply circuit
and the effect that overloading of the circuits might have
on overcurrent protection and supply wiring. Appropriate
consideration of equipment nameplate ratings should be
used when addressing this concern.

3
CONTACT US 858.546.5050 www.picomacom.com
PICO MACOM SIRD-FTA-2
13. Reliable Earthing: Reliable earthing of rack-mounted
equipment should be maintained. Particular attention
should be given to supply connections other than direct
connections to the branch circuit (e.g. use of power strips).
14. Power Sources: This product should be operated only
from the type of power source indicated on the marking
label. If you are not sure of the type of power supplied to
your home, consult your appliance dealer or local power
company.
15. Power-cord Protection: Power-supply cords should be
routed so they are not likely to be walked on or pinched by
items placed upon or against them. Pay particular attention
to cords and plugs, convenience receptacles, and the point
where they exit from the appliance.
16. Lightning: For added protection for this product during a
lightning storm, or when it is left unattended or unused
for long periods of time, the unit should be disconnected
from power source.
17. Power Lines: An outside antenna system should not be
located in the vicinity of overhead power lines, other
electric light or power circuits, where it can fall into such
power lines or circuits. When installing an outside antenna
system, extreme care should be taken to keep from
touching such power lines or circuits as contact with them
may be fatal.
18. Object and Liquid Entry: Never push objects of any kind
into this product through openings as they may touch
dangerous voltage points or short-out parts that could result
in a fire or electric shock. Never spill liquid of any kind on
the product.
19. Servicing: Do not attempt to service this product yourself
as opening or removing covers may expose you to
dangerous voltage or other hazards. Refer all servicing to
qualified service personnel.
20. Damage Requiring Service: Unplug this product from the
wall outlet and refer servicing to qualified service personnel
under the following conditions:
a. When the power-supply cord or plug is damaged.
b. If liquid has been spilled, or objects have fallen into
the product.
c. If the product has been exposed to rain or water.
d. If the product does not operate normally by
following the operating instruction. Adjust only those
controls that are covered by the operating
instructions. An improper adjustment may result in
damage and will often require extensive work by
a qualified technician to restore the product to its
normal operation.
e. If the product has been dropped or the cabinet has
been damaged.
f. When the product exhibits a distinct change in
performance—this indicates a need for service.
21. Replacement Parts: When replacement parts are required,
be sure the service technician has used replacement parts
specified by the manufacturer or have the same
characteristics as the original parts. Unauthorized substitutes
may result in fire, electric shock or other hazards.
22. Safety Check: Upon completion of any service or repairs to
this product, ask the service technician to perform safety
checks to determine that the product is in proper operating
conditions.
NOTE TO THE CATV SYSTEM INSTALLER
THIS REMINDER IS PROVIDED TO CALL THE CATV
SYSTEM INSTALLER’S ATTENTION TO ARTICLE
820-22 OF THE NEC THAT PROVIDES GUIDELINES
FOR PROPER GROUNDING AND, IN PARTICULAR,
SPECIFIES THAT THE CABLE GROUND SHALL BE
CONNECTED TO THE GROUNDING SYSTEM OF
THE BUILDING, AS CLOSE TO THE POINT OF CA-
BLE ENTRY AS PRACTICAL.

4CONTACT US TOLL FREE 800-421-6511
www.picomacom.com
PICO MACOM
SIRD-FTA-2
P O W E R
L O C K
VO L- VO L+ M EN U OK CH- CH +
P O W E R
L O C K
VO L- VOL+ M EN U OK CH- C H+
SIRD-FTA-2
SIRD-FTA-2
Free-to-Air Digital Satellite Receiver
Front View Rear View
SIRD-FTA-2 Free-to-Air Digital Satellite Receiver
• Blindscanfeaturesallowseasyandquickidenticationofallactivetranspondersinasatellite
• Supportelectronicprogramguide(EPG)
• WideC/Kuband950~2150MHztunerwithdynamicrangeof-25to–65dBmprovidesoptimumperformanceinlowsignalconditions
• MPEG-2andDVBdecompressionwitherrorcorrectionensuressharpclearpicturequality,fastbootingandquickchannelchanges
• Stereooralternateaudioprogrammingselectionprovidescrispsoundandlanguagecompatibility
• Microprocessorcontrolledtuningand256coloron-screendisplaysavestimebyallowingsimpliedsetup(On-ScreenGuide,Zoom,
Pause, Favorite Channel, Parental Lock, Testing) and troubleshooting
• 500mAMax.LNBPower,DiSEqC1.0&1.2and22kHzswitchingcontrolprovidesvoltageandswitchinginformationtoexternalLNBs,
switches and dish rotor systems, eliminating costs associated with external powering devices
• Controls(PowerOn/Off,Menu,ChannelUp/Down,VolumeUp/Down)areaccessibleeitherviafrontpanelorergonomicallydesigned
handheld remote control
• 90DayWarranty
Specifications
Video
Decoding MPEG-2 & MEPG-1 Compatible
Bit Rate Max 15Mbps
Output PAL/NTSC
Aspect Ratio 4:3, 16:9, Auto
Active Pixel 720x480 @ 30fps; 720x576 @ 25fps
Output Connectors RCA, S-Video, IF-Out
Audio
Decoding MPEG-2/MPEG-1 layer I & II
Mode Mono, Dual, Stereo, Joint Stereo
Bit Rate Max 384Kbps
Demodulator
Demodulation QPSK
Symbol Rate SCPC/MCPC
Outer Code RS (204, 188, 8)
Inner Code ALL DVB Rates
Energy Dispersion DVB-S Recommendation
Input Signal
Frequency 950MHz ~ 2150MHz
Input Level -65dBm ~ -25dBm
Channel Bandwidth 36MHz
Input Socket F-Type Connector
LNB Control
Power Supply 13/18V (500mA max) with Short Circuit Protection
Polarized Control 13/18V Polarization (Vertical/Horizontal)
DiSEqC Control DiSEqC1.0, DiSEqC1.1 and DiSEqC1.2
RF Modulator
Input F-Type Connector
Output F-Type Connector
Band VHF
TV Standard NTSC M
Output Channel 3/4 Switchable
Ordering Information
SIRD-FTA-2 Free-to-Air Digital Satellite Receiver
P O W E R
L O C K
VO L - VOL + M ENU O K CH- C H +
P O W E R
L O C K
VO L - V O L+ MEN U OK CH- CH +
SIRD-FTA-2
SIRD-FTA-2
Free-to-Air Digital Satellite Receiver

5
CONTACT US 858.546.5050 www.picomacom.com
PICO MACOM SIRD-FTA-2
Table of Contents
1. Remote Control & Panel Description......................................................................................................................6
1.1 Front Panel Description .....................................................................................................................................6
1.2 Rear Panel Description......................................................................................................................................6
1.3 Remote Control Description ..............................................................................................................................6
2. Basic Operations ......................................................................................................................................................7
2.1 Switch on STB...................................................................................................................................................7
2.2 Standby Mod.....................................................................................................................................................7
2.3 Mute...................................................................................................................................................................7
2.4 Channel Number................................................................................................................................................7
2.5 MULTI-PIC .........................................................................................................................................................7
2.6PGUP/PGDN ...................................................................................................................................................8
2.7FAV+/-...............................................................................................................................................................8
2.8 CHp/q.............................................................................................................................................................8
2.9VOLt/u............................................................................................................................................................8
2.10OK....................................................................................................................................................................8
2.11 Menu................................................................................................................................................................8
2.12 Exit...................................................................................................................................................................8
2.13 EPG .................................................................................................................................................................9
2.14 Audio .............................................................................................................................................................10
2.15 SUB ...............................................................................................................................................................10
2.16Zoom .............................................................................................................................................................10
2.17 FAV.................................................................................................................................................................10
2.18 List .................................................................................................................................................................10
2.19PAUSE ...........................................................................................................................................................10
2.20 TXT ................................................................................................................................................................11
2.21 INFO ..............................................................................................................................................................11
2.22TV/Radio........................................................................................................................................................11
2.23 Recall.............................................................................................................................................................11
2.24 SAT ................................................................................................................................................................11
2.25 LNB Short......................................................................................................................................................11
3. Channel ...................................................................................................................................................................11
3.1 TV Channel List ...............................................................................................................................................12
3.1.1 Favorite.................................................................................................................................................12
3.1.2 Move.....................................................................................................................................................12
3.1.3 Sort .......................................................................................................................................................13
3.1.4 TV Channel List Edit .............................................................................................................................13
3.1.4.1 Delete..........................................................................................................................................13
3.1.4.2 Skip.............................................................................................................................................14
3.1.4.3 Lock ............................................................................................................................................14
3.1.4.4 Edit..............................................................................................................................................14
3.1.5 Find.......................................................................................................................................................15
3.2 Radio Channel List ..........................................................................................................................................15
3.3 Channel Setup.................................................................................................................................................15
3.4 Favorite group list name..................................................................................................................................15
3.5 Delete All..........................................................................................................................................................16
3.6 Restore channel list and settings ....................................................................................................................16
3.7 Save channel list and settings.........................................................................................................................16
4. Installation...............................................................................................................................................................16
4.1 Single Search...................................................................................................................................................17
4.2 Multi Search.....................................................................................................................................................18
4.3 TP Scan ..................................................................................................................................................... 18-19
4.4 Satellite List .....................................................................................................................................................20
4.5 TP List..............................................................................................................................................................21
4.6 Satellite Guide .................................................................................................................................................22
5. System Setup..........................................................................................................................................................22
5.1 Language.........................................................................................................................................................22
5.2 TV System .......................................................................................................................................................23
5.3Time&TimerSetting .......................................................................................................................................23
5.4 OSD Setting.....................................................................................................................................................25
5.5 Parental Lock...................................................................................................................................................25
5.6 Power setting...................................................................................................................................................26
6. Tools ........................................................................................................................................................................26
6.1 Information ......................................................................................................................................................27
6.2 Quick Setup.....................................................................................................................................................27
6.3 Game ...............................................................................................................................................................27
6.4 Factory Default ................................................................................................................................................28
6.5 Software Upgrade ...........................................................................................................................................28
6.5.1 Software Upgrade ................................................................................................................................29
6.5.2 Upgrade by Satellite .............................................................................................................................29
6.6 SatcoDX Auto Programming ...........................................................................................................................29
Warranty .......................................................................................................................................................................30
1. Remote Control and Panel Description
1.1 Front Panel Description
1. POWER: Is used to switch between the working mode
and the standby mode.
2. VOL+/-: Adjust volumes up or down.
3. MENU: To enter into the main menu and exit all menus.
4. OK: To select an item in the menu and confirm it or pop
up channel list when no menu.
5. CH+/-: To change channels or for navigating and
changing values in menus.
6. Display (4-Digit/7-Segment): Displays the received
channel number.
7. Remote Sensor: Detects the infrared signals from the
remote control unit.
1.2 Rear Panel Description
1. S-VIDEO: S-VIDEO output
2. VIDEO: CVBS video output for TV AV in.
3. AUDIO: HiFi outputs for stereo set.
4. IF IN: Satellite input.
5. IF OUT: Satellite output for cascading to other devices
Note:The operation of another receiver at the same time
is only possible with limited channel selection.
6. S/PDIF: Coaxial output for digital audio (AC3)
7. RS-232: Serial Port allowing software upgrades.
8. TO TV: Modulator output for the connection to a TV set.
9. ANT IN: Antenna input for the terrestrial antenna.
10. AC IN: Main input cable.
11. POWER ON/OFF:TurnsthereceiverOff/On.
1.3 Remote Control Description
6CONTACT US TOLL FREE 800-421-6511
www.picomacom.com
PICO MACOM
SIRD-FTA-2
1.2
1.3
1.1

2. Basic Operations
2.1 Switch on STB
Switch the [Device’s Main Power] switch on.
When the STB is first used, it will display “Quick Setup” window. You will set Language, First Audio, Second
Audio, LNB Power, Antenna Setup and Multi-Search.
Frequently Asked Questions
Q: The power of my STB is on and it is running in TV mode but the TV screen shows nothing:
A: Make sure the TV set has been set to the correct video input (not the TV channels). For example, if you have
connected the unit to the video1 input of the TV set then you need to select the corresponding input of the TV.
Mostly it is done with the AV button of the TVs remote control unit.
Q: My STB is running in TV mode but the TV screen shows nothing except one ball and “No Signal”.
A: That means the channel you selected has no signal. This can be caused by several reasons:
1. The channel you selected is not from the satellite to which your dish is pointing. Select another channel.
2. The signal of current TV channel is too weak. You can try to change to other channels with a
stronger signal. If the problems still exist, please consult your local dealer or installer for technical service.
3. You selected the wrong LNB type in the installation menu or your DiSEqC switch configuration
is not correct.
2.2 Standby Mode
1. Press[Power]buttontoswitchfromTV/radiomodetostandbymode.
2. Instandbymodepress[Power]buttonagaintoswitchbacktoTV/radiomode.
The last active channel will be shown.
3. To switch off the STB, press the main power button.
2.3 Mute
1. Press the [Mute] button to mute the sound. On the screen an icon will be displayed to indicate
the muted sound.
2. Press the [Mute] button again to restore the sound.
2.4 Channel Number
In TV mode you can enter the channel number directly with your remote control unit and confirm
thenumberwiththeOKbuttontochangetothedesiredchannel.
2.5 MULTI-PIC
In TV mode, press [0] key to enter the “MULTI-PIC” menu.
1. In “MULTI-PIC” menu, you can choose channels’ preview window (static), starting from the current channel.
Only the marked preview program is continuously playing.
2. Press [CHp/q] [VOLt/u] to change the marked channel among the
preview programs.
3. Withthenumberbuttons[1]~[9]youcandirectlymovethehighlighttotherelatedchannel.
4. With[OK]youreturntofullscreenmodeinthemarkedchannel.
7
CONTACT US 858.546.5050 www.picomacom.com
PICO MACOM SIRD-FTA-2

2.6 PGUP / PGDN
InTVmode,press[PGUP/PGDN]toswitchdirectlybetweensatellites.
2.7 FAV +/-
1. Infullscreen,press[FAV+/-]keytoswitchthefavoritechannelsincurrent
satellite channels list directly.
2. The sequence of the switch favorite channels is by following the sequence
of the current channel, but not the sequence in the favorite group.
2.8 CHt/u
InTV/Radiomodepress[CHp/q] to change channel.
2.9 VOLp/q
InTV/Radiomode,press[CHp/q] to adjust volume.
2.10 OK
1. InTVmodepress[OK]buttontoopentheChannelListwindow.
2. Press the [Red] exchange screen.
3. Press [Green] button to sort the channels by free and scrambled channels.
Free channels are listed first and scrambled channels last.
4. Press [Yellow] button to open the SAT list. After selecting a satellite,
the channel list will be reduced to the channels of this satellite.
5. Press [FAV] button to open FAV list. After selecting a Favorite Group, the
channel list will be reduced to the channels of this group.
6. Press [Blue] button to open the Find window. You can use this feature to
find channels by their names.
7. Press[OK]tochangeanddisplaythemarkedchannel.
2.11 Menu
Press [Menu] button to enter or exit the current menu.
2.12 Exit
Press [Exit] button to exit the current menu.
8CONTACT US TOLL FREE 800-421-6511
www.picomacom.com
PICO MACOM
SIRD-FTA-2
2.6
2.10

2.13 EPG
1. The STB supports Electronic Program Guides (EPG) gives
information about the actual programs of certain channels like event
name, subtitle, description, start and finish time. This feature is
dependent on the service of the channel provider.
Press [EPG] to open the EPG window.
2. The [Red] button opens the detailed schedule of the marked channel.
You can select an event with [CHp/q] and display the event’s detailed
descriptionwith[OK].
3. Press the [Green] button in the EPG menu to display the detailed
information of the actual event in the selected channel. With the [Yellow]
button you can program a timer with the start and finish time and date of
this event.
4. Press the [Yellow] button in the EPG menu to program a timer with the
actual events data.
5. To close the EPG menu press [Exit].
9
CONTACT US 858.546.5050 www.picomacom.com
PICO MACOM SIRD-FTA-2
1
2
3
4

2.14 Audio
1. In TV mode, press the [Audio] button to open the
Audio Mode window.
2. Select the item you want to adjust with [CHp/q] and change the value
with [VOLt/u].
2.15 SUB
Sub (Subtitle): In “OSD Setting”menu, use [Volume t/u] to select “On” or
“Off”. If the current channel has subtitle information, it will be displayed if this
function is “On”. If this function is “Off”, subtitles won’t be displayed.
2.16 Zoom
1. The[Zoom]keyallowsyoutomagnifyacertainareaontheimagesand
the current screen.
2. Press[Zoom]keyagain,theimagewillenlargerotateasx1,x2,x4,x6,x8,
x12, x16.
3. In“x2~x16”image,using[CHp/q]/[VOLt/u] keys to move the image
center area.
4. Inzoommode,press[Exit]toclose“Zoom”window.
2.17 FAV
1. In TV mode press the [FAV] button to display the Favorite Group
window on the screen as the picture beside shows.
2. In the Favorite Group window you can select the desired favorite channel
with [CHp/q]andconrmitwith[OK]toswitchtoit.
3. Inbiggergroupsyoucannavigatewith[PGUP/PGDN].
4. With [VOLt/u] you can select different Favorite Groups.
5. Press [Exit] to close the Favorite Group window.
Frequently Asked Question
Q: Why does the screen display “No Favorite Channel” after pressing the [Favorite] button?
A: No channels have been assigned to a Favorite Group. You can do this in the channel menu.
2.18 List
In TV mode, press [List] button to access directly to the “TV Channel List” menu or to the “Radio Channel List”
menu.
2.19 PAUSE
1. In playing mode, press [PAUSE], the picture will be paused, but the sound of the channel still continues.
2. Press [PAUSE] again, the screen’s picture will skip over to the current playing picture, and the sound of the
channel will correspond playing.
10 CONTACT US TOLL FREE 800-421-6511
www.picomacom.com
PICO MACOM
SIRD-FTA-2
2.14
2.16
2.17

2.20 TXT
1. Press [TXT] button in TV mode to open the teletext page. This service is
depending on the support of the channel provider.
2. If the channel does not support teletext information, it will show “No
Teletext Data” on the screen.
2.21 INFO
In TV mode, press [INFO] button to open information screen. The window
shows the parameters of the current channel.
Two dynamic bars at the bottom of the window reflect the signal intensity and
signal quality of the current channel.
2.22 TV/Radio
InTVmode,press[TV/Radio]toswitchtoRadiomode.InRadiomodepress
[TV/Radio]againtoswitchbacktoTVmode.
2.23 Recall
Pressing the [Recall] button allows you to toggle between the actual and the
last selected channel.
2.24 SAT
1. In TV mode, press [SAT] button to open satellite list, select, then press
[OK]toopen“TVChannelList”menu,selectchannel.
2. InTVmode,press[PageUp/Down]toswitchdirectlybetweensatellites.
2.25 LNB Short
When LNB is shorted, it will notify user on screen “LNB Short!” Please check
your cables and connections for shorts. When the short is removed, the
warning message will disappear.
3. Channel
Press[Menu]intheTV/radiomodetoenterthemainmenu.
1. Press [CHp/q] to select the channel item.
2. Press[OK]toentertheselecteditem.
2.20
2.21
2.24
3
11
CONTACT US 858.546.5050 www.picomacom.com
PICO MACOM SIRD-FTA-2

In the channel menu:
Press [CHp/q] to select the wanted menu item among TV Channel List,
Radio Channel List, Channel setup, Favorite group list name, Delete All,
Restore channel list and settings and Save channel list and settings.
Press[OK]toentertheselecteditem.
3.1 TV Channel List
If you enter the channel list menu, a window like the one shown beside
will open.
1. You can move the highlighted channel with [CHp/q]andpress[OK]to
preview the highlighted program in the preview window.
2. Press[PGUP/PGDN]ontheRCUtojumpbetweenthechannelsbypages.
3. Press [VOLt/u] to switch satellite of the program group.
4. Press [Menu] or [Exit] buttons to enter TV playing mode.
5. The color buttons offer further functions to manage the channel list.
3.1.1 Favorite
1. Press [FAV] to open the favorite window.
2. You can select between 8 favorite groups with [CHp/q].Press[OK]to
assign the channel to a favorite group, press [EXIT] to exit favorite group.
3. Press[OK]againtoremovethechannelfromthemarkedfavoritegroup.
4. Press [MENU] button and you will be asked, “Are you sure to save?”.
Select “Yes” to save the marked favorite group. Select “No” to cancel the
operation.
5. To return to the TV channel list. The channels of favorite groups are
indicated with a favorite icon behind the name.
3.1.2 Move
Pressing the [Red] button in the TV channel list will open another
window where you can choose between move the actual channel and
swaptheactualchanneltothedesiredposition,press[OK]
to confirm it.
a) Move
1. Press [Red] button to show a moving icon behind the channel
name.
2. Move the channel to the desired position with [CHp/q].
Press[OK]toconrmtheposition.
b) Swap
1. Press [Green] button to show a moving icon behind the channel name.
Move the channel to the desired position with [CHp/q].Press[OK]toconrmtheposition.
3
3.1
3.1.1
3.1.2
12 CONTACT US TOLL FREE 800-421-6511
www.picomacom.com
PICO MACOM
SIRD-FTA-2

3.1.3 Sort
Press [Green] to open the sort window. Press [CHp/q] to select and
[OK]toconrmyourchoice.
The ways of sorting are:
• Default: Sort channel factory default.
• FTA/CAS:Sortchannelbyfreeandscrambledsequence
Free channels will be listed first, followed by scrambled
channels.
• Lock: Unlocked channels are listed first, followed by locked
channels.
• Name(A-Z):SortinginAlphabeticalorder,ignoring“$”symbol.
• Name(Z-A):SortinginAlphabeticalorder,ignoring“$”symbol.
3.1.4 TV Channel List Edit
After pressing the [Yellow] button, a password window will open.
The default password is “0000”.
You can delete, skip, lock and edit the channel.
Press [MENU] to leave the channel editing. The system will
ask you to confirm saving any changes made.
3.1.4.1 Delete
In channel edit menu, press [Red] button to open another
window where you can choose between delete one channel or
delete all channels.
a) Del One
Press [Red] button to mark a channel for deleting. Marked
channel will be deleted after you confirm saving changes
when you leave this menu.
b) Del All
1. Press [Green] button to show a deleting icon behind all
channel name.
2. Press [MENU] button. You will be asked “Are you sure
tosave?”.Select“OK”todeleteallchannels.Select
“Cancel” to cancel the operation.
3.1.3
3.1.4
13
CONTACT US 858.546.5050 www.picomacom.com
PICO MACOM SIRD-FTA-2

3.1.4.2 Skip
In channel edit menu, press [Green] button to place a skip icon behind the name of the highlighted
channel. Marked channels will be skipped when you change channels in TV mode after you confirm savings
changes when you leave this menu.
3.1.4.3 Lock
In channel edit menu, press [Yellow] button to place a lock icon behind the name of the highlighted channel.
Marked channels will be locked and displayed only after a password has been entered if you confirm
saving changes when you leave this menu.
3.1.4.4 Edit
After pressing the [Blue] button in the TV channel list, the edit menu will
open another window where you can choose between edit the actual
channel or create a new channel.
a) Edit
Press [Red] button to edit the channel.
1. Selectingthenameitemwith[OK]willdisplayabutton,
pad to show how to edit the channel name.
2. On the “Video PID”, “Audio PID” and “PCR PID” items,
you can input numbers to modify the item’s value.
3. Aftermodicationselect“Save”andpress[OK]buttonto
save the modified values and exit “Edit” mode. Or, select
“Exit”andpress[OK]toleaveeditmodewithoutsaving
the modifications.
b) Create
Press [Green] button to open the create channel window.
1. Press[OK]onthe“Satellite”itemtodisplaythe
satellite list. You can select the satellite for which you
want to create a new channel.
2. Withmarked“TPIndex”item,press[OK]todisplayTP
list, use [CHp/q] to select or create a new channel.
Press[OK]todisplaytheTPnumberwherethechannel
can be found. The next three items will show the related
parameters.
3. Highlightthe“Name”itemandpress[OK]todisplaythe
button pad and edit the new channel’s name. In “Video
PID”, “Audio PID” and “PCR PID” items you can enter the
numbers directly to set these parameters of the new
channel.
4. Aftermodicationselect“Save”andpress[OK]tosave
the new channel and leave the edit mode. Select “Exit”
andpress[OK]toexittheeditmodewithoutsavingthe
new channel.
3.1.4.4
14 CONTACT US TOLL FREE 800-421-6511
www.picomacom.com
PICO MACOM
SIRD-FTA-2

3.1.5 Find
1. Press [Blue] button to open the “Find” window as shown
beside. Press [CHp/q]/[VOLt/u] to select the leading
characterofthechannelnameandpress[OK]toconrmit.
2. Afterenteringthecharacter(s),highlight“OK”inthewindowand
press[OK]ontheRCU.
3. Press [Exit] button to close the find window and brings you back
to the channel list.
3.2 Radio Channel List
Basically the operation of “Radio Channel List” is the same as “TV Channel
List”, except that in the small channel window, the radio Logo will be dis-
played.
3.3 Channel Setup
When you enter the “Channel Setup” menu, you will see a screen like shown
beside:
1. StartupChannel:Press[OK]toenter“StartupChannel”menutoseethe
screen as shown beside:
• If you set of “Boot on Channel” to “On” you can edit the following
two items. If the setting is “Off”, the box always starts with the chan-
nel that was running when the box had been switched off.
• On the “Mode” item, you can select either “TV channel” or “Radio
channel”.
• On “Startup Channel”, item you can open the channel list by pressing
[OK].Thenyoucanselectthechannelofyourchoice.
Press[OK]againtoconrm.
2. Channel Play type: Use [CHp/q]toselect,press[OK]toenter“Channel
Play Type” menu. Here you can select the “playing channels” as “All”,
“Free” or “Scrambled” with [VOLt/u].
3. If you select “Free” , all scrambled channels will be skipped when you
change channels with [VOLt/u].
4. Press [Exit] to leave the “Channel Setup” menu.
3.4 Favorite Group List Name
When you enter “Favorite group list name” menu, 8 favorite group will be
displayed,press[OK]ontheRCUtorenamefavoritegroup.Use[CHp/q]/
[VOLt/u]toselectcharacter,press[OK]toconrmit.
Aftermodicationselect“OK”ofbuttonbarandpress[OK]ontheRCUto
rename the favorite group name and leave the edit mode. Press [Exit] on the
RCU to exit the edit mode without saving the favorite group name.
3.1.5
3.4
3
2
1
15
CONTACT US 858.546.5050 www.picomacom.com
PICO MACOM SIRD-FTA-2

3.5 Delete All
To delete all channels:
1. Enter the password. The default password is “0000”.
2. After entering the password correctly, a safety question will appear
to confirm.
3. Select“OK”todeleteallchannelsor“Cancel”tocanceltheoperation.
Conrmwith[OK].
4. In step 1 and step 2, pressing [Menu] will exit the function directly without
saving.
Frequently Asked Question
Q: If I carelessly delete all channels, what should I do?
A: There are two ways to restore:
• Research all channels in the “Installation” menu.
• Use “Factory Default” function to restore all channels in the “Tools”
menu.
3.6 Restore Channel List and Settings
To restore channel list and settings.
1. Enter the password. The default password is “0000”.
2. After entering the password correctly, a safety question will appear to
confirm.
3. Select“OK”,press[OK]torestorethelastbackupchannellist,the
currentchannellistwillbeerased.Select“Cancel”,press[OK]tocancel
the operation.
3.7 Save Channel List and Settings
To save channel list and settings.
1. Enter the password. The default password is “0000”.
2. After entering the password correctly, a safety question will appear to
confirm.
3. Select“OK”,press[OK]tosavecurrentchannellisttobackupchannel
list.Select“Cancel”press[OK]tocanceltheoperation.
4. Installation
After selecting the installation menu, you can see the window (as shown
beside) in the “Installation” menu;
1. Press [CHp/q] to select menu items among Single Search, Multi Search,
TP Scan, Satellite List, TP List and Satellite Guide.
2. Press[OK]toentertheselecteditem.
3.5
3.6
3.7
4.
16 CONTACT US TOLL FREE 800-421-6511
www.picomacom.com
PICO MACOM
SIRD-FTA-2

4.1 Single Search
After selecting “Single Search”, you will see a window as shown beside:
1. In the “Satellite” item, press [VOLt/u] to select the satellite that you want
toscanorpress[OK]toopenthe“satellitelist”toselectdirectlywith
[CHp/q],press[OK]toconrmit.
2.LNBConguration:Press[OK]toenterLNBconguration,youwillseea
window as shown beside:
• LNB Type: Press [VOLt/u] to switch among “Standard”, “User” and
“Universal” mode.
For Example: If you use a Dual LNB, you should select “User” option in
“LNB Type” and set the correct frequency in LNB type.
• 22K: Use [VOLt/u]toswitch“ON”and“Off”.The22KHzsignalis
usedinKUuniversalLNBstochangebetweenlowbandandhigh
band.
! Notice: After choosing LNB type “Universal”, you cannot
modify22K.
• DiSEqC1.0: Use [VOLt/u]toswitchtheoptionsorpress[OK]toopen
the DiSEqC1.0 option list to select directly with [CHp/q],press[OK]to
confirm it.
• DiSEqC1.1: Use [VOLt/u]toswitchDiSEqC1.1optionorpress[OK]
to enter DiSEqC1.1 option to select directly with [CHp/q],press[OK]
toconrmit.Theoptionsofthisitemare:Disable/CCard1M1Port1
/CCard1M1Port2/CCard1M1Port3/CCard1M1Port4/CCard1
M2Port1/CCard1M2Port2/CCard1M2Port3/CCard1M2Port4/
CCard1M3Port1/CCard1M3Port2/CCard1M3Port3/CCard1M3
Port4/CCard2Port1/CCard2Port2/CCard2Port3/CCard2Port4/
CCard2Port5/CCard2Port6/CCard2Port7/CCard2Port8/CCard2
Port9/CCard2Port10/CCard2Port11/CCard2Port12/CCard2
Port13/CCard2Port14/CCard2Port15/CCard2Port16.
• Positioner: Press [VOLt/u]toselectbetween“Off/DiSEqC1.USALS”
! Notice: When you select “DiSEqC1.2 or USALS”, “DiSEqC1.0” and
“DiSEqC1.1” items will be disabled.
• Polarity: Press [VOLt/u]toswitchbetween“Auto/H/V”.
• Toneburst: Press [VOLt/u] to switch this function “On” or “Off”.
3. DiSEqC1.0 4Port: Use [VOLt/u] to switch the options of DiSEqC1.0.
BetweenDisable/LNB1/LNB2/LNB3/LNB4.
4. TP Index: Use [VOLt/u]toselectthedesiredtransponderorpress[OK]
to open the TP list to select directly with [CHp/q],press[OK]againto
display the TP number where the channel can be found.
5. FTA Only: Press [VOLt/u] to select to scan only free channels or even
scrambled channels. If you select “Yes” it will scan free channels only.
6. Scan Channel: Press [VOLt/u] to select to scan TV + radio channels, or
just TV channels or radio channels.
4.1
17
CONTACT US 858.546.5050 www.picomacom.com
PICO MACOM SIRD-FTA-2

7. Scan Mode: You can select “Auto Scan”, “Preset Scan” or “NIT Search”
to blind scan preset transponders or network transponders of the
selected satellite.
8. Search:Press[OK]tostartscanning.Inthelowerpartofthewindow,the
progress of scanning and the found channels are displayed.
4.2 Multi Search
When you enter the “Multi Search” menu, a window like shown beside will
open.
1. In the “Satellite” item press [VOLt/u] to select the satellite which you
wanttoscanorpress[OK]toopenthe“satellitelist”toselectdirectly
with [CHp/q],andpress[OK]tomark/unmarkand[MENU]tonish
the selection. You can select several satellites in this menu. The system
willuseDiSEqC1.0/1.1,DiSEqC1.2andUSALSfunctionstosearchthe
marked satellites and scan channels.
2. On “FTA Only” item, press [VOLt/u] to select scanning of all channels or
just scanning of free channels. If you select “Yes”, it will scan free
channels only.
3. On “Scan Channel” item, press [VOLt/u] to select the scanning range
from TV + radio channels, only TV channels or only radio channels.
4. On “Scan Mode” item, you can select “Auto Scan”, “Preset Scan” or
“NIT Search” to blind scan preset transponders or network transponders
of the selected satellite.
5. Select“Search”andpress[OK]tostartscanning.Inthelowerpartofthe
window the progress of scanning and the found channels are displayed.
Press[Menu/Exit]tocancelornishthescanningandsavingthefound
channels.
4.3 TP Scan
When you enter “TP Scan” menu, a window like the one shown beside will be
displayed.
1. In the “Satellite” item, press [VOLt/u] to select the satellite which you
wanttoscanorpress[OK]toopenthe“satellitelist”toselectdirectly
with [CHp/q],press[OK]toconrm.
2. TP Index: Use [VOLt/u]toselectthedesiredtransponderorpress[OK]
to open the TP list to select directly with [CHp/q],press[OK]againto
displaytheTPnumberwherethechannelcanbefound.Press[Red/
Green/Yellow]keyontheRCUfortherelatedfunctions.
• When you press [Red] it will display “New TP” in “TP Index” item. You
have to set the parameters of “TP Frequency”, “Symbol Rate” for this
new transponder. Therefore use the number buttons of the RCU.
Theavailablerangesare“3000~13450MHz”and“1000~45000KS/s”.
• When you press [Green], a safety question will be displayed for
confirmation to delete the current transponder or not. If you select
“OK”,thecurrenttransponderwillbedeletedandthetotalnumberof
transponders will be reduced.
4.2
4.3
18 CONTACT US TOLL FREE 800-421-6511
www.picomacom.com
PICO MACOM
SIRD-FTA-2

• When you press [Yellow], a safety question will be displayed for
conrmationtodeletealltranspondersornot.Ifyouselect“OK”,theall
transponders on current satellite will be deleted.
3. For existing transponders, you can use number buttons to modify the pa-
rameters of “TP Frequency” and “Symbol Rate” or [VOLt/u] to change
the value directly. “Polarity” and “FTA only” are used for setting scan
conditions. Press [VOLt/u] to select a different mode.
On“TPScan”item,press[OK]toopenanotherwindowwhereyoucanset
“ScanMode”,“ProgramType”and“NITSearch”.Press[Menu/Exit]tore-
turn to the previous menu.
Press [Red] button to add a new TP.
Press [Green] button to delete the current TP.
Press [Yellow] button to delete all transponders on current satellite.
4. AntennaSetup:Press[OK]toenterLNBconguration,asshownbeside:
• LNB Type: Press [VOLt/u] to switch among “Standard”, “User” and
“Universal” mode.
For Example: If you use a Dual LNB, you should select “User”
option in “LNB Type” and set the correct frequency in LNB type.
• 22K: Use [VOLt/u]toswitch“ON”and“Off”.The22KHzsignalis
usedinKUuniversalLNBstochangebetweenlowbandandhigh
band.
! Notice:AfterchoosingLNBtype,“Universal”,youcannotmodify22K.
• DiSEqC1.0: Use [VOLt/u]toswitchtheoptionsorpress[OK]toopen
the DiSEqC1.0 option list to select directly with [CHp/q],press[OK]to
confirm it.
• DiSEqC1.1: Use [VOLt/u]toswitchDiSEqC1.1optionorpress[OK]
to enter DiSEqC1.1 option to select directly with [CHp/q],press[OK]
toconrmit.Theoptionsofthisitemare:Disable/CCard1M1Port1
/CCard1M1Port2/CCard1M1Port3/CCard1M1Port4/CCard1
M2Port1/CCard1M2Port2/CCard1M2Port3/CCard1M2Port4/
CCard1M3Port1/CCard1M3Port2/CCard1M3Port3/CCard1M3
Port4/CCard2Port1/CCard2Port2/CCard2Port3/CCard2Port4/
CCard2Port5/CCard2Port6/CCard2Port7/CCard2Port8/CCard2
Port9/CCard2Port10/CCard2Port11/CCard2Port12/CCard2
Port13/CCard2Port14/CCard2Port15/CCard2Port16.
• Positioner: Press [VOLt/u]toselectbetween“Off/DiSEqC1.2/
USALS”.
!Notice: When you select “DiSEqC1.2 or USALS”, “DiSEqC1.0” and
“DiSEqC1.1”, items will be disabled.
• Polarity: Press [VOLt/u]toswitchbetween“Auto/H/V”.
• Toneburst: Press [VOLt/u] to switch this function “On” or “Off”.
5. Afteryoucompletedyourmodicationonthe“TPScan”item,press[OK]
twice to start scanning.
4.3
19
CONTACT US 858.546.5050 www.picomacom.com
PICO MACOM SIRD-FTA-2

4.4 Satellite List
When you enter the “Satellite List” menu, you will see a window like the one
shown beside:
1. Press [Red] button to enter edit satellite menu. You can edit the satellite’s
name and its longitude.
2. Press [Green] button to open the “Add satellite” window.
3. After pressing [Yellow] button, you will be asked “Are you sure to de-
lete?”.Select“OK”todeletethemarkedsatellite.Select“Cancel”tocan-
cel the operation.
4.4
20 CONTACT US TOLL FREE 800-421-6511
www.picomacom.com
PICO MACOM
SIRD-FTA-2
Table of contents
Other Pico Macom Receiver manuals

Pico Macom
Pico Macom PRRSeries User manual

Pico Macom
Pico Macom PRR-1 User manual

Pico Macom
Pico Macom PFR-2 User manual

Pico Macom
Pico Macom SIRD-FTA User manual

Pico Macom
Pico Macom PR3200 User manual

Pico Macom
Pico Macom PR3200 User manual

Pico Macom
Pico Macom PFR-2 User manual

Pico Macom
Pico Macom SIRD-FTA User manual
Popular Receiver manuals by other brands

Grace Industries
Grace Industries MS900 Series User information

Maclean Energy
Maclean Energy MCE07 operation instruction

Sennheiser
Sennheiser EM 100 G2 Service manual

Kenwood
Kenwood R-599D operating manual

Converters.TV
Converters.TV 995 Operation manual

Pioneer
Pioneer SPH-DA120 Important information for the user