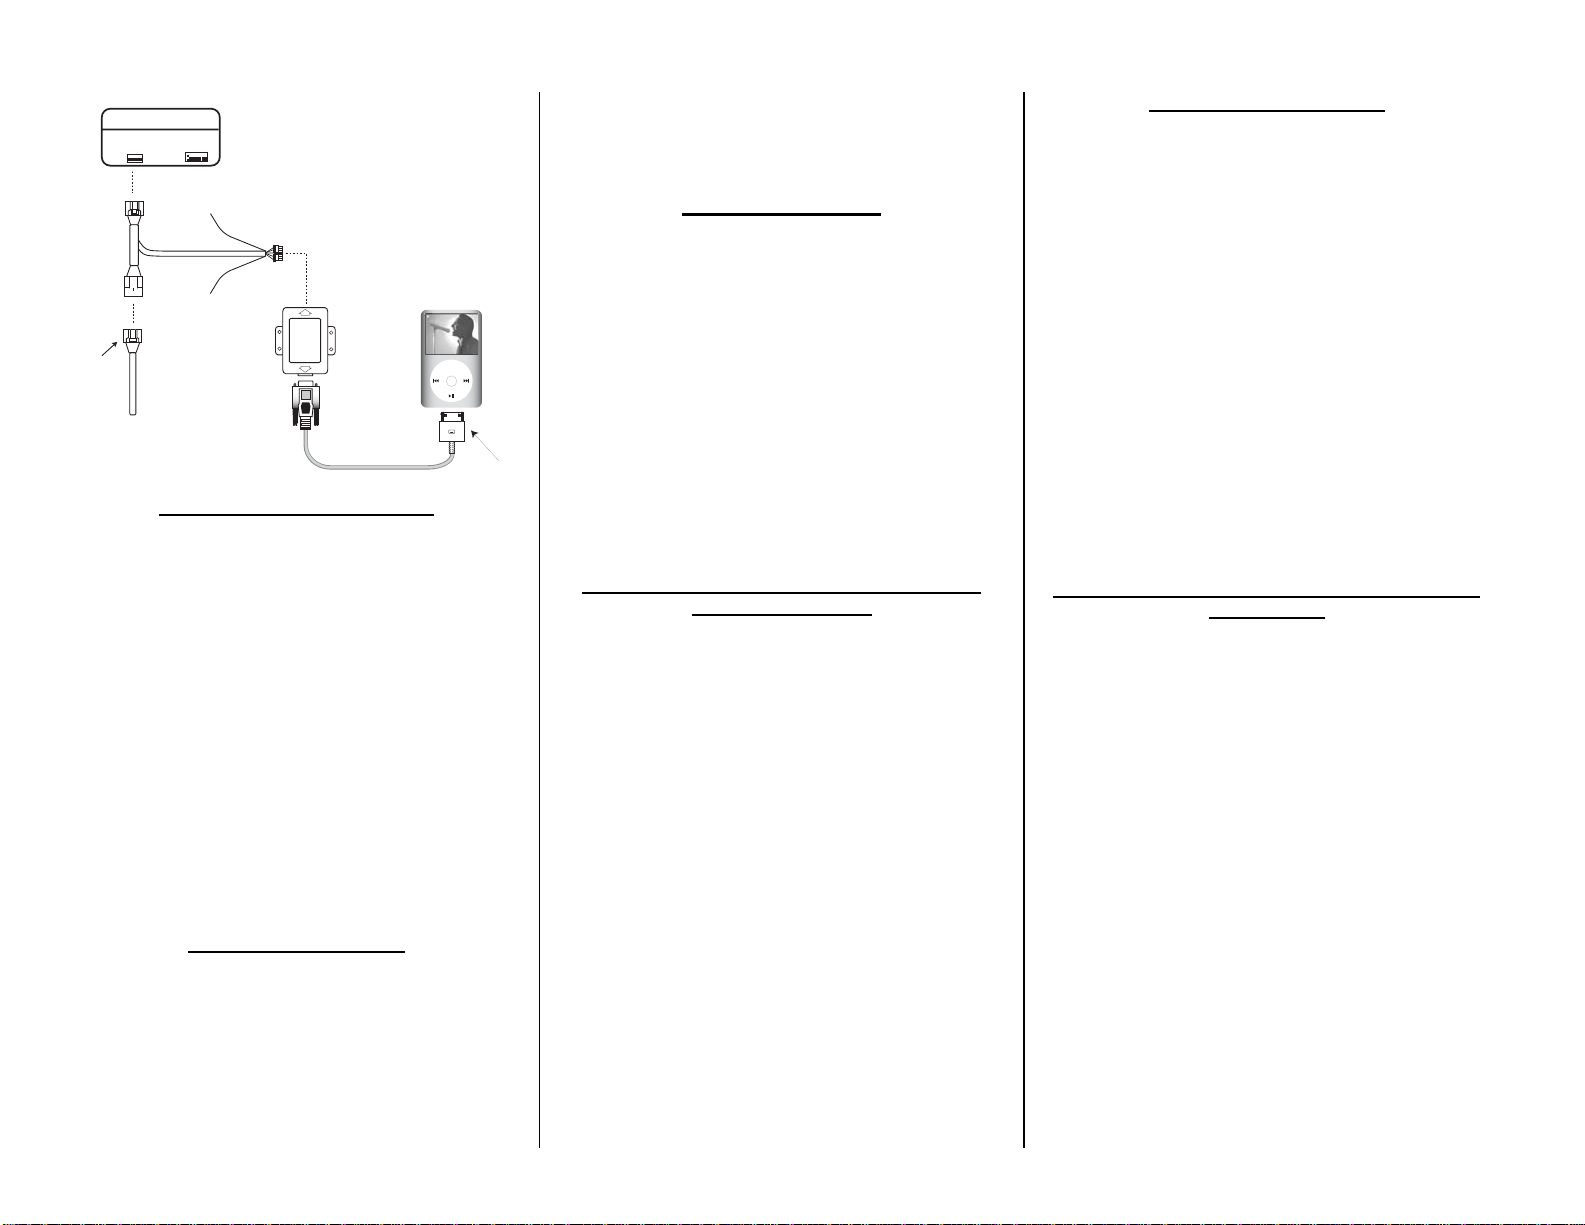
FACTORY RADIO (REARVIEW)
Factory 16 pin
connector
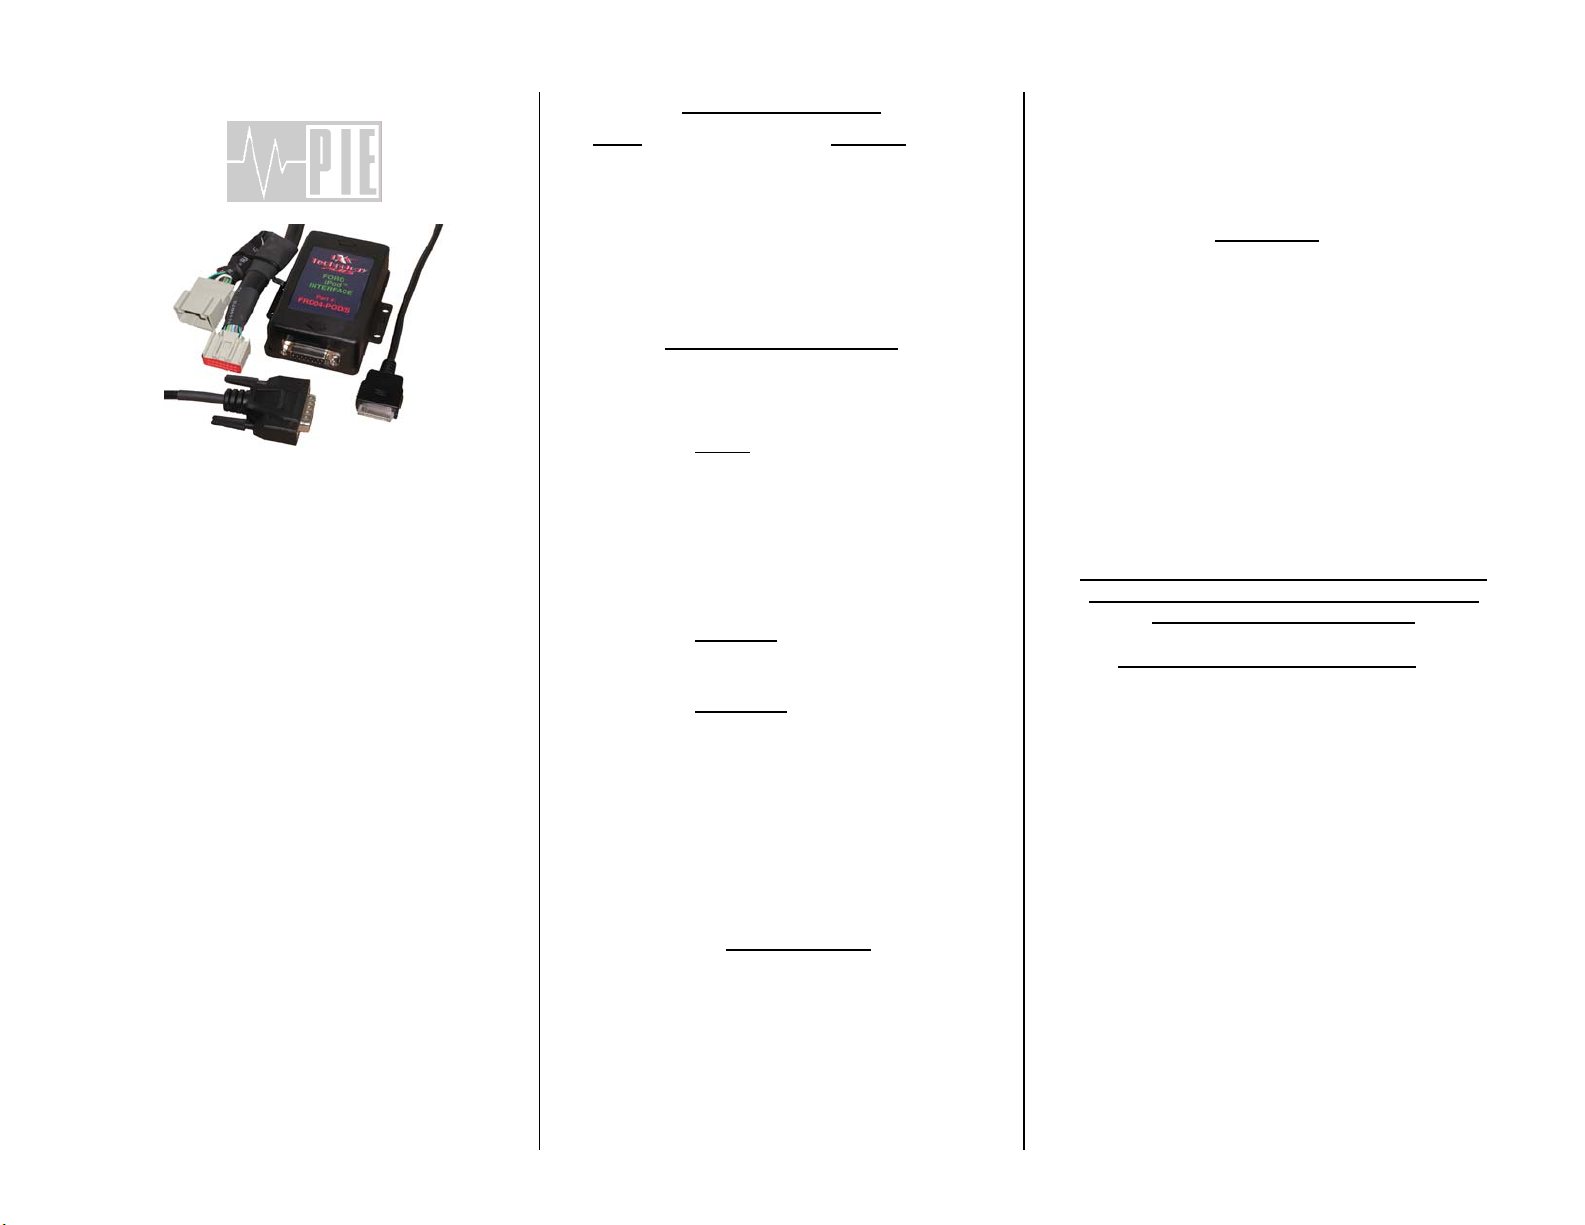
DPX
Technology
TM
PLUSPLUS
FORD
iPod
INTERFACE
Part #:
FRD04-POD/S
Dock
Connector
Cable
TM
MENU
+12V CONSTANT
(GREY/VIOLET)
GROUND
(BLACK/GREEN)
Installation of iPod to interface
Note: For best synchronization between iPod and
radio, radio and iPod should both be ON.
1. Press the AUX button on the OEM radio to get to SAT1
mode.
2. Connect the routed 4-foot dock cable to the iPod. A
symbol showing your battery is being charged will show
next to the battery indicator.
3. Wait a few seconds while the iPod interface searches
for all the playlist(s). Searching time may vary
depending on the number of playlist(s).
4. After connecting the iPod, the iPod will begin to play
and will show an “OK to disconnect” message. This
message means the iPod is in external control mode
and proper synchronization is complete.
NOTE: If this “OK to disconnect” does not appear
and / or the iPod does not begin to play within 5-10
seconds, please disconnect the iPod and recheck your
connections.
iPod Playback functions
The control functions for the iPod using the OEM radio’s
satellite radio controls are similar to those used on the iPod
itself. Due to certain radio limitations, there are some
differences in how the iPod information is accessed and /
or displayed through the OEM radio.
The following describes how to control the iPod from the
OEM radio, and any similarity to the iPod’s controls or
buttons has been noted.
Listening to your iPod
Once you are in SAT1 mode and the iPod is connected to
the dock cable, the iPod will begin playing the song that it
was currently at before it was connected. After the radio
displays IPOD HEAD ÆMUSIC SELECT ÆPLAYLISTS,
the current song title and elapsed time will be displayed (up
to 12 characters). At this point the radio is in ‘IPOD HEAD’
mode and all controls are done through the satellite radio
control buttons on the Ford radio.
Pressing the AUX button a second time will display “SAT2”.
This is the ‘REMOTE MODE’ and will restore the iPod
screen and controls while still allowing limited control
through the radio. “SAT3” will switch control back to the
radio and is the same as “SAT1”.
Radio Controls for your iPod in ‘IPOD HEAD’
mode (SAT1 / SAT3)
Now that your iPod is connected and you are listening to
your music, you can begin navigating through your music
library in much the same way you would from the iPod
itself. The radio buttons / iPod controls and their similarity
to the buttons / controls on the iPod itself are as follows:
<SEEK -Similar to iPod PREVIOUS TRACK button; press
and hold to rewind through current song
SEEK> -Similar to iPod NEXT TRACK button; press and
hold to fast forward through current song
TEXT -Toggles between artist name, album name, and
song name; button location varies by headunit
PRESET 1 - (Similar to iPod “MENU” button)
PRESET 2 - (Similar to iPod “SELECT” button)
PRESET 3 - (Similar to counter-clockwise rotation of iPod
Click wheel)
PRESET 4 - (Similar to clockwise rotation of iPod Click
wheel)
PRESET 5 - (Toggles between SHUFFLE SONGS,
SHUFFLE ALBUMS, SHUFFLE OFF)
PRESET 6 - (Toggles between SCAN ON, SCAN OFF,
REPEAT ON, and REPEAT OFF)
Browsing by song, artist, etc.
Pressing radio preset 1 will allow you to enter MUSIC
SELECT mode in order to toggle through the following
categories:
PLAYLISTS ÆARTISTS ÆALBUMS Æ
SONGS ÆPODCASTS ÆGENRES Æ
COMPOSERS ÆAUDIOBOOKS
Example of finding a song by a particular artist:
•Press radio preset 1 to get into MUSIC SELECT
mode.
•Using radio presets 3 & 4, locate the ARTIST category
and press radio preset 2.
•Using radio presets 3 & 4, locate the desired artist and
press radio preset 2.
•Using radio presets 3 & 4, select the desired album for
that artist and press radio preset 2.
•Using radio presets 3 & 4, locate the desired song and
press radio preset 2 to begin play.
Radio Controls for your iPod in ‘IPOD REMOTE’
mode (SAT2)
Upon entering the SAT2 band on the Ford radio, the check
mark on the iPod display screen will disappear, the radio
will display ‘IPOD REMOTE’, and the iPod screen and
controls are now operational. This is useful for more rapid
navigation through the iPod song library when using an
iPod that contains an unusually large number of songs.
In IPOD REMOTE mode, radio controls are limited to the
following:
<SEEK -Similar to iPod PREVIOUS TRACK button; press
and hold to rewind through current song
SEEK> -Similar to iPod NEXT TRACK button; press and
hold to fast forward through current song
TEXT -NO FUNCTION
PRESET 1 - (Similar to iPod “MENU” button)
PRESET 2 - (Similar to iPod “SELECT” button)
PRESET 3 - (Similar to counter-clockwise rotation of iPod
click wheel)
PRESET 4 - (Similar to clockwise rotation of iPod click
wheel)
PRESET 5 - (Toggles between SHUFFLE SONGS and
SHUFFLE OFF)
PRESET 6 - (Used to Pause iPod; press again to play)
.