3
DruckprüfungderAnlagemit8 bar. Wasserdruckauf3 - 5 bareinstellen.
Nach Beendigung der Installationsarbeiten unbedingt Wasserleitung
durchspülen.Bei mehrerenAnlagenist einzentraler Abstellhahnerfor-
derlich.DiesermussvomSalonausleichtzugänglichsein.
Die Montageanleitunggilt für den Anschluss einer Anlage. Bei
mehrerenAnlagenist der Rohrquerschnittentsprechendzuerwei-
tern (eventl. Ringleitung).
Wichtig: Bei Wasserdrucküber5 bar ist dieserdurchein Druckminder-
ventilzuregulieren.DafürWarmwasserboilereinDruckminderventilver-
wendetwird,kanndiesesgleichbeiderallgemeinenWasserzufuhrange-
brachtwerden.
UmTemperaturschwankungenzu vermeiden, solltenWassermenge
sowie Wasserdruck für Warm - und Kaltwasser identisch sein.
Temperatur:
maximal70° C (Warmwassereingang)
empfohlen60° C (Energieeinsparung)
Hinweis für denBesitzer:
Bis hierhermussderInstallateurdieAnlagemontieren,prüfenunddafür
garantieren.FürhierauftretendeStörungenist nurderInstallateurzustän-
dig. Der Herstellerder Anlage übernimmtfür diese Arbeitenkeine
Garantieleistung.
Pressuretest of installationwith8 bar. Set waterpressureto 3 - 5 bar.
Aftertheendof theinstallationworkabsolutelyrinsethewaterconduit.
Incaseofseveralinstallationsa centralregulatingtapist required.Same
mustbeeasilyaccessiblefromthesaloon.
The mountinginstructions are for the connectionof one installati-
ononly. In case of several installations thepipecross section must
be extendedcorrespondingly.
Important:At waterpressureover5 bar samemustbe regulatedby a
pressurereducingvalve.Since for waterboilersa pressurereducingis
beingused,samemayas wellbeappliedtothegeneralwatersupply. In
order to avoid fluctuations of temperature, quantity of
water and water pressure for hot and cold water must be
identical.
Temperature:
maximum70°C (hotwaterinlet)
recommended60°C (energysaving)
Informationfor the proprietor:
Untilheretheplumbermustinstalltheinstallation,testit andwarrantfor
it. For anytroublesherethe plumberis responsible.The manufacturer
doesn’t takeoveranyresponsibilityforthisjob.
MOUNTING INSTRUCTIONS
FOR THE PLUMBER
MONTAGEANLEITUNG
FÜR DEN INSTALLATEUR
SWING MONO
DGB
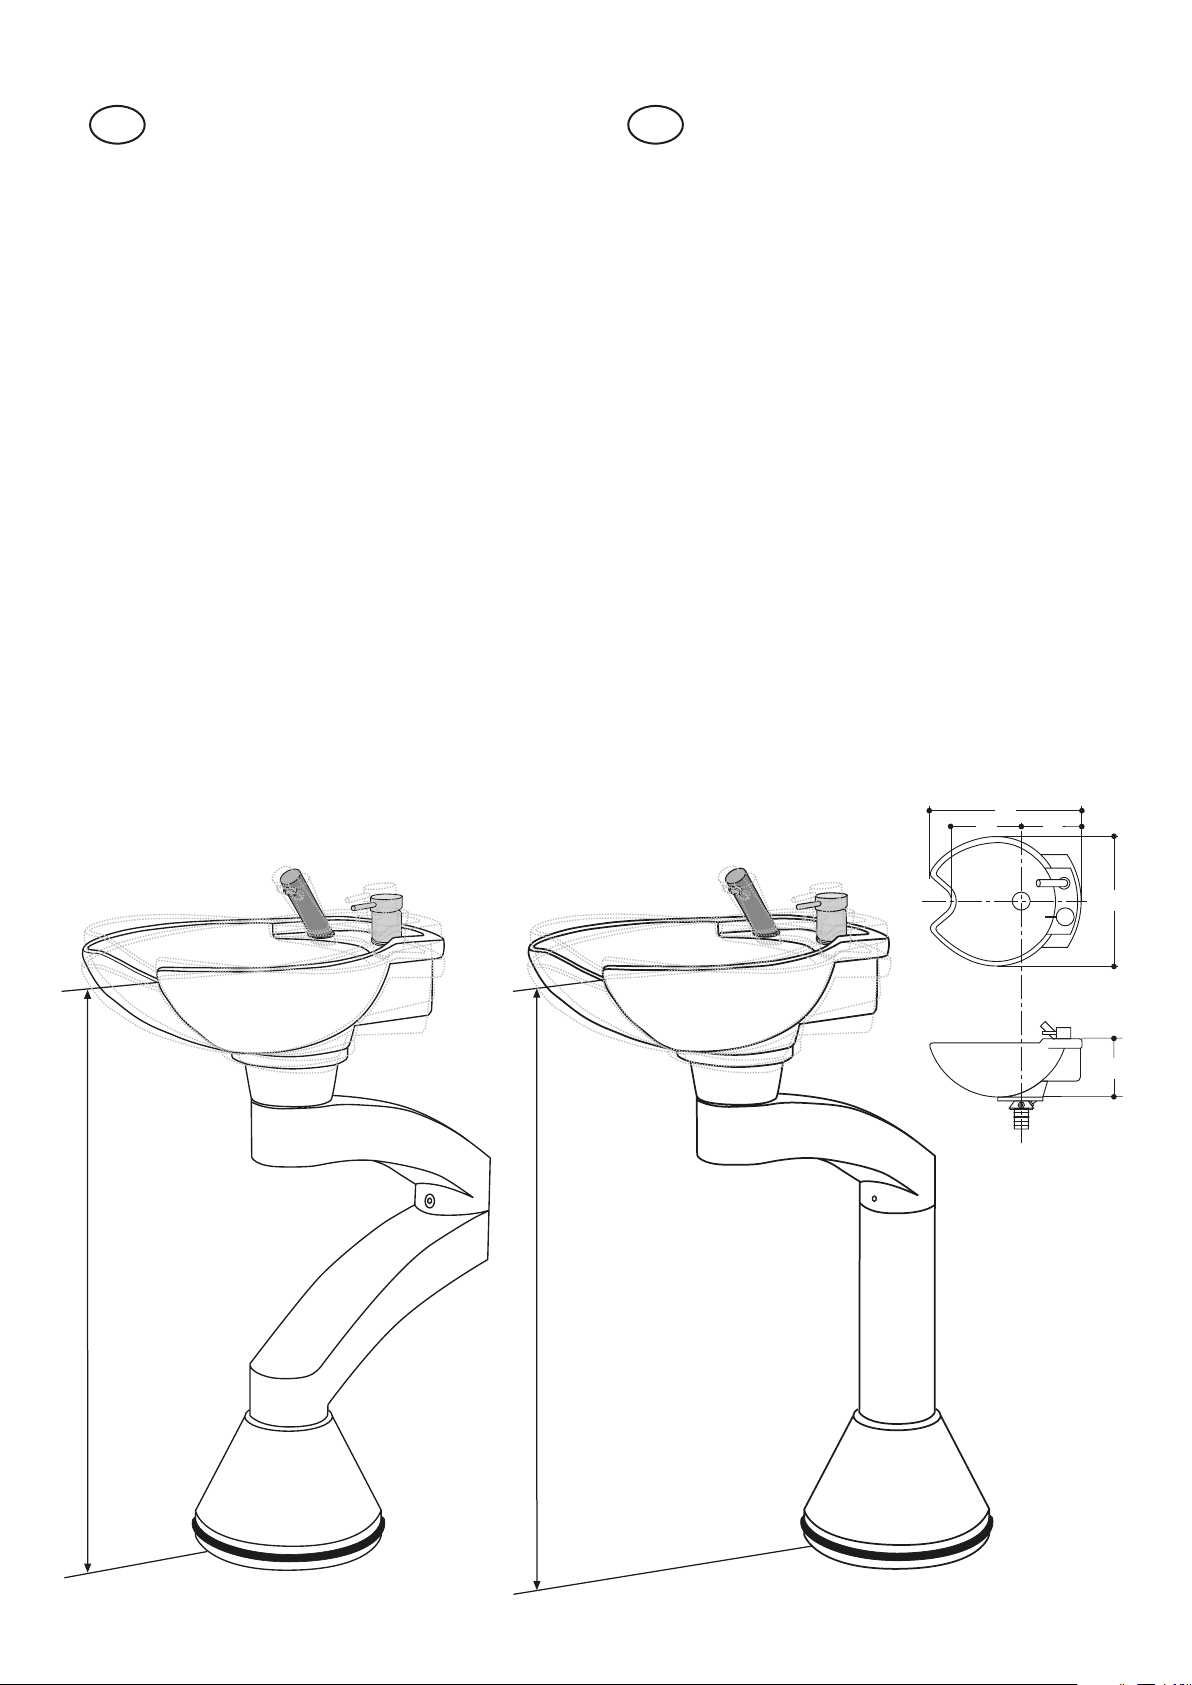
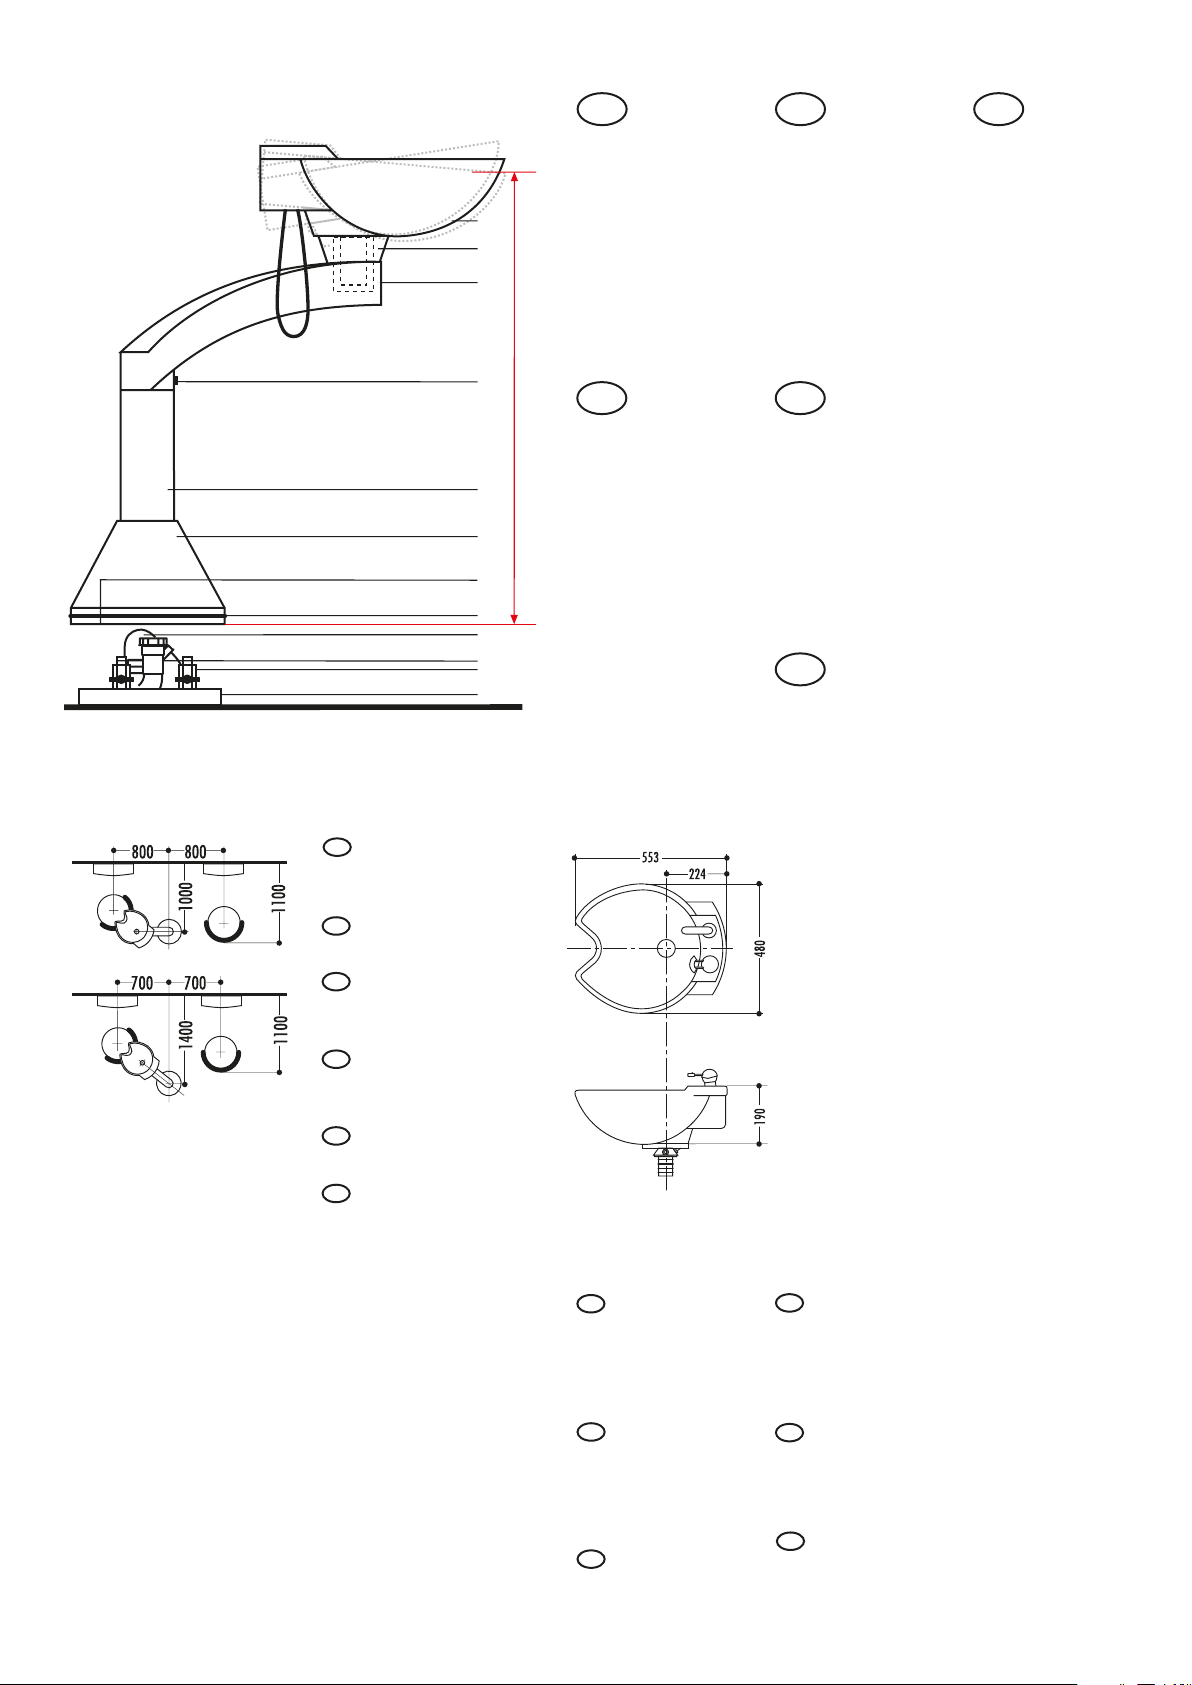
555
480
230 225
190
940- 1005
940- 1005