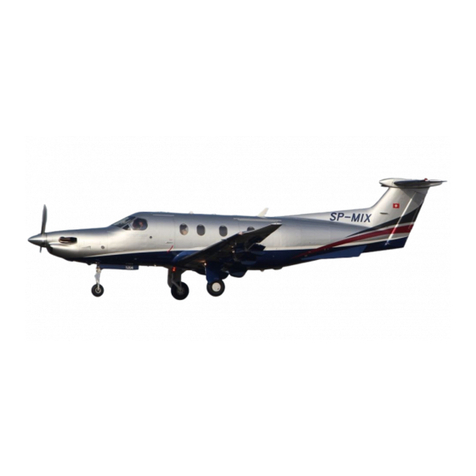
Pilatus PC-12 User manual

12037 N Highway 99
Seminole, OK 74868
Phone (405) 382-0731
Fax (405) 382-0737
http://www.enviro-ok.com
COPYRIGHT 2007
ENVIRO SYSTEM INC.
ORIGINAL ISSUE
DECEMBER 28/ 2007 21-00-22
JULY 21, 2011
OPERATING, SERVICING, AND COMPONENT
MAINTENANCE MANUAL
WITH ILLUSTRATED PARTS LIST
PILATUS PC12
R-12 AIR CONDITIONING SYSTEM COMPONENTS:
1) COMPRESSOR CONDENSER MODULE ASSEMBLY, PART # 1250900-4
2) EVAPORATOR MODULE ASSEMBLY, PART # 1250200-42 (L) /-43 (C,R)
ATA SPECIFICATION 21-00-22

Component Maintenance Manual
EFFECTIVITY: ALL 21-00-22
Record of Revisions
Page 1
JULY 21, 2011
RECORD OF REVISIONS
REV DESCRIPTION OF CHANGE DATE APPROVAL
ORIGINAL RELEASE 12/28/07 BH
1 Updated Storage, Section 14. Updated information concerning
cold weather operations under General and System Off
Season/On Aircraft Functional Testing.
5/5/08 BH
2 Delete page 2002 Subtask 21-00-22-99-002
This removes wiring diagram Figure 3, and removes 4.2 “Wiring
Schematic”and4.2.1 "The following electrical schematic shows
the system components and how they interrelate to each other."
renumber subsequent Figures 4 and 5 and references to those
Figures. Revise Note above Table 3 to remove reference to
Figure 3 Wiring Schematic
9/19/08 BH
3 Change and label Table 3.5 & 3.6 to corrected schedule hours
and months. Remove Section 3.4 Drive Motor Brush Testing.
Renumber subsequent sections. Delete Figure 1 Brush Length.
Section 7 Renumber Subsequent Figures. add new Figure 4, 5,
and 6, commutator wear examples. Section 8.2.1.2: change
verbiages to reflect replacement of brushes and add CAUTION
referring to commutator wear condition examples IPL Figure
10001 Item -13C, Qty of Brushes changed from 4 ea to 1 set.
IPL Change all AN960 p/n to NAS equivalent. Remove IPL item
numbers from Sections 2 thru 10.
07/21/11 BH
NOTE: Check Enviro Systems Inc. web site to verify current revision. www.enviro-ok.com

Component Maintenance Manual
EFFECTIVITY: ALL 21-00-22
Record of Temporary
Revisions
Page 2
JULY 21, 2011
RECORD OF TEMPORARY REVISIONS
REV DESCRIPTION OF CHANGE DATE APPROVAL

Component Maintenance Manual
EFFECTIVITY: ALL 21-00-22
List of Service Bulletins
Page 3
JULY 21, 2011
LIST OF SERVICE BULLETINS
SERVICE
BULLETIN #
DESCRIPTION DATE
RELEASED

Component Maintenance Manual
EFFECTIVITY: ALL 21-00-22
List of Effective Pages
Page 4
JULY 21, 2011
LIST OF EFFECTIVE PAGES
CHAPTER / SECTION PAGE DATE CHAPTER / SECTION PAGE DATE
All All 12/28/07
All All 5/5/08
All All 9/19/08
All All 07/21/11

Component Maintenance Manual
EFFECTIVITY: ALL 21-00-22
Table of Contents
Page 5
JULY 21, 2011
TABLE OF CONTENTS
RECORD OF REVISIONS...................................................................................................................................1
RECORD OF TEMPORARY REVISIONS...........................................................................................................2
LIST OF SERVICE BULLETINS .........................................................................................................................3
LIST OF EFFECTIVE PAGES.............................................................................................................................4
TABLE OF CONTENTS ......................................................................................................................................5
LIST OF ILLUSTRATIONS .................................................................................................................................7
LIST OF TABLES................................................................................................................................................7
INTRODUCTION..................................................................................................................................................8
1.0 MANUAL INTRODUCTION....................................................................................................................8
1.1 General introduction (How to Use): ....................................................................................................8
1.2 Acronyms, Abbreviations, and Symbols:...........................................................................................9
1.3 Standard Torque Values: ...................................................................................................................10
1.4 Documents Required:.........................................................................................................................10
1.5 Consumable Products:.......................................................................................................................10
DESCRIPTION AND OPERATION ...................................................................................................................11
2.0 R12 AIR CONDITIONING SYSTEM DESCRIPTION AND OPERATION............................................11
2.1 General:................................................................................................................................................11
2.2 System Description and Operation:..................................................................................................12
2.3 System Component Description and Operation:.............................................................................13
TESTING AND FAULT ISOLATION .............................................................................................................1001
3.0 R12 AIR CONDITIONING SYSTEM COMPONENT – TESTING AND FAULT ISOLATION..........1001
3.1 General:............................................................................................................................................1001
3.2 Compressor Condenser Module Testing Procedures ................................................................1001
3.3 Evaporator Module Testing Procedures.......................................................................................1001
3.4 System Leak Check Testing Procedure: ......................................................................................1002
3.5 Fault Isolation (Trouble Shooting): ...............................................................................................1004
SCHEMATIC AND WIRING DIAGRAMS......................................................................................................2001
4.0 R12 AIR CONDITIONING SYSTEM SCHEMATIC AND WIRING DIAGRAMS ..............................2001
4.1 R12 Refrigerant Flow Schematic:..................................................................................................2001
DISASSEMBLY .............................................................................................................................................3001
5.0 R12 AIR CONDITIONING SYSTEM COMPONENT - DISASSEMBLY...........................................3001
5.1 General:............................................................................................................................................3001
5.2 Compressor Condenser Module Disassembly Procedures .......................................................3002
5.3 Evaporator Module Disassembly Procedures .............................................................................3005
CLEANING ....................................................................................................................................................4001
6.0 R12 AIR CONDITIONING SYSTEM COMPONENT – CLEANING PROCEDURES.......................4001
6.1 General:............................................................................................................................................4001
6.2 Compressor Condenser Module Cleaning Procedures:.............................................................4002
6.3 Evaporator Module Cleaning Procedures: ...................................................................................4002
CHECK (INSPECTION SCHEDULE)............................................................................................................5001
7.0 R12 AIR CONDITIOING SYSTEM COMPONENT – INSPECTION SCHEDULE............................5001
7.1 Compressor Condenser Module Inspection Schedule:..............................................................5001
7.2 Evaporator Module Inspection Schedule: ....................................................................................5005

Component Maintenance Manual
EFFECTIVITY: ALL 21-00-22
Table of Contents
Page 6
JULY 21, 2011
REPAIRS .......................................................................................................................................................6001
8.0 R12 AIR CONDITIONING SYSTEM COMPONENT – REPAIR PROCEDURES............................6001
8.1 General:............................................................................................................................................6001
8.2 Compressor Condenser Module Repair Procedures:.................................................................6001
8.3 Evaporator Module Assembly Repair Procedures:.....................................................................6003
ASSEMBLY ...................................................................................................................................................7001
9.0 R12 AIR CONDITIONING SYSTEM COMPONENT - ASSEMBLY.................................................7001
9.1 General:............................................................................................................................................7001
9.2 Compressor Condenser Module Assembly Procedures ............................................................7002
9.3 Evaporator Module Assembly Procedures ..................................................................................7007
SPECIAL TOOLS, FIXTURES, AND EQUIPMENT......................................................................................9001
10.0 SPECIAL TOOLS/EQUIPMENT.......................................................................................................9001
10.1 General:............................................................................................................................................9001
ILLUSTRATED PARTS LIST ......................................................................................................................10001
11.0 R12 AIR CONDITIONING SYSTEM COMPONENT ILLUSTRATED PARTS LISTING ...............10001
11.1 Introduction:..................................................................................................................................10001
SPECIAL PROCEDURES ...........................................................................................................................11001
12.0 SPECIAL PRODECURES ..............................................................................................................11001
12.1 Expansion Valve Alignment:........................................................................................................11001
12.2 Balancing Multiple Evaporators:.................................................................................................11002
12.3 Motor Insulation Resistance Check:...........................................................................................11003
12.4 Motor Bearing Inspection: ...........................................................................................................11003
12.5 Compressor Bearing Inspection: ................................................................................................11004
12.6 Motor Brush Seating Procedure: ................................................................................................11004
12.7 Compressor Oil Level Check:......................................................................................................11004
SERVICING .................................................................................................................................................14001
13.0 R12 AIR CONDITIONING SYSTEM SERVICING PROCEDURES ...............................................14001
13.1 General:..........................................................................................................................................14001
13.2 Evacuating The System (R12): ....................................................................................................14002
13.3 Charging The System (R12):........................................................................................................14002
13.4 Flushing The System (R12):.........................................................................................................14003
STORAGE ...................................................................................................................................................15001
14.0 COMPRESSOR CONDENSER MODULE ASSEMBLY STORAGE PROCEDURES...................15001
14.1 General:..........................................................................................................................................15001
14.2 System Long Term Shelf Storage: ..............................................................................................15001
14.3 System Off-Season/On-Aircraft Functional Tests:....................................................................15002
14.4 General System Component Storage procedures: ...................................................................15002

Component Maintenance Manual
EFFECTIVITY: ALL 21-00-22
List of Tables
Page 7
JULY 21, 2011
LIST OF ILLUSTRATIONS
Figure 2 R12 Refrigerant Flow Schematic.................................................................................................2001
Figure 3 Brush Removal Details.................................................................................................................3005
Figure 4 Commutator In Excellent Condition...........................................................................................5002
Figure 5 Commutator In Serviceable Condition ......................................................................................5003
Figure 6 Commutator In Unserviceable Condition..................................................................................5004
Figure 7 Belt Tensioning Reference...........................................................................................................7006
Figure 10001 Compressor Condenser Module Assembly 1250900-4...................................................10002
Figure 10001 Compressor Condenser Module Assembly (1250900-4) Details ...................................10003
Figure 10001 Compressor Condenser Module Assembly (1250900-4) Details Cont. .........................10004
Figure 10002 Evaporator Module Assembly 1250200-42 (L) /-43 (C,R) ................................................10005
Figure 10002 Evaporator Module Assembly (1250200-42/-43) Details .................................................10006
LIST OF TABLES
Table 1 Standard Torque Values ....................................................................................................................10
Table 2 Consumable Products .......................................................................................................................10
Table 3 Trouble Shooting List ....................................................................................................................1005
Table 3 Trouble Shooting List ....................................................................................................................1006
Table 3 Trouble Shooting List ....................................................................................................................1007
Table 3.5 Compressor Condenser Module Inspection Schedule............................................................5001
Table 3.6 Forward and Aft Evaporator Module Inspection Schedule .....................................................5005
Table 4 Typical Operating Values.............................................................................................................11001
Table 5 Refrigerant Charge .......................................................................................................................14003

Component Maintenance Manual
EFFECTIVITY: ALL 21-00-22
Introduction
Page 8
JULY 21, 2011
INTRODUCTION
TASK 21-00-22-99F-801
1.0 MANUAL INTRODUCTION
SUBTASK 21-00-22-99F-001
1.1 General introduction (How to Use):
1.1.1 This operating, servicing and component maintenance manual (OSCMM) covers the
requirements for field servicing the R-12 air conditioning system for the Pilatus PC12
Aircraft. This document includes component descriptions, servicing, maintenance,
inspection requirements and an illustrated parts list.
1.1.2 This component maintenance manual has been prepared with guidance from the Air
Transport Association of America (ATA) Specification 2200. The user must not change the
repair methods in this manual without authorization from the aviation authorities and the
manufacturer.
1.1.3 This manual gives the procedures to perform the servicing and maintenance of the
component in a workshop environment as well as on the aircraft. Only approved personnel
with the necessary skills shall perform the maintenance procedures in this manual.
Although Enviro Systems tries to cover all conceivable issues that may arise, there may be
issues that are not covered in this manual. In these cases, please call Enviro Systems
customer service.
1.1.4 This manual uses the Maintenance Task Oriented Support System (MTOSS) to organize
the maintenance information. It is divided into maintenance tasks and subtasks, graphics
and tables. Each task consists of one or more subtasks. Each subtask contains procedural
steps and can contain one or more graphics or tables. The maintenance tasks and other
data have special MTOSS numbers that are used for Electronic Data Processing (EDP).
1.1.5 You must use the instructions in this manual to do all the maintenance procedures related to
the component. Read all the related warnings, cautions and notes before you begin work
on the components. Warnings, cautions and notes shown in this manual provide the
following information:
1.1.5.1 WARNING: Discloses vital information in order to prevent injury or death while
performing the maintenance procedure.
1.1.5.2 CAUTION: Discloses vital information in order to prevent damage to the equipment
during the maintenance procedure.
1.1.5.3 NOTE: Discloses more information that will help perform a step of the procedure or
refers to a different procedure.

Component Maintenance Manual
EFFECTIVITY: ALL 21-00-22
Introduction
Page 9
JULY 21, 2011
1.1.6 A complete Illustrated Parts Listing (IPL) is supplied as additional documentation (Section
11) to provide service technicians access to exploded views and a parts list while
performing maintenance, testing, disassembly and assembly procedures. Refer to the IPL
for all figure and item numbers.
SUBTASK 21-00-22-99F-002
1.2 Acronyms, Abbreviations, and Symbols:
CMM Component Maintenance Manual
ATA Air Transport Association
MTOSS Maintenance Task Oriented Support System
EDP Electronic Data Processing
IPL Illustrated Parts Listing
BTUH British Thermal Unit per Hour (standard in U.S. heating and air-conditioning)
Db Dry Bulb
RH Relative Humidity
CFM Cubic Feet per Minute
In.w.g Inch of Water Gage
VCS Vapor Cycle System
MSDS Material Safety Data Sheet
PSIG Pressure Per Square Inch, Gage
SAE Society of Automotive Engineers
CCW Counter Clockwise
CW Clockwise
FOD Foreign Object Damage
OAT Outside Air Temperature

Component Maintenance Manual
EFFECTIVITY: ALL 21-00-22
Introduction
Page 10
JULY 21, 2011
SUBTASK 21-00-22-99F-003
1.3 Standard Torque Values:
TYPE FASTENER DESCRIPTION/LOCATION TORQUE
.25-28 SET SCREW ALL LOCATIONS 40-50 IN LBS
6-32 SCREW AN500-6-6, MS35265-30, ALL
LOCATIONS
7-9 IN-LBS
8-32 SCREW AN500-A8-6, MS35265-45, ALL
LOCATIONS
12-15 IN-LBS
10-32 SCREW ALL LOCATIONS 60-75 IN-LBS
¼-28-UNF ALL LOCATIONS 135-185 IN-LBS
5/16-24UNF ALL LOCATIONS 270-360 IN-LBS
3/8-24UNF AN6-10A, AN6-14A, ALL LOCATIONS 270-360 IN-LBS
5/8-18 PLUMBING
CONNECTIONS
RECEIVER DRYER
SUCTION/DISCHARGE PORT
132-156 IN-LBS
7/8-14 PLUMBING
CONNECTIONS
COMPRESSOR SUCTION PORT 252-324 IN-LBS
¾-16 PLUMBING
CONNECTIONS
COMPRESSOR DISCHARGE PORT 180-240 IN LBS
7/16-20 PLUMBING
CONNECTIONS
EXPANSION VALVE INLET PORT 100-140 IN LBS
¾-16 PLUMBING
CONNECTIONS
EXPANSION VALVE OUTLET PORT 270-350 IN LBS
Table 1 Standard Torque Values
SUBTASK 21-00-22-99F-004
1.4 Documents Required:
Illustrated Parts Listings (IPL) (included with this manual)
Pilatus PC12 Aircraft Maintenance Manual
SUBTASK 21-00-22-99F-005
1.5 Consumable Products:
PART NUMBER DESCRIPTION REMARKS
11602 SEALANT RTV BLACK
7471 THREAD SEALANT PRIMER LOCTITE
569 THREAD SEALANT LOCTITE
BVM100N REFRIGERANT OIL R12
Table 2 Consumable Products

Component Maintenance Manual
EFFECTIVITY: ALL 21-00-22
Introduction
Page 11
JULY 21, 2011
DESCRIPTION AND OPERATION
TASK 21-00-22-99F-802
2.0 R12 AIR CONDITIONING SYSTEM DESCRIPTION AND OPERATION
SUBTASK 21-00-22-99F-006
2.1 General:
2.1.1 The air conditioning system installed on the Pilatus PC12 Aircraft is not considered a
primary flight system. However, an air conditioning system does perform the important
function of providing passenger and flight crew comfort during aircraft movement on the
ground and while in flight. Aircraft air conditioning systems not only provide effective
passenger cooling, but must also maintain a high level of reliability to minimize aircraft
downtime due to unscheduled repairs.
2.1.2 In order to ensure component reliability and achieve a long service life for which the system
is designed, periodic inspection and preventive maintenance must be performed. Failure to
complete periodic inspections, service, or maintenance schedules may reduce product life
and potentially void manufacturer’s warranty.
2.1.3 Inspections, servicing, and/or maintenance schedules are presented in the following
sections. This will ensure component and/or system reliability and performance are
maintained when performed at the specified intervals.
WARNING: SERVICE TECHNICIANS ARE ADVISED TO OBSERVE STANDARD SAFETY
PRECAUTIONS, SUCH AS WEARING PERSONAL SAFETY GEAR, TO PREVENT INJURY WHILE
PERFORMING SERVICE TO THE UNIT. LIQUID REFRIGERANT CAN CAUSE FROSTBITE AND/OR
BLINDNESS.
WARNING: PROPER VENTILATION IS REQUIRED. KEEP REFRIGERANTS AND OILS AWAY FROM
OPEN FLAMES. REFRIGERANTS CAN PRODUCE POISONOUS GASSES IN THE PRESENCE OF A
FLAME. WORK IN A WELL VENTILATED AREA AND AVOID BREATHING REFRIGERANT /LUBRICANT
VAPOR MIST IF ACCIDENTAL DISCHARGE OCCURS.
WARNING: AVOID USE OF COMPRESSED AIR. DO NOT INTRODUCE COMPRESSED AIR OR
OXYGEN INTO AN AIR CONDITIONING SYSTEM OR REFRIGERANT CONTAINER. R12 IN THE
PRESENCE OF AIR OR OXYGEN ABOVE ATMOSPHERIC PRESSURE MAY FORM A COMBUSTIBLE
MIXTURE.
2.1.4 Do not discharge R12 refrigerant into the atmosphere. Although its ozone depletion
potential is zero, it can have an effect on global warming. In the United States recovery and
recycling are mandated by the Clean Air Act.

Component Maintenance Manual
EFFECTIVITY: ALL 21-00-22
Introduction
Page 12
JULY 21, 2011
2.1.5 Refrigerant recovery/recycling service equipment must be approved for use with R12
refrigerant. Recycling machines must be approved by Underwriters Laboratories (UL) and
meet SAE standard J2210 and SAE standard J2099 for refrigerant purity.
SUBTASK 21-00-22-99F-007
2.2 System Description and Operation:
2.2.1 The cabin cooling system installed in the Pilatus PC12 Aircraft operates using a closed
vapor cycle concept using refrigerant R12 as the heat absorption media. The R12 air
conditioning system cools the aircraft in a similar manner as systems found in an
automobile or home. However, aircraft air conditioning systems contain components which
are designed to be light weight, compact, provide high performance, and provide the ability
to operate at extreme altitudes and ambient temperatures.
2.2.2 The concept of air conditioning a room, cabin or cockpit is straight forward. An example of a
system is shown in Figure 2 (refer to Schematic and Wiring Diagrams, Section 4).
Refrigerant is the media which absorbs and rejects the room or cabin heat. By continuous
recirculation of the warm cabin air, heat is absorbed in the evaporator module(s) and is
rejected to the outside through the system condenser. When the system is turned on, the
electric motor drives the R12 compressor at a constant speed and capacity which
compresses the R12 refrigerant gas to a high pressure. The hot, high pressure gas then
passes through the condenser coil where it is cooled and condensed into a warm liquid at
constant pressure. The warm liquid is then routed into a receiver-dryer container where the
liquid and any remaining gas are separated and any moisture is absorbed. The warm, dry
liquid is then directed to the evaporator module expansion valve where the high pressure
liquid is expanded to a low pressure. The expansion process creates a super cool gas
which passes through the evaporator coil and absorbs heat from the warm cabin air passing
over the coils. The warm low pressure refrigerant then enters the R12 compressor where
the process starts all over again. In addition to cooling the cabin air, a refrigerant type
system also removes a large percentage of the moisture in the air as well as removing dust
and pollen particles in the air. Thus, the system conditions the air as well as cooling it. As a
safety feature, the unit is also equipped with a binary pressure switch. This switch prevents
the unit from operating if the discharge pressure becomes excessively high. The switch
also prevents the unit from operating if the internal pressure is very low due to leakage or
low ambient temperatures.

Component Maintenance Manual
EFFECTIVITY: ALL 21-00-22
Introduction
Page 13
JULY 21, 2011
SUBTASK 21-00-22-99F-008
2.3 System Component Description and Operation:
2.3.1 The R12 air conditioning system installed on the Pilatus PC12 Aircraft uses the following
major system components:
Compressor Condenser Module Assembly 1250900-4
Evaporator Module Assembly 1250200-42 (L) /-43 (C,R)
2.3.2 The COMPRESSOR CONDENSER MODULE ASSEMBLY (PN 1250900-4) has a rated
cooling capacity of 20,000 BTUH when operating with the other components in the Pilatus
PC12 Aircraft at an ambient temperature of 95°F OAT. Under this condition, the nominal
current draw is 105 AMPS at 28 VDC.
2.3.3 The Compressor Condenser Module Assembly is packaged to meet the aircraft installation
requirements and contains the following major components (refer to Figure 10001):
Compressor Drive Motor
Compressor Assembly
Condenser Coil
Receiver Dryer Assembly
Binary Pressure Switch
2.3.3.1 COMPRESSOR DRIVE MOTOR: The compressor drive motor has a double-ended
shaft and operates on 27.5 VDC power with a rated current draw of 115 AMPS max.
One output shaft drives the R12 compressor and the other end drives the motor
cooling fan. The motor design power is 3.2 HP at 5000-5250 RPM and is specially
designed to provide a high starting torque to overcome the compressor startup
requirements. The motor is a brush commutated permanent magnet design and was
selected for its efficiency, excellent controllability, long life, and low vibration. The
shaft is supported on high speed ball bearings for reliability and friction reduction.
2.3.3.2 COMPRESSOR ASSEMBLY: The compressor assembly contains an R12
compressor and 5.01 inch pitch diameter pulley assembly. The compressor also
features a five piston wobble plate design as well as anti-slugging features that
eliminate the need for a suction trap/accumulator. The compressor has a light-weight
aluminum housing. The pulley assembly is designed for a high strength, positive grip
240L100 timing belt and contains a radial bearing to assure no side loads are
transmitted into the compressor input shaft. The assembly is designed for continuous
operation.

Component Maintenance Manual
EFFECTIVITY: ALL 21-00-22
Introduction
Page 14
JULY 21, 2011
2.3.3.3 CONDENSER COIL ASSEMBLY: The condenser coil assembly is a copper tube and
aluminum fin configuration with 6061-T6 aluminum support brackets. The coil heat
rejection is 26,000 BTUH based on a 117°F ambient day. Condenser cooling airflow
and coil sizes are based on the design cooling capacity and compressor input
horsepower. This assembly requires an airflow of 900 CFM for proper operation.
2.3.3.4 RECEIVER DRYER ASSEMBLY: The receiver-dryer assembly consists of a
refrigerant container, Schrader valve, high pressure charging port and a binary
pressure switch. The receiver-dryer is constructed of aluminum alloy and contains a
standpipe, wire filter, and desiccant. The receiver dryer assembly is provided with a
corrosion resistant baked enamel finish. The receiver volume is approximately 40
cubic inches and can store up to 1.8 pounds of refrigerant at 240 PSIG. The Schrader
valve located in the container inlet port allows for the binary pressure switch to be
removed without venting the system refrigerant charge.
2.3.3.5 BINARY PRESSURE SWITCH: The binary pressure switch performs two major
functions. The first function prevents the R12 compressor from operating if the
system charge is lost or the ambient temperature is too low. The second function
stops the compressor from operating if the head pressure increases to an unsafe
level. The high pressure cutout is at 305 PSIG on rise and the low pressure cutout is
at 22 PSIG falling.
2.3.4 The EVAPORATOR MODULE ASSEMBLY (PN 1250200-42 (L) /-43 (C,R)) has a rated
cooling capacity of 7000 BTUH at an ambient air temperature of 80° F (db), and 50% RH
(relative humidity). The assembly provides an air flow of 200 CFM (cubic feet per minute) in
order to maintain these performance specifications.
2.3.5 The Evaporator Module Assembly is packaged to meet the aircraft installation requirements
and contains the following major components (refer to Figure 10002):
Coil Assembly
Blower Motor
Blower Wheel
Blower Scroll
Expansion Valve
Evaporator Housing
2.3.5.1 COIL ASSEMBLY: The evaporator coil assembly contains the evaporator coil,
mounting hardware, and refrigerant plumbing connections. The coil is constructed of
copper tube and aluminum fins with aluminum support brackets made of 6061-T6
Aluminum. The assembly receives its air (return air) from the suction created by the
blower assembly. This air is conditioned and returned to the cabin.

Component Maintenance Manual
EFFECTIVITY: ALL 21-00-22
Introduction
Page 15
JULY 21, 2011
2.3.5.2 BLOWER MOTOR: The blower motor (1250210-1) operates on 24 VDC with a
current draw of 5 amps and has a design RPM of 5225. The blower motor is a four
brush design with an integrated controller and was selected for its efficiency, excellent
controllability, long life and low vibration at high speeds. The motor has two speeds,
low speed designed for the heating recirculation requirement and high speed
designed for maximum system cooling.
2.3.5.3 BLOWER WHEEL: The blower wheel is the component that is used in concert with
the blower motor and provides for the movement of air. It is made of light weight
aluminum that provides superior strength and durability.
2.3.5.4 BLOWER SCROLL: The blower scroll is constructed of high impact, fire retardant,
self extinguishing, and corrosion resistant, lightweight polycarbonate material . It is
nickel plated to give it superior strength and durability qualities. The blower scroll has
successfully passed blower wheel containment testing.
2.3.5.5 EXPANSION VALVE: The expansion valve is an automatic thermostatic type. The
valve provides the proper refrigerant flow while maintaining constant return gas
superheat at all evaporator heat load conditions. Controlling the evaporator
refrigerant flow based on cooling demand prevents coil freeze up. This allows the
system cooling capacity to best meet transient aircraft heat load demands.
2.3.5.6 EVAPORATOR HOUSING: The evaporator housing is constructed of high impact, fire
retardant, self extinguishing, and corrosion resistant, lightweight polycarbonate
material.

Component Maintenance Manual
EFFECTIVITY: ALL 21-00-22
Page 1001
JULY 21, 2011
TESTING AND FAULT ISOLATION
TASK 21-00-22-70-801
3.0 R12 AIR CONDITIONING SYSTEM COMPONENT – TESTING AND FAULT ISOLATION
SUBTASK 21-00-22-99F-009
3.1 General:
3.1.1 Testing and Fault Isolation of the R12 Air Conditioning System may be necessary if the
system does not operate and/or perform in accordance with information contained herein.
Therefore it is necessary for the service personnel to diagnose the discrepancy by
troubleshooting the system and its components. To assist in this diagnoses, refer to table 3
(Trouble Shooting List)
SUBTASK 21-00-22-70-001
3.2 Compressor Condenser Module Testing Procedures
(refer to Figure 10001):
3.2.1 Ensure that power is applied to the aircraft and that the air conditioning system is switched
on using the cockpit mounted selector switch. Gain access to the Compressor Condenser
Module (refer to the aircraft maintenance manual for removal of access panels and other
hardware that might need to be removed). Verify that these components are operating and
perform the following:
Verify that system is running smoothly and that there is no excessive noise and/or vibration
coming from the assembly.
Verify that the system is cooling properly.
3.2.2 If there is excessive noise and/or vibration coming from the Compressor Condenser Module
assembly or the system is not cooling, refer to Fault Isolation, Section 3.6, Disassembly
procedures in section 5 and Check (inspection) procedures in section 7. This will help in
identifying whether one or more components are dirty or damaged and are in need of repair
or replacement.
SUBTASK 21-00-22-70-002
3.3 Evaporator Module Testing Procedures
(refer to Figure 10002):
3.3.1 Verify blower motor operation in both low and high speed positions using cockpit mounted
selector switch.
3.3.2 While blower motor is operating in both positions, listen carefully for the following:

Component Maintenance Manual
EFFECTIVITY: ALL 21-00-22
Page 1002
JULY 21, 2011
Verify that there is a distinct and noticeable change in sound of blower motor when changing
from low to high speed positions. This indicates that the cockpit selector switch is functioning
properly and that the blower motor is responding accordingly.
Verify that there is a smooth transition when changing from low to high speed positions, and
that there is no excessive noise or vibration coming from the blower motor during the change.
Excessive noise could indicate that the blower wheel is rubbing against the blower scroll.
3.3.3 If there is excessive noise and/or vibration coming from blower motor/wheel assembly
during this test, please refer to Fault Isolation, Section 3.6, Disassembly procedures in
section 5 and Inspection procedures in section 7.
3.3.4 Verify that the system is cooling properly. If not, the expansion valve(s) might need
aligning. Refer to Special Procedures, Section 12, for Expansion Valve Alignment
procedures.
SUBTASK 21-00-22-70-003
3.4 System Leak Check Testing Procedure:
3.4.1 A leak check of the refrigerant plumbing system is important to ensure the system maintains
its charge to provide the designed performance and reduce damage to system components.
A periodic check of the system charge is required to determine if any loss of refrigerant has
occurred.
3.4.2 A system leak check is required any time one or more of the following conditions occur:
New system plumbing installation
Component replacement in the plumbing system
Line or hose rupture
3.4.3 Special Tools and/or Equipment Required:
Gaseous dry nitrogen, regulated source (0-500 psig)
R12 refrigerant charging manifold with gauges and hoses (low pressure gauge, 0-300 PSIG),
(high pressure gauge, 0-600 PSIG)
Leak check fluid (soap solution), (Spec MS-SNOOP-GAL)
Assorted hand tools
Hand and eye protection
Thread sealant primer, PN 7471 (Loctite)
Thread sealant, PN 569 (loctite)
Hose adapter (1/2 in. male acme to ¼ in. female flare)

Component Maintenance Manual
EFFECTIVITY: ALL 21-00-22
Page 1003
JULY 21, 2011
3.4.3.1 Remove, if required, all panels, doors, shrouds, etc, to gain access to
system/component being leak checked (refer to aircraft maintenance manual).
3.4.3.2 Remove, if required, any enclosures or access doors to expose all tubing, hoses,
fittings, etc. to the system components.
3.4.3.3 Verify all plumbing connections are tight.
3.4.3.4 Verify that power is removed from aircraft. If it is not practical to remove aircraft
power, technician must pull and collar applicable circuit breakers.
CAUTION: HIGH PRESSURE HOSE (RED) IS CONNECTED TO PORT MARKED “D” AND THE LOW
PRESSURE HOSE (BLUE) IS CONNECTED TO THE SERVICE PORT MARKED “S”. INCORRECT
CONNECTION COULD RESULT IN MANIFOLD DAMAGE AND/OR INCORRECT PRESSURE READINGS.
3.4.3.5 Remove service port caps from the A/C system. Service ports are located on the
compressor.
3.4.3.6 Close all manifold gauge valves and verify hose connections are tight.
3.4.3.7 Connect R12 refrigerant charging manifold. R12 service gauges contain quick-
connect fittings to minimize refrigerant loss. To install quick-connect, push on firmly
until locked (a "clicking" sound is heard). Hold the grip ring and pull to remove quick-
connect fittings.
3.4.3.8 Connect yellow charging hose to a regulated dry nitrogen source
NOTE: An adapter is required to connect yellow charging hose to the nitrogen source.
CAUTION: APPLY NITROGEN PRESSURE SLOWLY DURING THIS PROCEDURE OR DAMAGE TO
SYSTEM COULD RESULT.
CAUTION: DO NOT EXCEED 200 PSIG NITROGEN PRESSURE DURING PROCEDURE OR DAMAGE TO
EXPANSION VALVE WILL RESULT.
3.4.3.9 Slowly regulate nitrogen source to a pressure of 200 PSIG maximum.
3.4.3.10 Slowly open high pressure (red) manifold valve and allow system pressure to increase
gradually until a pressure of 200 psig is achieved. Allow time for system pressure to
equalize across expansion valve and note final system pressure.
CAUTION: DO NOT USE ANY LEAK DYE IN R12 SYSTEM OR DAMAGE TO SYSTEM MAY RESULT.
CAUTION: DO NOT OVER TIGHTEN PLUMBING CONNECTIONS. STRIPPED THREADS OR CRACKED
FLARES MAY RESULT.
3.4.3.11 Apply soapy leak check fluid to each fitting connection. If leaks are detected, attempt
to tighten fitting without over tightening. If leak cannot be corrected with tightening,
system must be evacuated (refer to Servicing, Section 13) and then fitting must be
disconnected and new thread sealant applied.

Component Maintenance Manual
EFFECTIVITY: ALL 21-00-22
Page 1004
JULY 21, 2011
3.4.3.12 Using a wire brush and cleaning solvent, completely remove old thread sealant. Apply
a thin layer of thread sealant primer to fitting threads.
CAUTION: WHEN APPLYING THREAD SEALANT, TAKE EXTREME CARE TO KEEP SEALANT OFF
FIRST 2 OR 3 THREADS.
3.4.3.13 Apply Loctite thread sealant on all male fitting threads sparingly.
CAUTION: WHEN APPLYING R12 OIL TO FLARE AND O-RING, TAKE EXTREME CARE TO KEEP OIL
AWAY FROM FITTING THREADS
3.4.3.14 Apply a light coating of R12 refrigerant oil to flare and/or o-ring to prevent metal galling
or o-ring damage.
3.4.3.15 Tighten joints as required to stop leaks (refer to Table 1, Section 1.3 for torque
values).
CAUTION: VENT SYSTEM PRESSURE VERY SLOWLY TO ASSURE COMPRESSOR OIL IS NOT
VENTED WITH THE NITROGEN. DO NOT LET AIR ENTER THE SYSTEM.
3.4.3.16 After leak check is finished and system integrity is sound, turn off nitrogen source,
disconnect yellow charging hose from nitrogen source and slowly release nitrogen
pressure to zero.
3.4.3.17 Close manifold valve.
3.4.3.18 System is now ready for charging (refer to Servicing, Section 13).
SUBTASK 21-00-22-81-001
3.5 Fault Isolation (Trouble Shooting):
3.5.1 The following list of system/component failures and/or abnormal operation and possible
solutions is only a partial listing of what may occur. The more informed service personnel
are in the operation of the system and its various components, the less time will be required
to diagnose failures. Use this trouble shooting list as well as all information contained in this
manual, to aid in diagnosing system faults. Contact Enviro Systems customer service for
any items not listed in this trouble shooting list.
Other manuals for PC-12
3
Table of contents
Other Pilatus Aircraft manuals

Pilatus
Pilatus PC-12 Quick setup guide

Pilatus
Pilatus PC-12/47E MSN-1001-UP User manual

Pilatus
Pilatus B-4 Manual

Pilatus
Pilatus PC-9 User manual

Pilatus
Pilatus PC-24 User manual

Pilatus
Pilatus PC-12/47E User manual

Pilatus
Pilatus PC-12/47E User manual

Pilatus
Pilatus PC-12/47E User manual

Pilatus
Pilatus PC-12 User manual

Pilatus
Pilatus PC-12 NGX Quick setup guide