PERSONAL PROTECTIVE EQUIPMENT
TOXIC VAPOURS when sprayed, certain material may be poisonous, create irritation or otherwise be
harmful to health. Always read carefully all labels and safety / performance data for the material being
sprayed and follow any recommendation.
IF IN DOUBT, CONSULT THE MATERIAL SUPPLIER.
The use of respiratory protective equipment is recommended at all times when spraying. The type of
respiratory protective equipment used must be compatible with the material being sprayed and the
level of concentration.
Always wear eye protection when spraying or cleaning the equipment.
Gloves must be worn for spraying or cleaning the equipment when certain coating materials and
solvents are used.
TRAINING
Personnel should be given adequate training in the safe use and maintenance of this equipment.
Training courses on all aspects of the equipment are available. For details contact your local
representative. The instructions and safety precautions contained in this literature and the literature
supplied with the coating material should be read and understood before the equipment is used.
MISUSE
All spray guns project particles at high velocity and must never be aimed at any part of the body.
Never exceed the recommended safe working pressures for any of the equipment used.
The fitting of non-recommended or non-original accessories or spare parts may create hazardous
conditions.
Before dismantling the equipment for cleaning or maintenance, all pressures, air and material, must be
isolated and released.
The disposal of non-metallic materials must be carried out in an approved manner. Burning may
generate toxic fumes. The removal of waste solvents and coating materials should be carried out by
an authorized local waste disposal service.
The materials used in the construction of this equipment are (bearing in mind the warning on
Halogenated Hydrocarbons) solvent resistant enabling the equipment to be cleaned using gun
washing machines. However, this equipment must not be left inside the gun washing machine for
prolonged periods of time after the automatic cleaning cycle has been completed. The solvents used
in the gun washing machine should be regularly checked to ensure that the equipment is not flushed
through with contaminated material. Follow the recommendations of the machine manufacturer.
NOISE LEVELS
The continuous A-weighted sound pressure level of this spray gun may exceed 85 dB (A) depending
on the air cap/nozzle set-up being used. Sound levels are measured using an impulse sound level
meter and analyzer, when the gun is being used in a normal spraying application. Details of actual
noise levels produced by the various air cap/nozzle set-ups are available on request.
INSTALLATION
IMPORTANT: To ensure that this equipment reaches you in first class condition, protective coatings,
rust inhibitors, etc. have been used. Flush all equipment through with a suitable solvent before use to
remove these agents from the material passages.
Attach the air supply line to the air intake connector (25). An air transformer installed as close as
possible to the gun will provide filtered and regulated air.
Recommended air hose sizes:
Attached air hose connector from a filtered regulated air supply.
Recommended air supply hose size up to 10meters long (1/4”) bore.
Attach the gravity feed cup to the material inlet and ensure that the sealing washer is compressed.
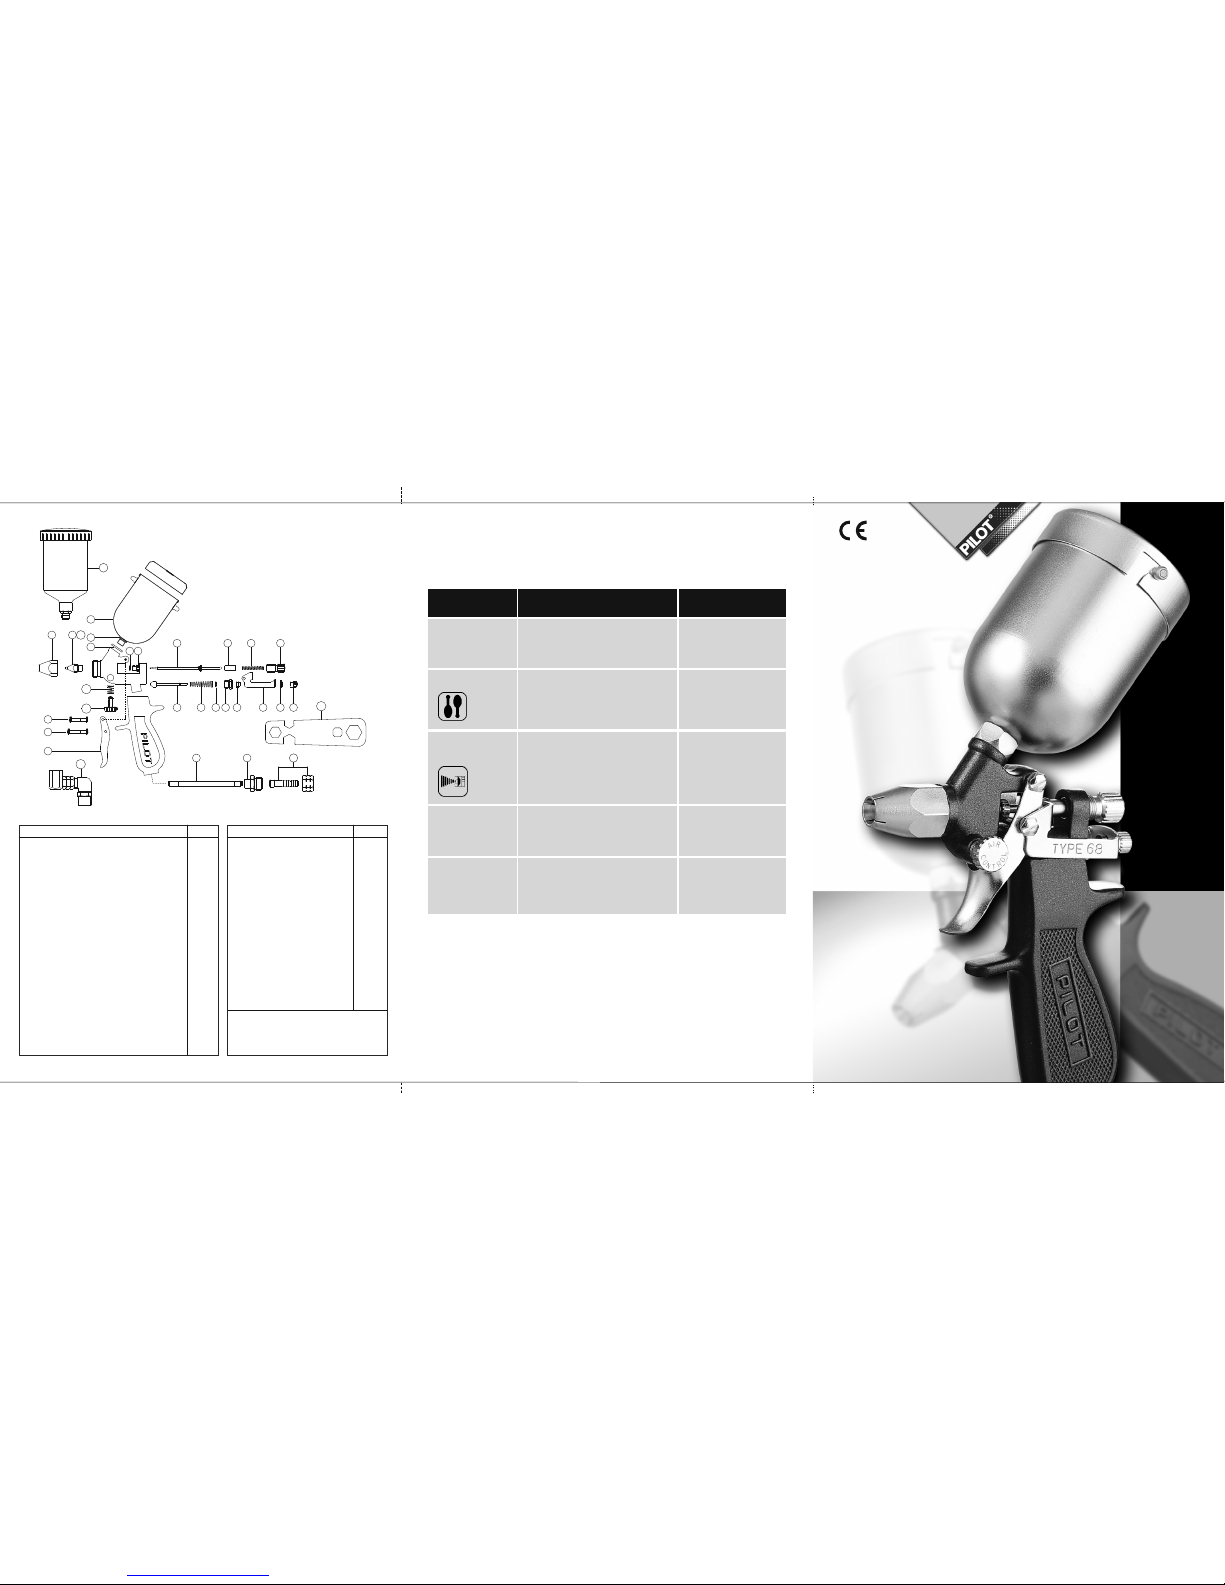
Type - 68 spray guns are easier to use than most spray guns. These lightweight gravity feed spray
guns are suitable for production work on articles of medium or large sizes. They are ideal for spray-
painting motorcar bodies, refrigerators, machinery, etc. Perfect balance, comfortable handle and
trigger action makes them easy and non-tiring to operate. A knob on the left can easily control round
to fan spray of pattern.
These gravity feed spray guns are supplied with a 0.15 lit. gravity cup.
D e s c r i p t i o n
Now as you've brought home one of your favourite Pilot spray guns. We'd like to say a
special ‘thank you’. These precision-engineered tools have been designed to excel, making
every spray job the work of a professional.
As you know Pilot has always spelt reliability and safety, earned by 5 decades of
experience and overwhelming customer satisfaction. We are certain we have met all safety
requirements. Our products bear the identification plate in conformance to the ruling.
To facilitate easy understanding of the working procedures please refer to the detailed
instruction manual. Along with the manual you will also find a certificate with the declaration of
conformity to various amendments.
CE
S a f e t y Wa r n i n g s
Dear
Important: These guns are not designed to be used with highly corrosive or highly abrasive
coating materials. Violation may increase the need for thorough cleaning and /or the necessity for
replacement of parts. If there is any doubt regarding the suitability of a specific material you may
seek advise and /or submit a sample for test.
Fire and Explosion
Solvents and coating materials can be highly flammable or combustible, especially when sprayed.
Workstations must be provided with adequate ventilation / exhaust to prevent the build up of
flammable vapors.
Smoking and naked flames must not be allowed in the spraying or mixing areas.
Fire extinguishing equipment must be provided in the spraying and mixing areas.
Users must comply with all local and national codes of practice and insurance company
requirements governing ventilation, fire precautions, operation, maintenance and housekeeping of
work stations.
HALOGENATED HYDROCARBON SOLVENTS for example 1,1,1 Trichloroethane and Methylene
Chloride can chemically react with aluminum and galvanized or zinc coated parts and cause an
explosion hazard. Read the label and data sheet of the material you intend to spray.
DO NOT USE SOLVENTS OR COATING MATERIALS CONTAINING HALOGENATED
HYDROCARBONS WITH THIS EQUIPMENT.
STATIC ELECTRICITY is generated by fluid moving through pipes and hoses. A static spar,
Capable of igniting certain solvents and coating materials could be produced by high fluid flow rates.
To prevent the risk of fire or explosion, earth continuity to the spray equipment and object being
sprayed should be maintained.
OPERATION
Mix, prepare and strain the coating material to be sprayed according to the paint manufacturers
instructions. Use a lint free mesh to strain the material.
Fill the gravity feed cup with the material. Do not overfill. Ensure that the vent hole in the cup lid is
clear.
Adjust the atomizing air pressure to 1-2.5 kgs/sq.cm. (14 to 36 p.s.i.).
It requires air about (2 - 4 c.f.m.) 55 - 115 liter per minute depending on the liquid to be sprayed.
Close the fluid needle adjusting screw by turning clockwise.
Turn on the air at the source of supply and spray test area by turning the fluid needle adjusting screw
counter-clockwise until a full coat is obtained.
In the finish is too sandy and dry, reduce the viscosity of the coating material supply by turning the
adjusting screw counter-clockwise.
Increasing or decreasing the atomizing air pressure can also correct both the above. The most
efficient atomizing air pressure is the lowest possible air pressure that will give the desired effect.
The gun should be held perpendicular to the spray surface at all times. Do not arc the gun as this
produces and uneven coat of paint. The recommended spraying distance is between 230mm (9”).
PREVENTIVE MAINTENANCE
Cleaning
Turn off air supply and release pressure.
Empty surplus coating material from cup and clean.
Remove air cap and clean by immersing in solvent, brush or wipe clean. If any holes in the air cap
are blocked use a toothpick or broom straw to remove the obstruction. Never use a steel wire or
hard implement which will damage the air cap and result in a distorted pattern.
Lubrication
Lubricate all moving parts daily with a few drops of light oil and occasionally place a light coating of
Vaseline on the needle spring. The packing may need to be oiled occasionally to keep them pliable.
REPLACEMENT OF PARTS
Fluid Needle (4)
1.Remove needle adjusting screw (11), spring (10) spring box (9) and needle (4). Replace any
worn or damaged parts ensuring that the fluid needle seats correctly in the fluid tip then adjust
packing with needle packing nut (4) so that the movement of the needle is not restricted.
Needle Packing (19)
Remove fluid needle as 1 above.
2.Remove trigger (7) and link (8) by unscrewing nut (15,16) and nut (17).
3.Remove packing nut (3) and packing (19). Replace any worn or damaged parts and re-assemble,
reversing steps 1 to 3. Adjust packing so that the movement of the needle is not restricted.
Air Valve (12) Packing (19)
Remove fluid needle as 1 above.
4.Remove air valve locking nut (17), pull trigger (7) and swing link (8) away, unscrew packing
box (14) and remove spring (13), valve (12), nuts (15 & 16) and packing (19). Replace any worn or
damaged parts and re-assemble reversing steps 1 and 4.