Pilot Power Electric Spray Guns are innovatively designed to
finely atomize all sprayable materials. A high speed piston
pump in the Pilot Power Electric Spray Gun draws up the fluid
and atomizes it solely by hydrostatic pressure. After passing
through a swirl-and-nozzle system
the fluid is then finely atomized and
delivered onto the surface to be
sprayed in the form of a cone.
Th is ad va nce d m et ho d
of sp ra y in g w i th out a
c o m p r e s s o r h a s b e e n
widely accepted all over the
world - with good reason. It is
easier. More economical.
Neater … and quicker.
I n t r o d u c t i o n
1.Spray vertical surfaces with a thin coat and then apply a second
coat to prevent paint runs.
2.Spray away from you on horizontal surfaces so that the paint
contacts the surface at an angle of about 45 degrees. Any
overspray will then be covered up by the next stroke.
3.Do not apply too thick a coat in one pass or the paint may run.
For best results, spray a thin coat first and allow it to dry, then
apply a second coat.
4.Mask off parts which are not to be sprayed
with cardboard, masking tape, paper etc.
Window frames can be effectively shielded
with damp newspaper.
5.Ensure that paint is properly thinned.
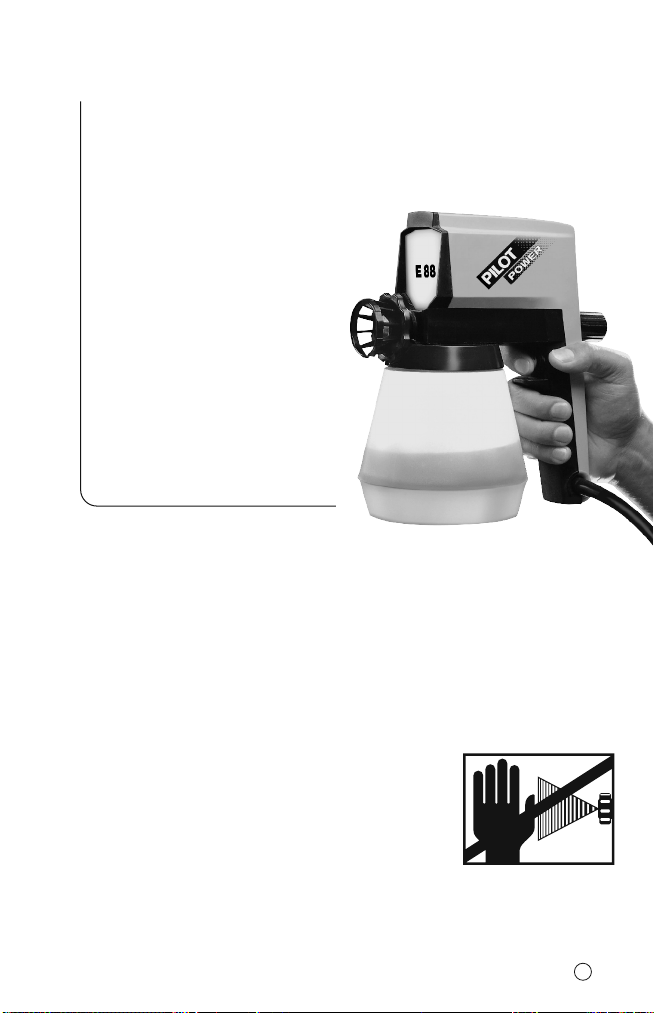
6.The high-pressure produced from the spray
gun might lead to injuries. Therefore do not point gun at yourself
or in the direction of other people.
Do's and don't's
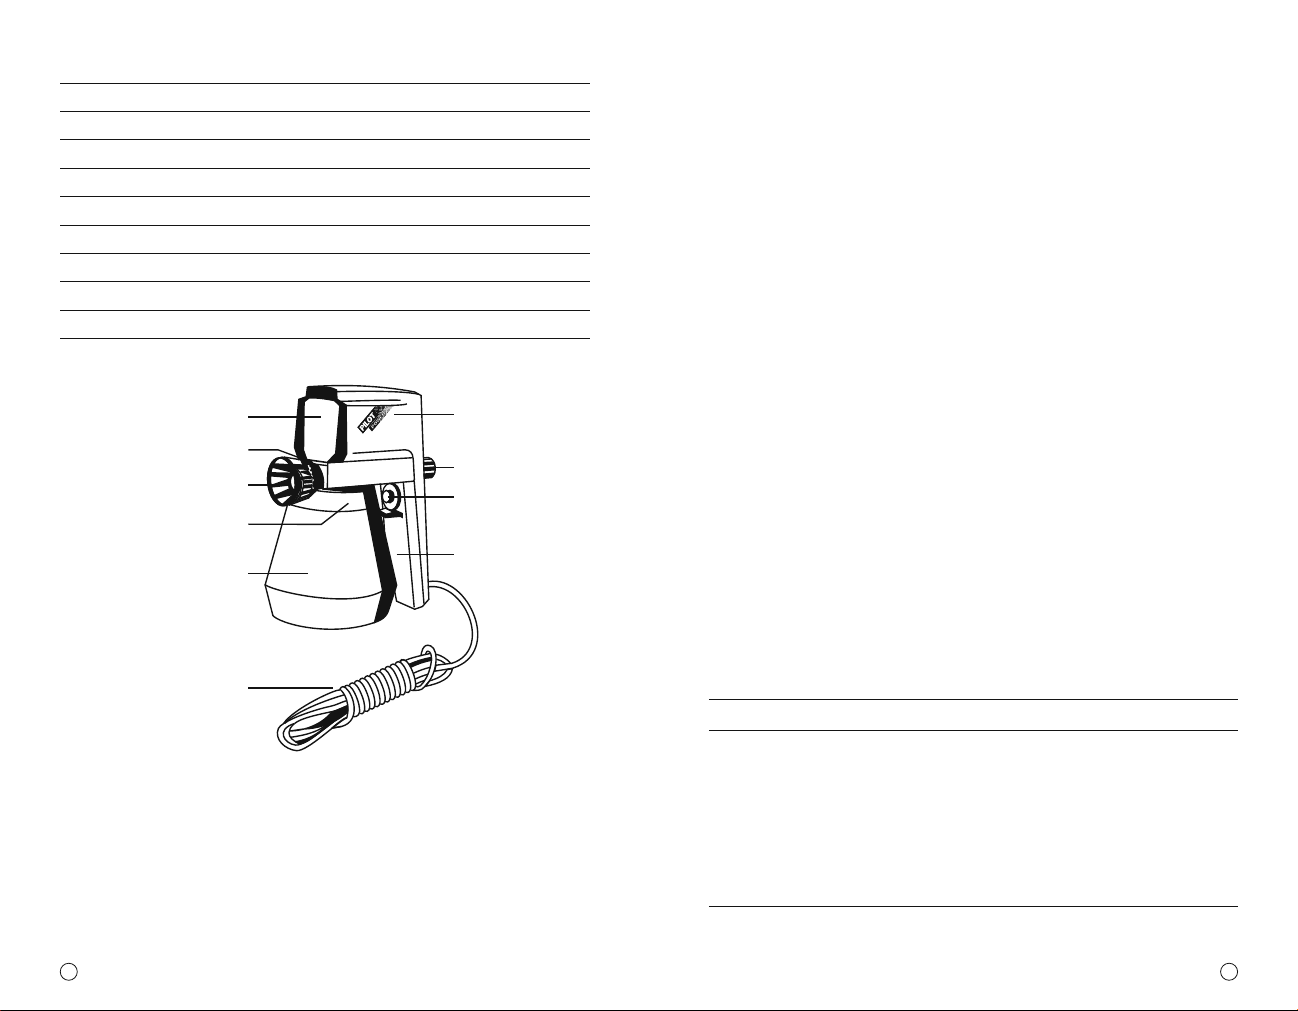
The valve (Pos. 3) is to be regarded as the part most subject to wear
and tear.
If the gun does not prime though the drive works normally please check
the valve cone for possible wear. The valve is easily replaceable.
F u n c t i o n a l d i s t u r b a n c e s
In the case of a clogged nozzle or a soiled valve it is normally not
necessary to dismantle the complete pump. Only unscrew the nozzle
(Pos. 1) and thoroughly clean it together with the valve (Pos. 3).
Minor repairs can be carried out by yourself. When ordering spares
please quote the correct reference numbers as given in the spare parts
list at the end of this manual.
For larger repairs, i.e. if electric components are concerned, ask your
local distributor.
I m p o r t a n t :
!Has the spray been thinned as
per instructions?
!Has the valve been properly
fitted?
!Is the suction tube in the correct
front vent?
!Has the locking screw been
tightened?
A c h e c k l i s t t o e n s u r e t r o u b l e - f r e e s e r v i c e
1. Only use suitable thinners for
cleaning the spray gun.
2. After having used the spray gun :
a) Clean thoroughly the gun with
appropriate thinner
b) Clean paint container with
thinner
c) Clean nozzle, suction tube
and filter by means of a fine
brush, then blow through filter
with air.
3. A f t e r s p r a y i n g a q u e a n s
solutions flush the gun by
M a i n t e n a n c e
!Has the regulating screw been
screwed in too far?
!Can the piston move freely?
!Has the suction filter been
cleaned?
!Are the 3 vents in the valve
completely clear.
spraying clean water followed
by a machine oil to prevent
errosion.
4. When spraying oil based
materials, flush or clean with a
compatible material or solvent,
and then follow with a light type
spindle or machine oil.
5. Spray through spray gun with a
machine oil before the gun is
stored away.
6. Always keep the Vent hole in
pump housing open.
1
8