Pilot Power TEX-90 User manual

Instruction Manual
S ta i n R e m o v i n g G u n
TEX-90

1. The spraying of abrasive materials, is not covered by our Guarantee.
2. Moderately corrosive liquids (stain removers, insecticides, water aqueous solutions) can readily be sprayed from the
Pilot Electric Spray guns.
Information on spraying materials
The appliance can be operated from single - phase AC supply only. Before starting up, check that mains voltages agrees
with operating voltage marked on gun rating plate.
Connection to supply
Pilot Power Stain Removing
Gun is an indispensable aid to the textile and garment industries. To get the maximum
benefit from this appliance it must be looked after. This manual is designed to help you
to keep the machine in good working condition.
1. Don’t operate the gun without liquid.
2. The high-pressure produced from the spray gun might lead to injuries. Therefore do not
point gun at yourself or in the direction of other people.
3. Do not spray abrasive solutions.
4. Use filtered solutions to avoid cloggy of nozzle.
Do's and don't's
Technical Data
Model TEX 90
Max. delivery rate 0.06 lit/min
(test liquid: water)
Weight 1.30 kg
Rated power 65 W
Voltage 220/110V
Frequency 50Hz / 60Hz
3
Container holds 800 cucm
Noise level 92 - 95 dB
TEX 90
Drive housing
Pump locking screw
Nozzle
Pump housing
Container
Connection
cord
Cover
Control screw
Switch
Handle

Instructions for removing stains
Preparation
l Do not operate the spray gun without fluid. l Fill fluid into cup of the spray gun and start the gun by pressing switch.
l Make sure that seen from the rear
the adjusting screw (Photo 1) is turned
counterclockwise. This yields the highest
pressure. Turn screw to the right if you desire
less fluid or less jet pressure. l By turning lever
on variable nozzle you can adjust infinitely any
given type of jet. For an extremely hard, sharp jet
the lever points upward; for a misty, very soft jet it
points downward.
Removal of stains
With Stain Removing Gun the dirt is flushed or shot through the material. The back of the fabric to be cleaned must, therefore be
free, or it must consist of an absorbant support. With every new fabric make a cleaning test in an area where no visible damage
can be done. Perform work quickly. Change over promptly from sharp to soft jet. The quicker the work is done and the less fluid
used, the less is also the danger of forming rings. With sensitive fabrics dry immediately after mist treatment by shaking cleaned
fabric up and down. If dirt residues are stilt visible after drying repeat entire cleaning procedure. It is better to clean twice quickly
with little fluid than to clean once slowly with a lot of fluid.
1
Nozzle handle upwards
Flushing with sharp jet
Appearance of fabric after
flushing with sharp jet
Nozzle handle downwards
Mist treatment with soft jet
Appearance after mist
treatment with soft jet
Operating Instructions for TEX-90
These Operating and Maintenance Instructions are for your information but are not binding. The differing characteristics of
the various types of woven and knitted materials may make it necessary, in individual cases, to carry out a test on a
remnant or on a hidden part of an article of clothing.
Correct use of the Nozzle
l Select type and force of jet using the lever on the Nozzle. The pressure of the jet should be set to match the resistance to
displacement of the soiled woven/knitted fabrics. The stain remover should never be brought so close to the material, that the
fabric is damaged or displaced.
l The stain remover has to be directed smoothly and with accuracy, to avoid unnecessary wetting of the fabric. For large soiled
areas it must be guided in a circular motion such that the pressure jet rinses the substance from the outside to
the inside.
l After the stain has been treated the Nozzle is set to produce a soft, fine mist spray This is to avoid the formation of ring marks.
Using this mist spray a circular and uniform transition from the damp to the dry part of the fabric is produced. The damp patch
should appear without contours - that is, without a visible transition. Rapid working will avoid ring marks becoming fixed in the
material.

l After completing treatment the damp back-up layer is to be removed. If the work is being carried out on an ironing board or
exhaust table the damp fabric is to be removed from the wet patch and transferred to the dry part of the working surface. This
avoids the transfer of dissolved staining substances back into the treated material. l If you have to dismantle the Nozzle for-
any reason, e.g., if the nozzle head is clogged, then refer to the operating instructions. Below is an exploded view of the
individual part. Do not use excessive force.
Dismantling the Nozzle
1. Remove the setscrew 1.2
2. Pull off the nozzle sleeve 1.3
3. Push the fitting spanner onto
the spindle nozzle head 1.4
4. Hold the threaded holder 1.8 by
means of a spanner and
unscrew the nozzle head.
5. Clean nozzle head and swirl
head 1.9.
Removing & Replacing the pump
Proceed in the sequence shown in the illustrations
1) Loosen the nozzle, takeoff valve, unscrew the container. 2) Take off the suction tube. 3) Loosen the locking screw.
4) Remove the complete pump. 5) Replace the pump. 6) Firmly
tighten the locking screw. 7) Insert suction tube, replace
container. 8) Insert valve secure the nozzle.
Assembling the Nozzle
1. Rotate the threaded holder 1.8 as far as possible against the circlip 1.7
2. Ensure that the teflon washer 1.5 and the brass washer 1.6 are placed in
the correct order on the swirl head or in the nozzle head.
3. Screw the nozzle head onto the threaded holder and tighten by rotaing both
spanners against each other.
4. Using the fitting spanner rotate the nozzle head back (to the right) until the
Nozzle is in the fine spray position.
5. Push the nozzle sleeve onto nozzle head to the position which is most
convenient for working.
6. Tighten setscrew.
Tips for better results
lWoven and knitted fabrics, which due to their nature & finish are particularly susceptible to formation of ring marks,
must be treated by application of a trace of fluid from the fine mist spray, before the actual treatment begins.
lFor very sensitive fabrics, & also for removal of ring marks (caused by incorrect finish with fine mist spray or drying),
treatment is carried out only with the soft, fine mist spray For the actual rinsing out process the fine mist spray is brought
as close to the fabric as possible, without causing it to be damaged (thread displacement), immediately afterwards a
uniform transition from the dry to the wet fabric is produced by making circular movements at a greater clearance from
the fabric.
lRepeat this process once or twice. Never allow too much fluid to penetrate the fabric. Always work very quickly. Dry and
if necessary, repeat process.
TEX90
TEX90
TEX90
TEX90
TEX90
1 2 3 4
1.1 Nozzle complete
1.2 Setscrew
1.3 Nozzle sleeve
1.4 Splined nozzle head
1.5 Teflon washer
1.6 Brass washer
1.7 Circlip
1.8 Thread holder
1.9 Swirl head
1.10 Brass washer
1.11 Nut
1.12 Tube
1.13 Nylon washer
Key Description Nozzle Assembly
1.1
1.3 1.4
1.6
1.8 1.9 1.11 1.12
1.10
1.7
1.5
1.2
1.13

We guarantee this appliance on the following terms:
We will carry out free repairs or replacement of all parts that are found to be defective owing to design or manufacturing flaws. This
warranty does not extend to damage caused by improper assembly or usage, normal wear & tear, negligent handling or servicing, or
damage owing to chemicals, electrochemicals, electric agents and par ticularly abrasive or corrosive materials not recommended by
us.
For the warranty to be valid, the card has to be stamped by the dealer as per provision, with the date of purchase and his signature. Also,
the appliance has to be returned with the completed warranty card.
We reserve the right to entrust compliance with the warranty to our approved sub-contractor / dealer. If inspection reveals that the
damage is not covered by this warranty, repairs will be carried out at the expense of the purchaser.
Managing Director
lWith certain types of stain, which occur less frequently, it is necessary, in spite of the increased danger of formation of
ring marks, to wet the stain before treatment with a few drops of methylated spirit, Together with dissolved staining
substance can be removed by spraying with fluid from TEX-90.
lThis treatment can be recommended for the following types of stains: Special oils based on molybdenum sulphide,
tallow, wax, ballpoint pen ink, make-up, stamp pad ink and also in some cases stains caused by fruit juices.
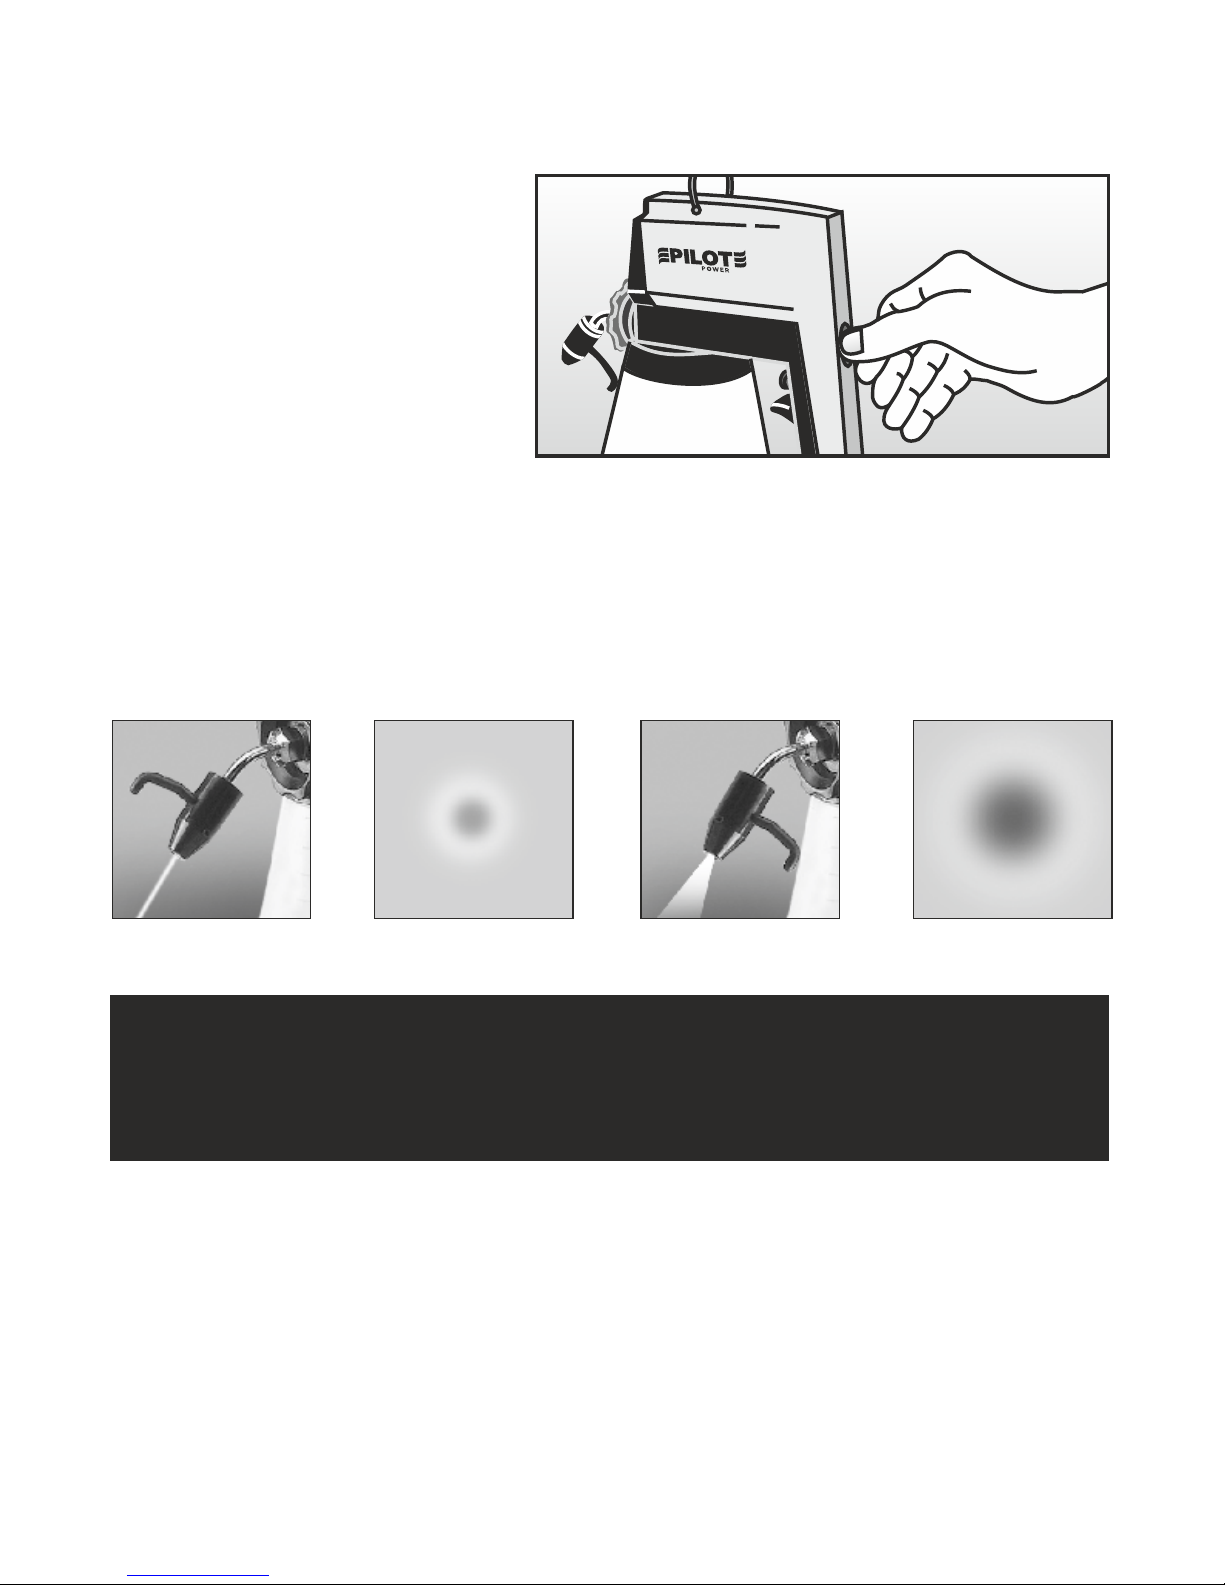
lIf spraying through the material is not possible, then cleaning is carried out by spraying tangentially across the surface. In
this case always work with a soft, fine mist spray.
lAll types of yarn packages and especially con bobbins can be successfully cleaned in this way, even if the soiled area is in
the bulge or dent. Should it be necessary to clean carpets, structured fabrics, mohair, velour or any napped fabric, the
soiled material can be laid over a round cushion or over the arm of the operator. In this way the stain is rinsed tangentially
out of the material.
lSedimentary stains, which have formed a crust on one side of fabric, should be cleaned from the back.
lThe removal of continuous and needle-shaped stains from plain fabrics is easy, economical and therefore to be
recommended.
lStains caused by specialized technical oils or greases, or those which have worked into the fabric over a lengthy period,
should first of all be treated by applying a trace of fluid using the fine mist spray, in order to somewhat soften the staining
substance. Do not make thoroughly wet: spray only a very thin layer.
lWhere possible, crusts should, first of all, be scraped off with the dull edge of a knife blade. The spray jet should if possible
be kept at a right-angle to the material, in order to reduce danger of thread displacement.
lSpraying of thick fabrics, treated with moisture-repellant, should be carried out when they are lying flat, and stretched, if
possible. If they are freely supported, fluid can escape downwards too quickly.
lProduction machines (ring travelers, shuttle-boxes, loom reeds, needle beds, sewing machines, and machines and
motors in general) can be treated and kept clean using this process.
lMoth repellant and impregnating agent can also be sprayed. However, these fluids are nearly always very corrosive, and
for this reason the stain remover must be cleaned immediately after use.
lIt is advised that a separate container is used for each type of fluid.
Terms & conditions of Warranty
Dear Customer,
It is in your own interest to ensure that the enclosed Warranty Card is filled in & stamped by the dealer at the time of
purchase. For warranty conditions, please refer below.
Yours faithfully,
Ishwar S. Manik

Spare parts list
* This set contains Valve complete, Pump Housing, Piston Spring & Piston Complete. # Accessories
Sr. No. Description Code No.
21 Anchorage Screw 902200
22 Cable anchorage 902300
23 Switch with circuit 902400
24 Cable with plug 902500
25 Grommet 902600
26 Terminal Block 902700
27 Suction Tube Complete 902800
28 Filter Complete 902900
29 Container 903000
30 Container cover 903100
31 Nozzle Sleeve with Set Screw 900103
32 Spindle Nozzle Head 900104
33 Teflon Washer 900105
34 Washer 9.8 900106
35 Circlip 900107
36 Thread Holder 900108
37 Swirl Head 900109
38 Washer 5.3 900110
39 Nut 900111
40 Tube Complete 900112
41 Nylon Washer 900113
# *
42 Repair kit 903900
Sr. No. Description Code No.
Stain Removing Gun Type
Tex-90 900000
1 Nozzle Complete 900100
2 Locking Screw 900200
3 Valve Complete 900300
4 Pump Housing Complete 900400
5 Piston Spring 900500
6 Piston Complete 900600
7 Drive Housing Complete 900700
8 Damper Part 900800
9 Coil 240V-50Hz 900900
10 Vibrating Armature Complete 901000
11 Leaf Spring 901100
12 Handle 901200
13 Handle Screw 901300
14 Control Knob spring 901400
15 Buffer 901500
16 Regulating Screw 901600
17 Cover 901700
18 Threaded stud 901800
19 Cover Screw 901900
20 Switch ring 902000
32
36
37
39
40
33
34
1
31
41
600
200
500
400
300
29
700
800 CCM
30
28
27
3
25
46
23
26
20
24
21
25
22
16
14
8
7109 12
11 13 15 17
19
18
38
35
multiprintindia.com
Manik Radiators Pvt. Ltd.
35, Balaji Industrial Estate, Hanuman Nagar, Akurli Village, Kandivali (East), Mumbai - 400 101 MH. INDIA
Tel.: +91 22 660 47 000 www.pilotindia.com
Manufactured by:
Table of contents
Other Pilot Power Paint Sprayer manuals