1
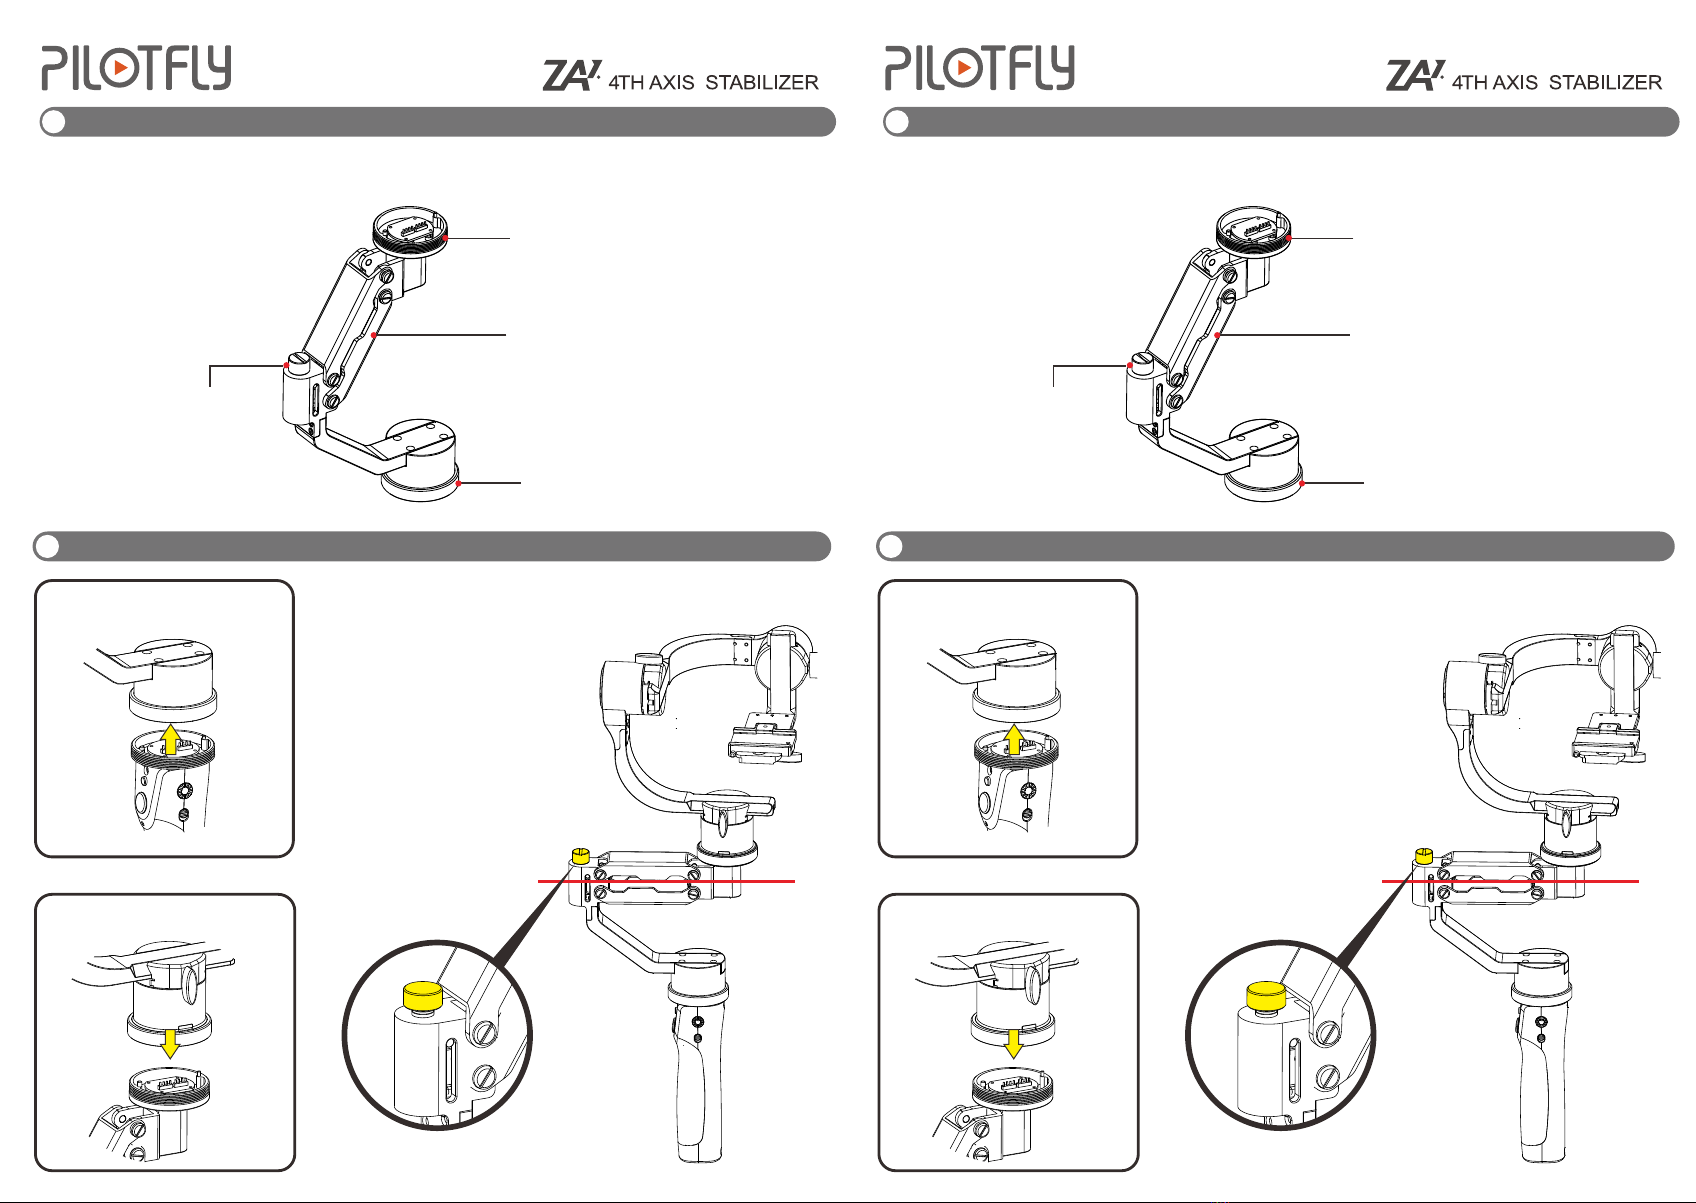
Beschreibung
Anschlussring an Gimbal
Drehknopf für die Stärke-
einstellung der Feder
2
Installation
Anschluss für Handhalterung
Arm
Die ZA-1 Z-Achse kompensiert merklich die Auf-und Abbewegung die bei normaler Benutzung beim Laufen,
Joggen oder Rennen auftreten. Die ZA-1 Achse ist kompatibel mit den Pilotfly Modellen H2 , H2-45 und T1.
Schritt 1. Anschluss an Griff
Schritt 2. Anschluss an Gimbal-
kopf
Waagerechte Linie
Stellen Sie das Gimbal auf eine
stabile Oberfläche oder auf ein
Stativ. Kamera mit Objektiv ist
montiert und Gimbal ist
ausbalanciert.
Um eine bestmögliche
Kompensation zu erhalten, stellen
Sie die Federstärke und Höhe der
ZA-1 Achse mit Hilfe des
Drehknopfes so ein, dass der
Federarm leicht über der
horizontalen Linie ist.
Schritt 3. Stärkeeinstellung der Federung
1
Description
Gimbal Securing Ring
Tension Adjustment Knob
2
Installation
Handle Connector
Arm
The Za1 Z-axis can significantly reduce vertical shaking from natural arm movements when walking or
jogging and running. It is compatible with the H2 , H2-45, T1 gimbal.
STEP1 Install handle
STEP2 Install Gimbal with ZA1
Horizontal Line
Place the Pilotfly Gimbal (Camera
with lens has mounted) on the flat
and stable surface so that it is
perfectly upright.
Adjust the height of the arm by
turning the tension adjust knob. The
arm should be elevated slightly
above the horizontal plane as
shown for best stability.
STEP3 Adjust tension of spring


