manuals.online logo
Brands
  1. Home
  2. •
  3. Brands
  4. •
  5. Pinolino
  6. •
  7. Indoor Furnishing
  8. •
  9. Pinolino Boks 14 34 03 G User manual

Pinolino Boks 14 34 03 G User manual

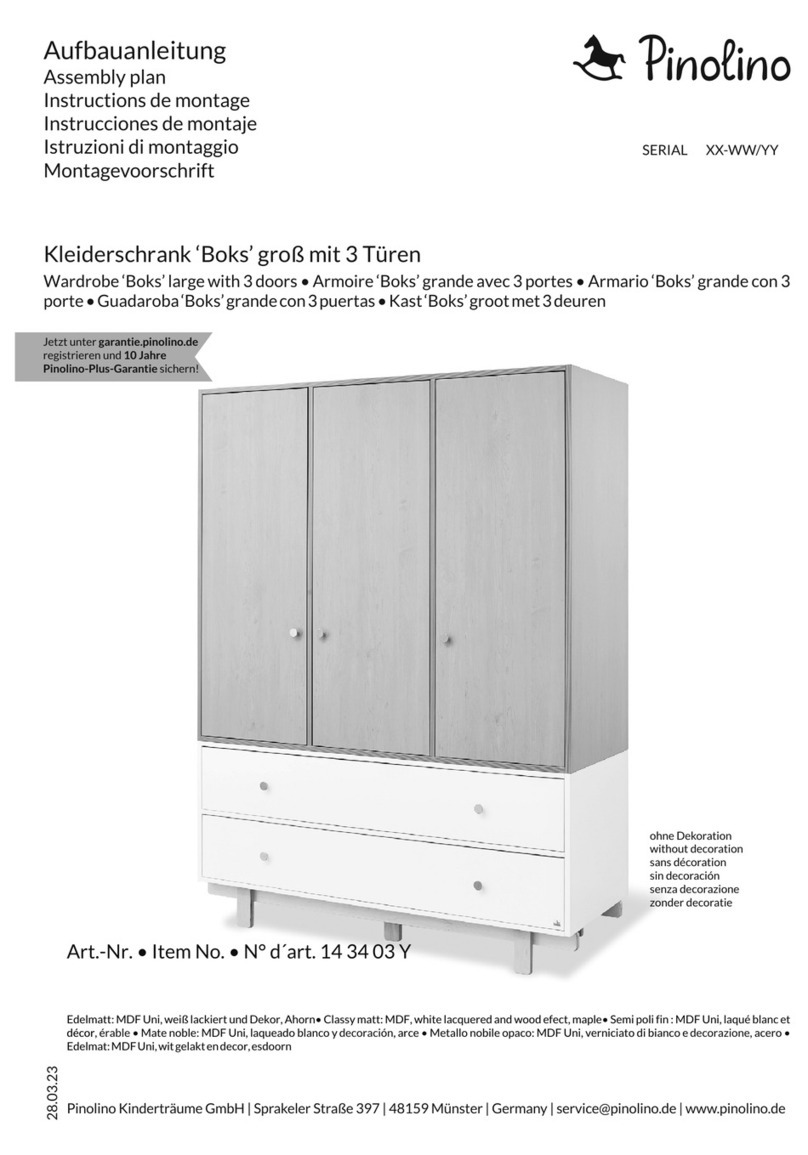
Kleiderschrank ‘Boks’ groß
Wardrobe ‘Boks’ large • Armoire ‘Boks’ grande • Armario ‘Boks’ grande • Guardaroba ‘Boks’ grande
• Kast ‘Boks’ groot
Art.-Nr. • Item No. • N° d´art. 14 34 03 G
Edelmatt: MDF Uni, weiß lackiert und Dekor, Ahorn• Classy matt: MDF, white lacquered and wood efect, maple• Semi poli
fin : MDF Uni, laqué blanc et , é • Mate noble: MDF Uni, laqueado blanco y , arce • Metallo nobile décor rable decoración
opaco: MDF Uni, verniciato di bianco e , acero • Edelmat: MDF Uni, wit gelakt en decor, esdoorndecorazione
Aufbauanleitung
Assembly plan
Instructions de montage
Instrucciones de montaje
Istruzioni di montaggio
Montagevoorschrift
Jetzt unter garantie.pinolino.de
registrieren und 10 Jahre
Pinolino-Plus-Garantie sichern!
27.03.23
Pinolino Kinderträume GmbH | Sprakeler Straße 397 | 48159 Münster | Germany | service@pinolino.de | www.pinolino.de
ohne Dekoration
without decoration
sans décoration
sin decoración
senza decorazione
zonder decoratie
SERIAL XX-WW/YY
2
Wie können wir dir helfen?
Es ist uns ein großes Anliegen, dir schnell und auf direktem Weg zu helfen,
wenn du Hilfe mit einem Pinolino Produkt oder Ersatz für einzelne Bauteile
oder Schrauben benötigst. Fülle dafür bitte das Formular unter
www.pinolino.de/ servicefall aus.
10 Jahre Garantie sichern!
Registriere jetzt dein Pinolino Produkt schnell und unkompliziert unter
garantie.pinolino.de und sichere dir damit die 10 Jahre Pinolino-Plus-
Garantie.
How can we help you?
It is very important to us that we can help you quickly and directly. If you
need help with a Pinolino product, need a spare part for a single component
or if you need screws, please fill in the form on www.pinolino.de/ servicefall.
Get 10 years warranty!
Go straight up to warranty.pinolino.com and register your Pinolino
product. After registration you are eligible for 10 years warranty.
Sicherheitshinweis:
Bitte überzeuge dich regelmäßig vom festen Sitz aller Schrauben und Verbindungsmittel und ziehe diese bei Bedarf nach. Diesen Artikel bitte nicht benutzen,
falls nicht alle Bauteile einwandfrei angebracht und eingestellt sind, wenn irgendein Teil defekt ist, abgerissen ist, oder fehlt. Nur original Zubehör- und
Ersatzteile verwenden. Kunststoffbeutel und etwaige Kunststoffelemente / Verpackungen sind sofort zu entfernen oder für Kinder unzugänglich
aufzubewahren! Lege während des Aufbaus eine geeignete Unterlage unter die Bauteile, um das Produkt und deinen Fußboden vor Beschädigungen zu
schützen. Um Beschädigungen am Produkt zu vermeiden, darf zum Anschrauben der Beschläge kein Akkuschrauber verwendet werden.
Warnhinweis:
Um ein Umkippen zu verhindern, ist dieser Schrank mit dem mitgelieferten Winkel an der Wand zu befestigen. Die verwendete Befestigung muss für deine
Wand geeignet sein, lasse dich im Fachhandel beraten.
Produkthinweis:
Dieser Artikel ist aus teilweise Holz gefertigt. Unregelmäßigkeiten in Struktur und Farbe sind typische Merkmale des natürlichen Rohstoffes und begründen
keinen Mangel. Bei der Herstellung unserer Produkte werden ausschließlich Öle, Lacke und Lasuren verarbeitet, die gesundheitlich unbedenklich und speziell
für Kinder geeignet sind. Manchmal kann es produktionsbedingt zu Geruchsentwicklungen durch die fabrikneuen Möbel kommen. In diesem Falle empfehlen
wir dieser ungefährlichen Geruchsbelästigung durch mehrmaliges Stoßlüften entgegenzuwirken. Weitere Informationen zur Pflege und Reinigung findest du
unter www.pinolino.de.
WICHTIG, FÜR SPÄTERE VERWENDUNG AUFBEWAHREN:
SORGFÄLTIG LESEN.
Schön, dass du dich für Pinolino entschieden hast! Wir haben diesen Artikel mit großer Sorgfalt und nach den strengen Auflagen der Europäischen
Sicherheitsnormen hergestellt. Bitte lies dir die Aufbauanleitung sorgfältig durch und kontrolliere die Vollständigkeit der mitgelieferten Teile. Bei
unsachgemäßer Bedienung oder Montage und insbesondere bei Veränderungen der Konstruktion erlischt der Garantieanspruch.
Safety advice:
Please check regularly that all screws and fasteners are tight and tighten them if necessary. Please do not use this item if all components are not properly fitted
and correctly adjusted, if any part is defective, torn off or missing. Only use original components and spare parts. Plastic bags and any plastic packaging have to
be removed immediately or need to be kept out of children's reach. During installation, place a suitable base under the parts in order to protect the product and
your floor from damage. To avoid damaging the product, do not use an electric screwdriver for tightening the screws!
Warning:
To prevent this cabinet from tipping over, it must be fixed to the wall with the supplied bracket. The fixing used must be suitable for your wall, consult a specialist
shop for advice.
Product notice:
This item is partly made of wood. Irregularities in structure and colour are typical characteristics of the natural raw material and do not constitute a defect. In
the manufacture of our products we only use oils, lacquers, and glazes that are harmless to health and especially suitable for children. Sometimes, there might
be a development of unpleasant smells from the brand-new furniture due to the production process. In this case, we recommend airing the room several times a
day. The smell is harmless. Further information regarding care and cleaning can be found on www.pinolino.de.
Thank you for choosing Pinolino! We have produced this article with great care and according to strict requirements of European safety standard. Please read
the set-up instructions carefully and check the delivered parts' completeness. In case of improper handling or installation and especially changes to the
construction the guarantee will be lost.
D
IMPORTANT, KEEP FOR FUTURE USE:
READ CAREFULLY.
GB
3
Comment pouvons-nous vous aider ?
Il nous tient à cœur de vous aider rapidement et directement si vous avez
besoin d'aide avec un produit Pinolino ou si vous avez besoin d'une pièce de
rechange ou des vis. Pour ce faire, veuillez remplir le formulaire sur
www.pinolino.de/ servicefall.
Assurez-vous de 10 ans de garantie !
Enregistrez votre produit Pinolino rapidement et sans complication en ligne
sur warranty.pinolino.com et profitez ainsi de la garantie Pinolino Plus de
10 ans.
¿Cómo podemos ayudarle?
Es muy importante para nosotros ayudarle de forma rápida y directa si
necesita ayuda con un producto Pinolino o una sustitución de
componentes o tornillos individuales. Rellene el formulario en
www.pinolino.de/servicefall.
¡Asegure una garantía de 10 años!
Registre ahora su producto Pinolino de forma rápida y sencilla en
warranty.pinolino.com y asegúrese la garantía Pinolino Plus de 10 años.
IMPORTANT, À CONSERVER POUR UNE UTILISATION
POSTÉRIEURE : LIRE ATTENTIVEMENT.
Nous sommes ravis que vous ayez choisi Pinolino ! Nous avons fabriqué cet article avec le plus grand soin et selon les conditions strictes des normes de sécurité
européennes. Veuillez lire attentivement les instructions de montage et contrôlez l'intégralité des pièces fournies. En cas d'utilisation ou de montage non
conforme et en particulier en cas de modification de la construction, le droit à la garantie est annulé.
¡IMPORTANTE - LEERSE ATENTAMENTE! -
GUARDAR PARA UTILIZACIÓN POSTERIOR
Nos alegramos de que haya elegido Pinolino. Hemos fabricado este artículo con gran cuidado y de acuerdo con los estrictos requisitos de las normas de
seguridad europeas. Lea atentamente las instrucciones de montaje y compruebe que las piezas suministradas están completas. El uso o el montaje
inadecuados, y en particular las modificaciones de la construcción, invalidarán la garantía.
Consigne de sécurité :
Veuillez vérifier régulièrement que toutes les vis et fixations sont bien serrées et les resserrer si nécessaire. Veuillez ne pas utiliser cet article si tous les
composants ne sont pas correctement montés et réglés, si une pièce est défectueuse, arrachée ou manquante. Utilisez uniquement des composants et des
pièces de rechange d'origine. Les sacs en plastique et tout emballage en plastique doivent être retirés immédiatement ou doivent être tenus hors de portée des
enfants. Pendant l'installation, placez une base appropriée sous les pièces afin de protéger le produit et votre sol contre les dommages. Pour éviter
d'endommager le produit, n'utilisez pas de tournevis électrique pour serrer les vis !
Attention:
Pour éviter que ce meuble ne se renverse, il doit être fixé au mur à l'aide du support fourni. La fixation utilisée doit être adaptée à votre mur, demandez conseil à
un magasin spécialisé.
Remarque sur le produit :
Cet article est partiellement fabriqué en bois. Les irrégularités de structure et de couleur sont des caractéristiques de la matière première naturelle et ne
constituent pas un défaut. Lors de la fabrication de nos produits, nous utilisons des huiles, de vernis et des lasures qui ne présentent aucun risque pour la santé
et qui sont spécialement adaptés aux enfants. Parfois, les meubles neufs peuvent être malodorants en raison de la production. Dans ce cas, nous
recommandons une aération régulière pour éviter les odeurs désagréables qui ne sont pas dangereuses. Pour plus d'informations sur l'entretien et le
nettoyage, voir www.pinolino.de.
Consejos de seguridad:
Por favor, compruebe regularmente que todos los tornillos y fijaciones están apretados y apriételos si es necesario. Por favor, no utilice este artículo si todos los
componentes no están bien montados y correctamente ajustados, si alguna pieza está defectuosa, arrancada o falta. Utilice únicamente componentes y piezas
de recambio originales. Las bolsas de plástico y cualquier embalaje de plástico deben ser retirados inmediatamente o deben mantenerse fuera del alcance de
los niños. Durante la instalación, coloque una base adecuada debajo de las piezas para proteger el producto y su suelo de posibles daños. Para no dañar el
producto, no utilice un destornillador eléctrico para apretar los tornillos.
Advertencia:
Para evitar que este armario se vuelque, debe fijarse a la pared con el soporte suministrado. La fijación utilizada debe ser adecuada para su pared, consulte a
una tienda especializada para que le asesoren.
Aviso sobre el producto:
Este artículo es en parte de madera. Las irregularidades en la estructura y el color son características típicas de la materia prima natural y no constituyen un
defecto. En la fabricación de nuestros productos sólo se utilizan aceites, barnices y tintes inocuos para la salud y especialmente adecuados para los niños. A
veces, debido al proceso de producción, los muebles fabricados en fábrica pueden desprender olores. En este caso, se recomienda contrarrestar esta
inofensiva molestia de olor ventilando el mueble varias veces. Encontrará más información sobre el cuidado y la limpieza en www.pinolino.de.
F
ES
4
Come possiamo aiutarvi?
Per noi è molto importante aiutarvi in modo rapido e diretto se avete
bisogno di assistenza per un prodotto Pinolino o per la sostituzione di
singoli componenti o viti. Compilare il modulo all'indirizzo
www.pinolino.de/servicefall.
Assicuratevi una garanzia di 10 anni!
Registra subito il tuo prodotto Pinolino in modo semplice e veloce su
warranty.pinolino.com e assicurati la garanzia di 10 anni Pinolino Plus.
Hoe kunnen we u helpen?
Het is voor ons erg belangrijk om u snel en direct te helpen als u hulp nodig
heeft met een Pinolino product of een vervanging voor losse onderdelen of
schroeven. Vul het formulier in op www.pinolino.de/servicefall.
Verzeker u van 10 jaar garantie!
Registreer uw Pinolino product nu snel en eenvoudig op
warranty.pinolino.com en verzeker u van 10 jaar Pinolino Plus garantie.
IMPORTANTE - LEGGERE ATTENTAMENTE! -
CONSERVARE PER FUTURI RIFERIMENTI
Siamo lieti che abbiate scelto Pinolino! Abbiamo prodotto questo articolo con grande cura e secondo i severi requisiti delle norme di sicurezza europee.
Leggere attentamente le istruzioni di montaggio e verificare che le parti fornite siano complete. L'uso o il montaggio improprio, e in particolare le modifiche alla
costruzione, invalidano la garanzia.
BELANGRIJK - ZORGVULDIG LEZEN!-
VOOR LATERE RAADPLEGING BEWAREN
Wij zijn blij dat u voor Pinolino gekozen heeft! Wij hebben dit artikel met grote zorg en volgens de strenge eisen van de Europese veiligheidsnormen
vervaardigd. Lees de montage-instructies zorgvuldig door en controleer of de geleverde onderdelen compleet zijn. Ondeskundig gebruik of montage, en in het
bijzonder wijzigingen aan de constructie, maken de garantie ongeldig.
Consigli per la sicurezza:
Controllare regolarmente che tutte le viti e gli elementi di fissaggio siano serrati e, se necessario, stringerli. Non utilizzare l'apparecchio se tutti i componenti
non sono montati e regolati correttamente, se qualche parte è difettosa, strappata o mancante. Utilizzare solo componenti e ricambi originali. I sacchetti di
plastica e gli imballaggi in plastica devono essere rimossi immediatamente o devono essere tenuti fuori dalla portata dei bambini. Durante l'installazione,
collocare una base adeguata sotto i componenti per proteggere il prodotto e il pavimento da eventuali danni. Per evitare di danneggiare il prodotto, non
utilizzare un cacciavite elettrico per stringere le viti!
Attenzione:
Per evitare il ribaltamento del mobile, è necessario fissarlo alla parete con la staffa in dotazione. Il fissaggio utilizzato deve essere adatto alla vostra parete,
consultate un negozio specializzato per una consulenza.
Avviso sul prodotto:
Questo articolo è realizzato in parte in legno. Le irregolarità nella struttura e nel colore sono caratteristiche tipiche della materia prima naturale e non
costituiscono un difetto. Per la fabbricazione dei nostri prodotti utilizziamo solo oli, vernici e smalti innocui per la salute e particolarmente adatti ai bambini. A
volte, a causa del processo di produzione, si possono sviluppare odori dai mobili fabbricati in fabbrica. In questo caso, si consiglia di contrastare questo
fastidioso odore innocuo arieggiando più volte il mobile. Ulteriori informazioni sulla cura e la pulizia sono disponibili sul sito www.pinolino.de.
Veiligheidsadvies:
Controleer regelmatig of alle schroeven en bevestigingsmiddelen goed vastzitten en draai ze zo nodig vaster aan. Gebruik dit artikel niet als niet alle
onderdelen goed gemonteerd en afgesteld zijn, als een onderdeel defect is, afgescheurd is of ontbreekt. Gebruik alleen originele onderdelen en
reserveonderdelen. Plastic zakken en eventuele plastic verpakkingen moeten onmiddellijk worden verwijderd of buiten het bereik van kinderen worden
gehouden. Plaats tijdens de installatie een geschikte ondergrond onder de onderdelen om het product en uw vloer te beschermen tegen beschadiging. Om
beschadiging van het product te voorkomen, mag u geen elektrische schroevendraaier gebruiken voor het aandraaien van de schroeven!
Waarschuwing:
Om te voorkomen dat deze kast omvalt, moet hij met de meegeleverde beugel aan de muur worden bevestigd. De gebruikte bevestiging moet geschikt zijn
voor uw muur, raadpleeg een speciaalzaak voor advies.
Product mededeling:
Dit artikel is gemaakt gedeeltelijk van hout. Onregelmatigheden in structuur en kleur zijn typische kenmerken van de natuurlijke grondstof en vormen geen
gebrek. Voor de vervaardiging van onze producten gebruiken wij uitsluitend oliën, vernissen en glazuren die onschadelijk zijn voor de gezondheid en bijzonder
geschikt voor kinderen. Soms kunnen er, als gevolg van het productieproces, geuren ontstaan uit de in de fabriek vervaardigde meubelen. In dat geval raden wij
aan deze onschadelijke geurhinder tegen te gaan door het meubel meerdere malen te luchten. Meer informatie over onderhoud en reiniging is te vinden op
www.pinolino.de.
IT
NL
5
57 cm
126 cm
190 cm
www.pinolino.de
Produktspezifikationen • Product specifications • Spécifications du produit • Especificaciones del producto • Specificazioni del prodotto •
Productspecificaties
Karton • Pack • Carton • Embalaje • Confezione • Verpakking
Artikelmaß • Product size • • Mediciones Dimensions de l'article
producto • Dimensioni del prodotto • Artikelafmetingen
Weitere Artikel aus diesem Programm • Other products from this program • Autres articles de cette collection • Otros productos de este programa
• Altri prodotti della presente collezione • Andere artikels in dit programma
A B
D
F
C
E
Kinderbett • Cot bed • Lit de bébé évolutif • Cuna• Lettino • Babybed 11 34 03
Wickelkommode breit • Changing unit wide • Commode à langer large • Cambiador ancho • Fasciatoio largo • Commode breed 13 34 03 B
Wickelkommode extrabreit • Changing unit extra wide • Commode à langer extra large • Cambiador extra ancho • Fasciatoio extra largo • Commode
extra breed 13 34 03 X
Kleiderschrank groß mit 3 Türen • Wardrobe large with 3 doors • Armoire grande avec 3 portes • Armario grande con 3 porte • Guadaropa grande con 3
puertas • Kast groot met 3 deuren 14 34 03 Y
6
Bauteile • Components • Composants • Componentes • Componenti • Onderdelen
1 x BR
Seitenteil rechts
Right side panel
Panneau latéral droite
Parte lateral derecha
Parte laterale destra
Zijkant rechts
1 x BL
Seitenteil links
Left side panel
Panneau latéral gauche
Parte lateral izquierda
Parte laterale sinistra
Zijkank links
1 x JML
Mittelwand links
Left intermediary panel
Panneau intermédiaire gauche
Pared indermediaria izquierda
Parete intermedia sinistra
Tussenwand links
1 x JMR
Mittelwand rechts
Right intermediary panel
Panneau intermédiaire droite
Pared indermediaria derecha
Parete intermedia destra
Tussenwand rechts
1 x G
Platte oben
Upper panel
Planche supèrieure
Placa superior
Parte superiore
Boven plank
1 x MM
Mittelplatte
Intermediary panel
Plaque intermédiaire
Placa intermediaria
Placa intermedia
Tussenwand
2 x I
Rückwand
Back panel
Panneau arrière
Panel detrás
Panello posteriore
Achterwand
1 x IM
Rückwand mittig
Intermediary back panel
Panneau arrière intermédiaire
Panel detrás indermediaria
Panello posteriore intermedia
Achterwand midden
1 x HL
Tür links
Left door
Porte gauche
Puerta izquierda
Anta sinstra
Deur links
1 x HR
Tür rechts
Right door
Porte droite
Puerta derecha
Anta destra
Deur rechts
1 x BR1
Seitenteil rechts
Right side
Partie latérale droite
Parte lateral
derecha
Parte laterale destra
Zijkant rechts
1 x BL1
Seitenteil links
Left side
Partie latérale
gauche
Parte lateral
izquierda
Parte laterale
sinistra
Zijkant links
2 x IU
Rückwand unten
Lower back panel
Panneau arrière inférieure
Panel detrás inferior
Panello posteriore inferiore
Achterwand onder
1 x KS
Leiste unten
Schubkasten
Drawer bottom slat
Latte inférieure tiroir
Listón inferior cajón
Asse inferiore cassetto
Onderregel lade
1 x KS1
Leiste unten
Schubkasten
Drawer bottom slat
Latte inférieure
tiroir
Listón inferior cajón
Asse inferiore
cassetto
Onderregel lade
1 x KUV
Querleiste unten vorne
Lower front transversal
slat
Traverse inférieure avant
Traversero inferior frente
Trave inferiore anteriore
Dwarsbalk voorkant onder
1 x KOV
Querleiste oben vorne
Upper front transversal
slat
Traverse supèrieure avant
Traversero superior
frente
Trave superiore anteriore
Dwarsbalk voorkant
boven
1 x KUH
Querleiste unten
hinten
Lower back transversal
slat
Traverse inférieure arrière
Traversero inferior detrás
Trave inferiore posteriore
Dwarsbalk achterkant
onder
1 x KOH
Querleiste oben hinten
Upper back transversal slat
Traverse supèrieure arrière
Traversero superior detrás
Trave superiore posteriore
Dwarsbalk achterkant
boven
2 x SV
Schubkastenfront
Front drawer panel
Front du tiroir
Frente cajónn
Frontalino cassetto
Voorkant lade
4 x SL
Schubkastenseitenteil
links
Left side panel for drawer
Latérale du tiroir gauche
Parte lateral cajón izquierda
Parte laterale cassetto
sinistra
Zijkant lade links
4 x SR
Schubkastenseitenteil
rechts
Right side panel for drawer
Latérale du tiroir droite
Parte lateral cajón derecha
Parte laterale cassetto
destra
Zijkant lade rechts
4 x SH
Schubkastenrückwand
Back drawer panel
Panneau arrière du tiroir
Detrás cajón
Parte posteriore cassetto
Achterkant la
4 x SB
Schubkastenboden
Drawer bottom
Fond du tiroir
Fondo cajón
Base cassetto
Ladebodem
2 x KU
Leiste unten
Lower slat
Latte inférieure
Listón inferior
Asse inferiore
Ondertengel
4 x F
Fuß
Leg
Pied
Pie
Piede
Voet
2 x JU
Mittelwand unten
Lower intermediary panel
Parroi mitoyenne
inférieure
Pared intermediaria
inferior
Parete intermedia inferiore
Tussenwand onder
3 x LG
Einlegeboden lose
groß
Large loose shelf
Étagère amovible grande
Estante móvil grande
Ripiano mobile grande
Losse plank groot
1 x LK
Einlegeboden lose
klein
Small loose shelf
Étagère amovible petite
Estante móvil pequeño
Ripiano mobile piccolo
Losse plank klein
2 x LK1
Einlegeboden lose
klein
Small loose shelf
Étagère amovible petite
Estante móvil pequeño
Ripiano mobile piccolo
Losse plank klein
7
Beschläge • Hardware • Ferrure • Herraje • Ferramenta • Ijzerwaren
Zusätzlich benötigtes Werkzeug • Additional necessary tools • Des outils supplémentaires • Otras herramientas necesarias • Altri utensili necessari • Andere
benodigde werktuigen
Die Montage muss unbedingt von 2 Erwachsenen durchgeführt werden!
The assembly must necessarily be carried out by 2 adults!
Le montage doit être réalisé par 2 adultes!
¡El montaje va de ser realizado imprescindible por 2 adultos!
L'assemblaggio dovrà essere eseguito per forza da 2 persone adulte!
De montage moet noodzakkelijkerwijs door 2 volwassenen worden uitgevoerd!
Aufbaupersonen • Persons needed for assembly • Personnes nécessaires au montage • Personas necesarias para montaje • Numero di persone occorrenti per il
montaggio • Aantal personen voor de montage
2
1 x T
Kleiderstange
Clothes rail
Tringle à vêtements
Barra de vestidos
Appendiabiti
Kledingstang
1 x N4
Riemen
Strap
Courroie
Correa
Cintura
Riem
2 x WK1
U-Scheibe
Washer
Rondelle
Arandela
Rotella
Sluitring
16 x VS 3,5/13
Holzschraube
Wood screw
Vis panneaux
Tornillo para madera
Vite per legno
Houtschroef
6 x VM 4/22
Gewindeschraube
Metric screw
Vis à tête fraisée bombée
Tornillo para mango
Vite per maniglia
Schroef voor de handvat
60 x WE 15
Exzenter
Eccentric cam
Boîtier de ferrure
Excéntrico
Eccentrico
Excentriek
56 x WBC
Exzenterstift
Eccentric rod
Goujon d’assemblage
Barra excéntrica
Perno eccentrico
Excentriek pin
52 x WDH 8/32
Holzdübel
Dowel
Cheville en bois
Tapón
Tassello in legno
Tap
8 x EML
Winkel
Metal bracket
Équerre
Esquadra metálica
Angolo metallico
Metalen hoek
1 x VS 3/16
Holzschraube
Wood screw
Vis panneaux
Tornillo para madera
Vite per legno
Houtschroef
1 x WI 4
Inbusschlüssel
Hex key
Clé à six pans
Llave hexagonal
Chiave a brugola
Inbussleutel
16 x VB 20
Verbinder
Connector
Connecteur
Conector
Connettore
Connector
2 x TA
Halter für Kleiderstange
Support for clothes rail
Support tringle v tementsà ê
Soporte para barra de vestidos
Supporto per l'appendiabiti
Houder voor de kledingstang
6 x SK15 CLIP
Scharnier
Hinge
Charnière
Bisagra
Cerniera
Scharnier
6 x KP1 CLIP
Kreuzplatte
Mounting plate
Embase cruciforme
Chapilla bisagra
Piastra cerniera
Scharnierplaatje
16 x ED 7/16
Einschraubdübel
Screw-in dowel
Goujon à visser
Tornillo para chapa
Toccando vite
Tapschroef
24 x VFZ 6/30
Zylinderkopfschraube
Cylinder-head screw
Vis à six pans creux, tête
cylindrique
Tornillo a cabeza cilídrica
Vite a testa cilindrica
Cylinderkopschroef
2 x WBE
Mittelwandbolzen
Centre panel bolts
Goujon pour panneau mitoyen
Bulón para pared intermediaria
Bullone per parete intermedia
Middelwandbout
2 x WDH 8/50
Holzdübel
Dowel
Cheville en bois
Tapón
Tassello in legno
Tap
4 x WSD-R
Führung rechts
Right drawer slide
Coulisse pour tiroir droite
Corredera derecha
Guida destra
Geleider rechts
25 x VS 3/20
Holzschraube
Wood screw
Vis panneaux
Tornillo para
madera
Vite per legno
Houtschroef
4 x WSD-L
Führung links
Left drawer slide
Coulisse pour tiroir gauche
Corredera izquierda
Guida sinista
Geleider linksgauche
16 x VES 7/50
Möbelschraube
Furniture screw
Vis de meuble
Tornillo de muebles
Vite per mobili
Meubelschroef
24 x VSC 6,3/10
Euroschraube
Euro-screw
Vis Euro
Tornillo euro
Vite euro
Euroschroef
12 x VSC 6,3/13
Euroschraube
Euro-screw
Vis Euro
Tornillo euro
Vite euro
Euroschroef
5 x WK
U-Scheibe
Washer
Rondelle
Arandela
Rotella
Sluitring
48 x VS 3/13
Holzschraube
Wood screw
Vis panneaux
Tornillo para madera
Vite per legno
Houtschroef
56 x NK
Rückwandverbinder
Back panel connector
Élément de jonction panneaux
arrières
Conectador panel detrás
Giunto pannello posteriore
Achterwandverbinder
8 x WBM
Duplo-Bodenträger
Shelf support
Taquet Duplo
Soporte para estantes móviles
Supporto per ripiani mobili
Houder voor de losse rekken
4 x WTN 6,3/16
Türanschlag
Door stop
Arrêt de porte
Parador de la puerta
Dispositivo d'arresto porta
Deurstop
6 x HK
Knopf
Knob
Poignée
Botón
Pulsante
Knop
8 x VFZ 6/35
Zylinderkopfschraube
Cylinder-head screw
Vis à six pans creux, tête
cylindrique
Tornillo a cabeza cilídrica
Vite a testa cilindrica
Cylinderkopschroef
8
Montage • Assembly • Montage • Montaje • Assemblaggio • Montage
2
3
1
• Bitte bauen Sie den Artikel nummerisch, nach Reihenfolge auf. Bitte Dübel in das richtige Loch einstecken! Beachten Sie bitte, dass
alle Dübel bis zum Anschlag zuerst in das tiefere Loch einzutreiben sind.
• Please set up the article in numerical order. Please, insert the dowels in the correct position! Please note that all dowels should be at first advanced in the deeper hole up to
marking.
• Veuillez monter l'article en tenant compte de l'ordre numérique des composants. Assurez-vous que les chevilles en bois sont introduites dans les trous indiqués! Faites
attention que tous les goujons en bois sont introduits jusqu'au fond, dans les trous les plus profonds.
• Les rogamos de montar el artículo en orden numérico. ¡Les rogamos de introducir los tapones en los agujeros correctos! Atención, deben tomar en cuenta el hecho que
todos los tapones necesitan ser introducidos completamente en orificio, sobre la profundidad entera del mismo.
• Siete pregati di inserire i tasselli in legno nei fori adatti! Vi chiediamo gentilmente di montare l'articolo in ordine numerica. Attenzione, dovete tener conto che tutti i tappi
devono essere inseriti nel foro, per tutta la sua profondità.
• Steekt u de tappen in de gepaste gaten! U wordt verzocht om het artikel in de volgorde van de nummers te monteren. Let op: alle verbindingspennen dienen compleet in de
gat worden gestoken, op de gehele lengte van de gat.
!
1 x JU
2 x WDH 8/322 x WDH 8/50
1 x KUV
1 x WBC
1 x KUH
1 x WBC
4
1 x KOV
1 x WBC
9
5
6
1 x KUH
1 x KUV
1 x JU
2 x WE 15
1 x KOH
1 x WBC
2 x WE 15
2 x WBE
1 x KS
1 x KS1
7
10
9
8
1 x JU
2 x WDH 8/32
4 x WE 15
1 x KOV
1 x KOH
6 x WDH 8/32
10
6 x WDH 8/32
11
1 x BR1
1 x BL1
1 x BL1
12 x WBC
1 x BR1
6 x WE 15
6 x WE 15
1 x IU
1 x IU
11
12
13
14
12
4 x VFZ 6/35
2x
1 x KU
1 x F
1 x F
16 x VFZ 6/30
8 x EML
48 x VS 3/13
15
16
17
13
2 x WSD-L
2 x WSD-R
8 x VSC 6,3/10
2 x WSD-L
2 x WSD-R
16 x VSC 6,3/10
5 x WS 3/20
5 x WK
20 x NK
!
Achtung • Warning • Attention • Atención • Attenzione • Let op
• Schrauben Sie die Rückwand erst an, nachdem Sie sich davon überzeugt haben, dass der Kleiderschrank im rechten
Winkel montiert ist.
• Screw the back panel only after having convinced yourself that the wardrobe is assembled in a r ight angle.
• Serrer les vis du panneau arrière seulement après vous avoir convaincu que l’armoire est montée à angle droit.
• F ijen la parte de trás de l a r mario con ornillos solamente despús de que se han a s egurado Uds. que eso es montado en ángulo derecho.
• Fissare la parte posteriore dell'armadio con le viti, dopo che vi siete assicurati che esso sia assemblato in angolo retto.
• Schroef het achterkant van de kast nada t u gecheckt heeft dat deze in een rechte hoek gemonteerd is.
18
19
14
20
4x
4 x VES 7/50
1 x SH
1 x SR
1 x SL
2x 8 x WBC
1 x SV
1 x HK
1 x HK
2 x VM 4/22
2x
8 x WE 15
1 x SV
4 x WDH 8/32
4x
1 x SL
1 x SR
1 x SH
!
• Verbinden Sie die Schubkastenteile zunächst nur lose miteinander. Ziehen Sie die Schrauben erst fest, nachdem Sie sich davon
überzeugt haben, dass die Schubkastenseiten im rechten Winkel montiert sind.
• First, connect the drawer parts loosely. Tighten the screws only after having convinced yourself that the drawer sides are in a right angle.
• Pendant l'assemblage du tiroir, les vis doivent être un peu lâches. Visser fortement les pièces seulement après vous avoir convaincu que les panneaux de côté sont
installés à a ngle droit.
• Ensamblen las piezas del cajón ligero. Apreten los tornillos sólo después de que se han asegurado Uds que las piezas del cajón se encuentran montadas en ángulo
derecho.
• Collegate I pezzi del cassetto senza serrarli. Serrare le viti soltanto dopo che vi assicurati che i pezzi del cassetto siano assemblati in angolo retto.
• De onderdelen van de losse la verbinden. Maak de s chroeven vast nadat u gecheckt heeft dat de onderdelen van de la in een rechte hoek gemonteerd zijn.
21
22
23
15
6 x VS 3/20
1 x SB
1 x SB
1 x JMR
1 x JML
1 x IM
8 x WDH 8/32
4 x WDH 8/32
8 x WBC
8 x WE 15
1 x JMR 1 x IM
1 x JML
24
25
26
27
4x
16
4 x WBC
4 x WBC
4 x WDH 8/32
4 x WDH 8/32
8 x WE 15
1 x JMR
1 x G
1 x MM
1 x JML
1 x MM
1 x G
28
29
30
17
4 x WBC 34
4 x WBC 34
3 x KP1 CLIP
6 x VSC 6,3/13
3 x KP1 CLIP
6 x VSC 6,3/13
1 x BR
1 x BL
1 x I
1 x I
31
32
33
18
8 x WE 15
36 x NK
1 x BR
1 x BL
34
35
!
Achtung • Warning • Attention • Atención • Attenzione • Let op
• Schrauben Sie die Rückwand erst an, nachdem Sie sich davon überzeugt haben, dass der Kleiderschrank im rechten
Winkel montiert ist.
• Screw the back panel only after having convinced yourself that the wardrobe is assembled in a r ight angle.
• Serrer les vis du panneau arrière seulement après vous avoir convaincu que l’armoire est montée à angle droit.
• F ijen la parte de trás de l a r mario con ornillos solamente despús de que se han a s egurado Uds. que eso es montado en ángulo derecho.
• Fissare la parte posteriore dell'armadio con le viti, dopo che vi siete assicurati che esso sia assemblato in angolo retto.
• Schroef het achterkant van de kast nada t u gecheckt heeft dat deze in een rechte hoek gemonteerd is.
Rotate
19
8 x VFZ 6/30
1
3
8 x VS 3/20
2
36
37
20
Für HR, HL • For HR, HL • Pour HR, HL • Para HR, HL • Per HR, HL • Voor HR, HL
1
2
1 x HL
1 x HR
1 x KH
1 x KH
2 x VM 4/22
6 x SK15 CLIP
12 x VS 3,5/13
1 x HL 1 x HR
38
39
• Die Einstellung der Tür funktioniert wie folgt:
• The door must be adjusted as follows:
• L’installation de la porte doit être faite de la manière suivante:
• La reglación de la puerta se efectuará así :
• La regolazione dell'anta sarà effettuata come di seguito ri portato :
• Het afstellen van de deur wordt gedaan als volgt :
!
click!

Other Pinolino Indoor Furnishing manuals

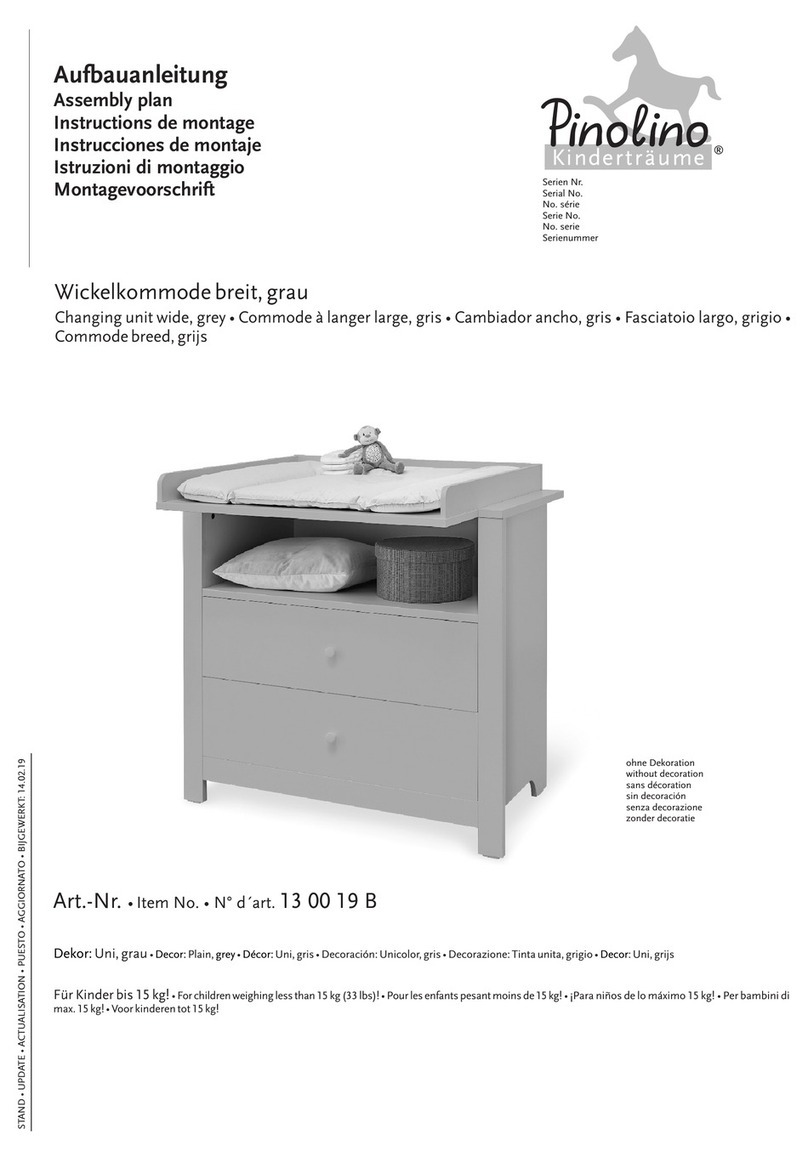
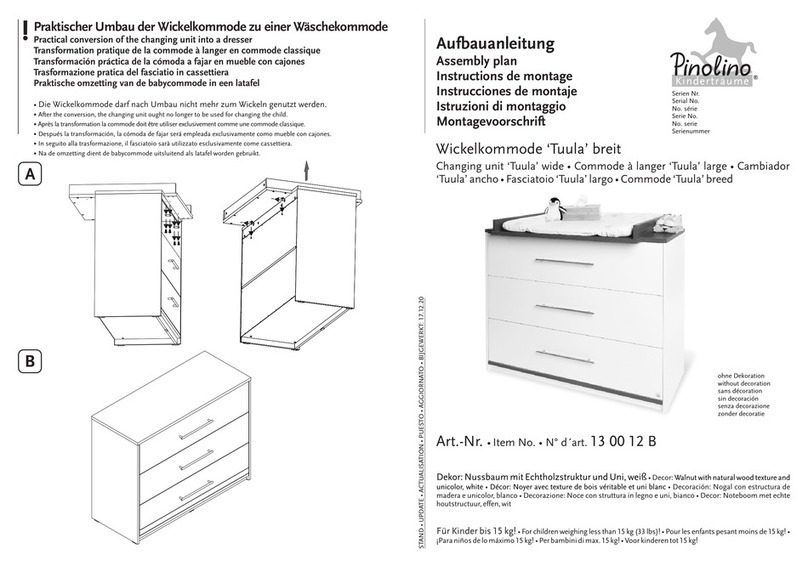
Pinolino Tuula 13 00 12 B User manual

Pinolino

Pinolino Tuula 13 00 12 B User manual

Pinolino 14 34 03 Y User manual

Pinolino

Pinolino 14 34 03 Y User manual

Pinolino Baby Lock Classic User manual

Pinolino

Pinolino Baby Lock Classic User manual

Pinolino Lumi 14 00 32 G User manual

Pinolino

Pinolino Lumi 14 00 32 G User manual

Pinolino 14 00 92 G User manual

Pinolino

Pinolino 14 00 92 G User manual

Pinolino Enzo User manual

Pinolino

Pinolino Enzo User manual

Pinolino 13 00 13 R User manual

Pinolino

Pinolino 13 00 13 R User manual

Pinolino Lumi 14 00 32 User manual

Pinolino

Pinolino Lumi 14 00 32 User manual

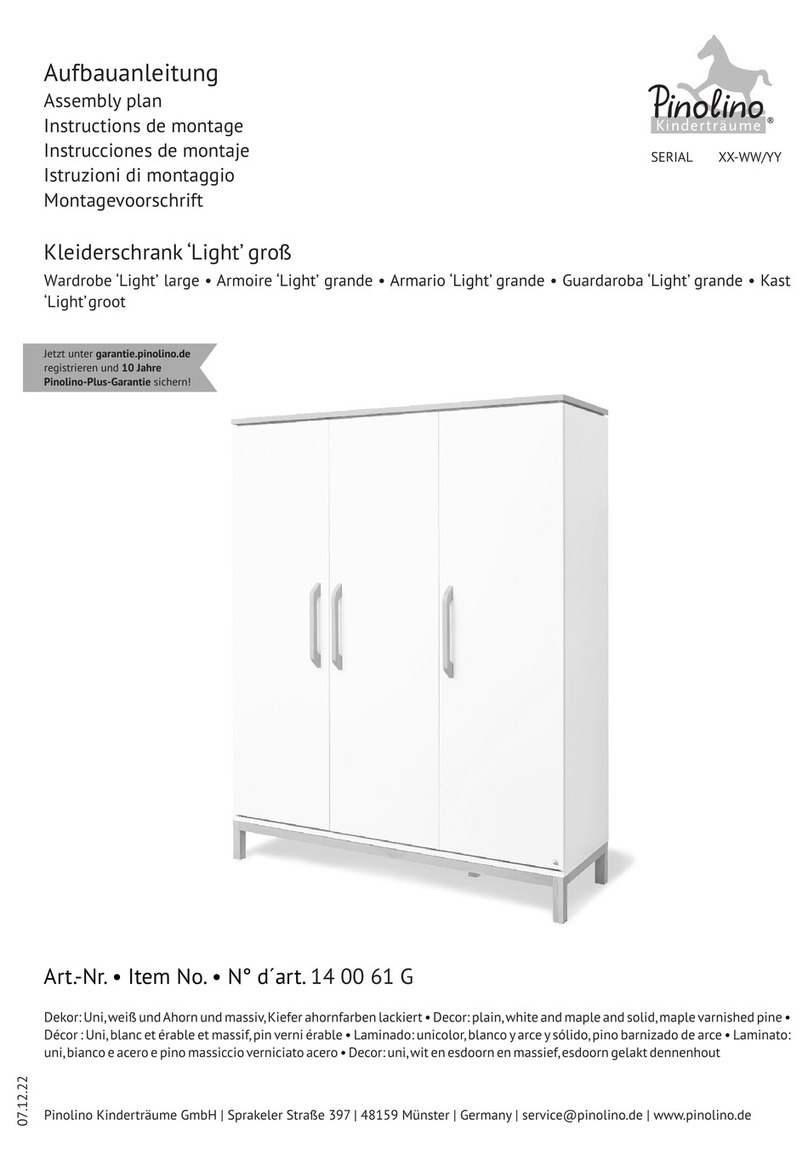
Pinolino Light 14 00 61 G User manual

Pinolino

Pinolino Light 14 00 61 G User manual

Pinolino Viktoria 14 00 22 User manual

Pinolino

Pinolino Viktoria 14 00 22 User manual

Pinolino Natura wide User manual

Pinolino

Pinolino Natura wide User manual

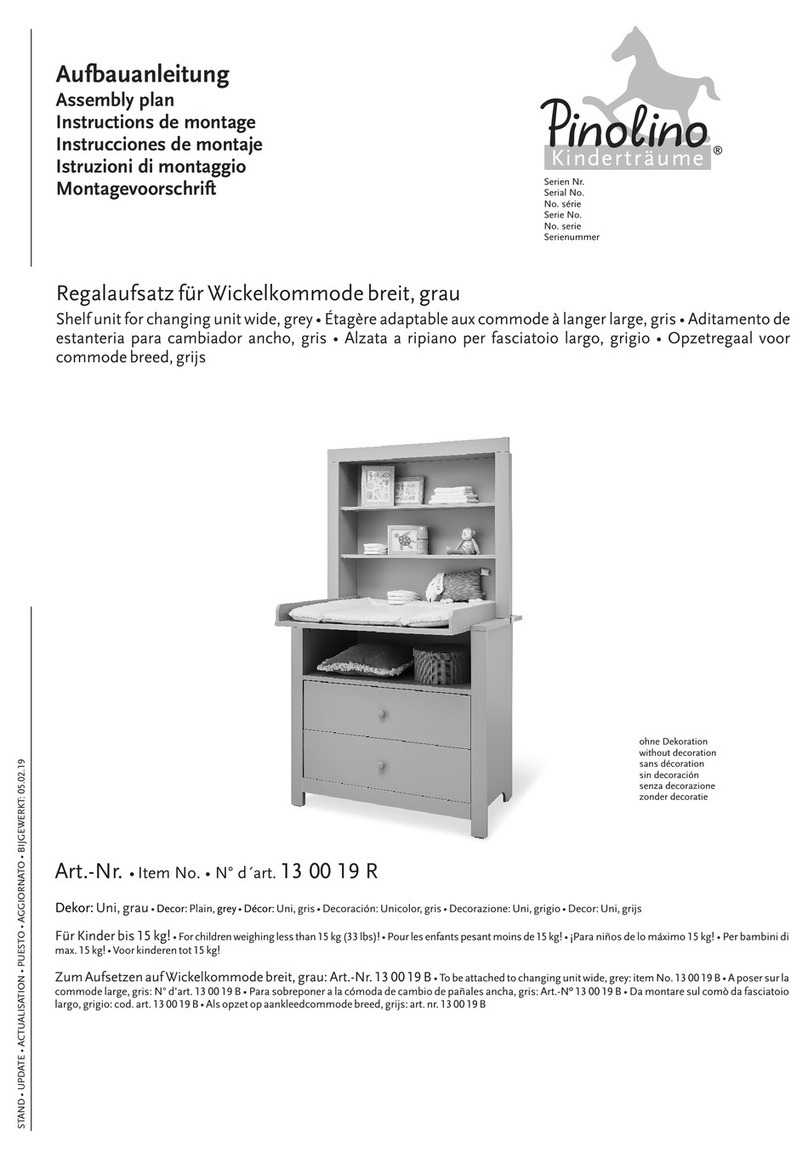
Pinolino 13 00 19 B User manual

Pinolino

Pinolino 13 00 19 B User manual

Pinolino Wardrobe Pan large 14 34 20 G User manual

Pinolino

Pinolino Wardrobe Pan large 14 34 20 G User manual

Pinolino Laura User manual

Pinolino

Pinolino Laura User manual

Pinolino 14 00 19 G User manual

Pinolino

Pinolino 14 00 19 G User manual

Pinolino 13 00 19 R User manual

Pinolino

Pinolino 13 00 19 R User manual

Popular Indoor Furnishing manuals by other brands

Furniture of America CM3546RT Assembly instructions

Furniture of America

Furniture of America CM3546RT Assembly instructions

Rapidline RC5-O GW Assembly instructions

Rapidline

Rapidline RC5-O GW Assembly instructions

Bell'O WAVS331 Assembly instructions

Bell'O

Bell'O WAVS331 Assembly instructions

Amart Furniture Rose Bay 64421 Assembly instruction

Amart Furniture

Amart Furniture Rose Bay 64421 Assembly instruction

Coaster 2408 Assembly instructions

Coaster

Coaster 2408 Assembly instructions

Crate&Barrel Cameo manual

Crate&Barrel

Crate&Barrel Cameo manual

Next MILANO 896267 Assembly instructions

Next

Next MILANO 896267 Assembly instructions

AlfrescoPlus BBQ MODULE Assembly instructions

AlfrescoPlus

AlfrescoPlus BBQ MODULE Assembly instructions

Forte Bohol BHLB01 Assembling Instruction

Forte

Forte Bohol BHLB01 Assembling Instruction

ZEITRAUM SNOOZE MDF Assembly instructions

ZEITRAUM

ZEITRAUM SNOOZE MDF Assembly instructions

Sedus netwin Instructions for use

Sedus

Sedus netwin Instructions for use

Sunnydaze Decor AGR-355 Assembly instructions

Sunnydaze Decor

Sunnydaze Decor AGR-355 Assembly instructions

Minka ERIK manual

Minka

Minka ERIK manual

Whittier Wood 4651AFDHa Assembly instructions

Whittier Wood

Whittier Wood 4651AFDHa Assembly instructions

PATIOJOY HW68244-12 manual

PATIOJOY

PATIOJOY HW68244-12 manual

Safavieh Furniture Julian AMH4103A quick start guide

Safavieh Furniture

Safavieh Furniture Julian AMH4103A quick start guide

KEUCO Royal 15 14405 171301 Instructions for use

KEUCO

KEUCO Royal 15 14405 171301 Instructions for use

Bonaldo AX Console manual

Bonaldo

Bonaldo AX Console manual

manuals.online logo
manuals.online logoBrands
  • About & Mission
  • Contact us
  • Privacy Policy
  • Terms and Conditions

Copyright 2025 Manuals.Online. All Rights Reserved.