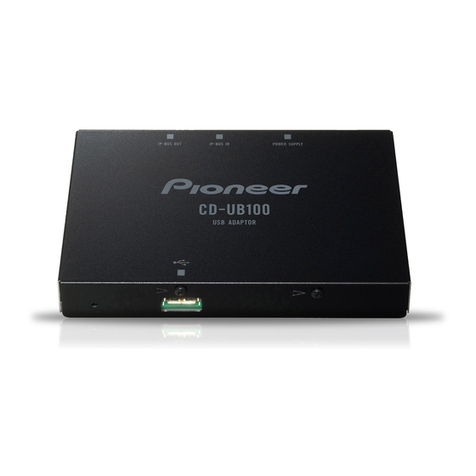
Pioneer CD-UB100 User manual


GBefore
You
Start
Information to User 3
For
Canadian model 3
About this unit 3
About this manual 3
After-sales service for Pioneer products 4
Visit
our
website 4
AboutWMA
4
About MP3 5
AboutAAC
5
Resetting the microprocessor 5
About handling the USB portable audio
player/USB memory 5
Connecting and disconnecting the USB
portable audio player/USB memory 6
Q)
Playing songs
on
USB
portable audio
player/USB memory
Basic Operations 7
Selecting
an
audio file directly
in
the current
folder 8
Introduction of advanced operations 8
Selecting arepeat play range 8
Playing files in random order 8
Scanning folders and files 9
Pausing playback 9
Displaying text information of
an
audio
file 9
Scrolling text information
in
the display
10
Selecting files from the file name list
10
~
Operating with different head units
Using
as
an external unit
11
Function compatibility charts
11
-Head unit group 1
11
-Head unit group 2
12
-Head unit group 3
12
-Head unit group 4
13
Displaying text information
13
CI)
En
Selecti
ng
arepeat play range
13
Scanning folders and files
14
Playing files in random order
14
~
Connections
Connecting the units
16
~
Installation
Installing this unit
17
-Mounting with Velcro fasteners
17
e
Additional
Information
Error messages
18
USB audio player/USB memory
compatibility
18
Compressed audio compatibility
18
-
The
sequence of audio files on USB
memory
19
-Compressed audio files
19
Specifications
20

C
B_e_fo_r_e_'/l_o_u_s_ta_rt
)
Section
C )
CD
Information
to
User
Alteration
or
modifications carried out without
appropriate authorization may i
nval
idate the
user's right
to
operate the equipment.
For
Canadian
model
This Class Bdigital apparatus complies with
Canadian
ICES-003.
About
this
unit
This
unit
is the adapter
for
aPioneer head
unit
featuring an IP-BUS input to control and listen
to songs on aportable audio player with a
USB interface.
You
can listen
to
songs
by
connecting USB
portable audio player/USB memory that
is
USB Mass Storage Class compliant.
For
de-
tails about the supported USB memory, refer
to
USB
audio player/USB memory compatibility
on page
18.
•This
unit
is
designed
for
use in vehicles
only.
•This
unit
can play back WMA/MP3/AAC
files.
For
details about the supported file
format, refer to Compressed audio compat-
ibility on page
18.
AWARNING
Handling the cord
on
this product or cords asso-
ciated with accessories sold with the product
may expose you to chemicals listed
on
proposi-
tion
65
known to the State of California and other
governmental entities to cause cancer and
bi
rth
defects
or
other reproductive harm.
Wash
hands
after
handling.
ACAUTION
Do
not allowthis unit to come into contact
with liquids. Electrical shock could result.
Also, this
unit
damage, smoke, and overheat
coul"d
result from contact with liquids.
Keep this manual handy
as
areference
for
op-
erating procedures and precautions.
Always keep the volume low enough so that
you can hear sounds from outside the vehicle.
Protect this
unit
from moisture.
Should this product fail to operate properly,
contact your dealer or nearest authorized
Pioneer Service Station.
~
Important (Serial number)
The
serial
number
is located on the bottom of
this unit.
For
your own security and convenience,
be
sure to record this
number
on
the enclosed
warranty card.
~
About
this
manual
Operate this
unit
with the connected head
unit. Instructions in this manual use DEH-
PS9001B,
DEH-PS90IB
as
an example of head
unit.
When using the head units otherthan DEH-
PS9001B,
DEH-PS90IB, refer to Operating with
dIfferent head
units
on page
11.
We
recommend
that
you familiarize yourself
with the functions and
their
operation
by
read-
ing through the manual before you begin
using
this
unit. It
is
especially important
that
you read and observe WARNINGs and CAU-
TIONs in this manual.
~
.~
m
::::J
'8.
iii-
:r
En
CD
Section
liD(Before You
Start
)
(------------)
After-sales service
for
Pioneer products
Please
contact
the
dealer
or
distri
butor
from
where you purchased
this
unit
for
after-sales
service
(i
ncluding warranty conditions)
or
any
other
information.
In
case
the
necessary infor-
mation
is
not
available, please
contact
the
companies
listed below:
Please do
not
ship
your
unit
to
the
companies
at
the
addresses listed below
for
repair
without
advance contact.
U.S.A.
Pioneer Electronics
(USA)
Inc,
CUSTOMER
SUPPORT
DIVISION
PO,
Box
1760
Long
Beach, CA 9080:
-1760
800-421-
1404
CANADA
Pioneer Electronics of Canada, Inc,
CUSTOMER
SATISFACTION
DEPARTMENT
300
Allstate Parkway
Markham, Ontario
L3R
OP2
1-877
-283-5901
For
warranty
information
please see
the
Li
m-
ited Warranty sheet included
with
th
is unit.
C!J
Visit
our
website
Visit us at
the
following site:
~
http://www.pioneerelectronics.com
~
Register your product.
We
will
keep
the details
of
you
r
pu
rchase
on
fi
Ie
to
hel
p
you
refer to
th
is
information
in
the event of
an
insurance
claimsuch
as
loss or theft.
2Receive updates
on
the latest products and
technolog
ies.
CD
En
3Download owner's manuals, order product
catalogues, research new products, and
much more.
C!J
AboutWMA
The
Windows
Media™
logo printed on
the
box
indicates
that
this
unit
can play back
WMA
data.
WMA
is
short
for
Windows
Media™
Audio
and refers
to
an
audio
compression
technol-
ogy
that
is developed by
Microsoft
Corporation.
WMA
data
can
be
encoded
by
using
Windows
Media
Player version 7
or
later.
Windows
Media
and
the
Windows
logo are tra-
demarks
or
reg istered
trademarks
of
Microsoft
Corporation in
the
United States
and/or
other
countries.
ONate
This unit may not operate correctly depending
on
the application used to encode
WMA
fi
les.
C!J

C_B_e_fo_r_e_'/l_o_u_S_ta_rt
)
Section
C )
GI
AboutMP3
Supply of
this
product only conveys alicense
for
private, non-commercial use and does not
convey alicense nor imply any right to use
this
product in any commercial (i.e. revenue-
generating) real time broadcasti
ng
(terrestrial,
satellite, cable and/or any other media), broad-
casting/streaming via internet, intranets
and/
or
other networks
or
in other electronic con-
tent distribution systems, such
as
pay-audio
or
audio-on-demand applications. An indepen-
dent license
for
such use
is
required.
For
de-
tai
Is,
please visit
http://www.mp3Iicensing.com.
~
AboutAAC
MC
is
short
for
Advanced Audio Coding and
refers to
an
audio compression technology
standard used with M
PEG
2and M
PEG
4.
Several applications can
be
used to encode
MC
files, but file formats and extensions dif-
fer depending on the application
which
is
used to encode.
This
unit
plays back
MC
files encoded
by
iTunes®
version 6.0.5 and earlier.
iTunes
is
atrademark of Apple Computer, Inc.,
registered in
the
U.S.
and other countries.
~
Resetting the
microprocessor
The microprocessor
must
be
reset underthe
following conditions:
•Prior to using
this
unit
for
the first
time
after installation
•If the
unit
fai
Is
to operate properly
•When strange
or
incorrect messages ap-
pear on the display
•
Press
RESET
with
apen
tip
or
other
pointed instrument.
RESET
button
About
handling
the
USB
portable
audio
player/USB
memory
ACAUTION
•Pioneer accepts no responsibility for data lost
on
the USB portable aud
io
player/USB mem-
ory
even
if that data
is
lost while using this
unit.
•
Do
not leave the USB portable audio player/
USB memory in direct sunlight for extended
amounts of time. Extended exposure to direct
sunlight can result in USB portable audio
player/USB memory malfunction due to the
resulting high temperature.
•
Do
not leave the USB portable audio player/
USB memory
in
any location with ahigh tem-
perature.
•Firmly secure the USB portable audio player/
USB memory when driving.
Do
not let the
USB portable audio player/USB memory fall
onto the floor, where it may become jammed
underthe brake or accelerator pedal.
For
more details, refer to the manual
for
the
USB portable audio player/USB memory.
~
m
~
~
iii"
:r
En
CD

Section
m(
Before
You
Start
)c )
Connecting and disconnecting
the
USB
portable audio playerl
USB
memory
•Connect
the
USB
portable audio playerl
USB
memory
to
this unit.
About the way to connect the USB portable
audio player/USB memory to this
unit,
refer to
Connecting the units
on
page
16.
•
You
can disconnect the USB portable audio
player/USB memory anytime you want to finish
listening to.
•Refer to
USB
audio
player/USB
memory
com-
patibility on page
18
and use aUSB portable
audio player/USB memory that is compatible.
Some USB portable audio players/USB memory
devices which meet the compatibility require-
ments may not operate properly with this unit.
•Partitioned USB memory is not compatible
with
this
unit.
•Depending on the kind of USB portable audio
player/USB memory
you
use,
this unit may not
re-
cognize the USB audio player/USB memory
or
audio files may not
be
played back properly.
•
You
cannot connect aUSB portable audio
player/USB memory to this
unit
via aUSB hub.
•
Do
not connect anything otherthan the USB
portable audio player/USB memory.
BNote
When the USB portable audio player having bat-
tery charging function connects to this unit and
the ignition switch is set to ACC
or
ON,
the bat-
tery is charged.
~
m
En

3
To
perform fast
forward
or
reverse,
push and hold MULTI-CONTROL
left
or
right.
Playing songs
on
USB
portable
audio
playerl
USB
memory
Basic
Operations
CD
MP3IWMA/AAC
indicator
Shows
the
type
of
file
currently
playing.
@Folder number indicator
Shows
the
folder
number
currently
playing.
®Track number indicator
Shows
the
track
(file)
number
currently
play-
ing.
@Play
time
indicator
Shows
the
elapsed playing
time
of
the
cur-
rent
track
(file).
®Bit rate indicator
Shows
the
bit
rate of
the
current audio fi
Ie.
1
Press
SOURCE
to
select
USB.
Playback starts.
•There may
be
aslight delay when starting
playback of audio files depending
on
the kind of
USB portable audio player/USB memory used.
2
Push
MULTI-CONTROL up or
down
to
select afolder.
•
You
cannot select afolderthat does not have
acompressed audio file recorded
in
it.
•
To
return to folder
01
(ROan,
press and hold
BAND (BAND/ESC). However, if folder
01
(ROan
contains no files, playback commences with
folder
02.
Section
[
J~
-------------------"
~
<s-
ui"
:::r
4
To
skip back or
forward
to
another
audio file, push MULTI-CONTROL
left
or
right.
Pushing
MULTI-CONTROL
right
skips
to
the
start
of
the
next
audio
file. Pushing
MULTI-CONTROL left
once
skips
to
the
start
of
the
current
audio
file.
Pushing
again
will
skip
to
the
previous
audio
file.
BNotes
•Playback is carried out in order of file number.
Folders are skipped if they containno
fi
les.
(If
folder
01
(ROan
contains no files, playback
commences with folder
02.)
•When playi
ng
back
fi
les
recorded
as
VBR
(variable bit rate) files, the play time will not
be
correctly displayed if fast forward
or
reverse
operations are used.
•When playing back VBR-recorded
WMA
files,
the average bit rate value
is
displayed.
•When playing back
VBR
(variable bit rate)-re-
corded MP3 files,
VBR
is
displayed instead of
bit rate
val
ue.
•There is no sound
on
fast forward or reverse.
•
If
an error message such
as
NO
AUDIO
is dis-
played, refer to Error messages
on
page
18.
•When the display setting
is
switched to the
text information
by
pressi
ng
DISPLAY, the text
automatically begin to scroll
in
the display.
When
Ever
Scroll is set to
ON
at the initial set-
ting, folder and file name scroll continuously.
About
Ever
Scroll, refer to the operation man-
ual of
DEH-P59001
B,
DEH-P5901
B.
0
En
CD

Section
lID
""-P-I-a-y-in-g-so-n-g-s-o-n-U-s-B---""""
portable
audio
playerl
USB
memory
Selecting an audio
file
directly in
the
current folder
When using the remote control, you can select
an aud
io
fi
Ie
directly
by
enteri
ng
the desi
red
track number.
1
Press
DIRECT.
Audio
file
number
input
display appears.
2
Press
0
to
9buttons
to
enter the desired
track number.
•
You
can cancel the input
number
by
pressing
CLEAR.
3
Press
DIRECT.
The audio file of entered
number
will
play.
iiiNote
After entering the
number
input mode, if you do
not perform an operation within about eight sec-
onds, the mode is automatically canceled.
(!J
Introduction
of
advanced
operations
1
Press
MULTI-CONTROL
to
display the
main menu.
FUNC,
AUDIO and ENTERTAINMENT appear
on the display.
2
Use
MULTI-CONTROL
to
select
FUNC.
Turn to change the menu option; press to
se-
lect.
The
function
name appears on the display.
3Turn MULTI-CONTROL
to
switch be-
tween
the
functions
in
the following order:
Play mode (repeat play)-Random mode
(random
play)-Scan
mode (scan
play)-
Pause
(pause)
(])
En
lJ
•
You
can also switch between the functions in
reverse order
by
turning
MULTI-CONTROL coun-
terclockwise.
•
To
retu
rn
to the playback display, press
BAND
(BAND/ESC).
iiiNote
If you do not operate the function within about
30
seconds, the display
is
automatically returned to
the playback display.
(!J
Selecting arepeat play range
There are three repeat play ranges:
Track repeat (one-file repeat), Folder repeat
(folder repeat), and All repeat (repeat all files).
1
Use
MULTI-CONTROL
to
select
Play mode
in
the
function menu.
2
Press
MULTI-CONTROL repeatedly
to
se-
lect the repeat range.
•Track repeat -Repeat
just
the current file
•Folder repeat -Repeat the current folder
•All repeat-Repeat all fi les
iiiNotes
•If you select another folder during repeat
play,
the repeat play range changes to All repeat.
•If you perform track search
or
fast forward/re-
verse during Track repeat, the repeat play
range changes to Folder repeat.
•When Folder repeat is selected, it
is
not pos-
si
ble to play back asubfolder of
that
folder.
(!J
Playing files in random order
Random play lets you play back files
in
aran-
dom order within the repeat play range,
Folder repeat and All repeat.

Pausing
playback
1Use MULTI-CONTROL
to
select Pause in
the
function menu.
Playing songs
on
USB
portable
audio
playerl
USB
memory
1Select
the
repeat range.
Refer to Selecting arepeat play range
on
the
previous page.
2Use MULTI-CONTROL
to
select
Random
mode
in
the
function menu.
3
Press
MULTI-CONTROL
to
turn
random
play
on.
Audio files will play in arandom order within
the previously selected Folder repeat
or
All repeat ranges.
•
To
turn
random playoff, press
MULTI-CONTROL again.
~
Scanning folders
and
files
While you are using Folder repeat, the begin-
ni
ng
of each fi
Ie
in the selected folder plays for
about
10
seconds. When you are usi
ng
All repeat, the beginning of the first file of
each folder
is
played
for
about
10
seconds.
1Select
the
repeat range.
Refer to Selecting arepeat play range
on
the
previous page.
2Use MULTI-CONTROL
to
select
Scan
mode in
the
function menu.
3
Press
MULTI-CONTROL
to
turn
scan
play
on.
The first
10
seconds of each file of the current
folder (or the first file of each folder)
is
played.
4
When
you find
the
desired file (or
folder) press MULTI-CONTROL
to
turn
scan
playoff.
The file (or folder) will continue to
play.
•If the display has automatically returned to
the
playback display, select Scan
mode
again
by
using MULTI-CONTROL.
•
After
file
or
folder scanning is finished, nor-
mal playback of
the
files will begin
again.~
Section
l
J;
ee.
en'
::T
2
Press
MULTI-CONTROL
to
turn
pause
on.
Playback of the current track pauses.
•
To
turn
pause off, press MULTI-CONTROL
again.~
Displaying
text
information
of
an audio file
•
Press
DISPLAY.
Press DISPLAY repeated
Iy
to switch between
the followi
ng
settings:
Play
time-Folder
name
(folder name) and
File
name
(file
name)-Artist
name
(artist
name) and Track
title
(track
title)-
Artist
name
(artist name) and Album
title
(album title)
-Album
title
(album title) and
Track
title
(track title)
-Track
title
(track title)
and play
time-Comment
(comment) and
playtime
•If
the
characters recorded on
the
audio file are
not compatible
with
a head unit, those characters
will not
be
displayed.
•If specific information has not been recorded
on an audio file,
title
or
name is not displayed.
•The text information of some audio files may
not
be
correctly displayed.
~
En
CD

Section
m
-P-I-a-y-in-g-so-n-g-s-o-n-U-S-B----
portable
audio
playerl
USB
memory
Scrolling
text
information
in
the
display
This
unit
can display the first
14
letters only of
Folder name, File name, Track title,
Artist name and Album title. When the
re-
corded information
is
longerthan
14
letters,
you can scroll the text to the left
so
that
the
rest of the text information can
be
seen.
•
Press
DISPLAY and hold until
the
text
information begins
to
scroll through
the
display.
ONate
When Ever Scroll is set to
ON
at the initial setting,
text information scrolls continuously
in
the dis-
play.
Refer to the operation manual of DEH-
P59001B,
DEH-P590IB.
[!J
Selecting
files
from
the
file
name
list
File name list lets you see the list of file names
(or folder names) and select one of them to
playback.
1
Press
LIST
to
switch
to
the
file name list
mode.
Names of files and folders appear in the d
is-
play.
2Use MULTI-CONTROL
to
select
the
de-
sired file name (or folder name).
Turn to change the name of file
or
folder;
press
to
play; push right to
see
alist of the
files (or folders) in the selected folder.
•
You
can also change the name of file or folder
by
pushing MULTI-CONTROL up or down.
•
To
retu
rn
to the previous Iist (the folder one
level higher), push MULTI-CONTROL left.
®
En
[ J
•If the folder/file
number
is
more than
100,
last
2-digit of the folder/file
number
is displayed.
•Numberof the folders/files in the currently
se-
lected folder will
be
indicated on the right side of
the display.
•If you do not operate the list within about
30
seconds, the file name list mode is canceled
automatically. [!J

Function compatibility
charts
II
Notes
•There may
be
a
slight
delay when starting
playback of audio files depending on the kind
of USB portable audio player/USB memory
used.
•
You
cannot select afolder
that
does not have
acompressed audio file recorded in it.
•Playback is carried out in order of file number.
Folders are skipped if they contain no files. (If
folder
01
(ROOT)
contains no fi
les,
playback
commences with folder
02.)
•When playing back files recorded as VBR
(variable bit rate) fi
les,
the play time wi
II
not
be
correctly displayed if fast forward
or
reverse
operations are used.
•There
is
no sound on fast forward
or
reverse.
•If an error message such as NO AUDIO
is
d
is-
played, refer to Error messages on page
18.
Section
[
JCB
----------------"
...
m
::J
ee.
(ir
:::T
Operating
with
different
head
units
Head
unit
group
1.
The following head units featuring FUNCTION
button operation or
SOFT
KEY
operation.
DEH-P9600MR
DEH-P7700MR
DEH-P6800MR
DEH-P6700MR
DEH-P5850MR
DEH-P5800MR
DEH-P4900MR
DEH-P4800MR
DEH-P4700MR
DEH-P3900MR
DEH-P3800MR
DEH-P3700MR
DEH-P2900MR
DEH-P960MR
DEH-P760MR
DEH-P670MR
DEH-P660,
DEH-P580MR
DEH-
P490MR
DEH-P480MR
DEH-P470MR
DEH-
P390MR
DEH-P26,
DVH-'P580MR
FH-
P5000MP
Using as
an
external
unit
The following head units operate this unit
as
an
external unit.
For
more details about the
ex-
ternal unit, refer to the head unit's manual.
•1
KEY
to
6KEY doesn't
be
used to operate
this unit.
Head
unit
group
2
The following head units featuring
MULTI-CONTROL operation.
DEH-P9800BT,
DEH-P8600MR
DEH-P7900B-r,
DEH-P7800MR
DEH-P6900UB,
DEH-P6800MR
DEH-P980BT,
DEH-P880PRS,
D.EH-P860MR
DEH-P790BT,
DEH-P780MR
DEH-P690UB,
DEH-P680MR
DEH-P80MR
DEH-P80RS,
DEH-
P8MR
DEH-P1Y
Head
u.,it
group
3
The following head units featuring touch
panel
key
operation.
AVH-P7600DVD,
AVH-P5750DVD,
AVH-
P5700DVD
Head
unit
group
4
The following head units are navigation units
featu
ri
ng
touch panel
key
operation.
AVIC-D2,
AVIC-N2,
AVIC-N3,
AVIC-Z1
C!J
Head
unit
group
1
Controls
Select
USB
as aPress SOURCE.
source
Select a
folder
Press ...
or
T.
Skip back or forward Press
~
or~.
to
another
song
*1
Fast
forward/re- Press and hold
~
or
~.
verse*2
Return
to
folder
01
Press and hold BAND
(ROOn*3. (BAND/ESC).
Select a
function
Press
FUNalON
(FUNC).
Pause asong Press
...
or
Tin FUNC1 (F1).
Switch
the
display Press
...
or
Tin FUNC2 (F2).
*1
You
can use
this
function when you select AUTO
in
AUTO/MANUAL (AIM).
*2
You
can use this function when you select MANUAL
in
AUTO/MANUAL (AIM).
*3
If folder
01
(ROOT)
contains no files, playback commences with folder
02.
En
CID

Section
D
Operating
with
different
head
units
Controls
lJ
Controls
Scroll
the
title
Turn scan play on or
off
Select arepeat play
range
Press and hold ... or Tin
FUNC2 (F2).
Press
...
or
Tin
FUNC3 (F3).
Press
...
or
Tin
FUNC4 (F4).
Turn random play on Press and hold MULTI-CON-
or
off TROL
in
FUNC4 (F4).
Switch between Press MULTI-CONTROL in
AUTO
and
MANUAL
AUTO/MANUAL
(AIM).
Turn random play on Press and hold
...
or Tin
or
off FUNC4 (F4). Head
unit
group
3
Switch between Press
....
or
~
in AUTOI
AUTO
and
MANUAL
MANUAL
(AIM).
Controls
Select
USB
as
a
source
Select afolder
Press SOURCE.
Touch ...
or
T.
Head
unit
group
2
Controls
Skip back
or
for'f;ard Touch
....
or~.
to
another
song
Fast
forward/reverse*2 Keep
touching
....
or~.
Select
USB
as aPress
SOURCE.
source
Select a
folder
Push MULTI-CONTROL up
or
down.
Skip back or forward Push MULTI-CONTROL left
to
another
song
*1
or
right.
Fast
forward/re- Push and hold MULTI-CON-
verse*2 TROL left
or
right.
Return to
folder
01
Press and hold BAND
(ROOT)*3.
(BAND/ESC).
Select a
function
Use MULTI-CONTROL.
Pause asong Press MULTI-CONTROL in
FUNC1
(F1).
Switch the display Press MULTI-CONTROL in
FUNC2 (F2).
Scroll
the
title Press and hold MULTI-CON-
TROL
in
FUNC2 (F2).
Turn scan play
on
or Press MULTI-CONTROL in
off FUNC3 (F3).
Select arepeat play Press MULTI-CONTROL in
range FUNC4 (F4).
Return to
folder
01
(ROOT)
*3,
Select a
function
Pause asong
Switch the display
Scroll
the
title
Turn scan play on or
off
Select arepeat play
range
Turn random play on
or off
Switch between
AUTO
and
MANUAL
Keep
touching
BAND.
Touch
A.MENU
and then
touch
FUNCTION.
Touch
...
Tin
FUNaION1.
Touch
...
Tin FUNCTION2,
Keep
touching'"
Tin FUNC-
TION2.
Touch
...
Tin FUNCTION3,
Touch
...
Tin
FUNCTION4,
Keep
touching'"
Tin FUNC-
TION4.
Touch
....
or
~
in AUTOI
MANUAL.
*1
You
can use this function when you select AUTO
in
AUTO/MANUAL (A/M),
*2
You
can use
this
function when you select MANUAL
in
AUTO/MANUAL (A/M),
*3
If
folder
01
(ROOT)
contains no files, playback commences with folder
02.
ill)
En

Operating
with
different
head
units
Section
( J
CD
------------------
Head
unit
group
4
Controls
Select
USB
as
a
source
Select afolder
Ski
pback or forward
to another song
*1
Fast
forward/re-
verse
*2
Return to folder
01
(ROOT)*3,
Select afunction
Pause
asong
Switch the display
Scroll the title
Turn
scan play
on
or
off
Select arepeat play
range
Press
SOURCE.
Touch
...
or
T.
Touch
....
or~.
Keep
touching
....
or~.
Keep
touching BAND.
Touch
A.MENU
and
then
touch FUNCTION.
Touch
SEND
in
FUNCTION1.
Touch
SEND
in
FUNCTION2,
Keep
touchi
ng
SEND
in
FUNCTION2.
Touch
SEND
in
FUNCTION3,
Touch
SEND
in
FUNCTION4.
Folder
number-track
number-play
time-
folder
name-file
name-album
title-track
title-artist
name
•If the characters recorded
on
the audio file are
not compatible with ahead unit, those characters
will not
be
displayed.
II
Notes
When using
this
unit
as
an
external unit, head
units can display the first 8letters of the folder
name, the file name, the album title, the song
title, the artist name.
If the characters recorded
on
the audio file are
not compatible with ahead unit, those char-
acters will not
be
displayed.
If specific information has not been recorded
on
an
audio file, title or name
is
not displayed.
The text information of some audio files may
not
be
correctly displayed.
You
can scroll to the left the folder name, the
file name, the album title, the song title, the
artist name.
C!J
Turn
random play
on
Keep
touching SEND
in
or off FUNCTION4.
Switch between
AUTO
and
MANUAL
Touch
AUTO/MANUAL.
Displaying
text
information
Text
information recorded
on
the audio file can
be
displayed.
•Select
the
desired information.
Refer to Function compatibility ch'arts
on
page
11.
Selecting arepeat play range
There are th
ree
repeat play ranges:
TRK
(one-
fi
Ie
repeat),
FLO
(folder repeat)Iand
ALL
(re-
peat all files).
•Select
the
repeat range.
Refer to Function compatibility charts on page
11.
•
TRK
-Repeat
just
the current file
•
FLD
-Repeat the current folder
•
ALL
-Repeat all files
*1
You
can use this function when you select AUTO
in
AUTO/MANUAL (A/M).
*2
You
can use this function when you select MANUAL
in
AUTO/MANUAL (A/M).
*3
If
folder
01
(ROOT)
contains no files, playback commences with folder
02.
En
(ill

Section
m
.-O-p-e-r-a-t-in-g-w-i-th-d-iff-e-re-n-t----
head
units
I!INotes
•If you select another folder during repeat
play,
the repeat play range changes to
ALL.
•If you perform track search or fast forward/re-
verse during
TRK,
the repeat play range
changes
to
FLO.
•When
FLO
is selected, it is not possible to play
back asubfolder of that folder.
[!J
Scanning
folders
and
files
Whi
Ie
you are using
FLO,
the beginning of
each file in the selected folder plays
for
about
10
seconds. When you are using
ALL,
the
be-
ginning
of
the first file of each folder is played
for
about
10
seconds.
1
Select
the repeat range.
Refer to Function compatibility charts on page
11.
•
FLO
-the beginning of each file
in
the
se-
lected folder plays for about
10
seconds
•
ALL
-the beginning of the first file of each
folder is played for about
10
seconds
2
Turn
scan
play
on.
Refer to Function compatibility charts on page
11.
3When you find the desired file (or
folder) turn
scan
playoff.
The file (or folder) will continue to play.
•If the display has automatically returned to
the playback display, select scan play on/off
mode again.
•After file
or
folder scanning is finished, nor-
mal playback of the files will begin again.
[!J
(ill
En
( J
Playing files in random order
Random play lets you play back files
ina
ran-
dom order
within
the repeat play range,
FLO
and
ALL.
1
Select
the repeat range.
Refer to Function compatibility charts on page
11.
•
FLO
-Play back audio files
in
arandom
order within the selected folder
•
ALL
-Play back all the audio files in aran-
dom order
2
Turn
random play
on.
Refer to Function compatibility charts on page
11.~

CConnections )Section
C )
C!D
~Important
•Use this
unit
in otherthan the following cond
i-
tions could result
in
fire or malfunction.
-Vehicles with a12-volt battery and negative
grounding.
•
To
prevent short-circuit, overheating or mal-
function,
be
sure to follow the directions
below.
-Disconnect the negative terminal of the
battery before installation.
-Secure the wiring with cable clamps or
ad-
hesive tape.
To
protect the wiring, wrap ad-
hesive tape around them where they lie
against metal parts.
-Place all cables away from moving parts,
such
as
gear shift and seat rails.
-Place all cables away from hot places,
such
as
nearthe heater outlet.
-
Do
not pass the yellow cable through a
hole into the engine compartment to con-
nect to abattery.
-
Do
not shorten any cables.
-Never
cut
the insulation of the power cable
of this
unit
in
orderto share the power to
other equipment. Current capacity of the
cable is limited.
-Use afuse of the rating prescribed.
•IP-BUS connectors are color-coded.
Be
sure
to connect connectors of the same color.
•Place antenna cable
as
far away
as
possible
from the other cables to prevent noise.
•Black cable is ground. This cable and other
product's ground cable (especially, high-cur-
rent products such
as
power amp) must
be
wired separately. Otherwise, fire or malfunc-
tion may result if they are accidentally
de-
tached.
•
Do
not connect anything otherthan the USB
portable audio player/USB memory.
•Plug the terminal of the USB portable audio
player/USB memoryfirmly into the connector
to connect, otherwise this unit may not work
properly
or
an error may
be
displayed on the
head unit.
En
®

Section
m(Connections
Connecting
the
units
)c )
®
En
To
(blue)
Connect
the
USB portable audio player
(sold separately)
or
USB
memory
(sold separately).
If necessary, use aUSB cable (sold separately)
to
connect
the USB portable audio
Yellow
To
terminal
always supplied
with
power
regardless of
ig
nition
switch
position.
Black
(ground)
To
vehicle (metal) body.
Fuse
(3
A)

C
Installation
)
----.
--------
Section
C )
G1
~Important
•Check all connections and systems before
final installation.
•Do not use unauthorized parts. The use of un-
authorized parts may cause malfunctions.
•Consult with your dealer if installation
re-
quires drilling of holes or other modifications
of the vehicle.
•
Do
not install
this
unit
where:
-it may interfere with operation of the
veh
i-
cle.
-it may cause injury to apassenger
as
a
re-
su
It of asudden stop.
•When
mounting
this unit, make sure none of
the leads are trapped between this
unit
and
the surroundi
ng
metalwork or fittings.
•
Do
not
mount
this
unit
nearthe heater outlet,
where it wou
Id
be
affected
by
heat, or near the
doors, where rainwater
might
splash onto it.
•Before drilling any mounting holes always
check behind where you want to d
ri
II
the
holes.
Do
not drill into the gas line, brake line,
electrical wiring or other important parts.
•
If
this
unit
installed in the passenger compart-
ment,
anchor
it securely
so
it does not break
free while the vehicle
is
moving, and cause in-
jury
or
an
accident.
•
If
th
is
unit
is installed under afront seat,
make su
re
it does not obstruct seat move-
ment. Route all leads and cords carefuIly
around the sliding mechanism
so
they do not
caught
or
pinched in the mechanism and
cause ashort-circuit.
Installing this
unit
Mounting
with
Velcro fasteners
Thoroughly wipe off the surface before affixing
the Velcro fasteners.
•If the Velcro fasteners (hard) adhere to the
car
mat
directly, you may install this
unit
without
using the Velcro fasteners (soft).
•
Mount
this
unit
using
the
Velcro fasten-
ers.
Car
mat
or chassis
En
GD

Appendix
It
C---A-d-d-i-ti-o-n-a-I-In-f-o-rm-a-ti-o-n--)
(----------)
Message Cause Action
Compressed
audio
compatibility
•Up to
15
000
files on a USB portable audio
player/USB memory can
be
played back.
USB
audio
player/USB
memory
compatibility
•Specification: USB
2.0
full speed
•USB Class: MSC (Mass Storage Class)
de-
vice
•Protocol: bulk
•
Maximum
amount
of memory:
250
GB
•File system:
FAT12,
FAT16,
FAT32
•Supply current:
500
mA
a
Notes
Partitioned USB memory
is
not compatible
with
this
unit.
Depending
on
the kind of USB portable audio
player/USB memory you use,
this
unit
may
not recognize the USB audio player/USB
memory
or
audio files may not
be
played back
properly.
You
cannot
connect aUSB portable audio
player/USB memory to this
unit
via aUSB
hub.~
Transfer audio files
not protected
by
Windows
Media
DRM 9/10 to the
USB portable
audio player/USB
memory
and con-
nect.
All
the
files on
the connected
USB portable
audio player/
USB
memory
are
protected
by
Windows
Media
DRM 9/10
PROTECT
N/A
USB The USB device Connect aUSB
connected to is portable audio
not supported
by
player
or
USB
this
unit. memory
that
is
USB Mass Storage
Class compliant.
CHK USB The USB connec- Confirm
that
the
tor
or USB cable USB connector or
is
short-circuited. USB cable is not
caught
in some-
thing
or
damaged.
The connected Disconnect the
USB portable USB portable
audio player/ audio player/USB
USB memory memory and do
consumes more not use it. Turn the
than 500
mA
ignition switch to
(maximum
allow-
OFF,
then to ACC
able current).
or
ON
and then
connect the com-
pliant USB porta-
ble audio player/
USB memory.
NO
AUDIO
No songs Transfer the audio
files to the USB
portable audio
player/USB mem-
ory and connect.
USB memory Follow the USB
with security en- memory instruc-
abled is con-
tions
to disable the
nected security.
DRM
SKIP The connected Play an audio file
USB portable not protected
by
audio player/ Windows Media
USB memory DRM 9/10.
contains
WMA
files
that
are pro-
tected
by
Windows
Media
DRM 9/10
Message Cause Action
Error
messages
When you contact your dealer
or
your nearest
Pioneer Service Center,
be
su
re
to record the
error message.
(ill
En

(Additional
Information)
Appendix
(----------)
II
•Up to
500
folders on aUSB portable audio
player/USB memory can
be
played back.
•There may
be
aslight delay when starting
playback of audio files on aUSB portable
audio player/USB memory with numerous
folder hierarchies.
•File extensions such as .wma, .mp3 or.m4a
must
be
used properly.
•Only
64
characters from the beginning can
be
displayed
as
afile name (including the
extension such
as
.wma, .mp3 or.m4a)
or
a
folder name.
Depending on the character sets, only the
first
32
characters may
be
displayed.
•The text information of some audio files
may not
be
correctly displayed.
•There may
be
aslight delay when starting
playback of audio files encoded with image
data.
The sequence
of
audio
files
on
USB
memory
For
USB
portable audio
players,
the
sequence
is
different from that
of
USB
memory and
de-
pends
on
the
player.
Example
of
ahierarchy
CJ:
Folder
Il
Compressed audio file
Level
1
Level
2
Level
3
Level
4
•
01
to
05
represent assigned folder num-
bers.
CD
to ®represent the playback
se-
quence. The user cannot assign folder
numbers and specify the playback
se-
quence with
this
unit.
•The sequence of audio files/folders to
be
played back, selected
by
the scan play and
displayed in the file name list
is
determined
as
follows:
-The sequence of files
is
given priority
over the sequence of subfolders.
-
In
afolder, the sequence of audio files/
subfolders
is
the same
as
the order you
copy from apersonal computerto the
USB memory.
However, the sequence may
be
altered
de-
pending on the settings and the operating
system of the personal computer.
Also, when you select several folders/files
at one time and copy to the USB memory,
the expected sequence of audio files to
be
played back, selected and .displayed may
not coincide with the actual sequence.
•If you want
to
specify the sequence of the
audio files, refer to
Example
of
ahierarchy
on this page and copy the folders/files in
order.
-
We
recommend
that
you specify the file
names in the desi
red
playback
se-
quence (e.g., 001xxxxx.mp3
for
the first,
099yyyyy.wma
for
99th, etc.).
Compressed
audio
files
WMA
•Compatible format:
WMA
encoded
by
Windows Media Player
Ver.
7,
7.1,8,9
or
10
•Bit rate: 5kbps to
384-
kbps (CBR), VBR
•Sampling frequency:
32
kHz,
44.1
kHz,
48
kHz
•Windows Media Audio 9Professional,
Loss-
less, Voice: No
En
(ill

Appendix
•
C-A-d-d-i-ti-o-n-al-I-n-fo-r-m-a-t-io-n-)
MP3
Compatible format: MPEG-1,
2,
2.5
Audio
Layer 3
Bit
rate: 8kbps to
320
kbps (CBR), VBR
Sampling frequency: 8kHz to
48
kHz
(32,
44.1,48 kHz
for
emphasis)
Compatible
103
tag version:
1.0,
1.1,2.2,
2.3,
2.4
(103
tag Version
2.x
is given priority
than Version
1.x.)
M3u playlist: No
MP3i (MP3 interactive), mp3
PRO:
No
AAC
Compatible format:
MC
encoded
by
iTunes®
version 6.0.5 and earlier
Sampling frequency: 8kHz to
48
kHz
Transmission rate:
16
kbps to
320
kbps
MC
file bought on the iTunes Music Store
(.m4p file extension): No
Apple Lossless: No
C!J
®
En
C )
Specifications
General
Power
sou
rce
".""
14.4
V
DC
(10.8
Vto
15.1
V
allowable)
Grounding system
...
"""""."". Negative type
Max.
current consumption
........
""""""""""
..
"
..
""".""""",,2.0 A
Dimensions
(W
xHx
D)
."
146
x
24
x
90
mm
(5-3/4
x1x
3-1/2
in.)
Weight
."
.........
""."""
...
""""
...
"."
0.32
kg
(0.7
Ibs)
USB
Specification """ """ """
USB
2.0
full
speed
Supply current """" """".500 mA
Maximum amount
of
memory
""""
..
""."""""""
..
"."."
..
""".250
GB
File
system """
..
"
..
"""""""
"."
FAT12, FAT16,
FAT32
Maximum number
of
files ".15000
Maximum number
of
folders
........
"."
"" " """.500
MP3
decoding format ".""
MPEG-1,
2&
2.5
Audio
Layer
3
WMAdecoding format "
.......
Ver.
7,
7.1,
8,
9,10
(2ch
audio)
(Windows Media
Player)
AAC
decoding format
....
"
......
MPEG-4
AAC
(iTunes®
en-
coded
only)
Audio
Signal-to-noise ratio
.......
"
....
"
95
dB
(1
kHz)
(IHF-A
net-
work)
Dynamic
range
" "
95
dB
(1
kHz)
Channel separation
..
"
..
" "
90
dB
(1
kHz)
Number
of
channels
......
" 2
(stereo)
UNote
Specifications and the design are subject to
pos-
sible modifications without notice due to im-
provements.
C!J
Other manuals for CD-UB100
2
Table of contents
Other Pioneer Adapter manuals

Pioneer
Pioneer CD-IB100II User manual

Pioneer
Pioneer CD-BTB100 User manual

Pioneer
Pioneer CD-IB100 II User manual

Pioneer
Pioneer as-bt100 User manual

Pioneer
Pioneer AS-BT200 User manual

Pioneer
Pioneer CD-IB100 II User manual

Pioneer
Pioneer CD-BTB200 User manual

Pioneer
Pioneer CD-UB100 User manual

Pioneer
Pioneer CD-BTB100 User manual

Pioneer
Pioneer SDA-11DAB User manual
Popular Adapter manuals by other brands

Ubiquiti
Ubiquiti mPower mini Quick start guides

SMC Networks
SMC Networks EZ Connect SMC2670W Specification sheet

Alvarion
Alvarion WCPEn-2400-U datasheet

TP-Link
TP-Link TL-PA201 STARTER Specifications

ORION TELESCOPES & BINOCULARS
ORION TELESCOPES & BINOCULARS 5264 quick start guide

Asus
Asus WL-106g quick start guide