manuals.online logo
Brands
  1. Home
  2. •
  3. Brands
  4. •
  5. Pioneer
  6. •
  7. Car Stereo System
  8. •
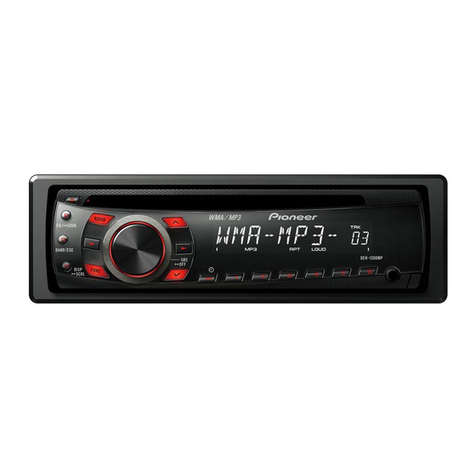
  9. Pioneer KEH-P4010R User manual

Pioneer KEH-P4010R User manual

Other manuals for KEH-P4010R

1

This manual suits for next models

3

Other Pioneer Car Stereo System manuals

Pioneer GX470 User manual

Pioneer

Pioneer GX470 User manual

Pioneer DEH-9350SD User manual

Pioneer

Pioneer DEH-9350SD User manual

Pioneer DEH-P3700MP - Radio / CD User manual

Pioneer

Pioneer DEH-P3700MP - Radio / CD User manual

Pioneer DEH-P7150UB User manual

Pioneer

Pioneer DEH-P7150UB User manual

Pioneer DEH-P9600MP User manual

Pioneer

Pioneer DEH-P9600MP User manual

Pioneer DEH P5800MP User manual

Pioneer

Pioneer DEH P5800MP User manual

Pioneer SCU 2556 ZRN User manual

Pioneer

Pioneer SCU 2556 ZRN User manual

Pioneer CD-CM1 User manual

Pioneer

Pioneer CD-CM1 User manual

Pioneer TS-A6993R User manual

Pioneer

Pioneer TS-A6993R User manual

Pioneer KEH-P4020 - Radio / Cassette Player User manual

Pioneer

Pioneer KEH-P4020 - Radio / Cassette Player User manual

Pioneer Super Tuner III D DEH-3150UB User manual

Pioneer

Pioneer Super Tuner III D DEH-3150UB User manual

Pioneer DEH-P75BT User manual

Pioneer

Pioneer DEH-P75BT User manual

Pioneer TS-A1683R User manual

Pioneer

Pioneer TS-A1683R User manual

Pioneer FH-P800BT - Premier Radio / CD User manual

Pioneer

Pioneer FH-P800BT - Premier Radio / CD User manual

Pioneer KEH-1900 User manual

Pioneer

Pioneer KEH-1900 User manual

Pioneer MVH-S41BT User manual

Pioneer

Pioneer MVH-S41BT User manual

Pioneer DEH-M8037ZT User manual

Pioneer

Pioneer DEH-M8037ZT User manual

Pioneer DEH-S6120BS User manual

Pioneer

Pioneer DEH-S6120BS User manual

Pioneer DEH-X9600BT User manual

Pioneer

Pioneer DEH-X9600BT User manual

Pioneer SPH-DA130DAB User manual

Pioneer

Pioneer SPH-DA130DAB User manual

Pioneer Super Tuner III D+ DEH-P7750MP User manual

Pioneer

Pioneer Super Tuner III D+ DEH-P7750MP User manual

Pioneer AVH-X7800BT User manual

Pioneer

Pioneer AVH-X7800BT User manual

Pioneer CDX-FM677-X1N/ES User manual

Pioneer

Pioneer CDX-FM677-X1N/ES User manual

Pioneer DEH-P8400MP User manual

Pioneer

Pioneer DEH-P8400MP User manual

Popular Car Stereo System manuals by other brands

Sony CDXM60UI - Marine CD Receiver MP3/WMA/AAC... Features

Sony

Sony CDXM60UI - Marine CD Receiver MP3/WMA/AAC... Features

Philips CED780/98 quick start guide

Philips

Philips CED780/98 quick start guide

Becker Online Pro 7800 installation guide

Becker

Becker Online Pro 7800 installation guide

JVC KD-LH810 instructions

JVC

JVC KD-LH810 instructions

Clarion PU-9836A Service manual

Clarion

Clarion PU-9836A Service manual

Sony RM-X7BT reference guide

Sony

Sony RM-X7BT reference guide

Mitsubishi Electric AR0M manual

Mitsubishi Electric

Mitsubishi Electric AR0M manual

Insignia NS-HD5113 user guide

Insignia

Insignia NS-HD5113 user guide

Clarion BTD3341 user manual

Clarion

Clarion BTD3341 user manual

USA SPECS PA11-VW6 owner's manual

USA SPECS

USA SPECS PA11-VW6 owner's manual

Sony MEX-N4380BT operating instructions

Sony

Sony MEX-N4380BT operating instructions

Kenwood KCD-BT6544U/UY Service manual

Kenwood

Kenwood KCD-BT6544U/UY Service manual

JVC KD-DB912BT instruction manual

JVC

JVC KD-DB912BT instruction manual

Philips CSQ405/98 user manual

Philips

Philips CSQ405/98 user manual

Alpine TDM-7544 Specifications

Alpine

Alpine TDM-7544 Specifications

JL Audio Stealthbox SB-CAN-G2MVX3D/10TW3 installation guide

JL Audio

JL Audio Stealthbox SB-CAN-G2MVX3D/10TW3 installation guide

Denso TEN FT0108A user manual

Denso TEN

Denso TEN FT0108A user manual

Pyle PLD57MU owner's manual

Pyle

Pyle PLD57MU owner's manual

manuals.online logo
manuals.online logoBrands
  • About & Mission
  • Contact us
  • Privacy Policy
  • Terms and Conditions

Copyright 2025 Manuals.Online. All Rights Reserved.

Multi-CD control High power cassette player with RDS tuner
2SHUDWLRQ0DQXDO
.(+35
.(+35
.(+35
.(+35%
Q
(1*/,6+
MAN-KEH-P5010R-GB_B.fm Page 1 Friday, October 6, 2000 2:22 PM

(1*/,6+
&RQWHQWV
,QVWDOODWLRQ 
Installation with the rubber bush ..................3
Removing the Unit .......................................3
&RQQHFWLQJWKH8QLWV
.H\)LQGHU
• Head Unit ...............................................6
• Steering Remote Controller (CD-SR80) .6
%HIRUH8VLQJ7KLV3URGXFW
About This Product ......................................6
About This Manual .......................................6
Precaution ....................................................6
In Case of Trouble .......................................6
When using the 50-Disc Type
Multi-CD Player ..........................................6
%DVLF2SHUDWLRQ
To Listen to Music ........................................7
Basic Operation of Tuner .............................7
• Manual and Seek Tuning
• Preset Tuning
• Band
Basic Operation of Cassette Player .............8
• Fast Forward/Rewind and Music Search
•Eject
• Cassette Loading Slot
• Direction Change
Basic Operation of Multi-CD Player .............8
• Track Search and Fast Forward/Reverse
• Disc Search
• Disc Number Search
(for 6-Disc, 12-Disc types)
7XQHU2SHUDWLRQ 
• Local Seek Tuning
• Best Stations Memory (BSM)
8VLQJ5'6)XQFWLRQV 
What is RDS? ..............................................9
Program Service Name Display ...................9
AF Function ................................................10
• Activating/Deactivating the AF Function
PI Seek Function ........................................10
•PISeek
• Auto PI Seek (for preset station)
Regional Function ......................................10
• Activating/Deactivating the REG Function
TA Function ................................................11
• Activating/Deactivating the TA Function
• Canceling Traffic Announcements
• Adjusting the TA Volume
• TP Alarm Function
PTY Function .............................................12
• PTY Search Setting Function
• PTY Search Function
• PTY Alarm
• Canceling Emergency Announcements
8VLQJWKH&DVVHWWH3OD\HU
• Repeat Play
•BlankSkip
• Radio Intercept
8VLQJ0XOWL&'3OD\HUV 
• Repeat Play
• Random Play
•ScanPlay
•Pause
$XGLR$GMXVWPHQW 
Selecting the Equalizer Curve ...................15
Entering the Audio Menu ...........................15
Audio Menu Functions ...............................15
• Balance Adjustment (FAD)
• Equalizer Curve Adjustment
(EQ-L/EQ-M/EQ-H)
• Loudness Adjustment (LOUD)
• Front Image Enhancer Function (FIE)
• Source Level Adjustment (SLA)
'HWDFKLQJDQG5HSODFLQJWKH
)URQW3DQHO
Theft Protection .........................................17
• Detaching the Front Panel
• Replacing the Front Panel
,QLWLDO6HWWLQJ 
Entering the Initial Setting Menu ................17
Initial Setting Menu Functions ....................18
• Changing the FM Tuning Step (STEP)
• Switching the Auto PI Seek (A-PI)
• Switching the AUX Mode (AUX)
2WKHU)XQFWLRQV 
Using the AUX Source ...............................18
• Selecting the AUX Source
Cellular Telephone Muting .........................18
&DVVHWWH3OD\HUDQG&DUH
Precaution ..................................................19
• About the Cassette Player
• About Cassette Tapes
Cleaning the Head .....................................19
6SHFLILFDWLRQV
MAN-KEH-P5010R-GB_B.fm Page 2 Friday, October 6, 2000 2:22 PM

(1*/,6+
,QVWDOODWLRQ
1RWH
• Before finally installing the unit, connect the wiring temporarily, making sure it is all
connected up properly, and the unit and the system work properly.
• Use only the parts included with the unit to ensure proper installation. The use of
unauthorized parts can cause malfunctions.
• Consult with your nearest dealer if installation requires the drilling of holes or other
modifications of the vehicle.
• Install the unit where it does not get in the driver's way and cannot injure the passenger if
there is a sudden stop, like an emergency stop.
• If installation angle exceeds 30° from horizontal, the unit might not give its optimum
performance.
,QVWDOODWLRQZLWKWKHUXEEHUEXVK
5HPRYLQJWKH8QLW
Holder
After inserting the holder into the dashboard,
then select the appropriate tabs according to the
thickness of the dashboard material and bend
them. (Install as firmly as possible using the top
and bottom tabs. To secure, bend the tabs 90
degrees.)
Screw
Rubber bush
Dashboard
Insert the supplied extraction keys into
the unit, as shown in the figure, until
they click into place. Keeping the keys
pressed against the sides of the unit,
pull the unit out.
MAN-KEH-P5010R-GB_B.fm Page 3 Friday, October 6, 2000 2:22 PM

(1*/,6+
&RQQHFWLQJWKH8QLWV
1RWH
• This unit is for vehicles with a 12-volt battery and negative grounding. Before installing it in
a recreational vehicle, truck, or bus, check the battery voltage.
• To avoid shorts in the electrical system, be sure to disconnect the -battery cable before
beginning installation.
• Refer to the owner’s manual for details on connecting the power amp and other units, then
make connections correctly.
• Secure the wiring with cable clamps or adhesive tape. To protect the wiring, wrap adhesive
tape around them where they lie against metal parts.
• Route and secure all wiring so it cannot touch any moving parts, such as the gear shift,
handbrake, and seat rails. Do not route wiring in places that get hot, such as near the heater
outlet. If the insulation of the wiring melts or gets torn, there is a danger of the wiring short-
circuiting to the vehicle body.
• Don’t pass the yellow lead through a hole into the engine compartment to connect to the
battery. This will damage the lead insulation and cause a very dangerous short.
• Do not shorten any leads. If you do, the protection circuit may fail to work when it should.
• Never feed power to other equipment by cutting the insulation of the power supply lead of
the unit and tapping into the lead. The current capacity of the lead will be exceeded, causing
overheating.
• When replacing fuse, be sure to use only fuse of the rating prescribed on this unit.
• Since a unique BPTL circuit is employed, never wire so the speaker leads are directly
grounded or the left and right -speaker leads are common.
• Speakers connected to this unit must be high-power types with minimum rating of 45 W
(50 W)* and impedance of 4 to 8 ohms. Connecting speakers with output and/or impedance
values other than those noted here may result in the speakers catching fire, emitting smoke,
or becoming damaged.
*KEH-P5010R
• When this product’s source is switched ON, a control signal is output through the blue/white
lead. Connect to an external power amp’s system remote control or the car’s Auto-antenna
relay control terminal (max. 300 mA 12 V DC). If the car features a glass antenna, connect
to the antenna booster power supply terminal.
• When an external power amp is being used with this system, be sure not to connect the blue/
white lead to the amp’s power terminal. Likewise, do not connect the blue/white lead to the
power terminal of the auto-antenna. Such connection could cause excessive current drain
and malfunction.
• To avoid short-circuiting, cover the disconnected lead with insulating tape. Especially,
insulate the unused speaker leads without fail. There is a possibility of short-circuiting if the
leads are not insulated.
• To prevent incorrect connection, the input side of the IP-BUS connector is blue, and the
output side is black. Connect the connectors of the same colors correctly.
• If this unit is installed in a vehicle that does not have an ACC (accessory) position on the
ignition switch, the red lead of the unit should be connected to a terminal coupled with
ignition switch ON/OFF operations. If this is not done, the vehicle battery may be drained
when you are away from the vehicle for several hours.
• The black lead is ground. Please ground this lead separately from the ground of high-current
products such as power amps.
If you ground the products together and the ground becomes detached, there is a risk of
damage to the products or fire.
ACC position No ACC position
• Cords for this product and those for other products may be different colors even if
they have the same function. When connecting this product to another product, refer
to the supplied Installation manuals of both products and connect cords that have
the same function.
MAN-KEH-P5010R-GB_B.fm Page 4 Friday, October 6, 2000 2:22 PM

(1*/,6+
&RQQHFWLQJWKH8QLWV
A
B
C
D
This product conforms to new cord colors.
Connect leads of the
same color to each other.
1RWH
Depending on the kind of vehicle, the function
of 3* and 5* may be different. In this case, be
sure to connect 2* to 5* and 4* to 3*.
Cap (1*)
When not using this terminal,
do not remove the cap.
Red (4*)
To electric terminal controlled
by ignition switch (12 V DC)
ON/OFF.
Yellow (2*)
To terminal always supplied
with power regardless of
ignition switch position.
Red (5*)
Accessory
(or back-up)
Yellow (3*)
Back-up
(or accessory)
Black (ground)
To vehicle (metal) body.
ISO connector
1RWH
In some vehicles, the ISO connector may be
divided into two. In this case, be sure to connect
to both connectors.
This product
Antenna jack
Rear output
Fuse
IP-BUS cable
Multi-CD player
(sold separately)
IP-BUS input (Blue)
Speaker leads
White : Front left +
White/black : Front left -
Gray : Front right +
Gray/black : Front right -
Green : Rear left +
Green/black : Rear left -
Violet : Rear right +
Violet/black : Rear right -
A
B
C
D
The pin position of the ISO connector will differ
depends on the type of vehicle. Connect 6* and 7*
when Pin 5 is an antenna control type. In another type
of vehicle, never connect 6* and 7*.
Blue/white
To system control terminal of the
power amp (Max. 300 mA 12 V DC).
Blue/white (7*)
To Auto-antenna relaycontrol terminal (max.300 mA 12 V DC).
Blue/white (6*)
Power amp
(sold separateley)
Perform these connections whenusing a
different amp (sold separately).
Rear speaker (Left)
System remote control
Connecting cords with RCA pin plugs
(sold separately)
Rear speaker (Right)
Yellow/black
If you use a cellular telephone, connect it via the Audio
Mute lead on the cellular telephone. If not, keep the Audio
Mute lead free of any connections.
MAN-KEH-P5010R-GB_B.fm Page 5 Friday, October 6, 2000 2:22 PM

(1*/,6+
.H\)LQGHU
+HDG8QLW
6WHHULQJ5HPRWH&RQWUROOHU&'65
The steering remote controller (CD-SR80) is an option only for KEH-P5010R.
SOURCE button
Cassette door EJECT button
PTY button
Detach button
AUDIO button
BAND button
TA button Buttons 1 – 6 8/2/4/6 buttons
LOCAL/BSM button
EQ button
+/– buttons
SOURCE/OFF button
ATT button
This lets you quickly
lower volume level
(by about 90%).
Press once more to
return to the original
volume level.
AUDIO button
BAND button
FUNCTION button
Not Used.
8/2 buttons +/– button
4/6 buttons
%HIRUH8VLQJ7KLV3URGXFW
$ERXW7KLV3URGXFW
The tuner frequencies on this product are allocated for use in Western Europe, Asia,
the Middle East, Africa and Oceania. Use in other areas may result in improper
reception. The RDS function operates only in areas with FM stations broadcasting
RDS signals.
$ERXW7KLV0DQXDO
This product features a number of sophisticated functions ensuring superior reception
and operation. All are designed for the easiest possible use, but many are not self-
explanatory. This operation manual is intended to help you benefit fully from their
potential and to maximize your listening enjoyment.
We recommend that you familiarize yourself with thefunctions and their operation by
reading through the manual before you begin using this product. It is especially
important that you read and observe the “Precaution” on this page and in other
sections.
This manualexplains head unit operation. You can perform the same operations with
the steering remote controller when operating KEH-P5010R.
3UHFDXWLRQ
•The Pioneer CarStereo-Pass is for use only in Germany.
•Keep this manual handy as a reference for operating procedures and precautions.
•Always keep the volume low enough for outside sounds to be audible.
•Protect this product from moisture.
•If the battery is disconnected, the preset memory will be erased and must be
reprogrammed.
,Q&DVHRI7URXEOH
Should this product fail to operate properly, contact your dealer or nearest authorized
Pioneer Service Station.
:KHQXVLQJWKH'LVF7\SH0XOWL&'3OD\HU
The available functions of the 50-Disc Type Multi-CD Player are described in this
Operation Manual. Note that other 50-Disc Type Multi-CD Player functions cannot be
used with this product.
• This product complies with the EMC Directives (89/336/EEC, 92/31/EEC) and CE
Marking Directive (93/68/EEC).
MAN-KEH-P5010R-GB_B.fm Page 6 Friday, October 6, 2000 2:22 PM

(1*/,6+
%DVLF2SHUDWLRQ
7R/LVWHQWR0XVLF
The following explains the initial operations required before you can listen to music.
1RWH
• Loading a cassette in this product. (Refer to page 8.)
 6HOHFWWKHGHVLUHGVRXUFHHJ7XQHU
Each press of the SOURCE button selects the desired source in the following order:
Tuner ]Tape ]Multi-CD player ]External Unit ]AUX
1RWH
• External Unit refers to a Pioneer product (such as one available in the future) that, although
incompatible as a source, enables control of basic functions by this product. Only one
External Unit can be controlled by this product.
• In the following cases, the sound source will not change:
* When a product corresponding to each source is not connected to this product.
* When no tape is set in this product.
* When no magazine is set in the Multi-CD player.
* When the AUX (external input) is set to OFF. (Refer to page 18.)
• When this product's blue/white lead is connected to the car's Auto-antenna relay control
terminal, the car's Auto-antenna extends when this product's source is switched ON. To
retract the antenna, switch the source OFF.
 5DLVHRUORZHUWKHYROXPH
 7XUQWKHVRXUFH2))
Each press changes the Source ...
Hold for 1 second
%DVLF2SHUDWLRQRI7XQHU
This product’s AF function can be switched ON and OFF. AF should be switched OFF
for normal tuning operations. (Refer to page 10.)
0DQXDODQG6HHN7XQLQJ
*
<RXFDQVHOHFWWKHWXQLQJPHWKRGE\FKDQJLQJWKHOHQJWKRIWLPH\RX
SUHVVWKH
4/6
EXWWRQ
1RWH
• If you continue pressing the button for longer than 0.5 seconds, you can skip
broadcast stations. Seek Tuning starts as soon as you release the button.
• Stereo indicator “%” lights when a stereo station is selected.
Manual Tuning (step by step) 0.5 seconds or less
Seek Tuning 0.5 seconds or more
%DQG,QGLFDWRU
)UHTXHQF\,QGLFDWRU
%DQG
F1 (FM1)
]F2 (FM2)
]MW/LW
3UHVHW1XPEHU,QGLFDWRU
3UHVHW7XQLQJ
*
<RXFDQPHPRUL]HEURDGFDVWVWDWLRQVLQEXWWRQV
WKURXJKIRUHDV\RQHWRXFKVWDWLRQUHFDOO
1RWH
• Up to 12 FM stations (6 each in F1 (FM1) and F2 (FM2)) and 6 MW/LW stations
can be stored in memory.
• You can also use the 8or 2buttons to recall broadcast stations memorized in
buttons 1 through 6.
Preset station recall 2 seconds or less
Broadcast station preset memory 2 seconds or more
MAN-KEH-P5010R-GB_B.fm Page 7 Friday, October 6, 2000 2:22 PM

(1*/,6+
%DVLF2SHUDWLRQ
%DVLF2SHUDWLRQRI&DVVHWWH3OD\HU
)DVW)RUZDUG5HZLQGDQG0XVLF6HDUFK
*
(DFKSUHVVRIWKH
6
EXWWRQVHOHFWV)DVW)RUZDUGRU)RUZDUG0XVLF
6HDUFK
FF (Fast Forward) ]F-MS (Forward-Music Search) ]Normal Playback
*
(DFKSUHVVRIWKH
4
EXWWRQVHOHFWV5HZLQGRU5HZLQG0XVLF6HDUFK
REW (Rewind) ]R-MS (Rewind-Music Search) ]Normal Playback
1RWH
• Fast Forward/Rewind and Music Search can be canceled by pressing the BAND
button.
(MHFW
1RWH
• The Tape function can be
turned ON/OFF with the
cassette tape remaining in this
product. (Refer to page 7.)
&DVVHWWH/RDGLQJ6ORW
1RWH
• Don’t insert any materials except for
cassette into Cassette Loading Slot.
'LUHFWLRQ,QGLFDWRU 'LUHFWLRQ&KDQJH
%DVLF2SHUDWLRQRI0XOWL&'3OD\HU
This product can control a Multi-CD player (sold separately).
'LVF1XPEHU6HDUFKIRU'LVF'LVFW\SHV
*
<RXFDQVHOHFWGLVFVGLUHFWO\ZLWKWKHWREXWWRQV-XVWSUHVVWKHQXPEHU
FRUUHVSRQGLQJWRWKHGLVF\RXZDQWWROLVWHQWR
1RWH
• When a 12-Disc Multi-CD Player is connected and you want to select disc 7 to 12, press the
1 to 6 buttons for 2 seconds.
1RWH
• The Multi-CD Player may perform a preparatory operation, such as verifying the presence
of a disc or reading disc information, when the power is turned ON or a new disc is selected
for playback. “READY” is displayed.
• If the Multi-CD Player cannot operate properly, an error message such as “ERROR-14” is
displayed. Refer to the Multi-CD Player owner's manual.
• If there are no discs in the Multi-CD Player magazine, “NO DISC” is displayed.
7UDFN6HDUFKDQG)DVW)RUZDUG5HYHUVH
*
<RXFDQVHOHFWEHWZHHQ7UDFN6HDUFKRU)DVW)RUZDUG5HYHUVHE\
SUHVVLQJWKH
4/6
EXWWRQIRUDGLIIHUHQWOHQJWKRIWLPH
1RWH
• Multi-CD indicator “ ” lights when a Multi-CD source is selected.
Track Search 0.5 seconds or less
Fast Forward/Reverse Continue pressing
3OD\7LPH,QGLFDWRU
7UDFN1XPEHU,QGLFDWRU 'LVF1XPEHU,QGLFDWRU
'LVF6HDUFK
MAN-KEH-P5010R-GB_B.fm Page 8 Friday, October 6, 2000 2:22 PM

(1*/,6+
7XQHU2SHUDWLRQ
/RFDO6HHN7XQLQJ
This function selects only stations with especially strong signals.
%HVW6WDWLRQV0HPRU\%60
The BSM function stores stations in memory automatically.
*
7RFDQFHOWKHSURFHVVSUHVVWKH/2&$/%60EXWWRQEHIRUHPHPRUL]DWLRQLV
FRPSOHWH
“LOC”
*
6ZLWFKWKH/RFDO212))ZLWKWKH
/2&$/%60EXWWRQ
*
3UHVVWKH/2&$/%60EXWWRQIRU
VHFRQGVWRVZLWFK%6021
The stations with the strongest
signalswill bestoredunderbuttons
1–6 and in order of their signal
strength.
8VLQJ5'6)XQFWLRQV
:KDWLV5'6"
RDS (Radio Data System) is a system for transmitting data along with FM programs.
This data, which is inaudible, provides a variety of features such as: program service
name, program type display, traffic announcement standby, automatic tuning and
program type tuning, intended to aid radio listeners in tuning to a desired station.
1RWH
• RDS service may not be provided by all stations.
• RDS functions, like AF (Alternative frequencies search) and TA (Traffic Announcement
standby), are only active when your radio is tuned to RDS stations.
3URJUDP6HUYLFH1DPH'LVSOD\
With this function, the names of networks/stations providing RDSservices replace the
frequency on the display a few seconds after they are tuned in.
*
:KHQ\RXZDQWWRNQRZ37<,QIRUPDWLRQRUWKHIUHTXHQF\RIWKHFXUUHQWVWDWLRQ
FKDQJHWKHGLVSOD\
Each press of the DISPLAY button for 2 seconds selects the display in the following
order:
Program Service Name ]PTY Information ]Frequency
1RWH
• After switching displays, if you do not perform an operation within 8 seconds, the Program
Service Name is automatically displayed.
)
37<,QIRUPDWLRQ
PTY(ProgramTypeIDcode)informationforthecurrentlytunedstationappearsonthe
display for 8 seconds. The information is correlated with the list in the section “PTY
Function” on page 12.
1RWH
• If a PTY code of zero is received from a station, “NONE” will be displayed. This indicates
that the station has not defined its program contents.
• If the signal is too weak for this product to pick up the PTY code, “NO PTY” will be displayed.
)
)UHTXHQF\
The frequency of the current station appears on the display.
Hold for 2 seconds
MAN-KEH-P5010R-GB_B.fm Page 9 Friday, October 6, 2000 2:22 PM

(1*/,6+
8VLQJ5'6)XQFWLRQV
$))XQFWLRQ
The AF (Alternative Frequencies search) function is used to search for other
frequenciesinthesamenetworkasthe currentlytunedstation.Itautomaticallyretunes
the receiver to another frequency in the network which is broadcasting a stronger
signal when there are problems with reception of the currently tuned station or better
reception is possible on a different frequency.
1RWH
• AF tunes the receiver only to RDS stations when you use Seek tuning or BSM Auto Memory
with the “AF” indicator ON.
• When you recall a preset station, the tuner may update the preset station with a new
frequency from the station's AF list. (This is only available when using presets on the FM1
band.) No preset number appears on the display if the RDS data for the station received
differs from that for the originally stored station.
• Sound may be temporarily interrupted by another program during an AF frequency search.
• When the tuner is tuned to a non-RDS station, the “AF” indicator flashes.
• AF can be switched ON or OFF independently for each FM band.
$FWLYDWLQJ'HDFWLYDWLQJWKH$))XQFWLRQ
AF is set to ON by default.
*
7XUQ$)WR2))
To turn AF back ON, repeat the preceding operation.
Hold for 2 seconds “AF”disappears
3,6HHN)XQFWLRQ
The tuner searches for another frequency broadcasting the same programming. “PI
SEEK” appears on the display and the radio volume is muted during a PI Seek. The
muting is discontinued after completion of the PI Seek, whether or not the PI seek has
succeeded. If the PI Seek is unsuccessful, the tuner returnsto the previous frequency.
3,6HHN
If the tuner fails to locate a suitable alternative frequency or if the broadcasting signal
is too weak for proper reception, the PI Seek will automatically start.
$XWR3,6HHNIRUSUHVHWVWDWLRQ
When preset stations cannot be recalled, as when traveling long distances, this
product can be set to perform PI Seek also during preset recall.
The default setting for Auto PI Seek is OFF.
1RWH
• Refer to “Initial Setting” for details on how to switch Auto PI Seek ON/OFF.
5HJLRQDO)XQFWLRQ
When AF is used to retune the tuner automatically, REG (regional) limits the selection
to stations broadcasting regional programs.
1RWH
• Regional programming and regional networks are organized differently depending on the
country (i.e., they may change according to the hour, state or broadcast area).
• The preset number may disappear on the display if the tuner tunes in a regional station
which differs from the originally set station.
• REG can be switched ON or OFF independently for each FM band.
$FWLYDWLQJ'HDFWLYDWLQJWKH5(*)XQFWLRQ
The REG function is set to ON by default.
*
7XUQ5(*WR2))
To turn REG back ON, repeat the preceding operation.
Hold for 2 seconds
MAN-KEH-P5010R-GB_B.fm Page 10 Friday, October 6, 2000 2:22 PM