manuals.online logo
Brands
  1. Home
  2. •
  3. Brands
  4. •
  5. Pioneer
  6. •
  7. DVD Player
  8. •
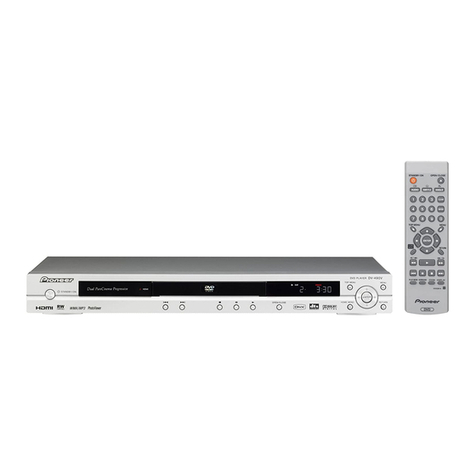
  9. Pioneer DV-533 User manual

Pioneer DV-533 User manual

3
IMPORTANT
A
The llghtnrng flash wtth arrowhead symbol. wrthln an
equilateraltriangle. is intended to alert the user to the
presenceof unrnsulated’dangerousvoltage” wrrhlnthe
product’senclosurethatmay beof sufficrentmagnrtude
to constrt”te a rrskof electrrc shock to persons
CAUTION:
TO PREVENTTHE RISKOFELECTRICSHOCK,DO NOT
REMOVECOVERIOR BACK). NO USER-SERVICEABLE
PARTS INSIDE. REFER SERVICING TO QUALIFIED
SERVICEPERSONNEL.
a
The exclamation pant wrthrn an equ,late,al mangle IS
Intended to alert the user to the presence of rmportant
operatr”gandmarntenance~selvrcrng~,nstruct,ons,nthe
hteratureaccompanymgthe applrance
___ IMPORTANT SAFETY INSTRUCTIONS H003
READINSTRUCTIONS-All the safety andoperat,ng
Instructions should be read before the product IS
operated.
RETAIN INSTRUCTIONS-The safety and operating
instructionsshould beretarnedforfuturereference
HEEDWARNINGS -All warnings on the product and
rnthe operating rnstructronsshould be adheredto
FOLLOW INSTRUCTIONS - All operatongand use
,nstr”ct~onsshould be followed.
CLEANING- Unpluathis product from the wall outlet
beforecleaning.iheproductshould becleanedonly
wttha polishrngcloth ora softdrycloth. Neverclean
with furniture wax. berune. rnsectrcidesor other
volatile liquids srncethey may corrode the cabinet
ATTACHMENTS - Do not use attachments not
recommended bythe product manufactureras they
may cause hazards
WATER AND MOISTURE - Do not use thrs product
near water-for example. near a bathtub, wash
bowl.krtchensrnk,orlaundrytub: rnawetbasement.
or near a swimmrng pool, and the lrke.
ACCESSORIES - Do not place thrs product on an
unstable cart. stand. tripod. bracket, or table. The
product mayfall, cawng serrousrn,uryto achrldor
adult. andseriousdamageto the product. Useonly
with a cart. stand, tripod, bracket, or table
recommended bv the manufacturer. or sold with
the product. Any’mount~ng of the product should
follow the manufacturer’s Instructions. and should
“se a mo”nt,ng accessory recommended by the
manufacturer.
CART - A product and cart combrnation should be
movedwith care Quackstops. excessiveforce, and
uneven surfaces may cause the product and cart
combrnatronto overturn
VENTILATION-Slotsand open~nasrnthe cabrnetare
provided for ventrlation’ and -to ensure r&able
operaton of the product and to protect rt from
overheatrng, and these openings must not be
blocked or covered. The openrngsshould never be
blocked by placrngthe product on a bed, sofa. rug,
or other srmrlarsurface. Thrsproduct should not be
placedinabullt-Ininstallatronsuchasabookcaseor
rack unless proper vent,laton ISprovrded or the
manufacturer’s rnstruct~onshavebeenadhered to
POWERSOURCES-Thfs product shouldbeoperated
onlyfrom the type of powersource rndrcatedonthe
markrng label If you are not sure of the type of
power supply to your home. consult your product
dealer or localpower company
LOCATION - The applrance should be installed I” a
stable location.
NONUSE PERIODS-The oower cord of the ao~lrance
should be unpluggedf&r? the outlet when ieft un-
used for a long perlod of trme
GROUNDING OR POLARIZATION
l
Ifth~sproductrsequrppedwithapolarw.?dalternat~ng
current linepluglaplughavrngone bladewrder than
theother),ttwrllfrtrntotheoutletonlyoneway.Thrs
rsasafetyfeature Ifyouareunabletornsentheplug
fullyrnto theoutlet. try reversingtheplug. lfrheplug
should still fail to fit, contact your electrrcran to
replace your obsolete outlet Do not defeat the
safety purpose of the polarizedplug.
l
If this product IS equrpped wrth a three-wire
groundrngtvpeplug,aplug havlngathrrdlgroundingl
prn,itwrllonlyfltintoagroundrngtypepoweroutlet
Thrsrsasafetyfeature Ifyouareunabletornsenthe
plug Into the outlet, contact your electrician to
replace your obsolete outlet Do not defeat the
safety purpose of the grounding type plug.
POWER-CORDPROTECTION - Power-supply cords
should be routed so that thev are not likelv to be
walked on or pinched by r&s placed upon or
againstthem. payrngpartrcularattentiontocordsat
plugs,conveniencereceptacles,andthepointwhere
they exit from the product
OUTDOOR ANTENNA GROUNDING - If an outsIde
antennaorcablesystem~sconnected totheproduct.
besuretheantennaorcable system isgrounded so
astoprovrdesomeprotectionagarnstvoltagesurges
andbuilt-upstatrccharges ArticleBlOoftheNat~onal
ElectricalCode,ANSI/NFPA70.providesinformation
with reqard to proper aroundina of the mast and
suppo&g str&t&, g&ndingbf the lead-Inwire
to an antenna drscharge unrt. size of grounding
conductors, locatron of antenna-discharge unit.
connection to grounding electrodes, and
requrrementsforthegroundingelectrade.SeeFrgure
A.
LIGHTNING - For added protectron for thrs product
durrngalrghtnrngstorm. orwhenitrskft unattended
andunusedfor long perrodsof trme. unplug rtfrom
the wall outlet anddtsconnectthe antennaor cable
system. This will prevent damage to the product
due to lightnrngand power-line surges.
POWER LINES-An outsrde antenna system should
notbelocatedin thevlcrnrtvofoverheadpowerlines
or other ekctrrc light or p&r circurts.‘or where rt
can fall Into such power lines or circuts. When
lnstallrnga” outsrdeantennasystem, extreme care
should betaken to keepfrom touching such power
linesorcircuitsascontact wrth them mrght befatal
OVERLOADING - Do not overload wall outlets.
extensroncords.~rintegralconvenrencereceptacles
as thuscan result in a ruskof fire or electric shock
OSJECTAND LIGUIDENTRV- Neveroush obiectsof
,
any krndrntothusproduct through odeningsasthey
may touch dangerous voltage pornts or short-out
parts that could result rn a fire or electric shock.
Neverspill liqud of any krndon the product
SERVICING- Do not attempt to sewrce thrs product
yourself asopeningor removrngcoversmayexpose
you to dangerousvoltage or other hazards.Referall
servicing to quaIlfredserwe personnel.
DAMAGEREQUIRINGSERVICE-Unplugthrsproduct
from the wall outlet and refer serwcing to qualified
service personnel under the followno condrtrons,
l
When the power-supply cord or plugqsdamaged.
. If lrqurdhasbeen sprlled.or obrects havefallen rnto
the product.
. If the product hasbeen exposed to ‘a,” or water
. Iftheproductdoesnotoperatenormallybyfollowrng
theoperatinginstructrons Adjustonlythosecontrols
that arecovered bythe operatrng~nstnxt,~ns asan
improper adiustment of other controls mavresult rn
damage and will often reqwe extensive work by a
qualified technrcran to restore the product to its
normal operaton.
l
If the product hasbeen dropped or damaged rnany
WV.
. When the product exhrbrts a drstrnct change rn
performance-this indrcaresa need for serwe
REPLACEMENT PARTS - When replacement parts
arerequired. besuretheselvicetechnrcran hasused
replacement partsspecrfredbythe manufacturer or
have the same characterrsticsas the ownal part
Unauthorrzedsubstitutronsmayresultrnfire. el&c
shock. or other hazards.
SAFETYCHECK- Upon completion of anv sewce or
repairsto thusproduct. askihe servrcet&hrvcran to
performsafetycheckstodetermrne thattheproduct
ISI” proper operatrngcondrbon
WALL ORCEILINGMOUNTING -The product should
not be mounted to awall or cerlrng.
HEAT-Theproductshould besrtuatedawayfrom heat
sourcessuchasradrators.heatregrsters.stoves, or
other products lincludlng amplrfers) that produce
heat
ANTz?j$-
-1 7~ POWERSERVICEGROUNDING
ELECTRODESYSTEM
Fig. A (NECART250, PART H)
NEC- NATIONAL ELECTRICALCODE
CONGRATULATIONS
ON YOUR PURCHASE OF THIS FINE PIONEER PRODUCT.
Pioneer is on the leading edge of DVD research for consumer products and this unit incorporates the latest technological
developments.
We are sure you will be fully satisfied with the DVD player.
Thank you for your support.
Please read through these operating instructions so you will know how to operate your model properly. After you have
2 finished reading the instructions, put them away in a safe place for future reference.
Cn l This player is not suitable for commercial use.
LII I I
WARNING:
TO PREVENT FIRE OR SHOCK HAZARD, DO
NOT EXPOSE THIS APPLIANCE TO RAIN OR
MOISTURE.
[For U.S. model1
IMPORTANT NOTICE
HOOGAEn
The serial number for this equipment is located in
the rear panel. Please write this serial number on
your enclosed warranty card and keep it in a secure
area. This is for your security.
[For Canadian model1
CAUTION:TO
PREVENT ELECTRIC SHOCK, DO NOT
USE THIS (POLARIZED) PLUG WITH AN EXTENSION
CORD, RECEPTACLE OR OTHER OUTLET UNLESS THE
BLADES CAN BE FULLY INSERTED TO PREVENT BLADE
EXPOSURE.
ATTENTION:
POUR PREVENIR LES CHOCS
ELECTRIQUES NE PAS UTILISERCETTE FICHEPOLARISEE
AVECUNPROLONGATEUR UNEPRISEDECOURANTOU
UNE AUTRE SORTIE DE COURANT, SAUF SI LES LAMES
PEUVENT ETRE INSEREES A FOND SANS EN LAISSER
AUCUNE PARTIE A DECOUVERT. Hco’IA2L
[For Canadian model]
This Class B digital apparatus complies with Canadian
ICES-003.
[Pour le modhle Canadienl
Cet appareil numerique de la classe B est conforme a
la norme NMB-003 du Canada. HO06a
On the bonnet of the unit.
This product incorporates copyright protectron
technology that is protected by method claims of
certain U.S. patents and other intellectual property
rights owned by Macrovision Corporation and other
rights owners. Use of this copyright protection
technology must be authorized by Macrovision
Corporation, and is intended for home and other limited
viewing uses only unless otherwise authorized by
Macrovision Corporation. Reverse engineering or
disassembly is prohibited.
NOTE:
This equipment has been tested and found to
complywith the limitsfora Class B digital device, pursuant
to Part 15 of the FCC Rules. These limits are designed to
provide reasonable protection against harmful interference
in a residential installation. This equipment generates,
uses, and can radiate radio frequency energy and, if not
installed and used in accordance with the instructions,
may cause harmful interference to radio communications.
However, there is no guarantee that interference will not
occur in a particular installation. If this equipment does
cause harmful interferenceto radioortelevision reception,
which can be determined by turning the equipment off and
on, the user is encouraged to tryto correctthe interference
by one or more of the following measures:
-Reorient or relocate the receiving antenna.
-Increase the separation between the equipment and
receiver.
-Connecttheequipmentintoanoutletonacircuitdifferent
from that to which the receiver is connected.
-Consult the dealer or an experienced radio/TV technician
for help.
Information to User
HOWEn
Alteration or modifications carried out without appropriate
authorization may invalidate the user’s right to operate the
equipment. HOI,E”
CAUTION:
This product satisfies FCC regulations when shielded
cables and connectors are used to connect the unit to
other equipment. To prevent electromagnetic
interference with electricappliancessuch as radiosand
televisions, use shielded cables and connectors for
connections.
H012En
WARNING:
BEFORE PLUGGING IN THE UNIT FOR THE
FIRSTTIME, READTHE FOLLOWING SECTION CAREFULLY. THE
VOLTAGE OF THE AVAILABLE POWER SUPPULY DIFFERS
ACCORDING TO COUNTRY OR REGION, BE SURE THAT THE
POWER SUPPLY VOLTAGE OF THE AREA WHERE THIS UNIT
WILL BE USED MEETS THE REQUIRED VOLTAGE (E.G., 230V OR
12OV)WRITTEN ON THE REAR PANEL.
HO.33En
CAUTION:
THE STANDBY/ON BUTTON IS SECONDARY CONNECTED
AND THEREFORE DOES NOT SEPARATE THE UNIT FROM
MAlNSPOWERINSTANDBYPOSITION.THEREFORElNSTALL
THE UNIT SUITABLE PLACES EASY TO DISCONNECT THE
MAINS PLUG IN CASE OFTHE ACCIDENT. THE MAINS PLUG
OFUNITSHOULDBEUNPLUGGEDFROMTHEWALLSOCKET
WHEN LEFT UNUSED FOR A LONG PERIOD OF TIME.,,,,,,,
[For U.S. model1
CAUTION
: USE OF CONTROLS OR ADJUSTMENTS OR PERFORMANCE OF PROCEDURES OTHER THAN THOSE
SPECIFIED HEREIN MAY RESULT IN HAZARDOUS RADIATION EXPOSURE.
CAUTION
: THE USE OF OPTICAL INSTRUMENTS WITH THIS PRODUCT WILL INCREASE EYE HAZARD. “013En 3
En
Compatible with DVD, Super VCD/
Video CD and CD formats
DVD. Surer VCDNideo CD and CD discs that difolav the
logos shbwn below can be played back on PIONEEP(
DVD players. For more information on discs compatible
with this player, refer to the table below.
ypes of playable Diameter/Playable
iscs
and their marks sides Playback time
VD VIDEO DVD VIDEO Digital audio
Digital video
(MPEG 2)
12
cm (5 in.)/ 1 layer 133 min.
single-sided 2 layer 242 min.
DVD VIDEO Digital audio
Digital video
(MPEG 2)
uper VCD
8
cm (3 in.)/ 1 layer 41
min.
single-sided 2 layer 75 min.
8
cm (3 in.)/ 1 layer 82 min.
double-sided 2 layer 150 min.
Super VCD Digital audio
(MPEG 1)
12
cm (5 in.)/ Digital video
single-sided (MPEG 2)
40 min.
(SUPER) Super VCD single Digital audio
(MPEG 1)
8
cm (3 in.)/ Digital video
single-sided (MPEG 2)
10 min.
IDE0 CD VIDEO CD
12
cm (5 in.)/
single-sided
Digital audio
Digital video
(MPEG I)
Max. 74
minutes
pEiziiE] VIDEO CD single Digital audio
Digital video
8
cm (3 in.)/ (MPEG I)
single-sided Max. 20
minutes
CD
12
cm (5 in.)/
0
@
Digital audio
Max. 74
DIGITAL AUDIO
single-sided minutes
fl[#@*’ CD single @ Digital audio
DIGITAL AUDIO 8
cm (3 in.)/ Max. 20
single-sided minutes
DIGITAL AUDIO
(ReWritablel
The disc format logos shown above are found on disc
labels or on disc jackets.
l To prevent malfunction, do not use an 8 cm (3 in.)
adaptor (for CDs).
l Discs other than the ones indicated above cannot be
played on this unit.
l DVDs that have incompatible region numbers, DVD-
Audio, DVD-ROM, and DVD-RAM cannot be played on
this unit. The region number of the player can be
found on the rear panel.
*‘Playing recordable CDs
This unit can play CD-R and CD-RW discs recorded in
CD Audio or Video CD format, or with MP3 audio files.
MP3 compatibility information
l The CD-ROM must be IS0 9660 compatible.
l Files should be MPEGI Audio Layer 3 format, 44.1 or
48kHz. Incompatible files will not play and
“UNPLAYABLE MP3 FORMAT” will be displayed.
l Not compatible with some variable bit-rate (VBR) files.
l VBR files may not show play times correctly.
l This player only plays tracks that are named with the
file extension “.mp3” or “.MP3”.
l This player is not compatible with multi-session discs.
If you try and play a multi-session disc, only the first
session will be played.
l Use CD-R or CD-RW media for recording your MP3
files. The disc must be finalized in order to play.
l Audio encoded at 128Kbps should sound close to
regular audio CD quality. Although this player will play
lower bit-rate MP3 tracks, the sound quality becomes
noticeably worse at lower bit-rates.
l Only the first 8 characters of folder and track names
(excluding the “.mp3” extension) are displayed.
l This player can recognize a maximum of 250 folders
and 250 tracks. Discs containing more than 250
folders or tracks will play, but only the first 250
folders/tracks.
Caution!
l CD-R/RW discs recorded using a personal
computer or a CD recorder may not play If the disc
is damaged or dirty, or if there is dirt or
condensation on the player’s lens.
l If you record a disc using a personal computer,
even if it is recorded in a compatible format, there
are cases in which it may not play because of the
settings
of the
application software%sed to create
the disc. (Check with the software publisher for
more detailed information.)
l Unfinalized CD-R/RW discs can be played, but not
all time information (playing time, etc.) will be
displayed.
l For more InformatIon on using CD-R/RW discs, see
‘Disc care’starting on page 56.
4
En
What is Super VCD?
[SUPER VIDEO)
Thusplayer supports the IEC’s Super VCD standard.
Compared to the Video CD standard, Super VCD offers
superior picture quality, and allows two stereo soundtracks to
be recorded. Super VCD also supports the widescreen size.
Compatible with a wide range of DVD
DIGITAL
DVDs are recorded In one of four types of digital audio
formats (asof October 1998). The digital audio output jacks
of this player output Dolby*2 Drgital, DTS*3, MPEG, and lrnear
PCM digital brtstreams.
Thusplayer has a function that converts Dolby Digital and
MPEG audio formats into the linear PCM format. This allows
playback of DVDs recorded in Dolby Digital and MPEG
without the need for a decoder.
TruSurround
TruSurround’”
by SRs <.I”
TruSurround’” uses technology that simulates multrchannel
surround sound using only two speakers. TruSurround works
in conjunction with 2 channel audio sources to create a
realistic surround sound.
This player is compatible with CD-R, CD-RW and CD-ROM
discs that contain MP3 audio tracks.
[Fine Focus], [Contrast], [Sharpness], [Chroma level] and
[Hue] picture quality adjustment settings are available. You
can memorize up to three sets of picture quality settings
(pages 31, 32).
Easy setup and adjustment using on-
screen menus
Press SETUP on the remote control to open the Setup
screen and you’ll find setting up and adjusting the system
easy to do with on-screen menus conveniently organized and
arranged. Additionally, on-screen rnformatron (0) appears to
clarify the functions and explain the options avarlable. Below
are lust a few examples. Answerafew questronsandhaveall
the necessaryaudro,video,andon-
screenlanguageadjustmentsset
automatrcallybytheplayerusrngthe
SetupNavrgator
(pages17, 18)
Selectthetypeof TVscreenyouare
usrngandthepreferredscreenformat
you’dlrketo usewhenwatchingDVDs
rnthe
Video 1
menu
(page29).
Multi-Angle (page33)*
You can view scenes from different camera angles when
watching movies or other media with multiple angle playback
available.
Multiple Languages (page 34)*
You can select the language on when watching movres or
other media that have multiple language and/or audio
soundtracks recorded on them.
Multi-Language Subtitles (page36)*
You can select a subtitle language or turn subtitles off when
watching movies or other media with subtitles available.
l
T!ZThusmarkindicatesthis maynotbepossiblewrthcertaindiscs
24-bit/192kHz compatible DAC delivers
The DAC used to convert digital audio to analog in this player
is fully 24-bit/192kHz compatible.
Karaoke microphone input and mixing
With thusplayer, it is possible to sing along with karaoke discs
or your favorite CD. Youcan also control the vocal mix using
the volume and digital echo effect controls.
This unit is designed to use less than 1W of energy when
this player is in standby mode.
*2
*3
*4
Manufactured underlrcensefrom Dolby Laboratories
“Dolby” andthe double-Dsymbol aretrademarks of Dolby
Laboratories.Confrdentralunpublishedworks. 0 1992-1997
Dolby Laboratones All rights reserved.
“DTS” ISa registered trademark of DrgrtaiTheaterSystems,
Inc.
TruSurroundandthe (0)m symbol aretrademarks of SRS
Labs,Inc TruSurroundtechnology is incorporatedunder
license from SRSLabs, Inc. 5
En
DVD
All discs are divided up into smaller, more manageable
sections so that you can find specific content more
easily.
DVD discs are divided into one or more titles. Each title
may be further divided into several chapters.
Occassionally, a chapter may contain index points,
effectively dividing the chapter up into several parts, too.
& Title 1 4 & Title 2 ---
IChapter 1 Chapter 2 1 1Chapter 1 Chapter2 1
DVD
Super VCD/Video CDs and CDs are divided into a
number of tracks. In rare cases, a track may contain a
number of index points, effectively dividing the track up
into several parts.
Track 1 Track 2 Track 3 Track 4
Super VCDlVideo CD
Track 1 Track 2 Track 3 Track 4 Track 5
b--
CD
MP3
MP3 (MPEGI audio layer 3) is a compressed audio file
format. Files are recognized by their file extension
“.mp3” or “.MP3”. Folders that contain mp3 files are
automatically numbered F-001, F-002, etc. Tracks within
folders are automatically numbered T-001, T-002, etc.
C’
MP3
DVD is an incredible format that presents the highest
quality digital audio and video available today.
Because using the DVD player and DVDs may be
confusing at first, following the order below should
help you get through the important stages of getting
set up so you can start using your player as soon as
possible.
Refer to the section ‘Before Using’on
page 8
to
confirm that all the accessories were included with the
player. If you are new to DVD, it might be beneficial for
you to go through the ‘Names and Functions’section
starting on
page
9 to get familiar with the parts and
buttons on the main unit and remote control as they
will be referred to throughout this manual.
There is also a list of terms that can be found on
page
61
if you are having trouble understanding some of the
terminology associated with DVD.
No entertainment system seems to be set up exactly
the same way. The ‘Making Connections’section
starting on
page 14
shows how video and audio
connections may be made to suit your home
entertainment system.
Set up the necessary player
menus.
Before you can begin to enjoy the benefits of the DVD
format, it is first necessary to set up the player to
output the video and audio information that
corresponds to your system. The section ‘Setting Up
the Player’starting on
page 17
explains how to use the
Setup Navigator, a function that automatically sets up
the player corresponding to the answers given in a
multiple-choice on-screen procedure. The Setup screen
menus, described in the section starting on
page 24,
are also used in a number of other functions. Learning
the procedure for operating these menus will make
using this player much easier and more enjoyable.
When all the connections and setups have been made,
you are ready to play a DVD, Super VCD/Video CD, CD,
or MP3 with the player. The section ‘Getting Started
Using Your DVD Player/starting on
page
20 outlines
the basic player operations.
Once you are comfortable using the basic player
functions, you are ready to take advantage of the
various options DVD and this player have to offer. The
section ‘Advanced Functions’starting on
page
39
describes how to use the features available on many
DVDs.
6
En
Before Using ........................................ 8
Checking Accessories .................................... .8
Preparing the Remote Control ........................ .8
.,a ..............
Names and Functions .......................... 9
Front Panel ..................................................... .9
Display Window.. ........................................... 10
Rear Panel ..................................................... 11
Remote Control ............................................. 12
Making Connections ......................... 14
Connecting Your DVD Player ......................... 14
Audio Connections ........................................ 15
Video Connections ......................................... 16
System Control Connections ......................... 16
..I. a\ i, I.,
Setting Up the Player ....................... 17
Setting the TV System.. ................................. 17
Using the Setup Navigator.. ........................... 17
Getting Started Using Your DVD
Player .............................................. 20
Playing DVDs, Super VCDs/Video CDs, CDs
and MP3s.. .............................................. .20
When a Menu Screen is Displayed ............... 21
To Open or Return to the DVD or
Super VCD/Video CD Menu Screen ........ .21
Chapter (Track) Skip Forward/Skip Back ...... ..2 2
Forward and Reverse Scanning .................... .22
Resuming Playback from
Where You Stopped ................................. 23
Stopping Playback and
Switching Power Off.. ............................. .23
Adjusting Audio and Video
Settings .......................................... 24
Using the Setup Screen Menus ................... .24
Changing to the Setup Screen
“Expert” Menu Mode.. ........................... .25
Adjusting the Dynamic Range of
the Audio Soundtrack.. ............................ .26
Setting the Digital Audio Output To Be
Compatible with Your AV Component.. ....26
Getting Surround Sound from
Stereo Speakers.. .................................... .28
Setting the TV Screen Size ........................... .29
Switching the S-Video Output ...................... .30
Selecting the Type of Paused Image to
Display .................................................... .30
Setting the Position of
the On-screen Display.. ........................... .30
Adjusting the Video Quality ........................... 31
Viewing from a Desired Camera Angle
(Multi-Angle). ............................................ 33
., ,, ., _a* ,,_ y\-., I ” _:x\esL .- \* -,s” _” x
Setting the Language Options.. ....... 34
Setting the On-screen Display
(OSD) Language.. .................................... .34
Changing the Audio Language
(Multi-Language Function) ...................... .34
Selecting a Subtitle Language
(Multi-Language Subtitles) ...................... .36
Advanced Functions .............
.”
............. 39
Still Frame/Slow Play/Frame
Advance Playback .................................... 39
Searching for a Title, Folder, Chapter, Track, or
Location on a Disc .................................... 40
Using the MP3 Navigator ............................. .41
Repeat Play .................................................... 42
Random Play.. ................................................ 43
Playback in a Desired Order
(Program Play) .......................................... 44
Continuing Playback from a Specified Location
(Last Memory). ......................................... 48
Memorizing Settings for Often Viewed DVDs
(Condition Memory) ................................ .49
Singing Your Favorite Songs Along with
Karaoke Discs (DV-533K only) .................. 50
Setting the Parental Lock Level .................... .51
Country Code List.. ........................................ 53
Changing the Background of the Screen.. .....53
Turning the Screen Saver On and Off.. .......... 53
Resetting the Player to System Settings.. .....53
Viewing Disc Information ............................. .54
Additional Information ..................... 56
Disc Care ....................................................... 56
For Proper and Long Use of This Unit ........... 56
Language Code List.. ..................................... 58
Troubleshooting ............................................. 59
Terms ............................................................. 61
Specifications ............................................... .63
7
En
Please confirm that the following were received with the
player.
Audio cord
Video cord
Power cord
Inserting batteries into the remote
control
compartment cover
toward the center
of the remote, pull
out in the direction
indicated by the
arrow.
Make sure to match
the plus (+) and minus
(4 polarity guides on
the batteries with the
marks inside the
battery compartment.
Remote control unit
3
Close the cover.
AA (R6P) dry cell batteries
When disposing of used batteries, please comply
with governmental regulations or environmental
public instruction’s rules that apply in your country
or area.
~048~~
Operating instructions (this manual)
Notes
l
Do not mix old and new batterres.
l
When replacing batteries, use all new batteries.
l
When not using the remote control for a long period of tin
(over 1 month), remove the batteries to avoid possible
damage from battery corrosion. If battery leakage occurs,
wipe the battery liquid from the battery component, then
Insert new batteries.
7e
When operating the remote control, point it at the
remote sensor (a) located on the player’s front panel.
The remote control can be used up to 7 m (23 feet) from
the player and within a 30” angle on each side of the
sensor.
Notes
l
Exposing the remote sensor to direct sunlight or strong ligt
may cause faulty operation.
l
If the CONTROL IN jack on the player’s rear panel is
connected to the CONTROL OUT jack of another
component, point the remote control at the other
component to operate the player. Operation will not be
possrble when pointed at this player
(page
16).
8
En
0 6 STANDBY/ON button
Press to switch the player on or to put in standby
(pages 20,23).
@ Disc tray
When loading a disc, place drscs in the disc tray with
the label side facing up (pages
20, 23).
OR
emote sensor
Point the remote control toward the remote sensor
to operate the player (page 8).
@ Display window
Displays system information (page
10).
@) Karaoke controls (DV-533K only)
MIC input jack
Use to connect a microphone (not supplied) to the
player to use the karaoke function. The karaoke
function is actrve when a microphone is connected
(page 50).
VOLUME control
Turn to adjust the volume of the vocals when using
the karaoke functron (page 50).
ECHO control
Turn to adjust the amount of drgital echo effect to
add to the vocals when using the karaoke function
(page 50).
@ I (open/close) button
Press to open and close the disc tray (pages 20,23).
0 w ++ (reverse) button
Press to go back to previous chapters/tracks. Press
and hold to perform reverse playback scanning
(pages 22).
@ w HI (forward) button
Press to advance to chapters/tracks. Press and hold
to perform fast-forward scanning (page
22).
@ n (stop) button
Press to stop playback. Pressing once enables
playback to resume from a point shortly before the
location where it stopped. Pressing twice causes the
disc to return to the beginning of the disc if playback
starts again (page 23).
@$ II (pause) button
Press during playback to pause. Press again to
resume playback (page 39).
0 F (play) button
Press to start or resume playback (pages
20,23).
9
En
0 DTS indicator
Indicates DTS audio playback.
@ GUI indicator
Indicates an on-screen menu operation is being
performed (pages 17,24).
@ & indicator
Indicates Multi-Angle playback is in progress (page
33).
@ TITLE indicator
Indicates a title number is being displayed.
@ (@> indicator
Indicates that TruSurround is selected (page 28).
@ TRK indicator
Indicates a track number is being displayed.
0 CHP indicator
Indicates a chapter number is being displayed.
@ LAST indicator
Indicates the Last Memory location is recorded in
memory for the currently loaded DVD or Super VCD/
Video CD (page 48).
@ COND. indicator
Indicates that Condition Memory settings are
memorized for the currently loaded DVD (page 49).
@ TOTAL indicator
Indicates that the disc in the player is stopped and
DISPLAY has been pressed (page 55).
0 REMAIN indicator
Indicates that the remaining playback time of a title
or chapter/track is being displayed.
@ IIOD indicator
Indicates Dolby Digital audio playback.
0 F indicator
Indicates when a disc is playing.
@ II indicator
Indicates when a disc is paused.
@$ Counter display
Displays the playback mode, type of disc, title/folder
and chapter/track numbers, playback time, etc.
b
10
En
0 CONTROL IN jack
Use to connect this player to another component
bearing the Proneer m mark. This lets you control
thus unit as though it were a component in a system.
Player operations are then performed by pointing the
remote control at the component that the player is
connect to
(page 16).
@ COMPONENT VIDEO OUT jacks
If your TV or monrtor has component video inputs,
you can produce a higher quality picture on your TV
or monitor by connecting to the component video
outputs on this unit
(page 16).
@ AUDIO OUT jacks
Use to output two-channel audio (analog) to the
audio stereo inputs on a TV or stereo amplifier. If you
are connecting to a receiver that has both digital and
analog input jacks for DVD player connection, it may
be beneficial to make both connections
(pages 14,
15).
@ AC IN power cord connection terminal
Use to connect the power cord to the wall outlet
(page 14).
@ S-VIDEO OUT jack
If your TV or monitor has an S-video input, clear
picture reproduction is possible by connecting the
player to your TV or monitor via the S-Video jack
(page 16).
You can switch between
[Sl]
and [S21 S-video
output from the Setup menu
(page 30).
@ VIDEO OUT jack
Connect to the video input on a TV or monitor or AV
amplifier or receiver with video input capability
(pages 14,161.
0 DIGITAL OUT OPTICAL jack
Use to output the digital audio signal recorded on
discs. You can output the digital signal via the optical
output jack to an AV amplifier or receiver
(page 15).
@ DIGITAL OUT COAXIAL jack
Use to output the digital audio signal recorded on
discs. You can output the digital signal via the coaxial
output jack to an AV amplifier or receiver
(page 15).
11
Fn
(Buttons indicated with * are used for menu operation.)
LAST MEMORY button
You can resume DVD or Super VCD/Video CD
playback from the point you last watched even if the
disc is removed from the player. Press LAST
MEMORY during playback to set a Last Memory
point, When you want to resume playback of that
disc, press LAST MEMORY in the stop mode and
playback starts from the memorized point. Last
Memory locations can be stored for up to 5 DVDs
and 1 Super VCD/Video CD
(page 48).
0 (standby/on) button
Press to switch the player on or to put in standby
(pages 20,231.
AUDIO button
Press repeatedly to select one of the audio
languages programmed on a DVD
(pages 34,35).
For Video CD, CD and MP3. each press changes the
audio output as follows.
r+ Stereo + l/L (Left) + 2/R (Right) 1
For Super VCD, each press changes the audio output
as follows.
I
1 Stereo -b IL+ IR 3
2R
+
2L
+
2 Stereo +
@ SUBTITLE button
Press repeatedly to select one of the subtitle
languages programmed on a DVD or to turn the
subtitles off
(page 36).
@ SETUP butto,n*
Press when the player is in either play or stop mode
to open and close the Setup screen
(pages l&24).
@ MENU button*
Use to display or close the DVD menu or MP3
Navigator screen
(pages 21,411.
0 DISPLAY button
Press during playback to display statistical disc
information. Press repeatedly to drsplay drfferent
information
(page 54).
@ Cursor buttons (+/)/A/W* c.
Use to move through the options on menu screens
and to change settings.
@ ENTER button*
Use to implement settings selected with the cursor
buttons or to set items highlrghted in a menu.
@$ PREV 1~ (previous) button
During playback, press PREV t+4 to go back to a
previous chapter/track
(page 22).
12
En
0 STOP
n
button
Press to stop playback. Pressing once enables
playback to resume from a point shortly before the
location where it was stopped. Pressing twice
causes the disc to return to the beginning of the disc
when playback starts again
(page 23).
@ STEP/SLOW 411/11) buttons
Press
STEP/SLOW
411 or II) during playback to
view still frame. Press and hold
STEP/SLOW
411 or
II) during playback to view slow playback. In still
frame, press
STEP/SLOW
II) to advance DVDs and
Video CDs frame by frame and
STEP/SLOW
411 to
back up a few frames at a time (DVD only)
(page 39).
@ Number buttons (I-9.0, +lO)*
Use to perfd;m direct title and chapter/track
searches, and to Input numerical values.
@ RANDOM button
Press to play title and chapters/tracks in random
order
(page 43).
@ PROGRAM button
You can program titles, chapters, or tracks to play
back in a desired order. Programs can be a
maximum of 24 steps. Additionally, DVD programs
for up to 24 discs can be stored in the player’s
memory for future use
(pages 44-47).
@ CONDITION MEMORY button
You can store in memory the settings for up to 15
DVDs. Press
CONDITION MEMORY
during DVD
playback to memorize the settings
(page 49).
0 OPEN/CLOSE button
Press to open or close the disc tray
(pages 20,231.
@ ANGLE button
Some DVDs are recorded with various camera angle
playback options. Press
ANGLE
repeatedly to
display different camera angles
(page 33).
@ REPEAT button
Use to set the repeat mode
(page 42).
@ REPEAT A-B button
Press at the beginning and end of the section you
want to repeat or to mark a location you want to
return to
(page 42).
@ TOP MENU button*
Press to call up the top menu programmed on the
DVD. Depending on the DVD, the top menu may be
Identical to the DVD menu
(page 21).
@ RETURN button*
Use to go one menu back (current settings are
maintained). Use
RETURN
when you do not want to
change the option setting in a menu.
@ NEXT HI button
During playback, press
NEXT
ti to advance to the
next chapter/track
(page 22).
@ PLAY ) button
Press to start or resume playback
(pages 20,23).
@ PAUSE II button
Press to pause playback of a disc. Press again to
resume playback
(page 39).
@ REV rr/FWD w (fast reverse/forward)
buttons
During playback of DVD and Super VCD/Video CD,
press
FWD H to perform fast forward scanning. Press
REV
+ to perform fast reverse scanning of DVD
and Super VCD/Video CD. When a CD or MP3 is
loaded, audio scanning is performed
(page 22).
@ CLEAR button
Works in conjunction with a number of player
functions. Use to cancel repeat and random
playback, and to edit programs.
@ SEARCH MODE button
Press to perform a title/folder, chapter/track OI
elapsed time search
(page 40).
13
En
Connection Guide
Unlike any other audiovisual media format, DVD offers a
wide array of audio and video output options which
allows playback to be enjoyed in any number of system
configurations from a standard TV with stereo audio
input to a home theater system with a TV or monitor and
full surround sound capabilities.
The illustration on this page shows the basic setup using
the audio and video cords included with this player. Use
this illustration as a guide to setting up your home
system.
An explanation of each type of audio and video
connection available can be found on pages
15
to 16. To
determine the best audio and video connection setup for
your system, refer to the manuals supplied with the
components you are making connections to.
In addition to making physical connections to your TV or
monitor, it is also necessary to assign the TV screen size.
You can use the [Setup Navigator] in the Setup screen
General menu to set whether you are using a wide
screen or standard size TV or monitor (page
18).
Additionally, you can use the [TV Screen1 setting in the
Setup screen Video
1
menu (page 29).
Notes
l
When maklng connections to this unit or when changing
connectlow, check that the unit is off by pressing
~3STANDBY/ON and unplug the power cord from the
power outlet.
l
The video output on this player uses copy protect circuitry
to prevent the video playback on DVDs from being copied.
If you connect the player to a TV via a VCR, or record and
play back the contents of a disc with a VCR, the playback
picture may not be normal.
14
En
This player features two digital (optical and coaxial) and
also analog audio output formats.
You can enjoy the digital audio recorded on DVD discs
from both optical digital and coaxial digital output jacks.
When making digital audio connections, do not
make connections from both the coaxial and optical
digital outputs to the same component.
When a DVD recorded in Dolby Digital, DTS, or MPEG
is loaded, noise will be output if you have made
connections via %e digital audio jacks to a receiver or
amplifier that cannot decode a Dolby Digital, DTS, or
MPEG digital bitstream. In this case, be sure to set up
the Setup Navigator audio settirrgs to best reflect the
type of system you are using (page 19). Additionally, the
digital audio settings can be adjusted manually in the
Setup screen Audio 1 menu (pages 26,27).
DIGITAL OUT OPTICAL
The digital signal is transmitted as light pulses through
a fiber-optic cable.
l Use to connect to an AV amplifier or receiver with
built-in Dolby Digital, DTS, or MPEG decoder.
l Use a fiber-optic cable (not supplied) to connect the
DIGITAL OUT OPTICAL (digital optical output) on
the player to the digital optical input on an AV
amplifier or receiver.
DIGITAL OUT COAXIAL
The digital signal is transmitted electronically through a
coaxial cable.
l Use to connect to an AV amplifier or receiver with
built-in Dolby Digital, DTS, or MPEG decoder.
l Use a coaxial cable (not supplied) to connect the
DIGITAL OUT COAXIAL (coaxial digital output) on
the player to the coaxial digital input on an AV
amolifier or receiver,
l When using a microphone, connect like this.
l Make analog audio connections to a stereo amplifier
or receiver.
l Analog audio connections can also be made to a TV or
monitor with stereo input jacks.
l Use the supplied audio cord to connect the AUDIO
OUT on the player to the audio input on the stereo
amplifier or receiver.
l When makrng analog audio connections, be sure to
match the color of the plugs with the color of the
15
En
This player features S-video, composite, and component
video output possibilities.
Check the manual supplied with your TV or monitor to
determine the best possible connection for your system.
In addition to making physical connections to your TV or
monitor, it is also necessary to assign the TV screen size. You
can use the [Setup Navigator] in the Setup screen General
to set whether you are using a wide screen or standard size
TV or monitor (page18).Additionally, you can use the [TV
Screen] setting in the Setup screen Video 1 menu (page29).
S-VIDEO OUT
l Make S-video connections to a TV or monitor with S-video
input to produce a high quality video image.
l Use an S-video cable (not supplied) to connect the S-
VIDEO OUT jack on the player to S-video input on the TV
or monitor,
VIDEO OUT
l Make composite video connectrons to a standard TV or
monitor with a video input jack.
l Use the supplied video cable to connect one of the VIDEO
OUT jack on the player to the video input on the TV or
monitor.
l Be sure to match the color of the plug with the color of the
jack (yellow).
COMPONENT VIDEO OUT
l Make component video connections to a TV or monitor
with component inputs to produce a higher quality video
image.
l Use a component video cable or 3 video cords (not
supplied) to connect the COMPONENT VIDEO OUT jacks
~$8the piayer to the comgment jacks ow the monitor.
Using a commercially available cord with a mini plug
(3.5 mm dia. with no resistance) to connect this player’s
CONTROL IN jack to the CONTROL OUT jack of another
PIONEERcomponent bearing the m mark, you can control
the player as though it were a component in a system
(system control).
l If you connect for system control, you cannot operate the
player directly. Point the remote control unit at the
component (AVamplifier, etc.) connected to the
CONTROL OUT jack to operate.
l When controlling as a system, be sure to make a
connection to the amplifier using an audio or video cord,
even when using only digital components.
l For details, refer to the operation manuals of the
cannecred CQmpQr?eWtS.
16
En
About MOD. (Modulation) PAL
notlce that the picture is distorted when playing some discs,
you
should leave it set to
AUTO.
If you experience picture distortion with some discs, set the
TV system to match your country or region’s system. Doing
this, however, may restrict the kinds of disc you can watch.
The table below shows what kinds of disc are compatible
with each setting
(AUTO,PAL
and
NTSC).
I
Disc I Output format I
TVP~
I I
Format Positionof TVSYSTEMmode
NTSC PAL AUTO
Switch the player into standby.
Hold down FF~ then press 0 STANDBY/ON
to switch the TV system.
The TV system changes as follows:
AUTO -. NTSC
NTSC
-, PAL
PAL
+ AUTO
The display indicates the new setting.
Note that you haveto switch the player into standby
before each change.
SHRINK
Most models of the newly developed countdown PAL TV
system detect 50 Hz (PAL)/60 Hz INTSC)and automatically
switch vertical amplitude, resulting in a display without
vertical shrinkage.
If your PAL TV does not have a V-Hold control, you may
not be able to view NTSCdisc because the picture may
roll. If the TV has a V-Hold control, adjust it until the picture
stops rolling. On some TVs, the picture may shrink
vertically, leaving black bands at the top and bottom of the
screen. This is not a malfunction; It is caused by the NTSC
+ PAL conversion.
The Setup Navigator has been designed to simplify the
process of getting the DVD player ready to perform.
Designed as a series of on-screen multiple-choice questions,
the Setup Navigator automatlcally sets the audio, video, and
language settings according to how the questions are
answered. Once this procedure is complete, it will be
possible to begin using the DVD player to enjoy DVDs.
The procedure on this page describes the operations
necessary to function within the Setup Navigator screens. A
detalled descnptlon of the contents of each question that
appears on the screen can be found on the following pages.
When setting up for the first time
Some DVDs start playing automatically when loaded in the
player. Because the Setup Navigator cannot be used if a disc
ISplaying, it is recommended to set up the player using the
Setup Navigator before loading a DVD for the first time If a
DVD has been loaded, be sure to press STOP
n
before
En
,_,‘,“,~__,‘,~,~“,____^_^ ” ,“. “~ f Ij f f I ^
1 Press (1,(6 STANDBY/ON on the front
panel).
If there’s already a disc loaded and it starts to play,
press
STOP H
to stop it.
2 Press SETUP.
When
SETUP
is pressed for the first time, the
following screen appears. Though the Setup
Navigator may be used more than once, this screen
only appears the first time
SETUP
is pressed.
@Setup using the Setup Navigator I
<,, “_V ~~,<~~<s,<,*<s,~“L~_ *““<s _+*,s *I_ ,_ I , , ,, <,,
3 Use the cursor buttons (A/V) to make a
selection.
l If you are going to use the Setup Navigator, it is
not necessary to change the setting on the first
screen. Please proceed to the next step.
l If you do not want to set up the player using
the Setup Navigator, use the cursor button
(7) to select [Auto Start Off] at this time.
The Setup Navigator function may still be used at
a later time in manual Setup screen menu
operation
(page 24).
4 Press ENTER.
The selection is entered and the next Setup
Navigator screen appears.
x1__<~~,,^j~~~“s‘,~,, I- _*“e,,s,*s,es,,,sm,%. I,
Use steps 3 and 4 as a basis for entering selections on
the all of the Setup Navigator screens described on the
following pages.
To change the answer to a prior question
Use the cursor button (4) to return to previous
screens. Please note, however, that you cannot go
forward using the cursor button (F), so
it
will be
necessary to answer all the questions that occur after
the screen that was returned to.
To exit the Setup Navigator
Press SETUP while on any of the screens to exit the
Setup Navigator. Please note that if the Setup Navigator
is exited before all the questions are answered, no
settings are changed.
Setting the OSD Language
The [OSD Language] screen establishes the OSD
language, or on-screen display language, which refers to
the language that is used by the player in menus and
on-screen messages. Additionally, the language that is
established at this setting will also be used for the
default audio and saabtitle language.
I
@Select the On Screen Language I
Notes
l
The
languages
that can be selected may be different from
those shown above.
l
In addition to setting the [OSD Language], the audro and
subtitle language are also set at this time. If you wish to
change the audio or subtitle language to a different
language, make changes rn the Setup screen Language
menu [Audio Language1 and [Subtitle Language] as
needed (pages 35.36).
The [TV Type1 screen establishes the size, or more
appropriately the width to height ratio of your television
or monitor. The width-to-height ratio of conventional TVs
is 4:3, while the width-to-height ratio of wide screen and
high-definition TVs is 16:9. This width-to-height ratio is
called the aspxt ratio
2 WidescreenTV
There are two screen formats that can be used to display
wade-screen format DVDs: letter box and pan & scan. When
.
[Standard (4:3)1 is selected rn the Setup Navrgator, the letter
box screen format ISautomatrcally selected. To swatch the
preference to the pan &scan format, make changes in the
Setup screen Video 1 menu [TV Screen1 settrng (page 28).
18
En
The [Exit Setup Navigator] is the final screen in the
The [Digital Jack] screen establishes whether digital
connections have been made to an AV amplifier,
receiver, or external decoder. As there are numerous
options available, please refer to the instructions
supplied with the component the player is connected to
determine what digital audio formats can be decoded. If
you have made no digital connections, select [Not
Setup Navigator.
To change other player settings in the Setup
screen menus g
The procedure for changing the settings in the Setup
screen menus is described on page 24.
Setting compatibility with 96 kHz
The 196 kHz PCM Audio] screen establishes whether or
not the AV component the player is connected to is
capable of processing an audro signal with a sampling
rate of 96 kHz. This screen only appears if connections
have been made to an external AV component as
determined in previous screens
19
En
Before you can start to enjoy the digital audio and video
on DVDs, be sure that you have either performed the
Setup Navigator procedure described in the previous
section or made the necessary settings in the Setup
screen menus as outlined in the next section to set up
the player to correspond to your home system. Having
made these settings, you are now ready to start using
the player to enjoy DVDs, Super VCDs/Video CDs, CDs
” “.” .~” I ” . _ _a- ._I.. _*.“I_?‘ _I‘,_ x ‘, ,~ ,,,,
1
Press (1,(0 STANDBY/ON on the front
panel). *__a“, ,<”S”Zs‘_,,‘,L‘,.
2 Press OPEN/CLOSE (A on the front panel).
The disc tray comes out.
3 Load a disc.
Load a drsc wrth the label side facing up, using the
disc tray guide to align the disc.
4 Press PLAY b b on the front panel).
l The disc tray closes, and playback begrns.
l MP3 only: It may take a few seconds for the
player to locate the track on the disc, depending
on the complexity of the file structure. During this
time, “Please wait a moment” is displayed.
l Depending on the disc, a menu may be
displayed. If a menu is displayed, proceed to
step 5.
5 Select the item you want to view.
l When a DVD is loaded:
Select the item with the cursor buttons (~/F/A/
v) or the number buttons then press ENTER.
l When a Super VCDlVideo CD is loaded:
Use the number buttons to select the item.
l
Noise is output if you make digital audio connections to a
receiver or amplifier that does not have a built-in decoder.
Check that the digital audio output format selected rn the
Audio 1 menu corresponds to the audio components you
have made connections to (pages 26, 27).
l
The TV screen size is factory set to present the wide
screen format 116:9 aspect ratio). If you have a standard TV
screen (4:3 aspect ratlo), this settrng can be changed to
match your
lV
screen size
in
the
Video
1 menu (page 29).
4
When an operation is prohibited
There are times when you are usrng the player and attempt to
perform an operation, but for some reason it cannot be
performed. When this occurs, one of the two following icons
appears on the screen.
I The operatron ISprohrbrted by the player
The operatron ISprohrbrted by the programming on
the drsc.
20
En

Other manuals for DV-533

1

This manual suits for next models

2

Other Pioneer DVD Player manuals

Pioneer DV-636D User manual

Pioneer

Pioneer DV-636D User manual

Pioneer DVD-V5000 User manual

Pioneer

Pioneer DVD-V5000 User manual

Pioneer Elite DV-79AVi User manual

Pioneer

Pioneer Elite DV-79AVi User manual

Pioneer DV-360-S User manual

Pioneer

Pioneer DV-360-S User manual

Pioneer DVL-909 User manual

Pioneer

Pioneer DVL-909 User manual

Pioneer DV-747A User manual

Pioneer

Pioneer DV-747A User manual

Pioneer DV-210K-K User manual

Pioneer

Pioneer DV-210K-K User manual

Pioneer DV-S733A User manual

Pioneer

Pioneer DV-S733A User manual

Pioneer Elite DV-58AV User manual

Pioneer

Pioneer Elite DV-58AV User manual

Pioneer DV-7474 User manual

Pioneer

Pioneer DV-7474 User manual

Pioneer DV-47Ai User manual

Pioneer

Pioneer DV-47Ai User manual

Pioneer Elite DV-48AV User manual

Pioneer

Pioneer Elite DV-48AV User manual

Pioneer HD-V9000 User manual

Pioneer

Pioneer HD-V9000 User manual

Pioneer DVL-909 User manual

Pioneer

Pioneer DVL-909 User manual

Pioneer DV-353-K User manual

Pioneer

Pioneer DV-353-K User manual

Pioneer Elite DV-05 User manual

Pioneer

Pioneer Elite DV-05 User manual

Pioneer DV-410V-K User manual

Pioneer

Pioneer DV-410V-K User manual

Pioneer DV-737 User manual

Pioneer

Pioneer DV-737 User manual

Pioneer DVD-V7200 Quick start guide

Pioneer

Pioneer DVD-V7200 Quick start guide

Pioneer DV-563A User manual

Pioneer

Pioneer DV-563A User manual

Pioneer DV-717 User manual

Pioneer

Pioneer DV-717 User manual

Pioneer DV-AX10 User manual

Pioneer

Pioneer DV-AX10 User manual

Pioneer DV-59AVi User manual

Pioneer

Pioneer DV-59AVi User manual

Pioneer DV-420V-K User manual

Pioneer

Pioneer DV-420V-K User manual

Popular DVD Player manuals by other brands

Desay DS-5701 owner's manual

Desay

Desay DS-5701 owner's manual

Denon DNV210 - Professional DVD Player user guide

Denon

Denon DNV210 - Professional DVD Player user guide

Philips DVD640/001 user manual

Philips

Philips DVD640/001 user manual

Sony DVP-NS39 operating instructions

Sony

Sony DVP-NS39 operating instructions

Sony DVP-NS975V Specifications

Sony

Sony DVP-NS975V Specifications

Eltax CV-153 instruction manual

Eltax

Eltax CV-153 instruction manual

LG LDA-730 owner's manual

LG

LG LDA-730 owner's manual

Philips DVP3360K/98 quick start guide

Philips

Philips DVP3360K/98 quick start guide

Harman Kardon DVD 25 owner's manual

Harman Kardon

Harman Kardon DVD 25 owner's manual

Tview T20DVFD user manual

Tview

Tview T20DVFD user manual

Philips DVP5990K/98 quick start guide

Philips

Philips DVP5990K/98 quick start guide

Classe Audio CDP-300 owner's manual

Classe Audio

Classe Audio CDP-300 owner's manual

Sony DVP-NS50P Specifications

Sony

Sony DVP-NS50P Specifications

Philips DVP6600 Service manual

Philips

Philips DVP6600 Service manual

Denver DVH-7779D instruction manual

Denver

Denver DVH-7779D instruction manual

Logik L1HDVD10E instruction manual

Logik

Logik L1HDVD10E instruction manual

Philips DVP3588 quick start guide

Philips

Philips DVP3588 quick start guide

Esoteric DV-30s owner's manual

Esoteric

Esoteric DV-30s owner's manual

manuals.online logo
manuals.online logoBrands
  • About & Mission
  • Contact us
  • Privacy Policy
  • Terms and Conditions

Copyright 2025 Manuals.Online. All Rights Reserved.