Pioneer VSX-321-K-P User manual

ORDER NO.
PIONEER CORPORATION 1-1, Shin-ogura, Saiwai-ku, Kawasaki-shi, Kanagawa 212-0031, Japan
PIONEER ELECTRONICS (USA) INC. P.O. Box 1760, Long Beach, CA 90801-1760, U.S.A.
PIONEER EUROPE NV Haven 1087, Keetberglaan 1, 9120 Melsele, Belgium
PIONEER ELECTRONICS ASIACENTRE PTE. LTD. 253 Alexandra Road, #04-01, Singapore 159936
PIONEER CORPORATION
2011
2011 Printed in Japan
Center
SurroundFront
HTP-071
RRV4273
HOME CINEMA PACKAGE
HTP-071
AUDIO/VIDEO MULTI-CHANNEL RECEIVER
VSX-321-K-P
SUBWOOFER SPEAKER SYSTEM
S-22W-P S-11-P
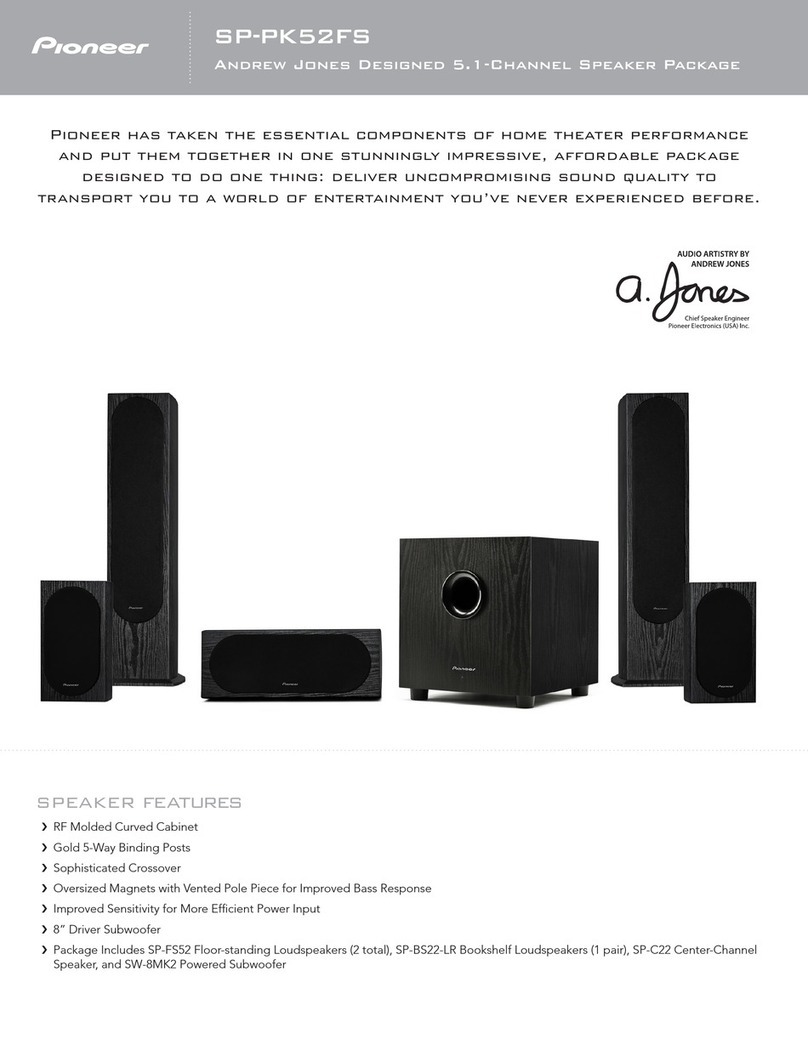
HTP-071 is a Home Cinema Package and consists of VSX-321-K-P, S-22W-P and S-11-P.
THIS MANUAL IS APPLICABLE TO THE FOLLOWING MODEL(S) AND TYPE(S).
Model
HTP-071 SYXE8 AC 220 V to 230 V
HTP-071 CXE AC 120 V
HTP-071 DLPWXE AC 220 V to 240 V
HTP-071 AXE5 AC 220 V
VSX-321-K-P SYXE8 AC 220 V to 230 V
VSX-321-K-P CXE AC 120 V
VSX-321-K-P DLPWXE AC 220 V to 240 V
VSX-321-K-P AXE5 AC 220 V
————— —————
————— —————
S-22W-P
S-11-P
Type Power Requirement Remarks
K-IZVOCT.

2HTP-071
12 3 4
A
B
C
D
E
F
12 3 4
SAFETY INFORMATION
WARNING
This product may contain a chemical known to the State of California to cause cancer, or birth defects or other reproductive
harm.
Health & Safety Code Section 25249.6 - Proposition 65
This service manual is intended for qualified service technicians; it is not meant for the casual do-it-
yourselfer. Qualified technicians have the necessary test equipment and tools, and have been trained
to properly and safely repair complex products such as those covered by this manual.
Improperly performed repairs can adversely affect the safety and reliability of the product and may
void the warranty. If you are not qualified to perform the repair of this product properly and safely, you
should not risk trying to do so and refer the repair to a qualified service technician.
1. SAFETY PRECAUTIONS
The following check should be performed for the
continued protection of the customer and service
technician.
LEAKAGE CURRENT CHECK
Measure leakage current to a known earth ground
(water pipe, conduit, etc.) by connecting a leakage
current tester such as Simpson Model 229-2 or
equivalent between the earth ground and all exposed
metal parts of the appliance (input/output terminals,
screwheads, metal overlays, control shaft, etc.). Plug
the AC line cord of the appliance directly into a 120 V
AC 60 Hz outlet and turn the AC power switch on. Any
current measured must not exceed 0.5 mA.
ANY MEASUREMENTS NOT WITHIN THE LIMITS
OUTLINED ABOVE ARE INDICATIVE OF A POTENTIAL
SHOCK HAZARD AND MUST BE CORRECTED BEFORE
RETURNING THE APPLIANCE TO THE CUSTOMER.
2. PRODUCT SAFETY NOTICE
Many electrical and mechanical parts in the appliance
have special safety related characteristics. These are
often not evident from visual inspection nor the protection
afforded by them necessarily can be obtained by using
replacement components rated for voltage, wattage, etc.
Replacement parts which have these special safety
characteristics are identified in this Service Manual.
Electrical components having such features are
identified by marking with a >on the schematics and on
the parts list in this Service Manual.
The use of a substitute replacement component which
does not have the same safety characteristics as the
PIONEER recommended replacement one, shown in the
parts list in this Service Manual, may create shock, fire,
or other hazards.
Product Safety is continuously under review and new
instructions are issued from time to time. For the latest
information, always consult the current PIONEER Service
Manual. A subscription to, or additional copies of,
PIONEER Service Manual may be obtained at a nominal
charge from PIONEER.
Leakage
current
tester
Reading should
not be above
0.5 mA
Device
under
test
Test all
exposed metal
surfaces
Also test with
plug reversed
(Using AC adapter
plug as required)
Earth
ground
AC Leakage Test
(FOR USA MODEL ONLY)

3
HTP-071
56 7 8
56 7 8
A
B
C
D
E
F
CONTENTS
SAFETY INFORMATION.......................................................................................................................................................... 2
1. SERVICE PRECAUTIONS.................................................................................................................................................... 4
1.1 NOTES ON SOLDERING ............................................................................................................................................... 4
1.2 NOTES ON REPLACING PARTS ................................................................................................................................... 4
1.3 SERVICE NOTICE.......................................................................................................................................................... 4
2. SPECIFICATIONS................................................................................................................................................................. 5
3. BASIC ITEMS FOR SERVICE .............................................................................................................................................. 7
3.1 CHECK POINTS AFTER SERVICING ...........................................................................................................................7
3.2 JIGS LIST ....................................................................................................................................................................... 7
3.3 PCB LOCATIONS ........................................................................................................................................................... 8
4. BLOCK DIAGRAM .............................................................................................................................................................. 10
4.1 OVERALL CONNECTION DIAGRAM........................................................................................................................... 10
4.2 OVERALL BLOCK DIAGRAM....................................................................................................................................... 12
4.3 D-MAIN BLOCK DIAGRAM .......................................................................................................................................... 14
5. DIAGNOSIS ........................................................................................................................................................................ 16
5.1 TROUBLESHOOTING.................................................................................................................................................. 16
5.2 PROTECTION CIRCUIT............................................................................................................................................... 23
5.3 IC INFORMATION ........................................................................................................................................................ 24
6. SERVICE MODE................................................................................................................................................................. 36
6.1 SERVICE MODE .......................................................................................................................................................... 36
7. DISASSEMBLY ................................................................................................................................................................... 39
7.1 VSX-321-K-P ................................................................................................................................................................ 39
7.2 S-22W-P ....................................................................................................................................................................... 47
7.3 S-11-P........................................................................................................................................................................... 48
8. EACH SETTING AND ADJUSTMENT ................................................................................................................................ 49
8.1 UPDATING OF THE FIRMWARE ................................................................................................................................. 49
9. EXPLODED VIEWS AND PARTS LIST............................................................................................................................... 54
9.1 PACKING SECTION ..................................................................................................................................................... 54
9.2 VSX-321-K-P SECTION ............................................................................................................................................... 56
9.3 S-22W-P SECTION ...................................................................................................................................................... 59
9.4 S-11-P SECTION.......................................................................................................................................................... 60
10. SCHEMATIC DIAGRAM.................................................................................................................................................... 62
10.1 INPUT ASSY .............................................................................................................................................................. 62
10.2 AMP ASSY ................................................................................................................................................................. 64
10.3 MAIN ASSY (1/2)........................................................................................................................................................ 66
10.4 MAIN ASSY (2/2)........................................................................................................................................................ 68
10.5 D-MAIN ASSY (1/3) .................................................................................................................................................... 70
10.6 D-MAIN ASSY (2/3) .................................................................................................................................................... 72
10.7 D-MAIN ASSY (3/3) .................................................................................................................................................... 74
10.8BR1, HP, FUNC and FRONT ASSYS ......................................................................................................................... 76
10.9 DG ASSY.................................................................................................................................................................... 78
10.10 CNT, G-T, G-L and G-H ASSYS ............................................................................................................................... 79
10.11 STBY ASSY.............................................................................................................................................................. 80
10.12 S-11-P....................................................................................................................................................................... 81
11. PCB CONNECTION DIAGRAM ........................................................................................................................................ 82
11.1 INPUT ASSY .............................................................................................................................................................. 82
11.2 AMP ASSY ................................................................................................................................................................. 84
11.3 MAIN ASSY ................................................................................................................................................................ 86
11.4 D-MAIN ASSY ............................................................................................................................................................ 90
11.5 BR1, HP, FUNC and FRONT ASSYS ......................................................................................................................... 94
11.6 DG ASSY.................................................................................................................................................................... 96
11.7 CNT ASSY.................................................................................................................................................................. 97
11.8G-T, G-L and G-H ASSYS .......................................................................................................................................... 98
11.9 STBY ASSY................................................................................................................................................................ 99
12. PCB PARTS LIST............................................................................................................................................................ 100

4HTP-071
12 3 4
A
B
C
D
E
F
12 3 4
1. SERVICE PRECAUTIONS
1.1 NOTES ON SOLDERING
1.2 NOTES ON REPLACING PARTS
1.3 SERVICE NOTICE
• For environmental protection, lead-free solder is used on the printed circuit boards mounted in this unit.
Be sure to use lead-free solder and a soldering iron that can meet specifications for use with lead-free solders for repairs
accompanied by reworking of soldering.
• Compared with conventional eutectic solders, lead-free solders have higher melting points, by approximately 40 ºC.
Therefore, for lead-free soldering, the tip temperature of a soldering iron must be set to around 373 ºC in general, although
the temperature depends on the heat capacity of the PC board on which reworking is required and the weight of the tip of
the soldering iron.
Do NOT use a soldering iron whose tip temperature cannot be controlled.
Compared with eutectic solders, lead-free solders have higher bond strengths but slower wetting times and higher melting
temperatures (hard to melt/easy to harden).
The following lead-free solders are available as service parts:
• Parts numbers of lead-free solder:
GYP1006 1.0 in dia.
GYP1007 0.6 in dia.
GYP1008 0.3 in dia.
The part listed below is difficult to replace as a discrete component part.
When the part listed in the table is defective, replace whole Assy.
Assy Name
D-MAINAssy
Ref No. Function Part No.
Parts that is Difficult to Replace
Remarks
IC102 Audio DSP System IC ————— IC with heat-pad
D-MAINAssy IC601 IC, LOGIC-D/A Converter ————— IC with heat-pad
• Discharging
For more detail, please refer to "7. DISASSEMBLY - 1. Discharging".
• Notes on Ground Points Connection
For more detail, please refer to "7. DISASSEMBLY - 2. Notes on Disassembly and Assembly - Confirmation of GND Wire".

5
HTP-071
56 7 8
56 7 8
A
B
C
D
E
F
2. SPECIFICATIONS
[VSX-321-K-P]
Audio section
(SYXE8)
Rated power output
Front, Center, Surround..100 W per channel (1 kHz, 6 Ω, 0.7 %)
Total Harmonic Distortion
.......................................... 0.06 % (20 Hz to 20 kHz, 8 Ω, 50 W/ch)
Frequency response (LINE Pure Direct mode)
.......................................................................... 10 Hz to 70 kHz dB
Guaranteed speaker impedance ....................................6 Ωto 16 Ω
Input (Sensitivity/Impedance)
LINE...................................................................... 200 mV/47 kΩ
Output (Level/Impedance)
REC..................................................................... 200 mV/2.2 kΩ
Signal-to-Noise Ratio (IHF, short circuited, A network)
LINE....................................................................................98 dB
• The specifications are applicable when the power supply is 230 V.
(CXE)
Front (stereo) ..........................................................60 W + 60 W
Rated power output
Front, Center, Surround..100 W per channel (1 kHz, 6 Ω, 0.7 %)
Total Harmonic Distortion
.......................................... 0.06 % (20 Hz to 20 kHz, 8 Ω, 50 W/ch)
Guaranteed speaker impedance ....................................6 Ωto 16 Ω
Input (Sensitivity/Impedance)
LINE...................................................................... 200 mV/47 kΩ
Output (Level/Impedance)
REC..................................................................... 200 mV/2.2 kΩ
Signal-to-Noise Ratio (IHF, short circuited, A network)
LINE....................................................................................98 dB
(DLPWXE)
Rated power output
Front, Center, Surround..100 W per channel (1 kHz, 6 Ω, 0.7 %)
Maximum power output (Front, Center, Surround)
.............................................120 W per channel (1 kHz, 6 Ω, 10 %)
Total Harmonic Distortion
.......................................... 0.06 % (20 Hz to 20 kHz, 8 Ω, 50 W/ch)
Guaranteed speaker impedance ....................................6 Ωto 16 Ω
Input (Sensitivity/Impedance)
LINE...................................................................... 200 mV/47 kΩ
Output (Level/Impedance)
REC..................................................................... 200 mV/2.2 kΩ
Signal-to-Noise Ratio (IHF, short circuited, A network)
LINE....................................................................................98 dB
• The specifications are applicable when the power supply is 230 V.
(AXE5)
Rated power output
Front, Center, Surround....90 W per channel (1 kHz, 6 Ω, 0.7 %)
Maximum power output (Front, Center, Surround)
.............................................120 W per channel (1 kHz, 6 Ω, 10 %)
Guaranteed speaker impedance ....................................6 Ωto 16 Ω
Video section (SYXE8, CXE, LPWXE)
Signal level
Composite ..............................................................1 Vp-p (75 Ω)
Tuner section
Frequency Range (FM) .................................87.5 MHz to 108 MHz
Antenna Input (FM)............................................... 75 Ωunbalanced
Frequency Range (AM) ...................531 kHz to 1602 kHz (SYXE8)
530 kHz to 1700 kHz (CXE)
9 kHz step ........................531 kHz to 1602 kHz (LPWXE, AXE5)
10 kHz step.......................530 kHz to 1700 kHz (LPWXE, AXE5)
Antenna (AM) ............................................................ Loop antenna
Digital In/Out section
HDMI terminal .......................................................... Type A (19-pin)
HDMI output type........................................................... 5 V, 100 mA
Miscellaneous
Power Requirements .......AC 220 V to 230 V, 50 Hz/60 Hz (SYXE8)
AC 120 V, 60 Hz (CXE)
AC 220 V to 240 V, 50 Hz/60 Hz (DLPWXE)
AC 220V, 50 Hz/60 Hz (AXE5)
Power Consumption ........................... 165 W (SYXE8, CXE, AXE5)
170 W (DLPWXE)
In standby......................................................................... 0.45 W
(ARC function: OFF) (SYXE8, DLPWXE)
Dimensions...................435 mm (W) x 168 mm (H) x 362.5 mm (D)
Weight (without package) ........................................................7.6 kg
[S-22W-P]
Cabinet ...........................................................Bass-reflex, floor type
Speaker.................................................................. 16 cm cone type
Nominal impedance.....................................................................6 Ω
Outline Dimension ........... 230 mm (W) x 418 mm (H) x 358 mm (D)
Weight (without package) ........................................................5.3 kg
[S-11-P]
Front speakers / Surround speakers
Enclosure
Front speakers
.................... Closed-box bookshelf type (magnetically shielded)
Surround speakers ...............................losed-box bookshelf type
System.............................................................7.7 cm 1-way system
Speaker................................................................. 7.7 cm cone type
Nominal impedance.....................................................................6 Ω
Dimensions......................106 mm (W) x 116 mm (H) x 106 mm (D)
Weight
Front speakers....................................................................0.8 kg
Surround speakers .............................................................0.6 kg
Center speaker
Enclosure.......... Closed-box bookshelf type (magnetically shielded)
System.............................................................7.7 cm 1-way system
Speaker................................................................. 7.7 cm cone type
Nominal impedance.....................................................................6 Ω
Dimensions......................270 mm (W) x 100 mm (H) x 106 mm (D)
Weight .....................................................................................1.0 kg
Note
• Specifications and the design are subject to possible
modifications without notice, due to improvements.

6HTP-071
12 3 4
A
B
C
D
E
F
12 3 4
Accessories
Remote control (AXD7618)
(8300761800010-IL)
AM loop antenna
(E601019000010-IL)
FM wire antenna
(E605010140010-IL)
Power cord (SYXE8, DLPWXE only)
(SYXE8: L068250160020-IL)
(DLPWXE: L068250100080-IL)
Dry cell batteries
(AAA size IEC R03) x2
Speaker cord (4 m) x 4
(8952S11005480-IL)
Speaker cord (10 m) x 2
(8952S11005490-IL)
Non-skid pads x 20
(8952S11005510-IL)
Brackets for wall mounting x 4
(8952S11005500-IL)
Screw (M5) x 4
(8952S11005520-IL)
Operating instructions (CD-ROM) (SYXE8 only)
(6517000000440-IL)
Operating instructions
(CXE: 5707000006100-IL, 5707000006210-IL)
(DLPWXE: 5707000006090-IL, 5707000006220-IL)
(AXE5: 5707000006080-IL, 5707000006230-IL)
Quick start guide (SYXE8 only)
(5707000006110-IL)
Warranty card (SYXE8, AXE5 only)

7
HTP-071
56 7 8
56 7 8
A
B
C
D
E
F
3. BASIC ITEMS FOR SERVICE
3.1 CHECK POINTS AFTER SERVICING
3.2 JIGS LIST
Items to be checked after servicing
To keep the product quality after servicing, confirm recommended check points shown below.
See the table below for the items to be checked regarding video and audio.
No.
Item to be checked regarding video Item to be checked regarding audio
Procedures Check points
1 Confirm whether the customer complain has been solved.
If the customer complain occurs with the particular source, such
as Dolby Digital, DTS, AAC, DVD-A and HDMI, input it for the
operation check.
The customer complain must not be reappeared.
Video, Audio and operations must be normal.
2 Check the analog audio playback.
(Make the analog connections with a DVD player.)
Each channel audio and operations must be normal.
3 Check the digital audio playback.
(Make the digital connections with a DVD player.)
Each channel audio and operations must be normal.
4 Check surround playback.
(Select Surround mode and check the multichannel operations
via the DSP circuit.)
Each channel audio and operations must be normal.
5 Check the video outputs.
(Connect with a DVD player.)
Video and operations must be normal.
6 Check the tuner (AM and FM) operations. Audio and operations must be normal.
7 Check the sound from headphone output. Sound must be normal, without noise.
8 Check the appearance of the product.
Block noise Distortion
Horizontal noise Noise
Flicker Volume too low
Disturbed image (video jumpiness) Volume too high
Too dark Volume fluctuating
Too bright Sound interrupted
Mottled color
No scratches or dirt on its appearance after receiving it for
service.
Jigs List
Jig Name Part No. Remarks
RS-232C update jig (Jig + 10P FFC) GGF1642 MAINUCOM Firmware update
(RS-232C ↔Rear panel)
HDMI & CEC UCOM firmware update
(USB ↔Rear panel)
RS-232C cable (9-pin to 9-pin, straight cable)
HDMI & CEC UCOM update Jig GGF1646
USB cable (USB A-Type ↔USB B-Type)
Diagnosis (D-MAINAssy ↔MAINAssy)
Diagnosis (AMP Assy ↔MAINAssy)
Board to board extension jig cable GGD1772
Diagnosis (D-MAINAssy ↔BR1 Assy)Board to board extension jig cable GGD1736
3P extension jig cable GGD1773
Lubricants and Glues List
Name Part No. Remarks
Silicon grease GEM1057 Refer to "9.2 VSX-321-K-P SECTION".
Silicon adhesive GYA1011 (KE40RTV-W) Refer to "9.2 VSX-321-K-P SECTION".

8HTP-071
12 3 4
A
B
C
D
E
F
12 3 4
3.3 PCB LOCATIONS
H
FRONT ASSY
M
G-H ASSY
VSX-321-K-P
I
DG ASSY
D
D-MAINASSY
J
CNT ASSY
E
BR1 ASSY
A
INPUT ASSY
N
STBY ASSY
C
MAINASSY
K
G-T ASSY
L
G-L ASSY
B
AMP ASSY
F
HP ASSY
G
FUNC ASSY
NSP 1..PCB TTL ASSY FRONT 7025HK1103011-IL
2..FRONT ASSY 7028071131010-IL
2..FUNCT ASSY 7028071132010-IL
2..BR1 ASSY 7028071133010-IL
2..HP ASSY 7028071134010-IL
NSP 1..PCB TTL ASSY D-MAIN 7025HK1103012-IL
2..D-MAIN ASSY 7028071161010-IL
NSP 1..PCB TTL ASSY INPUT 7025HK1103013-IL
2..DG ASSY 7028071111010-IL
2..INPUT ASSY 7028071112010-IL
NSP 1..PCB TTL ASSY AMP 7025HK1103014-IL
2..AMP ASSY 7028071141010-IL
NSP 1..PCB TTL ASSY CNT 7025HK1103015-IL
2..CNT ASSY 7028071151010-IL
NSP 1..PCB TTL ASSY MAIN 7025HK1103040-IL
2..MAIN ASSY (SYXE8) 7028071121040-IL
2..MAIN ASSY (CXE) 7028071121030-IL
2..MAIN ASSY (DLPWXE) 7028071121020-IL
2..MAIN ASSY (AXE5) 7028071121010-IL
2..STBY ASSY (SYXE8) 7028071122040-IL
2..STBY ASSY (CXE) 7028071122030-IL
2..STBY ASSY (DLPWXE) 7028071122020-IL
2..STBY ASSY (AXE5) 7028071122010-IL
2..G-T ASSY 7028071123010-IL
2..G-H ASSY 7028071124010-IL
2..G-L ASSY 7028071125010-IL
Mark No. Description Part No. Mark No. Description Part No.
LIST OF ASSEMBLIES
NOTES:
-
Parts marked by “NSP” are generally unavailable because they are not in our Master Spare Parts List.
-
The >mark found on some component parts indicates the importance of the safety factor of the part.
Therefore, when replacing, be sure to use parts of identical designation.

9
HTP-071
56 7 8
56 7 8
A
B
C
D
E
F

10 HTP-071
12 3 4
A
B
C
D
E
F
12 3 4
4. BLOCK DIAGRAM
4.1 OVERALL CONNECTION DIAGRAM
13P WIRE
9P WIRE
4P WIRE
CP201
CN701
CP304
CP301
CN702
4P WAFER
4P WIRE
CN1
6P WIRE
CP5
4P WIRE
CN603
CP603
8P WAFER 12P WAFER
6P WAFER
CP701
9P WAFER
CP702
CN721
MAINTRANS
CP302
CP202
CN3
8P WIRE
CP203
CP1
13P WAFER
BD-TO
AI
MAIN ASSY
(SYXE8: 7028071121040-IL)
(CXE: 7028071121030-IL)
(DLPWXE: 7028071121020-IL)
(AXE5: 7028071121010-IL)
C
C1/2- C2/2
E
FHP ASSY
(7028071134010-IL)
GFUNC ASSY
(7028071132010-IL)
IDG ASSY
(7028071112010-IL)
N
STBY ASSY
(SYXE8: 7028071122040-IL)
(CXE: 7028071122030-IL)
(DLPWXE: 7028071122020-IL)
(AXE5: 7028071122010-IL)

11
HTP-071
56 7 8
56 7 8
A
B
C
D
E
F
3P WAFER
13P WIRE
BD-TO-BD 27P
BD-TO-BD 29P
CP201
CN209
CN201
3P WIRE
CN603
CP3
CP400
CN600
CP2
CN704
CP104
4P WAFER
CP201
4P WIRE
CN5
CP17
CP401
CN203
CN1000
BD-TO-BD 29P
CP1000
12P WAFER
BD-TO-BD 21P
CN400
12P WIRE
CP404
CN601
BD-TO-BD 23P
27P FFC WAFER
CN704B
27P FFC WAFER
-When ordering service parts, be sure to refer to "EXPLODED VIEWS and PARTS LIST" or "PCB PARTS LIST".
-The >mark found on some component parts indicates the importance of the safety factor of the part.
Therefore, when replacing, be sure to use parts of identical designation.
-: The power supply is shown with the marked box.
AINPUT ASSY (7028071111010-IL)
BAMP ASSY
(7028071141010-IL)
D-MAIN ASSY
(7028071161010-IL)
D
D1/3- D3/3
EBR1 ASSY
(7028071133010-IL)
HFRONT ASSY
(7028071131010-IL)
J
CNT ASSY
(7028071151010-IL)
K
G-T ASSY
(7028071123010-IL)
L
G-L ASSY
(7028071125010-IL)
M
G-H ASSY
(7028071124010-IL)

12 HTP-071
12 3 4
A
B
C
D
E
F
12 3 4
4.2 OVERALL BLOCK DIAGRAM
HFRONT ASSY
AINPUT ASSY

13
HTP-071
56 7 8
56 7 8
A
B
C
D
E
F
ONT ASSY
CMAIN ASSY
CMAIN ASSY
PUT ASSY
BAMP ASSY FHP ASSY

14 HTP-071
12 3 4
A
B
C
D
E
F
12 3 4
4.3 D-MAIN BLOCK DIAGRAM
I2C DATA
A_R IN
A_L IN
4-IN2-OUT Switch
74VHCU04
74LCX257MTCK
SUB MICO
EPF021A
DIR
PCM9211
TO INPUT PART
HDMI R/T Processor
EP94A1K
I2C CONTROL BLOCK
DD-MAIN ASSY

15
HTP-071
56 7 8
56 7 8
A
B
C
D
E
F
TMS320DA788
DA_CONVERTER
SN74LVC2GU04DCKR
257MTCK
UB MICOM
PF021A
I2C DATA
SBL OUT
SBR OUT
C OUT
SL OUT
SR OUT
FL OUT
DSP
PCM1681
LOW PASS FILTER
SW OUT
FR OUT
TO INPUT PART
CEC-U
EPF011C MAINMICOM
CONTROL LINE

16 HTP-071
12 3 4
A
B
C
D
E
F
12 3 4
5. DIAGNOSIS
5.1 TROUBLESHOOTING
Step 0: Preliminary confirmation
confirm the following items before checking
To Step 1
To Step 3
do screws of COAX jack
securely tighten?
OR connect GND wire of
DSP JIG B'D to chassis.
step 1: B to B connector
CP201, CN601, CN600
To Step 2
To Step 5
To Step 4
Turn the power off and insert
the connectors securely
Are the connectors
securely inserted?
Ye s
Ye s
Ye s
No
BtoB connector
XMCK
* CN600 connectors doesn't connection
in case of DSP JIG B'D use.
Tighten screws securely.
No
Step 2: Regulator IC
IC608 (pin 2)
IC100 (pin 2)
Is the voltage of arround
10 V input?
Check the resistor (R27, R31)
MAINAssy.
No
Ye s
Is the voltage of 3.3 V
output? Replace IC608 or L160.
No
(to chassis)
(to chassis)
* If the "sub_pw" is high level to OK.
IC100 (pin 3)
Ye s
Is the voltage of 1.2 V
output? Replace IC102 or IC100.
No
Ye s
Step 3: Regulator IC
IC609 (pin3)
Is the voltage of arround
5 V input?
Check the IC1 (pin 3) of
MAINAssy.
No
(to chassis)
This power is power supply of
IC601 (PCM1681).
Ye s
Step 4: X'tal
IC602 (pins 39, 40)
IC102 (pin 17)
Is there a 24.576 MHz
output? Replace XTAL101 or IC602.
No
Ye s
Is there a 24.576 MHz
input?
Check the IC610 of pin 6 and
check the around of resistor.
No
[1] DSP TROUBLESHOOTING
TROUBLESHOOTING FOR ALL DESTINATION

17
HTP-071
56 7 8
56 7 8
A
B
C
D
E
F
Check the path to OUTPUT
pin of JACK601, JACK602.
Check the path to pins 4, 8
of IC600 or replace IC600.
Ye s
Step 5: DIR
IC600 (pins 3,11)
IC602 (pins 31, 37)
IC602 (pin 20)
IC602 (pin 18)
IC602 (pin 17)
Can observe the
digital signal?
Check that the S/PDIF signal is output.
Check that changes by pulling out and inserting the digital input lines.
No
Ye s
Can observe the
digital signal?
Is there a master
clock output?
Is the voltage of PDN
IC602 pin 34 3.3 V?
Ye s
No
No
31: OPTICAL
37: COXIAL
DIR_SCKO (master clock)
DIR_LRCK (LR CLOCK)
DIR_SDTO (DATA)
DIR_BCK (bit clock)
3: OPTICAL
11: COXIAL
(0 V ↔3.3 V)
(0 V ↔3.3 V)
Replace IC602.
Ye s
Is there a LR clock
output?
IC602 (pin 19)
Ye s
No
Check the MAINAssy.
No
(0 V ↔3.3 V)
Replace IC602.
Is there a DATA
output?
No
(0 V ↔3.3 V)
Ye s
Replace IC602.
Replace IC101.
Is there a bit clock
output?
No
Check the path between
IC101 pin 1 and MAINAssy.
No
(0 V ↔3.3 V)
SWITCH
DAI_MCK (MASTER CLOCK)
IC101 (pin 4)
Ye s
Is there a master clock
output?
No
(0 V ↔2.5 V)
DAI_LRCK (LR CLOCK)
*IC101 pin 1
0 V: DIR
3.3 V: HDMI
DAI_bck (bit CLOCK)
IC101 (pin 7)
IC101 (pin 9)
Ye s
Ye s
Is there a LR clock
output?
No
(0 V ↔2.5 V)
Ye s
Is there a bit clock
output?
Is the voltage of
IC101 pin 1 0V?
No
(0 V ↔2.5 V)
To Step 6

18HTP-071
12 3 4
A
B
C
D
E
F
12 3 4
Ye s
Step 6: DSP output (digital) to CODEC input
IC601 (pin 7)
IC601 (pin8 )
Is there a bit clock
input?
Digital output of each CH when inputting the digital signal with audio.
Is there a LR clock
output?
Is there a data input?
Ye s
IC601 (pin 6)
IC601 (pin11)
Ye s
IC601 (pin 11)
Ye s
IC601 (pin 13)
Ye s
Ye s
DSP_BCK (BIT CLOCK)
front L/R data
surround L/R data
(0 V ↔3.3 V)
(0 V ↔3.3 V)
(0 V ↔3.3 V)
(0 V ↔3.3 V)
(0 V ↔3.3 V)
(0 V ↔3.3 V)
To Step 7
No
No
No
No
No
No
Check the path between IC102
and data & address lines.
SDRAM (IC103), FLASH ROM (IC104).
Replace IC602, IC603, IC604,
IC605 and IC606.
Ye s
Step 7: CODEC output (ANALOG)
IC603 (pin 1)
IC603 (pin 7 )
Is there a audio signal
output?
Analog output of each CH when inputting the digital signal with audio.
Ye s
Is there a audio signal
output?
front R out
front L out
IC604 (pin 1)
Ye s
Is there a audio signal
output?
surround R out
IC604 (pin7)
Ye s
Is there a audio signal
output?
surround L out
IC605 (pin1)
Ye s
Is there a audio signal
output?
center out
IC605 (pin7)
Ye s
Is there a audio signal
output?
LFE out
End
No
No
No
No
No
No
DSP_LRCK (LR CLOCK)
CENTER/LFE data
surround back L/R data

19
HTP-071
56 7 8
56 7 8
A
B
C
D
E
F
Cause for noncomplection of HDMI authentication between the source equipment and this unit.
(the HDMI indicator is unlit or flasher)
Causes for no display or sound from the monitor
[2] HDMI TROUBLESHOOTING
Replace the HDMI cable.
NG
OK
Replace the HDMI cable.
Connect the source equipment
(player) to the Sink equipment
(monitor) directly.
OK
Repare the Receiver.
NG
Replace the Player.
OK
Repare the Player.
NG
Replace the Monitor.
OK
Repare the Monitor.
HDMI Troubleshooting
HDMI Simple Diagnosis
Step 0: Preliminary confirmation
Confirm the following items before checking
To Step 1
Do screws of COAX jack
securely tighten?
To Step 2
Tighten screws securely.
Ye s
No
Step 1: Connect the HDMI equipment
Source equipment:
Connect a dvd player to BD or DVD or DVR
Sink equipment:
Connect a TV to HDMI OUT
Turn on the power of the receiver and equipments which was
connected with HDMI.
switch the function that HDMI was assigned.
Factory shipments setting:
HDMI1: CD/SAT
HDMI2: BD
HDMI3: DVD
HDMI4: DVR/VCR
Function switch (BD or DVD or DVR)
POWER ON

20 HTP-071
12 3 4
A
B
C
D
E
F
12 3 4
Step 2: Power supply
CN601 (pin 14)
IC207 (pin 4)
Is the voltage 0 to 3.3 V?
Is the voltage 3.3 V?
Is the voltage 10 V?
Ye s
CP104 (pins 1, 2)
Ye s
IC205 (pin 2)
IC206 (pin 2)
IC200
Ye s
Ye s
NoDiagonose the MAINAssy.
NoCheck the pin 5 of IC207.
No
Is IC205 abnormally hot?
Ye s
NoReplace IC205.
NoReplace IC200.
The output and GND may be short-circuited.
Check the path between them.
Ye s
The output and GND may be short-circuited.
Check the path between them.
No
Diagonose the MAINAssy.
Is the voltage 3.3 V?
Is IC206 abnormally hot? NoReplace IC206.
No
Is the voltage 2 V?
Ye s
Is IC200 abnormally hot?
CEC_ON
sub MICOM 3.3V
IC609 (pin 3)
Is the voltage 5 V?
Ye s
Ye s
NoCheck the IC609 and
replace it.
HDMI +5V
HDMI_10V
HDMI 3.3V
GND is equal of chassis
HDMI 2.0V
To Step 3
This manual suits for next models
3
Table of contents
Other Pioneer Home Cinema Speakers manuals

Pioneer
Pioneer HTZ-55DV User manual

Pioneer
Pioneer HTZ-7 VisionPlus User manual

Pioneer
Pioneer S-FCRW730 User manual

Pioneer
Pioneer MCS-838 User manual

Pioneer
Pioneer S-FCRW240B-S User manual

Pioneer
Pioneer NS-DV990 User manual

Pioneer
Pioneer HTZ111DVD User manual

Pioneer
Pioneer HTZ-424DVD User manual

Pioneer
Pioneer HTZ-55DV User manual

Pioneer
Pioneer HTZ-7 VisionPlus User manual