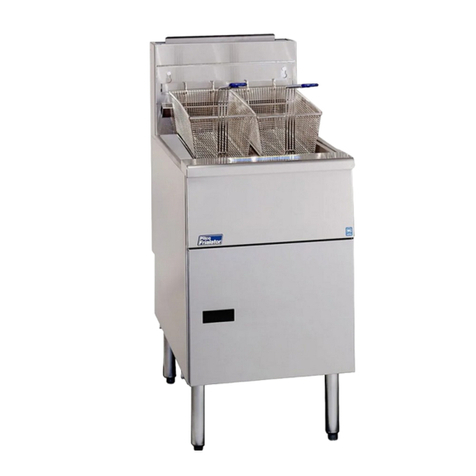
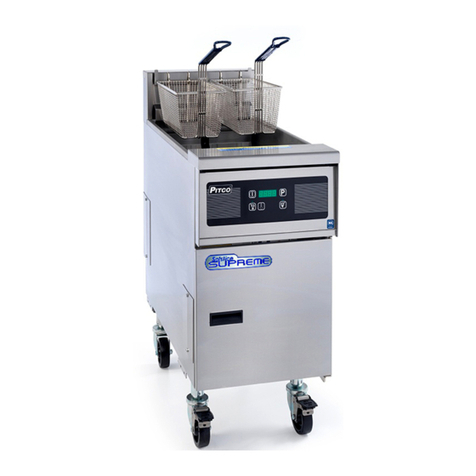
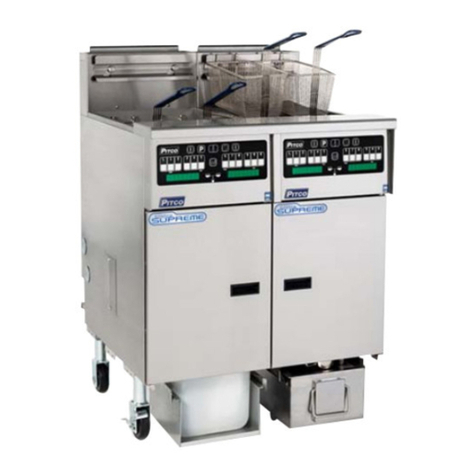
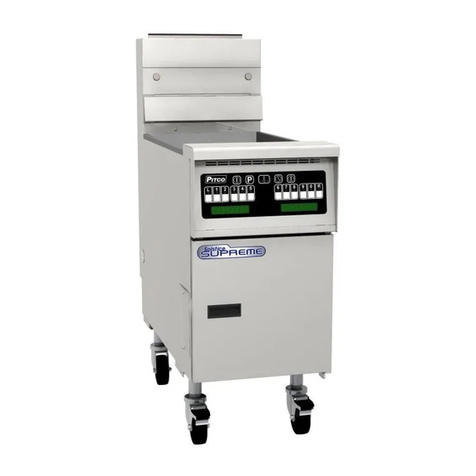
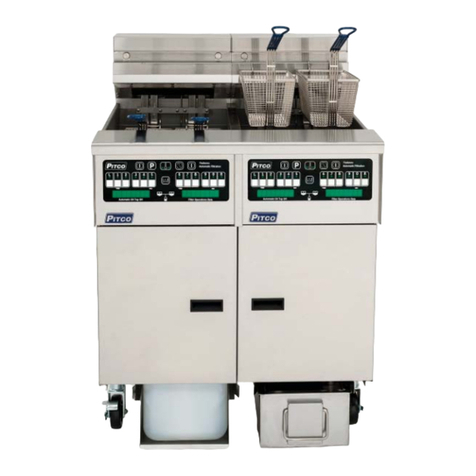
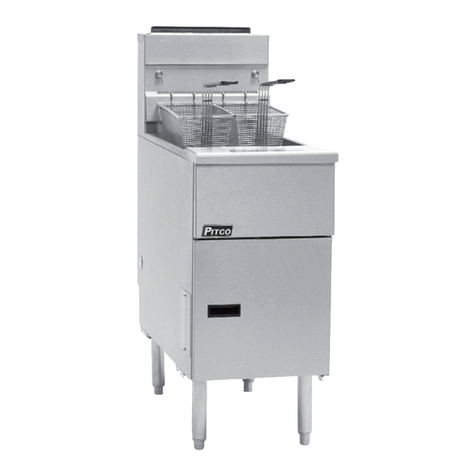
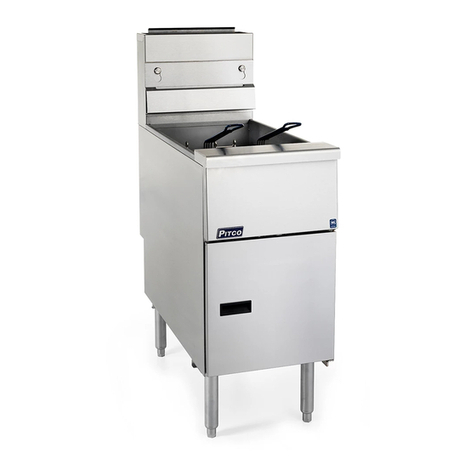
Pitco 45C+ User manual

Installation, Operation, and Maintenance Manual
For Gas Fryers
Covering Models
45C+, 35C+
Pitco Frialator, Inc., P.O. Box 501, Jct I-89 & I-93 Concord, NH 03302-0501 • 509 Route 3A, Bow, NH 03304
(800)258-3708•(603)225-6684•FAX(603)225-8497 L20-072 Rev 5(11/03)
ENGLISHFRANCAIS

Pitco Frialator #L20-072 Rev 5(11/03)

NOTICES
There are three different types of notices that you should be familiar with, a NOTICE, CAUTION,
and WARNING. A NOTICE is a special note used to call attention to a particularly important point.
CAUTION is used to point out a procedure or operation which may cause equipment damage. The
WARNING notice is the most important of the three because it warns of an operation that may cause
personal injury. Please familiarize yourself with your new cooker before operating it and heed the
notices throughout this manual. The WARNINGS are listed below and on the following page for your
review prior to operating the unit.
FOR YOUR SAFETY
DO NOT store or use gasoline or other flammable
vapors or liquids in the vicinity of this or any other
appliance.
WARNING: Improper installation, adjustment, alter-
ation, service or maintenance can cause property dam-
age, injury or death. Read the installation, operating
and maintenance instructions thoroughly before in-
stalling or servicing this equipment.
TO THE PURCHASER
POST IN A PROMINENT LOCATION INSTRUCTIONS TO
BE FOLLOWED IN THE EVENT THAT AN OPERATOR
SMELLS GAS. OBTAIN THIS INFORMATION FROM YOUR
LOCAL GAS SUPPLIER.
THIS MANUAL MUST BE RETAINED FOR FUTURE REFERENCE
ENGLISH

SAFETY SAFETY SAFETY SAFETY SAFETY
WARNING
The cooker must be electrically grounded in accordance with local
codes. If local codes do not apply, follow the requirements of
National Code ANSI/NFPA 70-1990.
WARNING
This cooker is equipped with a three prong safety plug. This safety plug
protectsoperatorsfromelectricalshockintheeventofanequipmentmalfunc-
tion. DO NOT remove the grounding (third) prong from this plug.
WARNING
DO NOT use an open flame to check for gas leaks!
WARNING
A cooker that is equipped with casters and a flexible power cord must be
connected to the gas supply with a Quick-Disconnect device. This quick
disconnect must comply with ANSI Z24.41-1989. A restraining cable must
be installed to limit the movement of the cooker.
WARNING
There is an open gas flame inside the cooker. The unit may get hot enough
to set nearby materials on fire. Keep the area around the cooker free from
combustible materials.
WARNING
Ensurethatthecookercangetenoughairtokeeptheflameburningcorrectly.
If the flame is starved for air it can give off dangerous carbon monoxide.
CarbonMonoxideisaclearodorlessgasthatcancausesuffocationanddeath.
WARNING
Be sure the burner tubes are COMPLETELY covered with water before
lighting the pilot or main burners. If the tubes are exposed, the cooker may
overheat,causingdamagetothekettle,creatingafirehazard,andvoidingthe
warranty.

SAFETY SAFETY SAFETY SAFETY SAFETY
THIS MANUAL MUST BE RETAINED FOR FUTURE REFERENCE
SAFETY SAFETY SAFETY SAFETY SAFETY
WARNING
Carbon monoxide can build up if the flue is blocked. Blocking the flue will
alsocausethecookertooverheat. Ensurethatminimumclearancesspecified
in the installation instructions are maintained. DO NOT obstruct the flow of
combustion/ventilation or air opening around the Noodle Cooker. Adequate
clearance around the cooker is necessary for servicing and proper burner
operation. Ensure that you meet the minimum clearances specified in the
installation instructions.
WARNING
The power supply must be disconnected before servicing or cleaning the
appliance.
WARNING
For gas cookers, DO NOT supply the cooker with a gas that is not listed on
thedataplate. Ifyouneedtoconvertthecookertoanothertypeoffuel,contact
your dealer. WARNING
Forgascookers,WAITfive(5)minutesbeforeattemptingtorelightthepilot.
This allows time for any gas remaining in the cooker to dissipate.
ENGLISH


i
Table of Contents
Section Title Page
Table of Contents ............................................................................................................................................ i
List of Tables and Figures ...................................................................................................................................ii
Chapter 1: General Information and Installation ..................................................................................... 1-1
1.1 WHICH FRYER DO I HAVE? .................................................................................................. 1-1
1.2 CHECKING YOUR NEW FRYER............................................................................................ 1-1
1.2.1 Check Your Order ................................................................................................................ 1-2
1.3 ASSEMBLY AND LEVELING ................................................................................................. 1-2
1.3.1 Leg/Caster Installation and Adjustment ............................................................................... 1-2
1.3.2 Assembling Multi Fryer Systems ......................................................................................... 1-3
1.4 INSTALLATION ........................................................................................................................ 1-3
1.4.1 Installation Clearances.......................................................................................................... 1-3
1.4.2 Gas Connection .................................................................................................................... 1-3
1.4.2.1 Fuel Types ..................................................................................................................... 1-4
1.4.2.2 Gas Line Connection ..................................................................................................... 1-4
1.4.2.3 Quick Disconnect Gas Connection ................................................................................ 1-4
1.4.2.4 Fuel Supply Line Leak and Pressure Testing ................................................................ 1-5
1.4.3 Ventilation and Fire Safety Systems .................................................................................... 1-5
1.5 INITIAL ADJUSTMENTS ......................................................................................................... 1-5
1.5.1 Visual Checks ....................................................................................................................... 1-6
1.5.2 Burner Ignition Systems ....................................................................................................... 1-6
1.5.2.1 Pilot Flame Adjustment ................................................................................................. 1-7
1.5.3 Main Burner System ............................................................................................................. 1-8
1.5.3.1 Gas Line Requirements.................................................................................................. 1-8
1.5.3.2 Burner Adjustment ........................................................................................................ 1-8
1.5.4 Initial Cleaning ..................................................................................................................... 1-9
1.5.5 Thermostat Calibration Check ............................................................................................ 1-10
1.5.6 Thermostat Calibration ....................................................................................................... 1-11
Chapter 2: Operating Instructions ............................................................................................................. 2-1
2.1 FILLING THE FRYER ............................................................................................................... 2-1
2.1.1 Filling the Fryer With Liquid Shortening ............................................................................. 2-1
2.1.2 Filling the Fryer With Solid Shortening ............................................................................... 2-1
2.2 OPERATING INSTRUCTIONS ................................................................................................ 2-2
2.2.1 Fryer Start-Up ....................................................................................................................... 2-2
2.2.2 Melting Solid Shortening ...................................................................................................... 2-2
2.2.3 Fryer Shutdown .................................................................................................................... 2-3
2.3 DAILY CLEANING ................................................................................................................... 2-3
Chapter 3: Owner Maintenance and Adjustments ................................................................................... 3-1
3.1 WEEKLY FRYER CLEANING (BOIL OUT) .......................................................................... 3-1
3.2 FLUE INSPECTION .................................................................................................................. 3-1
3.3 TROUBLESHOOTING .............................................................................................................. 3-2
ENGLISH
ii
List of Tables and Figures
Table Title Page
1-1 Fryer Model Information ........................................................................................... 1-1
1-2 Ventilation and Fire Safety References .....................................................................1-7
Figure Title Page
1-1 Pilot Assembly, Flame Adjustment ...........................................................................1-8
1-2 Gas Valve Showing Location of Pressure Regulator and Pilot Adjusters.................1-9

1-1
Chapter 1: General Information and Installation
Congratulations on the purchase of your new Pitco Frialator universal fryer. This unit will give you
manyyearsofreliable serviceifyoufollow thesimpleoperationand maintenanceproceduresinthis
manual. Containedinthismanualarethegeneralinstallation,operation,andmaintenanceprocedures
for the universal fryer Models 45C+, 35C+ and 40C+.
1.1 WHICH FRYER DO I HAVE?
There are two models of this gas fryer available. Each fryer has its own model number. To find out
whichmodelyouhave,lookinsidethedoorattheequipmentidentificationplate. Thisplatehasalot
ofusefulinformation,buttoidentifywhichfryeryouhave,lookatthemodelnumberblock. Themodel
numberidentifieswhichfryeryouhave. Abriefdescriptionof each model is provided inTable 1-1.
Table 1-1 Fryer Model Information
Model
Number
45C+
35C+
Description
This fryer can cook up to 85 lbs. of potatoes per hour.
This fryer can cook up to 63 lbs. of potatoes per hour.
Features
Frying Area: 14" x 14"
Oil Capacity: 42 lbs.
BTU Input: 122,000
Frying Area: 14" x 14"
Oil Capacity: 35 lbs.
BTU Input: 90,000
1.2 CHECKING YOUR NEW FRYER
Your new fryer has been carefully packed into one crate. Every effort has been made to ensure that
yourfryerisdeliveredtoyouinperfectcondition. Asyouunpackyournewfryer,inspecteachofthe
pieces for damage. If something is damaged, DO NOT sign the bill of lading. Contact the shipper
immediately,theshipperisonlyresponsiblefor15daysafterdelivery. Checkthepackinglistenclosed
withyourfryertoensurethatyouhavereceivedallofthepartstothefryer. Ifyouaremissinganyparts,
contact the dealer from whom the fryer was purchased. As you unpack the fryer and it's accessories
be careful to keep the weight of the fryer evenly distributed.
CAUTION
Topreventequipmentdamage,don'ttiltthefryeronto
anytwo ofit's castersor pulltheunit bythe fluevents. X
X
ENGLISH

1-2
LocateyourPitcoFrialatorwarrantyandfillintheserialnumberofthefryerandthedatereceived. You
willfindtheserialnumberontheplateinsidethedoor. Putyourwarrantycardinasafeplaceforfuture
reference. DO NOT return the card to Pitco Frialator.
1.2.1 Check Your Order
The crate containing the fryer unit will also contain the following:
(2) PitcoCleanerSample
(1) Drain Clean Out Rod
1.3 ASSEMBLY AND LEVELING
When you receive your fryer, it is completely assembled with the possible exception of the legs (or
casters)andtheheatshield. Insomecases,ifyouhavepurchasedamulti-fryerunit,youmayneedto
assemblethesystem.
1.3.1 Leg/CasterInstallationandAdjustment
Installingthelegsandlevelingthefryerisdonewitha7/16"wrench,socket,andalargepairofwater
pump pliers. The legs/casters must be installed to provide the necessary height to meet sanitation
requirementsandassureadequateairsupplytotheburner. Attachthelegsbyperformingthefollowing
procedure.
a. Laythefryeronitssidebeingcarefulnottodamagetheflue
by pulling on it. Protect the outside of the fryer with
cardboard or a drop cloth when laying it down.
b. Attach each leg/caster with the hex head cap screws sup-
pliedwiththefryer. Eachleg/casterrequiresfour1/4-20x
5/8" cap screws.
c. Mount the screws from the inside of the fryer with the nut
on the outside. The nuts have lock washers attached to
them, therefore it is not necessary to use lock washers.
d. When all four legs/casters are mounted, stand the unit up
being careful not to put too much weight on any one leg/
caster. Adjusttheheightandlevelthefryerbyadjustingthe
leveling devices on the leg/caster with the water pump
pliers.
e. Onunitswithcasters,movethefryertothedesiredlocation
andlock thewheels usingthe lockingdevices onthe sides
ofthe casters.
Adjust Here
Lock
Adjust
Here
Un Lock

1-3
1.3.2 AssemblingMulti FryerSystems
Ifyou purchased a multi-fryerunit,it could be shippedin more than onepiece. Toassemble the unit
followtheinstructionsbelow.
a. Unpack the units and move them close together. Remove the front panels and both heat
shieldsfromthefryers.
b. Therearefivejoiningstripstobeattachedtotheunitstomakethemintoonesystem. These
stripsareattachedintherear,front,upperfront,andtheforwardandrearcastermount. Use
thescrewssuppliedwithyoursystemtoattachthestrips. Securethemtightlytoeachunit.
c. Replace the heat shield and front panels to complete the system assembly.
1.4 INSTALLATION
Although it is possible for you to install and set up your new fryer, it is STRONGLY recommended
thatyouhaveitdonebyqualifiedprofessionals. Theprofessionalsthatinstallyournewfryerwillknow
the local building codes and ensure that your installation is safe.
WARNING
The fryer must be properly restrained to prevent movement or tipping. This
restraintmustpreventthefryerfrommovementsthatwouldsplashhotliquids
onpersonnel. This restraintmaybe any means(alcove installation, adequate
ties,orbatteryinstallation).
1.4.1 InstallationClearances
Thefryerneedsclearancearounditforproperoperation. Adequateclearancesallowforservicingand
properburneroperation. Theclearancesshownbelowareforcookerinstallationin combustibleand
non-combustibleconstruction.
Combustible Non-Combustible
Construction Construction
Back 6" 0"
Sides 6" 0"
Floor-Combustible 6" 6"
1.4.2 Gas Connection
Yourfryerwillgiveyoupeakperformancewhenthegassupplylineisofsufficientsizetoprovidethe
correctgasflow. ThegaslinemustbeinstalledtomeetthelocalbuildingcodesorNationalFuelGas
ENGLISH

1-4
Code (NFPA 54-Latest Edition) and ANSI Z223.1-Latest Edition Latest Edition. In Canada, install
the fryer in accordance with CAN/CGA-B149.1 or .2 and local codes. Gas line sizing requirements
can be determined by your local gas company by referring to National Fuel Gas Code, Appendix C,
Table C-4 (natural gas) and Table C-16 (propane). The gas line needs to be large enough to supply
thenecessaryamountoffueltoallapplianceswithoutlosingpressuretoanyappliance. Otherfactors
that are used to determine the piping requirements are BTU requirements of the appliances being
connected and the length of pipe between the meter (main shut off) and the appliances.
WARNING
NEVERsupplythefryerwithagasthatisnotindicatedonthedataplate. Using
theincorrectgastypewillcauseimproperoperation. Ifyouneedtoconvertthe
fryer to another type of fuel, contact your dealer.
1.4.2.1 Fuel Types - Each fryer is equipped to work with one type of fuel. The type of fuel with
whichtheapplianceisintendedtooperateisstampedonthedataplateattachedtotheinsideofthedoor.
WARNING
DO NOT use an open flame to check for gas leaks!
1.4.2.2 Gas Line Connection - Connect the fryer to the gas supply line with a connector that
complies with the Standard for Connectors for Movable Gas Appliances (ANSI Z21.69-Latest
Edition). IfyouareinstallingafryerwithcastersuseaquickdisconnectrefertotheQuickDisconnect
installationinstruction,1.4.2.3. Connectthegaslinetothefryerusingapipejointsealantthatisresistant
toliquefiedpetroleum. Ifthefryerwasdisconnectedduringthefuellinetesting,useasolutionofsoap
and water to leak test the new connection.
NOTICE
NEVER use an adaptor to make a smaller gas supply line fit the cooker
connection. Thismaynotallowpropergasflowforoptimumburneroperation,
resultinginpoorcookerperformance.
1.4.2.3 Quick Disconnect Gas Connection - Gas fryers equipped with casters must be installed
with connectors that comply with the Standard for Connectors for Movable Gas Appliances, ANSI
Z21.69-Latest Edition, and Addenda Z21.69A-Latest Edition. This connection should include a
quick disconnect device that complies with the Standard for Quick Disconnect Devices for Use
With Gas Fuel , ANSI Z21.41-Latest Edition. When installing a quick disconnect you must also
install a means for limiting the movement of the fryer. This device will prevent the gas line or the
quick disconnect from being strained. The restraining device should be attached to the cooker on
the back panel as shown in the illustration. The quick disconnect, hose, and restraining device can
be obtained from your dealer.

1-5
1.4.2.4 FuelSupplyLineLeakandPressureTesting-Thefuelsupplysystemmustbetestedbefore
thefryerisused. Ifthefuellineisgoingtobetestedatapressuregreaterthan(>)1/2PSIG(3.45kPa),
makesurethat the fryer is disconnected from thefuelline. If the fuel line is to betestedata pressure
equalto or less than(<)1/2 PSIG (3.45kPa), the fryer canbe connected but theunit's gas valvemust
be shut. Test all gas line connections for leaks with a solution of soap and water when pressure is
applied.
1.4.3 Ventilation and Fire Safety Systems
Yournewfryermusthaveproperventilationtofunctionsafelyandproperly. Exhaustgastemperatures
can reach as high as 1200°F. Therefore, it is very important to install a fire safety system. Your
ventilationsystemshouldbedesignedtoallowforeasycleaning. Frequentcleaningoftheventilation
systemandthefryerwillreducethechancesoffire. Table1-2providesalistofreferencedocuments
that provide guidance on ventilation and fire safety systems. This table is not necessarily complete.
AdditionalinformationcanbeobtainedfromtheAmericanGasAssociation,8501EastPleasantValley
Road, Cleveland, OH 44131.
Excessive ventilation causes drafts, which will interfere with the proper operation of the pilot and
the burner. Leave at least 18 inches of open space between the fryer's flue vent opening and the
intake of the exhaust hood.
CAUTION
Ensure that your ventilation system does not cause a down draft at the fryer's
flueopening. Downdraftswillnotallowthefryertoexhaustproperlyandwill
cause overheating which may cause permanent damage. Damage caused by
down drafts will not be covered under equipment warranty. NEVER allow
anything to obstruct the flow of combustibles or ventilation exiting from the
fryer flue. DO NOT put anything on top of the flue area.
NOTICE
NEVER connect the blower directly to the flue openings. The direct flow of
airwillcausepoortemperaturerecovery,poorignition,inefficientoperationof
the fryer, and could extinguish the pilot.
1.5 INITIAL ADJUSTMENTS
Afteryour fryer has beeninstalledas described in section1.4,it needs to beadjusted to ensure thatit
willperformasdesigned. Theseadjustmentsmustbeperformedbya qualifiedperson. Toperform
theseadjustment the following tools willbeneeded:
• Manometer(lowpressuregauge) • DigitalThermometer(Temperatureprobe)
• DCMillivoltMeter
ENGLISH

1-6
1.5.1 Visual Checks
After the fryer is in its permanent location, lock the casters and check for levelness. Any additional
leveling that is necessary can be performed as described in section 1.3.
1.5.2 BurnerIgnitionSystems
CAUTION
Before going any further, fill the fryer with WATER. Water is used for the
installation adjustments because the temperature will never exceed 212°F
(100°C)therebyallowingplentyofadjustmenttime. Neverletthewaterlevel
go below the MIN LEVEL mark on the rear of the tank.
WARNING
Thereisanopenflameinsidethefryer. Theunitmaygethotenoughtosetnear
by materials on fire. Keep the area around the fryer free from combustibles.
Topic
Grease Extractor
Ventilation Hood
Type of Fire Extinguishers
and Detection Equipment
CO2
Dry Chemical
Water
Foam
Sprinklers
Smoke Detectors
Fire Detection Thermostats
National Fuel Gas Code
Document
ANSI/NFPA 96-Latest Edition
ANSI/NFPA 12-Latest Edition
ANSI/NFPA 17-Latest Edition
ANSI/NFPA 13-Latest Edition
ANSI/NFPA 11-Latest Edition
ANSI/NFPA 13-Latest Edition
ANSI/FPA 72B-Latest Edition
UnderwritersLaboratory
Document
ANSI/UL 710-Latest Edition
ANSI/UL 705-Latest Edition
ANSI/UL 154-Latest Edition
ANSI/UL 299-Latest Edition
ANSI/UL 626-Latest Edition
ANSI/UL 199-Latest Edition
ANSI/UL 268-Latest Edition
ANSI/UL 521-Latest Edition
Table 1-2. Ventilation and Fire Safety References

1-7
Tolight thepilot light, referto theseinstructions.
WARNING
Wait5minutesbeforeattemptingtorelightthepilottoallowforanygasinthe
fryertodissipate.
a. Open the gas supply valves to the fryer.
b. Open the fryer's door to gain access to the controls. Turn the thermostat control knob
counterclockwise to the OFF position.
c. Turn the Unitrol valve knob to the PILOT position and push in on the
knob. Hold the knob in for approximately one minute to purge the air
outoftheline. Holdaflametothepilotlightuntilthepilotignites. This
maytakealittlewhile thefirst timeyou lightthe fryerbecauseofairin
the lines. Once lit, hold the knob in for approximately 60 seconds and
thenrelease.
d. If the pilot goes out wait 5 minutes and repeat step c. If after three tries the pilot will not
remainlit,refertotheoperatortroubleshootingsectionofthismanual.
e. Turn the Unitrol valve knob counterclockwise to the ON position.
f. Setthe thermostatcontrol knobtothedesiredtemperature setting.
g. The main burner will light and be controlled by the thermostat.
h. Tocompletelyshutdownthefryer,turntheUnitrolvalveknobtopilot,pushinandcontinue
turning to OFF.
1.5.2.1 PilotFlameAdjustment-Thepilotflameshouldbeadjustedtoproducethepropermillivolt
outputfrom the pilot sensingdevice. Millivoltoutput for the thermopileshouldbe between 300 and
500millivolts. Thisprocedureisonlynecessaryonthemanualpilotignitionsystem. Figure1-1shows
thepilotassemblywithexamplesoftheincorrectandcorrectpilotsize. ExampleAillustratesapilot
flamesizethatistoosmalltoproducesufficientmillivoltoutput. ExampleBisthecorrectsizeforproper
millivoltoutput.
a. This test requires a DC millivolt meter set to a scale of 0-1000mv.
b. Locatethethermopilewirescomingfromthethermostat/HighLimitboxgoingtothegas
shut off valve. The wire insulation size decreases near the gas valve connections.
ENGLISH
1-8
c. Connect the negative (-) test probe to pilot bracket.
d. Connect the positive (+) test probe to to one of the High Limit terminal connections
e. Removethepilotflameadjustmentcover.
f. Turning the flame adjusting screw clockwise lowers the flame and the millivolt output.
Turningthescrewcounterclockwiseincreasesflamesizeandmillivolt output.
g. Rotate the screw in the direction to achieve a reading of 400 ±50 mv for thermopiles.
NOTICE
Allow3to5minutesbetweenflameadjustmentstoallowthereadingtosettle.
h. Replacethepilot flame adjusting screw cover.
1.5.3 Main Burner System
For the burners to work, the gas supply valve must be open. The main burner receives gas from the
maingassupplythroughthethermostaticallycontrolledvalve. Whenthethermostatisturnedupthe
gascontrol valve opens. Thepilot ignites theburners. The burnerflame should beadjusted at theair
collar(at thebottomof theburner) sothethe flamearea softblue colorwithoutlifting offtheface of
theburner.
1.5.3.1 GasLineRequirements-Aproperlyinstalledgassupplysystemwilldeliver7.0±2.0"w.c.
natural gas (12.0 ±2.0" w.c. LP) to all appliances connected to the line, operating at full demand.
1.5.3.2 BurnerAdjustment- Theburnersmust beadjustedtodeliveroptimum flame. Adjustthe
burnerflame using the followingprocedure.
Figure 1-1 Pilot Assembly, Flame Adjustment
BA

1-9
a. EnsurethattheUnitrolvalveknobisinthe OFFposition. Removethemanifoldpressure
tapplugandconnect anaccuratepressuregauge(rangeof 0-16"w.c.in0.1"increments)
ormanometer.
b. Lightthepilotburner(see1.5.2)fortheunitbeingtestedandadjustthethermostattolight
themainburners.
c. Theinstalledpressuregaugereadingshouldbethesame,±0.1",asthatmarkedonthedata
plate inside the door. If the pressure is correct go to step e, if not, adjust the pressure.
d. Toadjustthepressure,removetheregulatoradjustmentscrewcover(seeFigure1-3). Use
aflat tipscrewdriver toadjust thescrew untilthe properpressure isreached. Turning the
screwclockwisewillincreasethepressure,counterclockwisewilldecrease thepressure.
e. Whenthe pressureiscorrect, installtheregulator adjustmentscrewcover.
f. Toremovethepressuregauge,turngascontrolvalvetoOFF. Removethegaugeandinstall
the pressure tap plug.
g. Nowthatthepressureissetforproperoperation,setthemainburnerflame. Unlocktheair
collarsbylooseningthesetscrewforthecollars. SeeFigure5. TurntheUnitrolvalveknob
to ON and turn thermostat to light the main burners.
h. Adjusttheshapeandsizebyraisingorloweringtheaircollarstoachieveasoftblueflame
with well defined inner cones.
i. Whentheflames havebeenproperly adjusted,lockthe collarsinplace withthesetscrew
provided.
1.5.4 InitialCleaning
Whenthe fryer is shipped,many of its partsarecovered with a thincoat of oil forprotection. Before
thefryerisreadyforcookingitmustbecleaned. Thiswillremovetheoilcoatingandanyforeignmatter
that may have accumulated during storage and shipment. Perform the cleaning as described below.
Figure 1-2 Gas Valve
Showing Location of the
Pressure Regulator and
Pilot Adjusters
ENGLISH

1-10
a. Fill the tank with water and add one packet of Pitco fryer cleaner or a mild detergent.
b. Turnthe fryer on andset the thermostat to 200°F. Allowthefryer to heat for15minutes.
NOTICE
Donotleavethefryerunattendedduringcleaning. Neverletthewaterlevelgo
below the "Min Level" mark on the back of the tank.
c. Usingthefryercleaning brush,scrubtheinsideofthefryer toremoveprotectivecoating.
d. Whencleaningiscomplete,turnoffthefryermainburnersandturntheUnitrolvalveknob
tothePILOT position.Drainthe waterintoacontainersuitable forhotwater anddispose
ofit.
e. Whenthetank hascooled, rinseit thoroughlywithcoolwater. Continueto rinsethe tank
until the cleaner has been rinsed, thoroughly from the tank.
f. Using a clean dry cloth, wipe out all of the water. Be very thorough removing the water,
because any residual water will cause hot oil to splatter out of the fryer.
CAUTION
Mild steel tanks must be wiped down/coated with oil to keep the tank from
rusting.
g. Now that the tank is clean, you are ready to fill and operate the fryer. Refer to 2.1 for
instructionson adding shortening tothe fryer.
1.5.5 Thermostat Calibration Check
NOTICE
Thermostatcalibrationrequiresthatthetemperatureofthefryerberaisedabove
boiling. Therefore,youwillneedtodrainthewaterfromthefryerandfillitwith
oil. Before removing the water, perform the initial cleaning of the fryer.
Cleaningthefryernowwillpreventyoufromhavingtodraintheoilandrefill
withwaterlater.
Fillingthefryerwithoilisdescribedin2.1. Toperformthecalibrationcheckdetailedbelowyouwill
needadigitalthermometer.
a. Placethetipofthethermometerintheshorteningapproximately1"abovethetemperature
sensors.

1-11
b. Setthethermostatat325°Fandwaitforthetemperaturereadingonthethermometertorise.
Asthetemperature rises toward 325°F watch the thermometer closely.
c. If the shortening temperature reaches 350°F and the burners DO NOT turn off, turn the
thermostat down. Keep lowering the thermostat setting until the burners go out.
CAUTION
If the burners do not turn off at the lowest thermostat setting, the thermostat
couldbedefective. Contactyourrepresentative immediately.
d. Letthefryercycle4to6timesbeforecheckingthetemperature. Comparethethermometer
temperatureagainstthethermostatsetting. Ifthevaluesaremorethan5°Fapart,calibrate
thethermostatusingtheappropriatecalibrationprocedureinthismanual.
1.5.6 ThermostatCalibration
a. Placethetipofthethermometerintheshorteningapproximately1"abovethetemperature
sensors.
b. SettheThermostatto325°Fandwaitforthetemperaturereadingonthethermometertorise.
c. Letthefryercycle4to6timestoensurethatthetemperaturehasstabilized. Comparethe
thermometer temperature against the thermostat setting. If the values are more than 5°F
apart,calibratethethermostatusingtheappropriatecalibrationprocedure.
ENGLISH

1-12
This manual suits for next models
1
Table of contents
Other Pitco Fryer manuals

Pitco
Pitco SG14TS User manual

Pitco
Pitco SG Series User manual

Pitco
Pitco SOLSTICE SFSSH55 User manual

Pitco
Pitco W14S-S WF User manual

Pitco
Pitco E12SS User manual

Pitco
Pitco PE14D User manual

Pitco
Pitco First Choice L22-282 Guide

Pitco
Pitco E14X User manual

Pitco
Pitco E7 User manual

Pitco
Pitco TURBOFRY 2000 User manual