Pitney Bowes Internet Fax Kit User manual

Internet Fax Kit
User's Manual
For use with 5000/3500
Internet Fax Kit
User's Manual
For use with 5000/3500

i
Do not place anything on the equipment that
contains water or chemical drug.
Do not place articles on the equipment such as
flower vases, potted plants, beverage cups,
cosmetics, containers of chemical drugs or water, or
small metallic articles. These substances, once
overturned and dropped inside of the equipment,
may cause a fire or electric shock.
Safety precautions
• Please read “Safety precautions” in the operation manual of the fax main unit.
• The following notations are used to alert the user to harm or damage that could result from mishandling due to negligence of
precautions.
Warning This notation alerts the user to the potential for serious injury or death.
Caution This notation alerts the user to the potential for bodily harm or damage to hardware.
• The following symbols are used to distinguish the types of alerts. (Shown below are the examples.)
This symbol indicates warning or caution. An illustration will give a concrete description.
This symbol indicates prohibition in handling. An illustration will give a concrete description.
This symbol indicates mandatory handling. An illustration will give a concrete description.
Never attempt to disassemble, repair or
modify the equipment.
It may cause electric shock or machine failure.
Request repairs from the Customer Information
Center.
When any of the following occurs, stop
operation immediately, unplug the power cable
of the fax main unit from power outlet, and
call our Information Center.
◆Smoke generation or an unusually heated
machine housing
◆Abnormal noise
Never attempt anything other than specified
in this manual.
It may cause unexpected accidents or machine
failure.
Warning
Caution

ii
Internet fax transmission
Paper documents, such as hand-written letters, can be transmitted by e-mail using the existing e-mail environ-
ment just like sending a fax. All you have to do is load the original and designate the recipient’s e-mail address
using a One-touch key or Speed-dialing.
Scanned data from the original is sent by e-mail as an image data attachment.
Internet mail reception
Internet Fax Kit allows you to receive and print a PC or internet fax machine transmitted e-mail automatically
or manually, depending on its setup configuration. However, if the received e-mail includes a file attachment in a
format other than TIFF-FX (Profile-S/F/J), such as Word, Excel, or PowerPoint, then Internet Fax Kit returns an
error message via e-mail.
Network management
With the use of a Web browser, a PC can perform such operations as Internet Fax Kit settings, display of trans-
mission/reception history of e-mails and faxes, as well as registration of One-touch dial, etc..
PC
E-mail transmission/
reception history
Fax transmission/
reception history
One-touch dial setting
Speed-dial setting
LAN
P
r
i
n
t
o
u
t
E-mail
LAN
PC
Internet FAX Internet FAX
Internet
PC
Internet FAX
E-mail
Original
document
LAN PC
Internet FAX
Internet
PC
Internet FAX
Internet communication features

iii
Forwarding fax document
This feature works with F-code box that is setup for “Relay box”. Internet Fax Kit can route documents received
in its F-code relay box to e-mail addresses and/or to other fax machines.
In order to route the received fax documents to the designated e-mail address(s) and/or other fax machine(s), the
F-code relay box should be configured with the proper sub-address and password.
Forwarding e-mail
Internet Fax Kit is capable of transferring the received Internet e-mail to the G3 facsimile(s) that designated fax
number in a e-mail text.
Also, you can setup either Internet Fax Kit prints the transferred document(s) or not.
P
r
i
n
t
o
u
t
Fax
Fax
Telephone line
Telephone line
Internet Fax Kit
E-mail
LAN
PC
Internet
PC
Fax
G3 Fax
Internet Fax Kit
F-Code
fax reception
Telephone line
E-mail
LAN PC
Internet FAX
Internet
PC
Internet FAX

iv
Internet relay broadcasting
Internet relay broadcasting is a powerful function that takes advantage of a remote Pitney Bowes Office
SystemsInternet FAX
(Internet Fax Kit) to reduce your total communication costs.
The internet relay station performs a relay broadcast, and the internet fax machine which sends the original doc-
ument to the internet relay station has performed a relay broadcast initiation.Your fax machine can perform
either operation; in other words, your machine can either send to a “internet relay station”unit or be a “internet
relay station”unit.
Archive
With this feature, all transmitted and received fax and e-mail are collected at one place automatically so that an
administrator can easily keep track of the document flow.
Programming or retrieving parameters using E-mail
With this feature, you can retrieve and program the e-mail environment, e-mail account user settings,
one-touch number, speed-dial number, fax gateway, and retrieve the current journal data from your PC by send-
ing the text e-mail message to Internet Fax Kit.
E-mail
PC Internet Fax Kit
E-mail environment
Transmission/
reception history
One-touch dial setting
Speed-dial setting
E-mail
Internet Fax Kit
Transmitted E-mail
F
a
x
T
x
Transmission
Reception
Received E-mail
Transmitted E-mail
Received E-mail
F
a
x
R
x
F
a
x
T
x
F
a
x
R
x
Internet Fax KitInternet Fax Kit Fax
Fax
Fax
Internet
Telephone line
Telephone line
Telephone line

v
Table of Contents
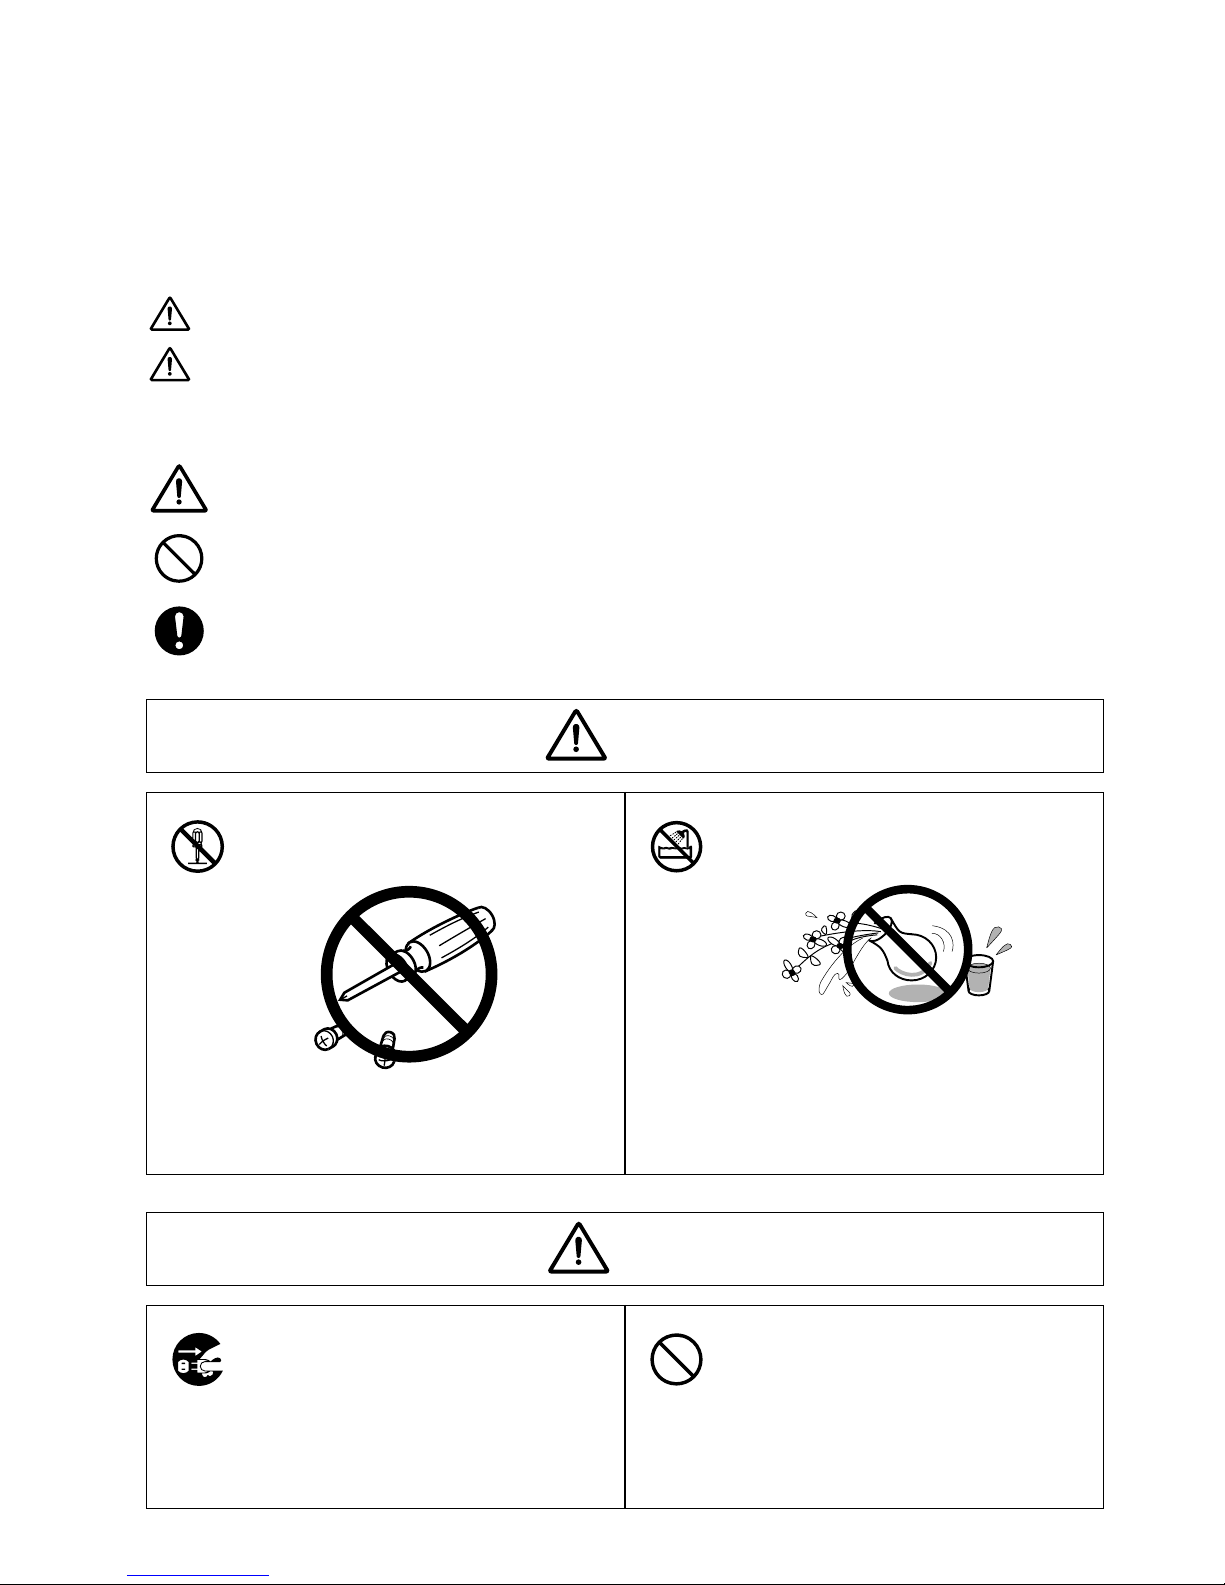
Safety precautions . . . . . . . . . . . . . . . . . . . . . . . . . . . . . . . . . . . . . . . . . . . . . . . . . . . . . . . . . . . . . . . . . . . . . . .i
Internet communication features . . . . . . . . . . . . . . . . . . . . . . . . . . . . . . . . . . . . . . . . . . . . . . . . . . . . . . . . . .ii
Installing Your Machine
Pre-Installation information . . . . . . . . . . . . . . . . . . . . . . . . . . . . . . . . . . . . . . . . . . . . . . . . . . . . . . . . . . . .1.2
Installation procedures . . . . . . . . . . . . . . . . . . . . . . . . . . . . . . . . . . . . . . . . . . . . . . . . . . . . . . . . . . . . . . . . .1.3
Setting your Time Zone . . . . . . . . . . . . . . . . . . . . . . . . . . . . . . . . . . . . . . . . . . . . . . . . . . . . . . . . . . . . . . . .1.4
Setting the Internet parameters . . . . . . . . . . . . . . . . . . . . . . . . . . . . . . . . . . . . . . . . . . . . . . . . . . . . . . . . .1.5
IP address and Subnet mask setting . . . . . . . . . . . . . . . . . . . . . . . . . . . . . . . . . . . . . . . . . . . . . . . . .1.5
Installation information registration . . . . . . . . . . . . . . . . . . . . . . . . . . . . . . . . . . . . . . . . . . . . . . . .1.6
Network environment setting . . . . . . . . . . . . . . . . . . . . . . . . . . . . . . . . . . . . . . . . . . . . . . . . . . . . . .1.7
E-mail environment setting . . . . . . . . . . . . . . . . . . . . . . . . . . . . . . . . . . . . . . . . . . . . . . . . . . . . . . . .1.8
E-mail account user registration . . . . . . . . . . . . . . . . . . . . . . . . . . . . . . . . . . . . . . . . . . . . . . . . . . . .1.9
Administrator registration . . . . . . . . . . . . . . . . . . . . . . . . . . . . . . . . . . . . . . . . . . . . . . . . . . . . . . . .1.11
System configuration
Programming or retrieving parameters using “Administration tool”. . . . . . . . . . . . . . . . . . . . . . . . . . . .2.2
What is “Administration tool for Internet Fax Kit”on the web? . . . . . . . . . . . . . . . . . . . . . . . . . . .2.2
Startup of “Administration tool for Internet Fax Kit”. . . . . . . . . . . . . . . . . . . . . . . . . . . . . . . . . . .2.2
Descriptions of “Administration tool for Internet Fax Kit”. . . . . . . . . . . . . . . . . . . . . . . . . . . . . . .2.2
Programming or retrieving parameters using E-mail . . . . . . . . . . . . . . . . . . . . . . . . . . . . . . . . . . . . . . .2.13
Using E-mail for Program or Retrieve Parameter (Device management by E-mail) . . . . . . . . . .2.13
Remote access setting on the Web . . . . . . . . . . . . . . . . . . . . . . . . . . . . . . . . . . . . . . . . . . . . . . . . . .2.14
Setting the command in the Subject line . . . . . . . . . . . . . . . . . . . . . . . . . . . . . . . . . . . . . . . . . . . .2.15
Programming and Retrieving E-mail environment settings. . . . . . . . . . . . . . . . . . . . . . . . . . . . . .2.16
Programming and Retrieving One-touch/Speed-dialing setting . . . . . . . . . . . . . . . . . . . . . . . . . .2.18
Programming and Retrieving Fax Gateway settings . . . . . . . . . . . . . . . . . . . . . . . . . . . . . . . . . . .2.19
Programming and Retrieving Account settings . . . . . . . . . . . . . . . . . . . . . . . . . . . . . . . . . . . . . . .2.21
Programming Your Machine
Programming an E-mail address into the one-touch keys . . . . . . . . . . . . . . . . . . . . . . . . . . . . . . . . . . . . .3.2
Programming an E-mail address into the speed-dial numbers . . . . . . . . . . . . . . . . . . . . . . . . . . . . . . . . .3.8
Programming an E-mail address into the group dial numbers . . . . . . . . . . . . . . . . . . . . . . . . . . . . . . . .3.14
Registration of a Mail Broadcast list . . . . . . . . . . . . . . . . . . . . . . . . . . . . . . . . . . . . . . . . . . . . . . . . . . . . .3.19
Basic Operation
Sending a document over the LAN . . . . . . . . . . . . . . . . . . . . . . . . . . . . . . . . . . . . . . . . . . . . . . . . . . . . . . .4.2
Registering To/Cc/Bcc fields in soft keys. . . . . . . . . . . . . . . . . . . . . . . . . . . . . . . . . . . . . . . . . . . . . . .4.2
Directly set a mail address and send. . . . . . . . . . . . . . . . . . . . . . . . . . . . . . . . . . . . . . . . . . . . . . . . .4.2
Sending using the one-touch key. . . . . . . . . . . . . . . . . . . . . . . . . . . . . . . . . . . . . . . . . . . . . . . . . . . . .4.4
Sending using a speed-dial number. . . . . . . . . . . . . . . . . . . . . . . . . . . . . . . . . . . . . . . . . . . . . . . . . .4.6
Sending using the EasyDial directory . . . . . . . . . . . . . . . . . . . . . . . . . . . . . . . . . . . . . . . . . . . . . . . .4.8
Broadcasting . . . . . . . . . . . . . . . . . . . . . . . . . . . . . . . . . . . . . . . . . . . . . . . . . . . . . . . . . . . . . . . . . . .4.10
Receive document via LAN . . . . . . . . . . . . . . . . . . . . . . . . . . . . . . . . . . . . . . . . . . . . . . . . . . . . . . . . . . . .4.19
Receiving e-mail from POP server . . . . . . . . . . . . . . . . . . . . . . . . . . . . . . . . . . . . . . . . . . . . . . . . . .4.19
Manual reception from POP server . . . . . . . . . . . . . . . . . . . . . . . . . . . . . . . . . . . . . . . . . . . . . . . . .4.19
Advanced Features
TTI transmittion . . . . . . . . . . . . . . . . . . . . . . . . . . . . . . . . . . . . . . . . . . . . . . . . . . . . . . . . . . . . . . . . . . . . . .5.2
TTI transmission setting . . . . . . . . . . . . . . . . . . . . . . . . . . . . . . . . . . . . . . . . . . . . . . . . . . . . . . . . . .5.2
TTI setting with the Soft Key . . . . . . . . . . . . . . . . . . . . . . . . . . . . . . . . . . . . . . . . . . . . . . . . . . . . . .5.2
Entering TTI transmission . . . . . . . . . . . . . . . . . . . . . . . . . . . . . . . . . . . . . . . . . . . . . . . . . . . . . . . .5.2
Subject line entry . . . . . . . . . . . . . . . . . . . . . . . . . . . . . . . . . . . . . . . . . . . . . . . . . . . . . . . . . . . . . . . . . . . . .5.3
Mail subject setting . . . . . . . . . . . . . . . . . . . . . . . . . . . . . . . . . . . . . . . . . . . . . . . . . . . . . . . . . . . . . . .5.3

vi
Forwarding the received fax document to mail address . . . . . . . . . . . . . . . . . . . . . . . . . . . . . . . . . . . . . .5.5
Forwarding fax by using F-code relay box . . . . . . . . . . . . . . . . . . . . . . . . . . . . . . . . . . . . . . . . . . . . .5.5
Default relay setting . . . . . . . . . . . . . . . . . . . . . . . . . . . . . . . . . . . . . . . . . . . . . . . . . . . . . . . . . . . .5.12
Forwarding the received e-mail to fax . . . . . . . . . . . . . . . . . . . . . . . . . . . . . . . . . . . . . . . . . . . . . . . . . . .5.15
Fax Forwarding setting . . . . . . . . . . . . . . . . . . . . . . . . . . . . . . . . . . . . . . . . . . . . . . . . . . . . . . . . . . .5.15
Accepting Fax Forwarding requests / Rejecting Fax Forwarding requests . . . . . . . . . . . . . . . . . .5.16
Unconditional Fax forwarding of received e-mail . . . . . . . . . . . . . . . . . . . . . . . . . . . . . . . . . . . . . .5.17
Archive . . . . . . . . . . . . . . . . . . . . . . . . . . . . . . . . . . . . . . . . . . . . . . . . . . . . . . . . . . . . . . . . . . . . . . . . . . . . .5.18
Archive transmitted fax and Archive reception fax setting . . . . . . . . . . . . . . . . . . . . . . . . . . . . . .5.18
Archive transmitted mail and Archive reception mail . . . . . . . . . . . . . . . . . . . . . . . . . . . . . . . . . .5.21
Internet relay broadcasting
(Using Fax Gateway) . . . . . . . . . . . . . . . . . . . . . . . . . . . . . . . . . . . . . . . . . . . . . . . . . . . . . . . . . . . . . . . . .5.24
Fax Gateway setting . . . . . . . . . . . . . . . . . . . . . . . . . . . . . . . . . . . . . . . . . . . . . . . . . . . . . . . . . . . . .5.24
Sending fax via Internet relay . . . . . . . . . . . . . . . . . . . . . . . . . . . . . . . . . . . . . . . . . . . . . . . . . . . . .5.26
Troubleshooting
Troubleshooting . . . . . . . . . . . . . . . . . . . . . . . . . . . . . . . . . . . . . . . . . . . . . . . . . . . . . . . . . . . . . . . . . . . . . .6.2
Mail transmission error report . . . . . . . . . . . . . . . . . . . . . . . . . . . . . . . . . . . . . . . . . . . . . . . . . . . . .6.2
Mail reception error report . . . . . . . . . . . . . . . . . . . . . . . . . . . . . . . . . . . . . . . . . . . . . . . . . . . . . . . . .6.2
Other error report . . . . . . . . . . . . . . . . . . . . . . . . . . . . . . . . . . . . . . . . . . . . . . . . . . . . . . . . . . . . . . . .6.2
Appendix and Index
Main Specifications . . . . . . . . . . . . . . . . . . . . . . . . . . . . . . . . . . . . . . . . . . . . . . . . . . . . . . . . . . . . . . . . . . . .7.2
Glossary . . . . . . . . . . . . . . . . . . . . . . . . . . . . . . . . . . . . . . . . . . . . . . . . . . . . . . . . . . . . . . . . . . . . . . . . . . . . .7.3
Index . . . . . . . . . . . . . . . . . . . . . . . . . . . . . . . . . . . . . . . . . . . . . . . . . . . . . . . . . . . . . . . . . . . . . . . . . . . . . . .7.5

vii
Control panel overview
* Internet Fax key is required to change from Fax mode to Internet Fax mode.
Press this key when you want to use the Internet Fax functions.

viii
This page intentionally blank.

Installing Your Machine
Pre-Installation information . . . . . . . . . . . . . . . . . . . . . . . . . . . . . . . . . . . . . . . . . . . 1.2
Installation procedures . . . . . . . . . . . . . . . . . . . . . . . . . . . . . . . . . . . . . . . . . . . . . . . 1.3
Setting your Time Zone . . . . . . . . . . . . . . . . . . . . . . . . . . . . . . . . . . . . . . . . . . . . . . . 1.4
Setting the Internet parameters . . . . . . . . . . . . . . . . . . . . . . . . . . . . . . . . . . . . . . . . 1.5

1.2
For the total system to work properly via LAN, certain information must be set in advance. Please contact your
network administrator if you need any help.
Please set the following information before the installation.
Internet Parameters
Note: Internet Fax Kit can store up to 30 accounts, so the POP user name and POP password are registered
individually for each account.
Pre-Installation information
IP Address
Subnet Mask
SMTP Server Name or IP Address
Default Gateway IP Address
E-mail Address
DNS Server IP Address
POP Server Name or IP Address
POP User Name
POP Password (for security, do not write it here, but keep it in a safe place.)

Carry out registrations in accordance with the following procedures.
1.3
Installation procedures
Time zone setting (See page 1.4)
E-mail environment setting (See page 1.8)
E-mail account user registration (See page 1.9)
Network environment setting (See page 1.7)
IP Address and Subnet mask setting (See page 1.5)
Administrator registration (See page 1.11)
If necessary ...
Installation information registration (See page 1.5)

1.4
“Time Zone” setting is added to the “User Install” by pressing MENU,9.
The Time Zone is required as part of the E-mail header information when sending Internet faxes.
1
Press MENU, 9.
5000 3500
2
Press ENTER repeatedly until the following display appears.
5000 3500
3
The LCD asks you to enter the Time Zone.
Using the cursor key, [ + ], [ - ], and numeric keypad, enter the Time Zone.
If your machine is 3500, use or to select “+” or “-”.
(Refer to the example of Time Zone below.)
Example of Time Zone:
GMT
--
11:00 Midway Island
GMT
--
10:00 Hawaii
GMT
--
9:00 Alaska
GMT
--
8:00 Pacific Time (US & Canada)
GMT
--
7:00 Mountain Time (US & Canada)
GMT
--
6:00 Central Time (US & Canada)
GMT
--
5:00 Eastern Time (US & Canada)
GMT
--
4:00 Atlantic Time (Canada)
GMT
--
3:30 Newfoundland
GMT(Greenwich Mean Time): Dublin, Edinburgh, Lisbon, London
GMT + 01:00 Amsterdam, Berlin, Bern, Rome, Stockholm,Vienna
GMT + 02:00 Brussels, Copenhargen, Madrid, Paris
GMT +10:00 Guam
4
Press ENTER to save the setting. The LCD will show the next setting of “User Install”.
If you want to go back to the previous step, press BACK. Otherwise, press STOP to exit this mode.
Time Zone +00:00
9.User Install
Time Zone
+00:00 [+ ][- ]
[Program] No.9
9 User Install
Setting Menu
4.Doc. Management
5.Print
9.User Install
Setting your Time Zone

1.5
The internet parameters for Internet Fax Kit can be entered from the Web browser such as “Internet Explorer”
(4.0 or later) or “Netscape Communicator” (4.5 or Later). Before you use these tools to enter the internet param-
eter, you must do the following procedure to enter the correct IP address and subnet mask.
Contact your Network Administrator if you need any help.
IP address and Subnet mask setting
For 5000
1
Press MENU, 3, 8, 0, 1, ENTER.
2
The LCD asks if you want to set “IP Address” or “Subnet Mask”.
Example display:
3
Select “IP Address” using the cursor key. Then press ENTER.
4
Enter the IP address using the numeric keypad. Then press ENTER.
Note: To enter numbers less than 2 digits between the dots, use the cursor key to move the entry point.
To correct a wrong number entry, move the cursor with the cursor key and overwrite it.
5
Set the “Subnet Mask” using the same procedure as with “IP Address”.
6
Press “Exit”. When the LCD shows “To reflect change, please power off and on with the administrator”,
press [OK].
7
To reflect the setting, turn the power off and on.
For 3500
1
Press MENU, 3, 8, 1, ENTER.
2
Enter the IP address using the numeric keypad. Then press ENTER.
Note: To enter numbers less than 2 digits between the dots, use the cursor key to move the entry point.
To correct a wrong number entry, move the cursor with the cursor key and overwrite it.
3
Enter the subnet mask address using the numeric keypad. Then press ENTER.
4
Press STOP.
5
To reflect the settings, turn the power off and on.
Set Subnet Mask
255.255.255.000
Set IP Address
192.168.001.013
01.TCP/IP
Exit
IP Address : 192.168.001.013
Subnet Mask : 255.255.255.000
Setting the Internet parameters

1.6
Installation information registration
Registration of device information makes it easier to identify the device.
Installation data, once registered, is fed into the device information for display.
1
Start up “Internet Explorer” (4.0 or later) or “Netscape Communicator” (4.5 or Later) on your PC.
Note: Use the latest browser version possible. Some old versions may not produce the correct display.
2
Enter the IP address of Internet Fax Kit in the address box, and press ENTER.
3
The “Administration tools for Internet Fax Kit” will be appear on your screen.
Note: If the “Administration tools for Internet Fax Kit” does not appear, double-check the IP address
in “Entering the IP address setting and Subnet mask” (see above), and carry out power off/on of the
fax machine to restart.
4
Click Instauration information under [Setup].
5
Fill in each of the following fields, and then click the [SET] button.

1.7
Network environment setting
This setting is to establish the network connection of this device.
1
Start up “Administration tool for Internet Fax Kit”. Click Network environment under [Setup].
2
The IP address and Subnet mask you have entered will be appeared.
If necessary, enter Gateway address and DNS server address and then click [SET] button.
Gateway
“Gateway” collectively refers
to hardware and software
that interlink systems and
networks using different
protocols.

1.8
E-mail environment setting
This setting enables the device to perform e-mail transmission and reception.
1
Start up “Administration tool for Internet Fax Kit”. Click E-mail environment under [Setup].
2
Enter the “SMTP server name” and “POP server name”, and then click the [SET] button.

1.9
E-mail account user registration
Register a default account. A default account is an account used when the account cannot be specified when
forwarding received fax and archiving sent/received faxes. If the default account is not registered, some func-
tions may not be available.
1
Start up “Administration tool for Internet Fax Kit”. Click E-mail account users under [Operation
setting].
2
To register a new account, click Register new “account user” .

1.10
3
Fill in each of the following fields, and then click the [REGISTER ACCOUNT] button.
4
The information screen appears. If necessary, enter the POP user name and POP password, then click
[SET] button to register the entry.

1.11
Administrator registration
What is administrator registration?
Administrator registration will enable the following:
◆Authentication is requested whenever making or altering any device settings.
◆Authentication is requested whenever making or altering a user registration.
◆Authentication is requested whenever making or altering fax distribution settings.
Once an administrator has been identified for the system, the administrator’s password is needed to manage
account and to modify the system setting and administrator’s information
Registration of administrator information
1
Start up “Administration tool for Internet Fax Kit”. Click Administrator’s Information under
[Setup].
Table of contents
Other Pitney Bowes Fax Machine manuals