Pitney Bowes AddressRight DA Series User manual

1 Elmcroft Road Stamford, CT 06926-0700
SV61108 Rev. E ©2008 Pitney Bowes Inc.
This document is a publication of Pitney Bowes. The use of this information by the recipient or others for purposes other than the repair, adjustment
or operation of Pitney Bowes equipment may constitute an infringement of patent and/or other intellectual property rights of Pitney Bowes or others.
Pitney Bowes assumes no responsibility for any such use of the information. Except as provided in writing, duly signed by an officer of Pitney Bowes,
no license, either express or implied, under any Pitney Bowes or any third party’s patent, copyright, or other intellectual property rights is granted by
providing this information.
Installation Instructions
Installing Printer Drivers, Control Panel Software, and Envelope
Designer™with AddressRight®DA Series Printers/DocuMatch®
Page 1 of 28
Introduction
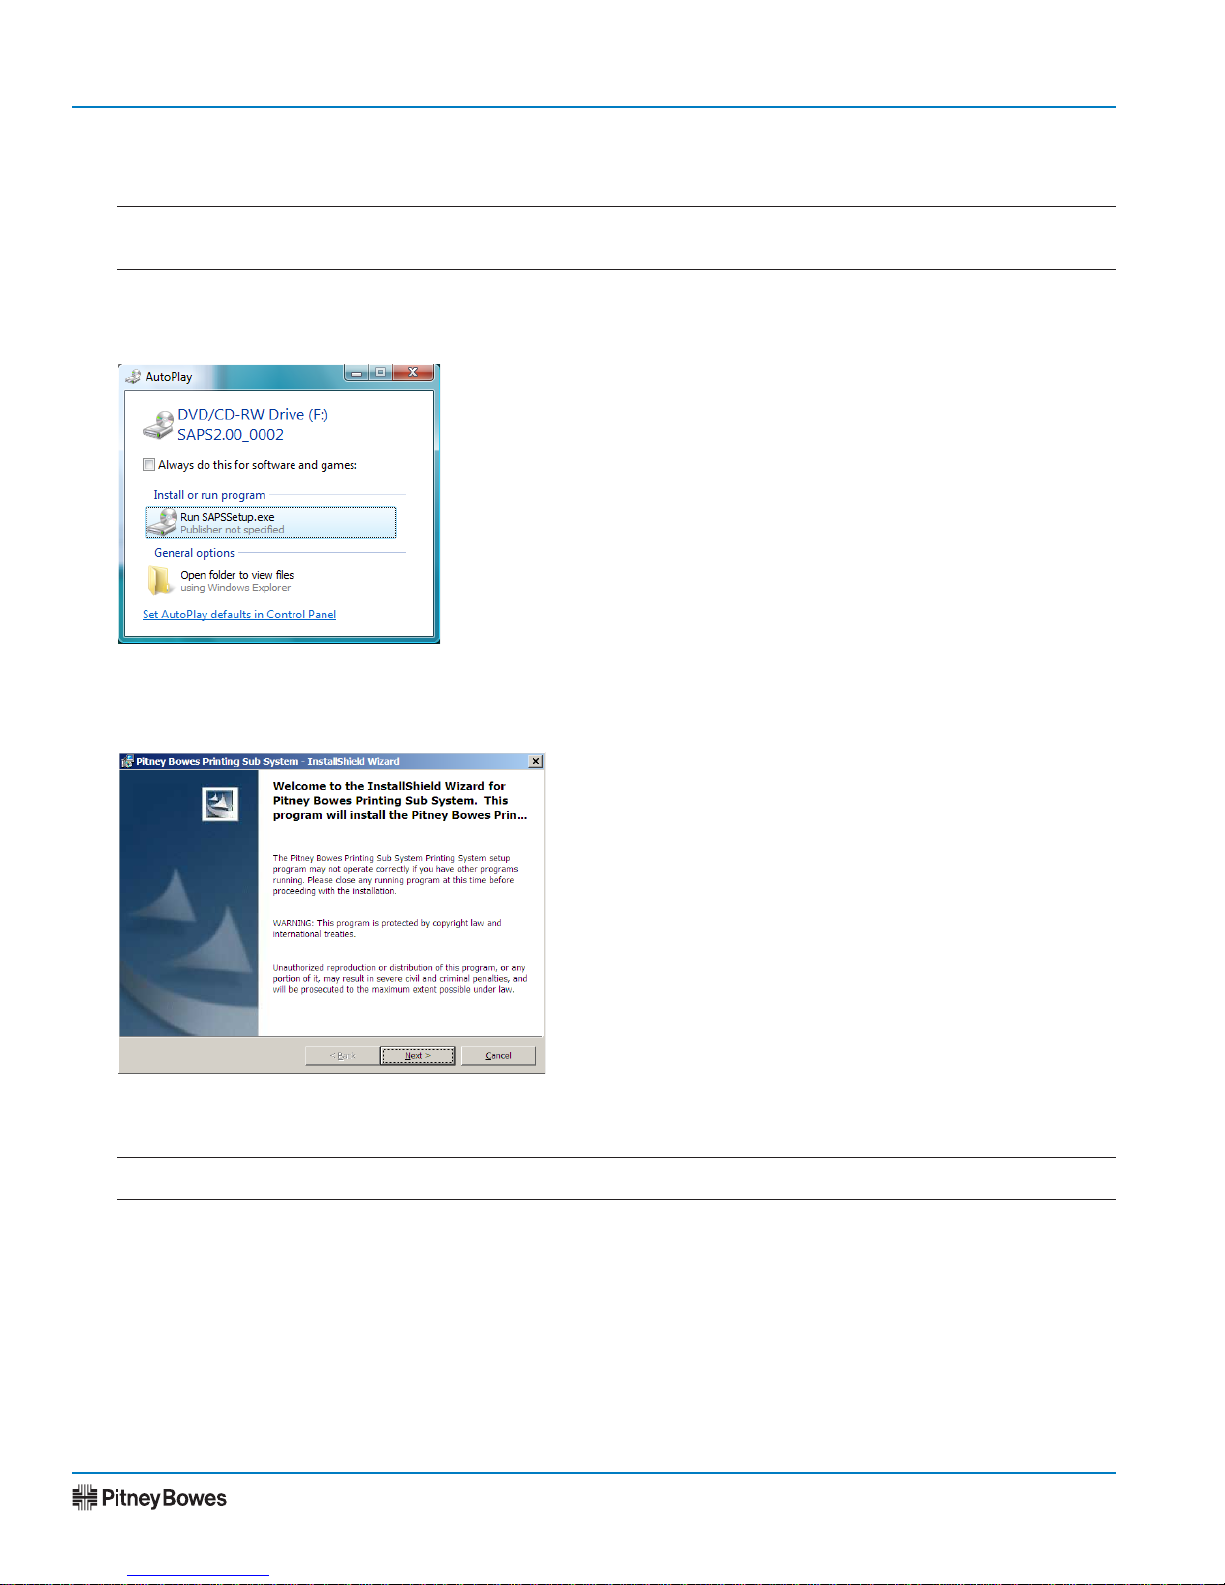
This document provides instructions for installing the printer drivers and Envelope Designer®Plus software
used with the AddressRight®DA Series Printers and DocuMatch®. The install CD for these drivers is also
known as SAPS (Stand-Alone Printing System). These instructions contain the following sections:
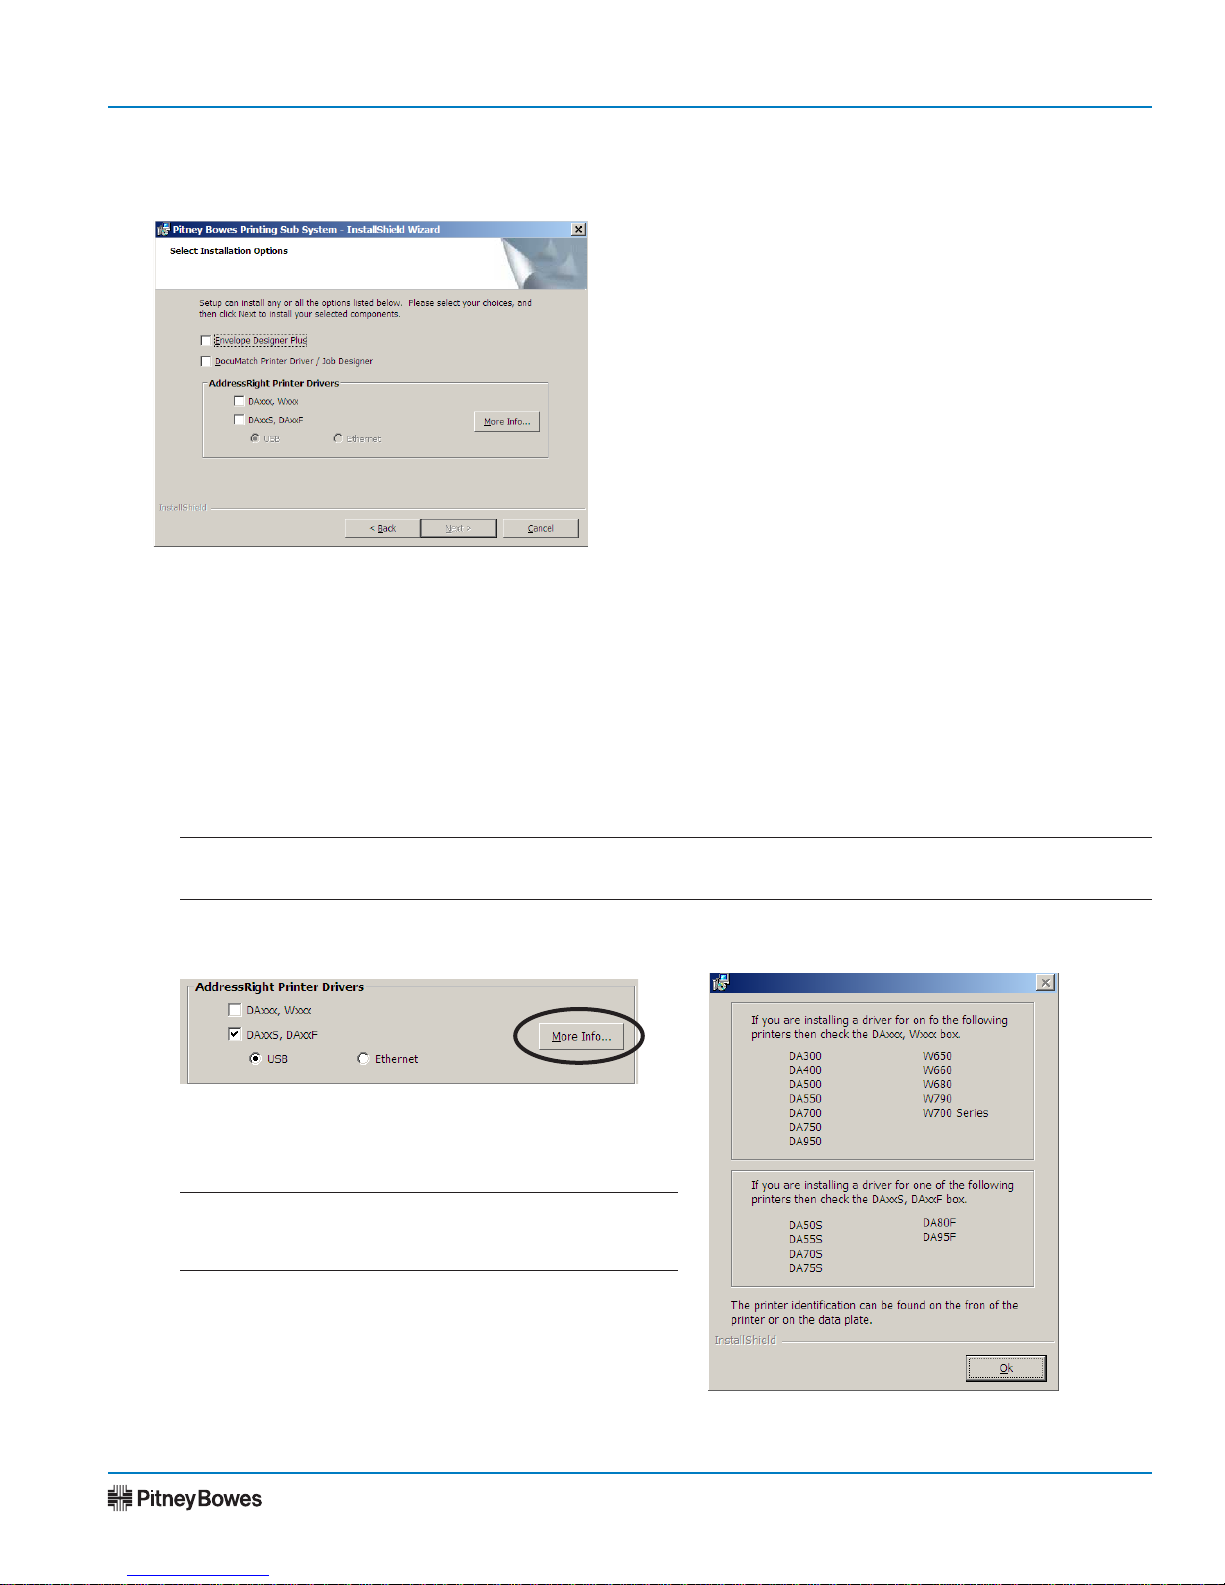
Section 1 - Selecting the Files/Drivers to Install .........................................................................2
Section 2 - Installing Envelope Designer™Plus..........................................................................5
Section 3 - Installing the AddressRight® Printer Driver - DAxxS/DAxxF with USB......................6
Section 4 - Installing the AddressRight® Printer Driver - DAxxS/DAxxF with Ethernet .............12
Section 5 - Installing the AddressRight®Printer Driver - DAxxx or Wxxx (Legacy) ..................18
Section 6 - Installing the Pitney Bowes Envelope Printer Accelerator......................................20
Section 7 - Finishing Install Wizard ..........................................................................................21
Section 8 - Installing the DA900 Printer Driver .........................................................................22
Section 9 - Installing the DocuMatch® Printer Driver.................................................................24
You may or may not be prompted to follow the steps in all of these sections, depending upon the driver and
software options you select to install.
IMPORTANT:
• Windows®2000 systems must have Windows 2000 Service Pack 4 (or higher) installed.
• Windows®XP systems must have Windows XP Service Pack 2 (or higher) installed.
• Windows®Vista™ systems must have Windows Vista Service Pack 0 installed (SP1 for Vista has not been tested).
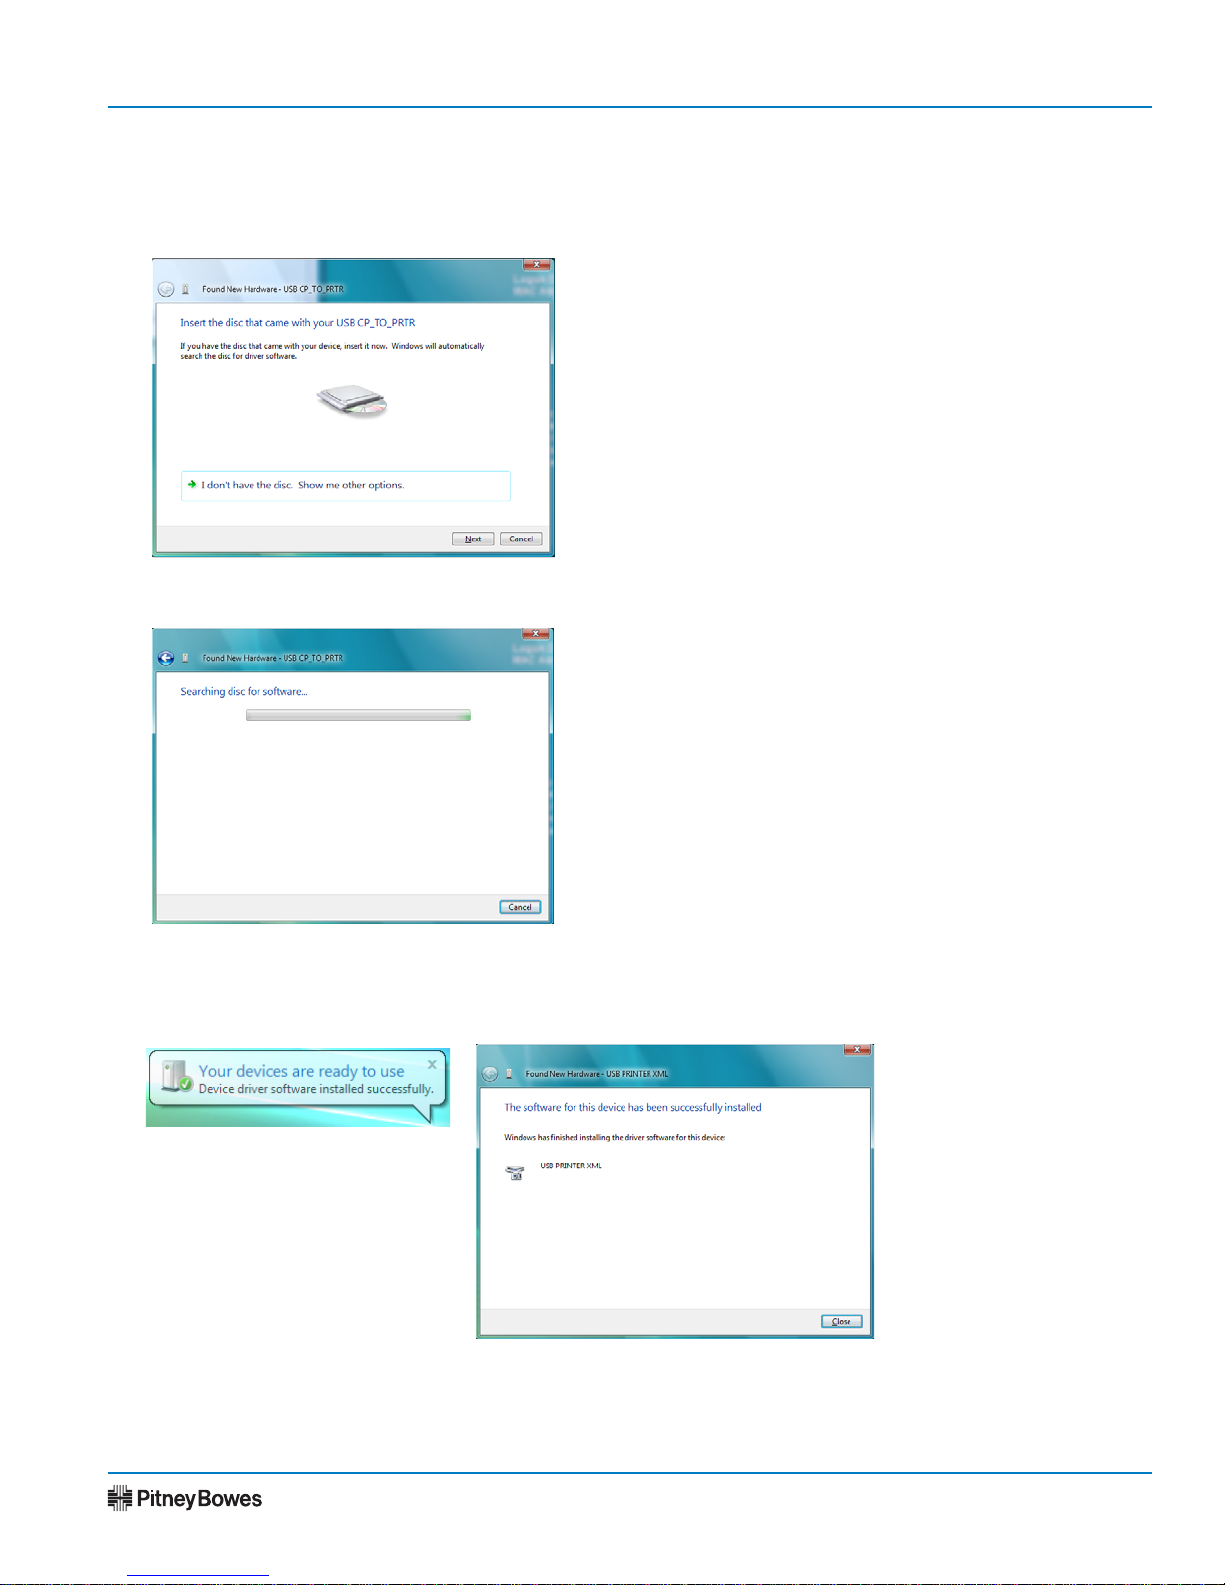
Important Note When Connecting via USB Port
CAUTION! If you are connecting the AddressRight®DA Printer through the USB port of the PC, you
must install the print driver software BEFORE you plug in the printer USB cable into the PC, contrary
to the normal order of "plug and play".
NOTE: All screen displays in this installation show a Windows XP system, unless otherwise noted.

Printer Drivers - AddressRight®and DocuMatch®
Page 2 of 28
SV61108 Rev. E
1. Insert the Envelope DesignerTM Plus CD into the CD-DVD drive.
NOTE: If the program does not start automatically, click Start and select Run. Type D:\SAPSSetup.exe,
(where D:\ represents your CD-DVD drive), and then click OK.
Windows Vista - At the AutoPlay screen, click on Run SAPSSetup.exe when it displays. At the User
Account Control screen, select "Allow".
Section 1 - Selecting the Files/Drivers to Install
3. At the License Agreement screen, read the information on the screen, then click I Agree.
NOTE: If you click I Do Not Agree, you will not be able to continue with the installation.
4. At the Read Me screen, read the information in the file, then click Next.
Windows Vista
2. At the Welcome to the InstallShield Wizard screen, click Next.

Page 3 of 28
Installation Instructions
SV61108 Rev. E
5. Select the items you want to install from the list of options.
Section 1 - Selecting the Files/Drivers to Install (continued)
B. To view the specific AddressRight printers associated with each check box, click on the More Info
button.
C. Click Next once you have finished making your selections.
A. Please keep in mind the following items regarding this screen:
• The Next button is disabled until you make a selection.
• Options not accessible in your current configuration are disabled (grayed out). For example, when
choosing "DAxxx, Wxxx" for AddressRIght Printer Driver, the radio buttons of USB and Ethernet
are grayed out because these printers do not have these drivers.
• Pitney Bowes recommends that you install Envelope Designer™Plus. If you want to use a third-
party envelope design software instead, do not select the Envelope Designer™Plus option.
• If you have selected "DAxxS/DAxxF" for AddressRight Printer Drivers, you must also select the
type of connection you will make to the printer, either USB or Ethernet.
NOTE: The Pitney Bowes Addressing Printer Control Panel software will be installed on your system auto-
matically when you select the DAxxS/DAxxF printer option.
The Printer Information screen opens (see figure
on right); click OK to close the screen when done.
NOTE: On Windows Vista operating systems, the
W650, W660, W680, W790, and W700 Series choices
do not display because they are not supported in Vista.

Printer Drivers - AddressRight®and DocuMatch®
Page 4 of 28
SV61108 Rev. E
NOTES:
• A digital signature warning message may appear. If this is a Windows 2000 install, click Yes to continue.
The warning message may not appear in the foreground. Be sure to monitor the Task bar for a new dia-
log (that may appear) behind the Installing Pitney Bowes Addressing Printer window.
• The progress bar screen may pause (for approximately five minutes) at the 39% mark to install the Mi-
crosoft .NET Framework and service pack, if necessary
7. Once you have confirmed your selection, continue with the appropriate section, based on your method of
install:
►If are installing just the Envelope Designer Plus software, go to Section 2: Installing Envelope De-
signer™ Plus on page 5.
►If are installing the DAxxS and DAxxF printer drivers via USB, go to Section 3: Installing the Ad-
dressRight®Printer Driver - DAxxS/DAxxF with USB on page 6.
►If are installing the DAxxS and DAxxF printer drivers via Ethernet, got to Section 4: Installing the Ad-
dressRight®Printer Driver - DAxxS/DAxxF with Ethernet on page 12.
►If are installing the DAxxx or Wxxx legacy printer drivers, go to Section 5: Installing the Address-
Right®Printer Driver - DAxxx or Wxxx (Legacy) on page 18.
►If you want to print your designs more efficiently, go to Section 6: Installing the Pitney Bowes Enve-
lope Printer Accelerator on page 20.
►If are installing the Envelope Designer Plus and Documatch Printer Driver/Job Designer software,
go to Section 9: Installing the DocuMatch®Printer Driver on page 24.
6. Click Next to confirm your selection, or Back to make any changes.
Section 1 - Selecting the Files/Drivers to Install (continued)

Page 5 of 28
Installation Instructions
SV61108 Rev. E
If you are installing Envelop Designer™ Plus, follow the prompts to confirm the location for installation of
the Envelope Designer™Plus files, for selecting the Program folder group for the Envelope Designer™Plus
icons, and the desktop shortcuts.
NOTES:
• Pitney Bowes recommends using the default settings
• Envelope Designer does not support Windows Server 2003.
When the Completing Add Printer Wizard screen displays, click Finish.
Section 2 - Installing Envelope Designer™Plus

Printer Drivers - AddressRight®and DocuMatch®
Page 6 of 28
SV61108 Rev. E
CAUTION! If you are connecting the AddressRight®DA Printer through the USB port of the PC, you
must install the print driver software BEFORE you plug in the printer USB cable into the PC, contrary
to the normal order of "plug and play".
Section 3 - Installing the AddressRight® Printer Driver - DAxxS/DAxxF with USB
1. After choosing AddressRight Printer Driver - DAxxS or DAxxF and USB, the Pitney Bowes Printing Sub
System install screen displays.
2. At the InstallShield Wizard completed screen, click Finish.

Page 7 of 28
Installation Instructions
SV61108 Rev. E
Section 3 - Installing the AddressRight® Printer Driver - DAxxS/DAxxF with USB (continued)
USB Port
DA70S/DA75S Printer
USB Port
DA50S/DA55S Printer
USB
Port
DA80F Printer
USB Port
DA95F Printer
Refer to the appropriate section (Windows Vista, Windows XP, or Windows 2000) on the following pag-
es to continue the USB installation process.
3. Keep the SAPS install CD in the CD-DVD drive. Plug in the USB cable between the printer and PC.

Printer Drivers - AddressRight®and DocuMatch®
Page 8 of 28
SV61108 Rev. E
Section 3 - Installing the AddressRight® Printer Driver - DAxxS/DAxxF with USB (continued)
Windows Vista
A. At the found New Hardware screen, select "Locate and install driver software".
An "Installing Device Driver" message displays from the taskbar. An icon taskbar appears that indicates
software being loaded. If you click on this icon, a status screen displays.
Software Being Loaded Icon on Taskbar
Status Screen from Software Icon on Taskbar
B. At the User Account Control screen, select "Continue".

Page 9 of 28
Installation Instructions
SV61108 Rev. E
Section 3 - Installing the AddressRight® Printer Driver - DAxxS/DAxxF with USB (continued)
Windows Vista (continued)
C. At the "Insert the disc that came with your USB CP TO PTR" screen, click Next.
D. When finished, a "Your devices are ready to use" message displays from the taskbar. If you click on this
icon, a status screen displays. Click Close to finish.
A "Searching disc for software screen..." displays.

Printer Drivers - AddressRight®and DocuMatch®
Page 10 of 28
SV61108 Rev. E
Windows XP
A. At the Welcome to the Found New Hardware Wizard
screen, click the "No, not this time" radio button, then
click Next.
The Install Wizard installs the software.
NOTE: A digital signature warning message may ap-
pear. However, the warning message may not appear
in the foreground. Be sure to monitor the Task bar for a
new dialog that may appear. Click Continue Anyway to
continue.
C. When the Completing the Found New Hardware Wiz-
ard appears, click Finish.
Section 3 - Installing the AddressRight® Printer Driver - DAxxS/DAxxF with USB (continued)
B. Click the "Install the software automatically
(Recommended)" radio button. Click Next.

Page 11 of 28
Installation Instructions
SV61108 Rev. E
Windows 2000
A. The Welcome window appears. Click Next to continue.
B. At the Install Hardware Device Drivers screen, click the "Search for suitable driver for my device (rec-
ommended)" radio button. Click Next.
Section 3 - Installing the AddressRight® Printer Driver - DAxxS/DAxxF with USB (continued)
D. Click Next to continue.
NOTE: A digital signature warning message may appear. However, the warning message may not appear in the
foreground. Be sure to monitor the task bar for a new dialog that may appear. Click Yes to continue.
E. Click Finish to complete the installation.
C. Ensure that the CD-ROM drives check box is checked, then click Next.

Printer Drivers - AddressRight®and DocuMatch®
Page 12 of 28
SV61108 Rev. E
Section 4 - Installing the AddressRight® Printer Driver - DAxxS/DAxxF with Ethernet
DA70S/DA75S Printer
DA50S/DA55S Printer
Ethernet
Port
DA80F Printer
Ethernet Port
DA95F Printer
Ethernet
Port
Ethernet
Port
1. Keep the SAPS install CD in the CD-DVD drive. Plug in the Ethernet cable between the printer and net-
work port. Ensure that the PC is connected to the network as well.
2. After choosing AddressRight Printer Driver - DAxxS/DAxxF and Ethernet, the Pitney Bowes Printing
Sub System install screen displays.
Windows XP

Page 13 of 28
Installation Instructions
SV61108 Rev. E
Section 4 - Installing the AddressRight® Printer Driver - DAxxS/DAxxF with Ethernet (cont'd)
3. When prompted to start the Microsoft Add Printer Wizard, click OK to continue.
Windows 2000/XP - At the Add Printer Wizard screen, click Next.
4. At the Local or Network screen, select "Local printer..." or "Add a local printer", then click Next.
Windows XP Windows Vista
Windows XP

Printer Drivers - AddressRight®and DocuMatch®
Page 14 of 28
SV61108 Rev. E
Section 4 - Installing the AddressRight® Printer Driver - DAxxS/DAxxF with Ethernet (cont'd)
Windows 2000/XP - At the Add Standard TCP/IP Printer Port Wizard, click Next.
6. The Add Port screen displays. Enter the IP address of the printer in the "Printer Name or IP Address" field.
As you enter the IP address, the same text displays in the "Port Name" field. Click Next when done.
NOTE: You can obtain the device name or IP address from the printer LCD menu. Put printer Offline. Hold
Menu button down until the Setup Menu displays. Scroll to Option 5, Communications, then press Enter.
Windows XP
Windows Vista
5. On the next screen select "Create a new port" radio button. Select "XCL TCP/IP Port" in the dropdown
box. Click Next when done.
Windows XP Windows Vista
Windows XP

Page 15 of 28
Installation Instructions
SV61108 Rev. E
Windows 2000/XP - At the Completing the Add Standard TCP/IP Printer Port Wizard screen, click Finish.
Section 4 - Installing the AddressRight® Printer Driver - DAxxS/DAxxF with Ethernet (cont'd)
7. On the next screen, select "Pitney Bowes, Inc." in the Manufacturer panel, and the appropriate printer
model in the Printers pane. Then click Next.
Windows XP Windows Vista
8. On the next screen, select the appropriate choice based on operating system:
A. Windows 2000/XP - Select "Keep existing driver (recommended)" radio button, then click Next.
B. Windows Vista - Select "Use the driver that is currently loaded (recommended)", then click Next.
Windows XP Windows Vista
Windows XP

Printer Drivers - AddressRight®and DocuMatch®
Page 16 of 28
SV61108 Rev. E
Section 4 - Installing the AddressRight® Printer Driver - DAxxS/DAxxF with Ethernet (cont'd)
9. On the next screen, select the appropriate choice based on operating system:
A. Windows 2000/XP - Verify the name shown in "Printer name" field is correct, or enter a different
printer name. Select Yes or No in the field to make this printer the default. Click Next to continue
B. Windows Vista - Verify the name shown in "Printer name" field is correct, or enter a different printer
name. Check off the field to make this printer the default. Click Next to continue.
10. The Add Printer, Printer Sharing screen displays.
A. Select either "Do not share this printer", or "Share name" if you want to share the printer. If you
you've chosen to share, enter the printer name in the share name field.
B. Click Next.
Windows Vista
Windows XP
Windows XP Windows Vista

Page 17 of 28
Installation Instructions
SV61108 Rev. E
Section 4 - Installing the AddressRight® Printer Driver - DAxxS/DAxxF with Ethernet (cont'd)
11. The Add Printer Wizard, Printer Test Page screen displays.
A. Select Yes or No to the prompt to print a test page.
NOTE: If you select "Yes" at the prompt to print a test page, you need to have a #10 or DL envelope
loaded in the printer.
B. Click Next.
Windows XP Windows Vista
C. Windows 2000/XP - The Completing the Add Printer Wizard screen displays. Click Finish.
Windows XP

Printer Drivers - AddressRight®and DocuMatch®
Page 18 of 28
SV61108 Rev. E
Section 5 - Installing the AddressRight®Printer Driver - DAxxx or Wxxx (Legacy)
1. After choosing AddressRight Printer Driver - DAxxx or
Wxxx, the Pitney Bowes Printing Sub System install
screen displays. Click Next to continue.
2. When prompted, click OK to continue.
3. If you see a warning during the installation, click the appropriate response to continue the installation. For
Windows XP, select Continue Anyway; for Windows Vista, select Install this driver software anyway.
4. At the Add Printer Utility screen, click Next to con-
tinue.
Windows XP
Windows Vista

Page 19 of 28
Installation Instructions
SV61108 Rev. E
Section 5 - Installing the AddressRight®Printer Driver - DAxxx or Wxxx (Legacy) cont'd
5. At the Select Port screen, select the port required
and click Next to continue.
6. At the Select Printer Model screen, select the Pitney
Bowes printer required and click Next to continue.
7. At the Add Printer Utility Step 4 screen,
a. Name the printer.
b. Select Yes or No to the prompt to make this
printer the default.
c. Select Yes or No to the prompt to print a test
page.
d. Click Finish when done making selections.
8. The first screen of the Pitney Bowes Envelope Printer Accelerator setup displays. Go to Section 6: In-
stalling the Pitney Bowes Envelope Printer Accelerator later in this document for further instructions.

Printer Drivers - AddressRight®and DocuMatch®
Page 20 of 28
SV61108 Rev. E
NOTE: If you are only installing the DocuMatch®, do not
install the printer accelerator.
1. When the prompt for setting up the printer accel-
erator appears, click Next.
Section 6 - Installing the Pitney Bowes Envelope Printer Accelerator
2. When the 3rd Party Envelope Printing Setup
screen displays, you need to make a choice about
your use of Envelope Designer™Plus (ED+):
If you will use ED+ ...then
To create and print
envelopes,
Click Cancel.
To create designs
only, and print using a
third party application
such as MS Word,
Click Next to accept the tar-
get printer that the printer
accelerator will use when
printing the envelope. Click
OK when the Successful Con-
figuration screen appears.
Other manuals for AddressRight DA Series
1
This manual suits for next models
1
Table of contents
Other Pitney Bowes Software manuals
Popular Software manuals by other brands

Process Data Control
Process Data Control COMPASS-EI user manual

Microsoft
Microsoft Exchange 2000 Operation guide

Micro Innovations
Micro Innovations Windows CE manual

Yamaha
Yamaha Clavinova CVP-309 installation guide

McAfee
McAfee DFFCDE-AA-DA - Endpoint Encryption For Files Product guide

GRASS VALLEY
GRASS VALLEY MAESTRO 1.5 RELEASE NOTES release note