Please read these instructions carefully and store in a safe
place for future reference.
UPLIGHTERTM
As part of the Insect-O-Cutor®brand of insect control
products, UplighterTM is a compact and highly effective
decorative insect control unit for use within front of house
applications. UplighterTM utilises a highly effective Synergetic®
dual wavelength UV tube and is designed for use with a high
specification glupac®glueboard.
CONTENTS OF PACKAGE
- 1 x UplighterTM flykiller
- 1 x Mains cable (Type X)
- 1 x glupac®pheromone impregnated glueboard
- 3 x Screws and wall plugs
- 1 x 15W 18” Synergetic®tube (fitted)
WARNING - THIS APPLIANCE MUST BE EARTHED (CLASS 1)
INSECT CONTROL PRODUCTS
UplighterTM utilises a high powered dual wavelength ultra
violet tube to attract flying insects and retains the caught
insects on a pheromone impregnated glueboard for
inspection or hygienic disposal.
WARNING
UplighterTM is not to be used by children or persons with
reduced physical, sensory or mental capabilities, or lack of
experience and knowledge, unless they have been given
supervision or instruction.
Children should be supervised to ensure they do not play
with the appliance.
If the mains cable is damaged it must be replaced by a
specialist mains cable available from P+L Systems Ltd or your
supplier.
Not suitable for applications where potentially explosive
environments may exist.
POSITIONING AND GUIDANCE FOR USE
THIS UNIT IS FOR INDOOR USE ONLY.
UplighterTM should ideally be fixed around two meters above
the ground, preferably in the darkest place within the area to
be protected. Do not position the unit close to windows,
skylights or other sources of light, or where it may be obscured
by furniture, doors or other obstacles. Ideally, UplighterTM
should be visible from every part of the area to be protected.
UplighterTM should ideally be in operation for 24 hours a day,
ensuring your premises are kept free of flying insects. Insects
are most attracted to UplighterTM at night when there is no
competition from daylight or other light sources.
GUARANTEE
UplighterTM has a five year guarantee and if maintained as
recommended in these instructions should continue to work
for many years.* Use of non-approved consumables may
invalidate the guarantee. Ensure genuine glupac®
glueboards are used in conjunction with this product.
*Excludes tube, glueboard and starter. Does not cover breakdown due to misuse, incorrect
operation or use in an incorrect application. Uplighter
Decorative Glueboard Insect Control
MOUNTING FIXING CENTRES
METHOD Uplighter
Wall 300mm
INSTALLATION
INSTALLATION SHOULD BE CARRIED OUT BY SERVICE
PERSONNEL ONLY.
UplighterTM should be mounted as shown in the mounting
options section of this document, using the supplied wall
mounting plugs and screws, making sure correct wall plugs
are used for specialist mounting materials, such as
plasterboard.
To install UplighterTM, drill two fixing holes at the appropriate
distance as described below, before inserting the wall plugs
then inserting the fixing screws. To firmly secure UplighterTM
into position, swing down the front guard, then mark the
location of the third fixing hole onto the mounting surface.
Remove UplighterTM, then drill the final fixing hole and insert
the wall plug. Finally, replace UplighterTM onto the two fixing
screws through the keyhole slots, before securing in position
by screwing through the round fixing hole. Swing the front
guard back into position.
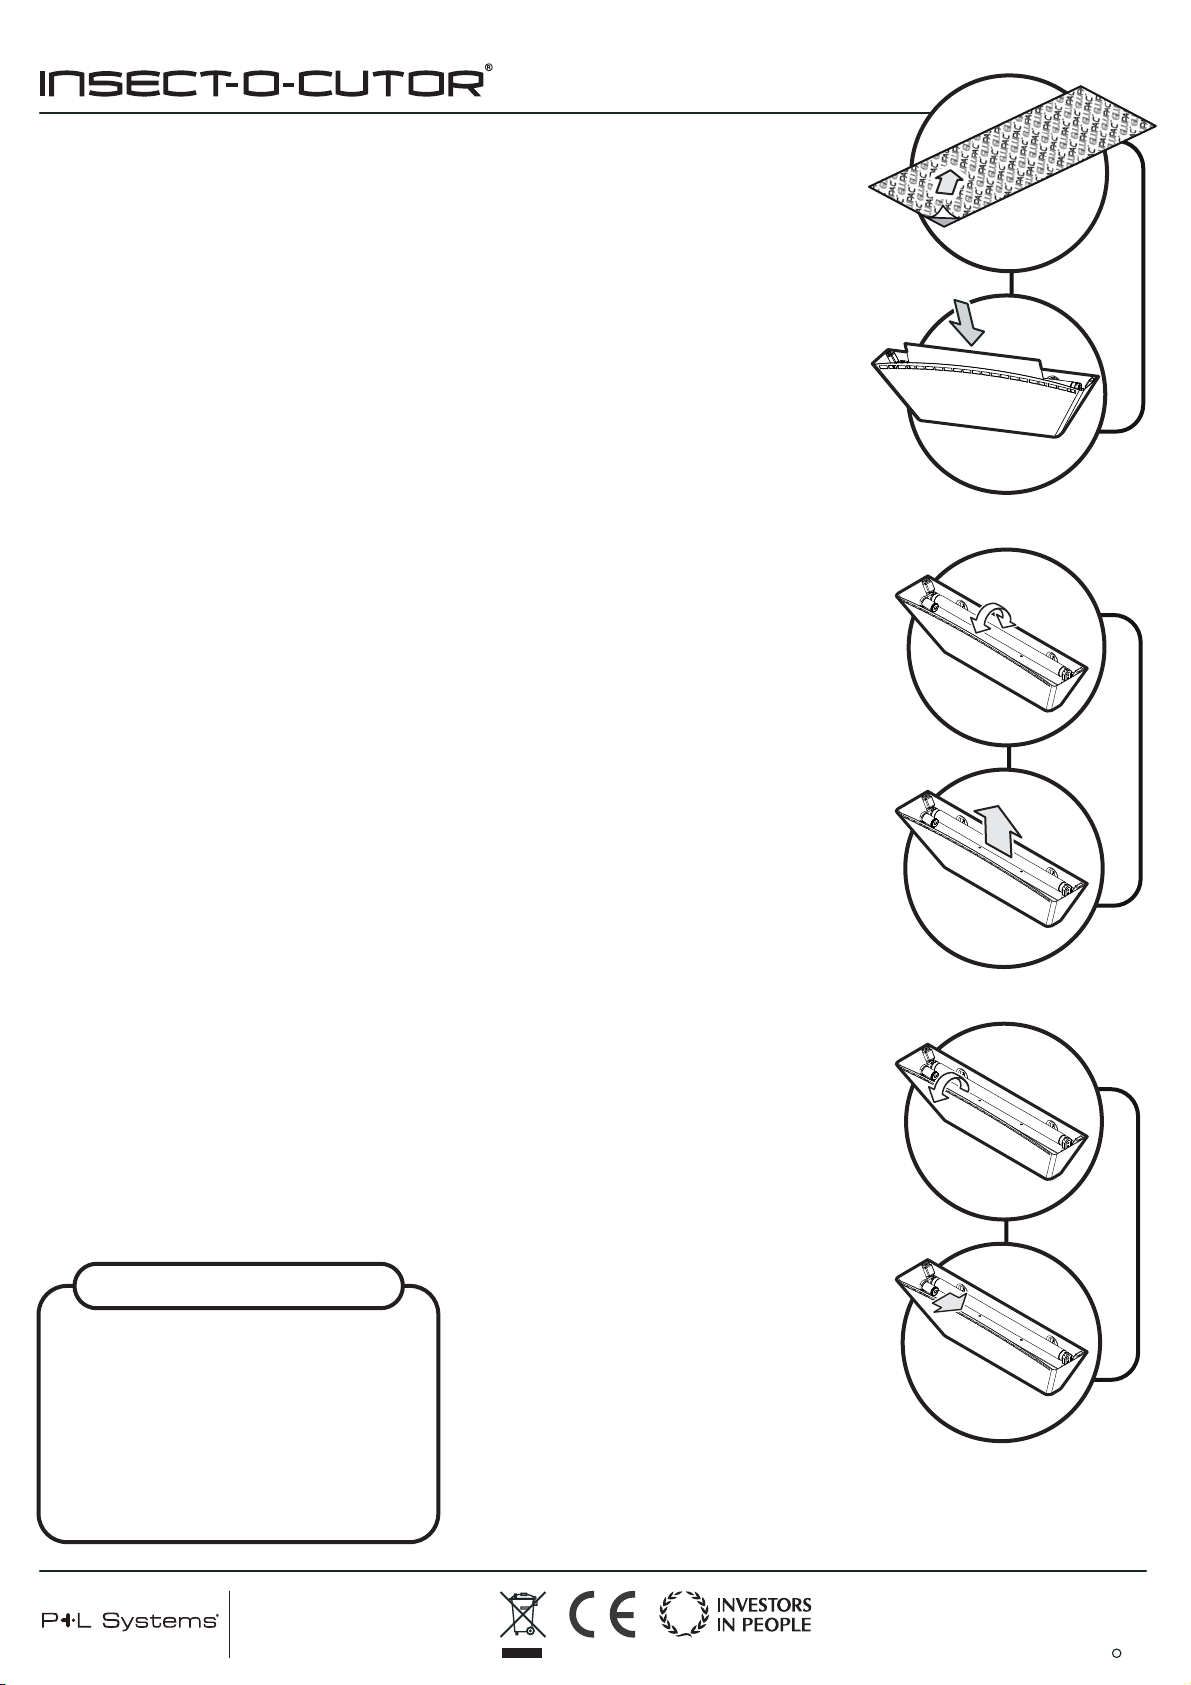
Once installed in position, fit the glupac®glueboard in
position as described in the glueboard replacement section
of this document. Use the removable mains lead and plug to
connect the UplighterTM to an appropriate power supply.
CLEANING
CLEANING SHOULD BE CARRIED OUT BY SERVICE PERSONNEL
ONLY, AFTER ENSURING THAT THE UNIT IS DISCONNECTED
FROM THE MAINS SUPPLY.
It is recommended that cleaning is carried out regularly when
the glueboard is replaced. Once the glueboard is removed,
the unit should be thoroughly wiped down with a damp
cloth, removing any build up of dirt. Ensure the unit is
completely dry before reconnecting it to the power supply.
Front Guard Removal
WALL MOUNTING
Uplighter