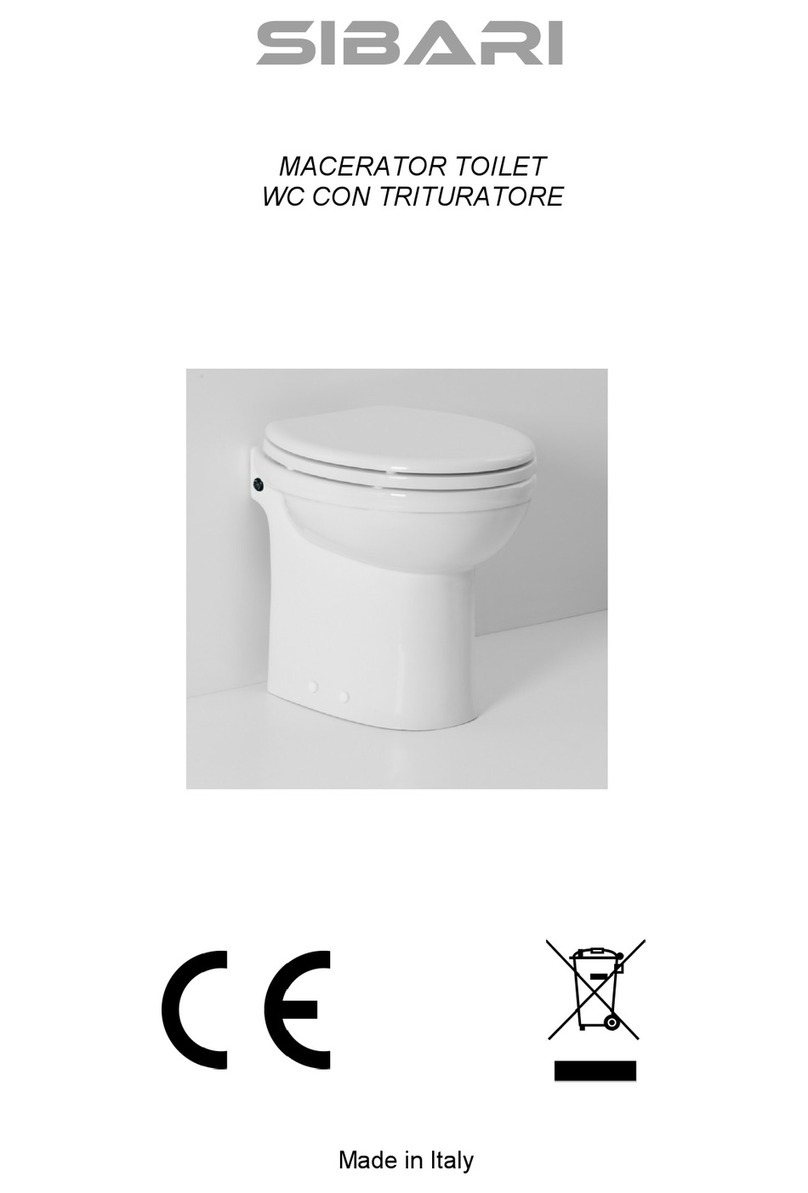
PLANUS WAVE User manual

1
MACERATOR TOILET
WC CON TRITURATORE
REGISTER YOUR PRODUCT:
WWW.PLANUS.EU
WAVE
-
STILOPLUS

2
INDEX
1. INSTALLATION WARNINGS: ……………………………….....… 03
2. WARNINGS AND PRECAUTIONS FOR USE: .......................... 03
3. DIMENSIONS: …………………………………………….….…….. 04
4. TECHNICAL DATA: ……………………….………..……………... 05
5. PRINCIPLE OF OPERATION: …………………….………………. 06
6. ACCESSORIES …………………………….……….……………… 07
7. INSTALLATION: ……………………….…………….…….….….... 08
8. MAINTENANCE OF THE PRODUCT: ….………………………… 09
9. WARRANTY CONDITIONS: ………………….…………….…...… 18

3
1. WARNINGS AND PRECAUTIONS FOR INSTALLATION
• The device must be installed only by qualified personnel and can
only be used following the correct installation carried out as indi-
cated in this booklet.
• The apparatus shall be powered by a network protected by a
differential switch having a maximum permissible current diffe-
rence not exceeding 30mA.
• It is advisable to provide a power outlet for the exclusive use by
the appliance.
• If the power cord is damaged, it must be replaced by the manu-
facturer or by similarly qualified personnel.
• During installation and before performing any maintenance, ma-
ke sure that the power cord is not connected.
• In case of malfunction, disconnect the power plug and avoid
using the toilet. For "All-in-one" versions, avoid using utilities
connected to the main exhaust sleeve.
2. WARNINGS AND PRECAUTIONS CONCERNING USE
• This appliance is for domestic use only.
• The device is designed to drain only toilet paper and organic
residues. Avoid throwing in foreign objects that can damage it
(such as: cloth, condoms, absorbents, make-up wipes, plastic or
metal objects, food or other solid kitchen residues, etc.).
• Children and all persons with reduced or inexperienced physical,
sensitive or mental abilities may not use the appliance unless
supervised or properly instructed by a person responsible for
their safety.
• In case the house or the bathroom is not used for a long time
(holidays or other) it is advisable to close the general entrance of
the water.
• Solvents or other chemicals can damage the appliance.
• In case of prolonged use, the thermal disconnector to protect the
appliance will automatically stop the power supply of the engine
if it overheats. In this case, disconnect the power supply and
then reconnect it after a break of about 30-60 minutes. The ap-
pliance will return to normal operation.

4
3. DIMENSIONI / DIMENSIONS (mm)
WAVE
STILO PLUS

5
4. DATI TECNICI / TECHNICAL DATA
Caratteristica della pompa:
Tensione di alimentazione / Power Supply AC 220-240V, 50Hz
Assorbimento / Power 600W
Grado di protezione / Degree of Protection IP55
Norme/Standards EN 60335-1
EN 60335-2
EN 12050-3
Prevalenza / Prevalence 4 m
Consumo di acqua / Water Consuption 3 Lt / 1.8 Lt
Diametro tubo di scarico / Discharge Hose ø 40 mm

6
5. PRINCIPLE OF OPERATION
• The system is operated by a button on the side of the toilet. Once pres-
sed, the operating cycle of the sanitary with macerator is structured as
follows:
• A quick push of the button starts the cycle with reduced water consump-
tion (ECO). Keeping the button pressed for longer increases the amount
of water used in the rinsing and filling phases (MAX 3lt.).
FLUSH
FLUSH
+
DISCHARGE PHASE OF THE PUMP
ADDITION OF CLEAN WATER

7
6. ACCESSORIES
ITEM QUANTITY (Pz.)
HOSE HOLDER Ø 40mm 1 (+1*)
CLAMP 32/50 W2 2 (+2*)
FLEXIBLE PIPE Ø 40mm 1 (+1*)
CAP Ø 40mm 1*
FILTERT 3/4” FOR HOT WATER 1
GROUND FIXING 2
*solo versione All-in-One
Connection for additional
INLET
(Only
All in One version)

8
7. INSTALLATION
• Electrical connection
It is necessary to prepare the connection to the home network
(230vac) according to current regulations.
• Hydraulic connection:
The system does not require a drain box. Connection to the domestic cold
water line is required.
For the attack position refer to diagram the following for the predispositions.
The indicated positions are indicative, being flexible fittings.

9
• Indications and preliminary suggestions
In order to realize a wire-wall installation, with not visible tubes it is suggested
the creation of a wall (preferably plasterboard), to create a gap suitable for the
passage of the pipes.
Then create a special frame (1) for the wall.
Prepare the discharge line (Ģ 40mm). It is suggested the use of rigid pipes in
PVC Ơ40mm. First make the ascending section (2), then through a softened
curve (3) realize the horizontal section, with a minimum slope of 1%. It is re-
commended in this section to provide for an increase in the section (4), until
reaching the ventilated sewer descending.
For the "All-in-One" versions, prepare the piping (5) for collecting the
waste water from additional utilities, connected to it (6). Ensure a slope of 3%.
NOTE for "All-in-One" versions:
In case of non-use of the additional inlet it is necessary to seal it with the sup-
plied 40cap. Tighten with a collar (clamp).
Prepare a tap with thread M 3/4" for connection to the domestic water supply
(cold water), which will be used for rinsing the toilet.
For only the "KB" version of the Stilo Plus, similarly arrange 2 taps with M1/2
thread" for the connection of the hot and cold water hoses of the integrated
bidet kit.

10
• Indications and preliminary suggestions
Place the toilet in the chosen point and draw with a pencil the profile of the
foot (1), also marking the position of the holes for fixing to the ground (2).
Move the toilet and, at the marks for the position of the hardware on the
ground, place the provided fixing brackets (1), taking care to leave enough
space for the thickness of the ceramic (at least 15mm).
Then fix the brackets to the ground with the dowels.

11
• Toilet preparation
Fasten the supplied HOSE HOLDER 40 (1) to the toilet outlet fitting via the
supplied collar (clamp) 32-50 (3). For the "All-in-One" versions, similarly
attach the second hose adapter 40 provided (2) to the additional inlet fitting
via collar (clamp) 32-50 provided (4). Make sure there are gaskets for the
hot and cold water hoses (5/6) of the integrated bidet kit (KB version only).
Then fix the 3/4 water inlet filter provided (1) to the flexible water inlet
pipe of the toilet (2), respecting the direction indicated on the filter itself.

12
• Hydraulic connection of the toilet
In correspondence of the suspended toilet holder (1) connect to the waste
line (2) the hose fitting Ģ 40mm provided (4), tightening it with the collar
(clamp) 32-50 provided (5).
For the "All-in-One" versions, connect to the waste water collection pipe of
the additional utilities(3) the second hose connection hose ø 40mm provi-
ded (7), tightening it with the collar (clamp) 32-50 provided (6).
Insert in the cavity the water inlet pipe of the toilet equipped with a filter (1).
Fasten the hose holder of the toilet drain (2) to its hose connection (3) via
the collar (clamp) 32-50 provided (4).
In the case of the "All-in-One" version, attach the respective hose holder (5)
to its
Flexible fitting (6) via collar (clamp) 32-50 supplied (7).
In case of "KB" version, insert the hot (8) and cold (9) water hoses of the in-
tegrated bidet mixer into the cavity.

13
• Connection to the domestic water supply
Inside the cavity, connect the water inlet pipe equipped with a filter (1) to the
tap (2) prepared for connection to the cold water line.
In order to be able to use the tap and to be able to carry out regular cleaning
and maintenance of the filter, as well as to exclude the toilet from the dome-
stic water supply, it is suggested the creation of an inspection opening (3).
Place the toilet and fix it to the brackets previously prepared, first inserting
the ceramic bushings provided (1), then tighten with screws (2) and then fa-
sten the supplied screw caps (3).

14
• Information on the hydraulic sistem
In order for the system to work properly, diameters and slopes should be
chosen according to the diagram below.
In the specific case of the shower tray, the difference in height between the
inlet of the drain and the reference plane must be at least 18 cm, to which
must be added the required slope (3 cm for each linear metre of pipe).
It is necessary to use the drain drain drain 90 mm.

15
• Connection to the mains
Electrical installation must be carried out by qualified personnel.
The apparatus must be connected to a network including a properly installed
ground connector.
The connection must respect the distances dictated by the national regula-
tions in force, as shown in the figure below.

16
WARNING : Tips for drain pipes
The exhaust pipe must not have bottlenecks.
In the case of discharge in prevalence, this must be done before the hori-
zontal one, at the beginning of the discharge path.
All horizontal strokes must have a minimum slope of 1:100 (10mm per me-
ter) until the connection to the sewer descender (slope 1%).
It is preferable to arrange a drainage point to allow the possible emptying of
the exhaust pipe before any intervention on the appliance.
The exhaust line shall be adequately ventilated:
In some cases the depression that is generated inside the exhaust pipe
could empty the appliance and the siphon or siphons of connected users,
resulting in the emission of bad odours. Make sure that the sewer descen-
ding is properly ventilated. Otherwise it is recommended to install a ventila-
tion valve at the highest point of the
tubing.
• If the exhaust pipe has external sections, it is advisable to protect the pipe
to prevent the possibility of freezing.
N.B.: Each bend along the discharge pipe results in a pressure drop
(approximately 50 cm from the declared vertical discharge capacity for each
curve).
It is recommended to use softened angle fittings (or 2 X 45 thick used to-
gether) avoiding the use of elbows at 90 º.
TESTING YOUR INSTALLATION
Toilet discharge: The engine of the appliance starts according to the preset
rinsing cycle, at the pressure of the discharge button. It may be normal at
first use for toilet emptying to be inadequate. Wait a few seconds and repeat
the discharge procedure.
Unloading of the other connected utilities (All-in-One version only): the
engine of the unit starts automatically. Depending on the inlet flow rate and
the exhaust pipe path, engine ignition can be intermittent.
Check that there is no water leakage from any of the
connections.

17
INSTRUCTIONS FOR CORRECT INSTALLATION AND USE:

18
9. PRODUCT MAINTENACE
WARNING !!!
TECHNICAL WORK MUST BE CARRIED OUT ONLY BY
QUALIFIED TECHNICAL PERSONNEL.
DISCONNECT THE POWER SUPPLY BEFORE ANY INTERVENTION ON
THE APPLIANCE.
For effective maintenance and cleaning of the
internal components, it is recommended to use
periodically the original Planus descaler.
See www.planus.eu for more information.
WARNING !!!
Do not use vinegar - caustic soda or other strongly acidic products for inter-
nal pump cleaning.
10. WARRANTY
The products are guaranteed 2 years, from the date of purchase. The war-
ranty expires if installed or used in a manner not in accordance with this ma-
nual.
It is recommended to register the product on the website www.planus.eu.
WARNING! The product is designed for the disposal of sanitary water
containing or not sewage water. Water soluble toilet paper is allowed.
The discharge of inappropriate material, such as cotton, tampons,
condoms, hair, wipes, food, metal objects, wood or plastic or by pum-
ping liquids such as solvents or motor oils can damage the appliance.

19
CAUTION: Proper disposal of this product (Applicable in the European Union
countries and countries with separate collection systems) The marking on
the product or its literature indicates that the product must not be disposed of
with other household waste at the end of the life cycle. To prevent possible
harm to the environment or human health from uncontrolled waste disposal,
the user is encouraged to separate this from other types of wastes and recy-
cle it responsibly to promote the sustainable reuse of material resources.
Household users should contact either the retailer where you purchased the
product or their local government office, for details on separate collection and
recycling for this type of product. Business users should contact their sup-
plier to check the terms and conditions of the purchase contract. This product
should not be mixed with other commercial waste
ACHTUNG: Die ordnungsgemäße Entsorgung dieses Produkts (In den Län-
dern der Europäischen Union und in Ländern mit einem separaten Sam-
melsystem)
Die Kennzeichnung auf dem Produkt oder seiner Literatur zeigt, dass das
Produkt nicht mit dem Hausmüll am Ende des Lebenszyklus entsorgt werden
müssen. Um mögliche Schäden für die Umwelt oder die menschliche Gesun-
dheit nicht durch unkontrollierte Abfallentsorgung zu verhindern, wird der
Benutzer aufgefordert, diese von anderen Arten von Abfällen zu trennen und
recyceln sie die nachhaltige Wiederverwertung von stofflichen Ressourcen
zu fördern. Private Nutzer sollten den Händler wenden, bei dem Sie das Pro-
dukt oder die zuständigen Behörden erworben haben, für weitere Details
über die getrennte Sammlung und das Recycling für diese Art von Produkt.
Gewerbliche Nutzer sollten sich an ihren Lieferanten die Bedingungen und
Konditionen des Kaufvertrages zu prüfen. Dieses Produkt sollte nicht mit an-
deren gewerblichen Abfällen gemischt werden
ATTENZIONE: Corretto smaltimento del prodotto (Applicabile nei paesi
dell’Unione Europea e in quelli con sistema di raccolta differenziata)
Il marchio riportato sul prodotto o sulla sua documentazione indica che il pro-
dotto non deve essere smaltito con altri rifiuti domestici al termine del ciclo di
vita. Per evitare eventuali danni all’ambiente o alla salute causati dall’inop-
portuno smaltimento dei rifiuti, si invita l’utente a separare questo pro-dotto
da altri tipi di rifiuti e di riciclarlo in maniera responsabile per favorire il riutiliz-
zo sostenibile delle risorse materiali. Gli utenti domestici sono invitati a con-
tattare il rivenditore presso il quale è stato acquistato il prodotto o l’ufficio
locale preposto per tutte le informazioni relative alla raccolta differenziata e
al riciclaggio per questo tipo di prodotto. Gli utenti aziendali sono invitati a
contattare il pro-prio fornitore a verificare i termini e le condizioni del contrat-
to di acquisto. Questo prodotto non deve essere smaltito unitamente ad altri
rifiuti commerciali

20
Planus S.p.A.
Via S. Giovanni Valdarno, 8 - 00138 Roma - Italy
Production Plant:
S.S. Flaminia Km 57,250 – Z.I. Prataroni - 01033 Civita Castellana – Italy
Tel +39 0761 542052 Fax +39 0761 540723
[email protected] - www.planus.eu
PLANUS S.p.A. - S.S. Flaminia Km 57,250 – Z.I. Prataroni
01033 Civita Castellana (VT) – Italy
23
EN 60335-1
EN 60335-2-84
EN 12050-3
WASTEWATER LIFTING PLANT
DN 23/28/32/40
Lifting effectiveness – see pump curve
08.167.00
This manual suits for next models
1
Table of contents
Other PLANUS Toilet manuals