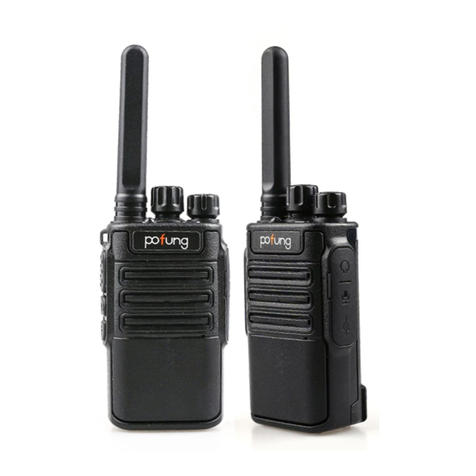
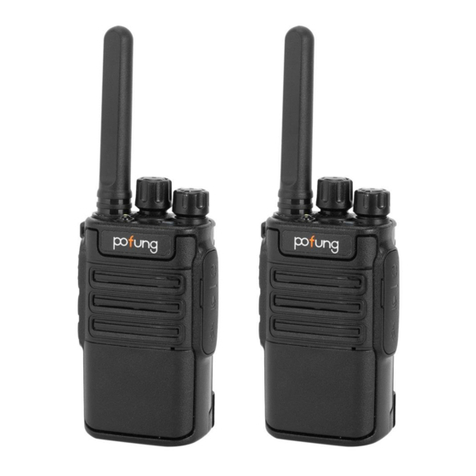
PO Fung Electronic F12 User manual

PREFACE
Thank you for purchasing F12 Two Way Radio, It is a multitask FRS transceiver. Combining the latest
technology in radio communication along with a sturdy mechanical frame, F12 is the ideal and
effective solution for the professionals who need to stay in touch with the working team (in
construction sites, buildings, shows, trade fairs or hotels) or for leisure users that just want to keep up
with friends and family.
This manual is applicable to the following product: BF-UV12, AR12, PR-12, 12E and VT-12 Two Way
Radios.
IMPORTANT NOTICE
To help you ward off bodily injury or property loss that may arise from improper operation, please
read all the information carefully before using our products. This contains instructions for safe usage
and RF energy awareness and control for compliance with applicable standards and regulation.
Safety Information for Pofung Radios
Your wireless handheld portable transceiver contains a low power transmitter. When the talk button
is pushed, it sends out radio frequency (RF) signals. The device is authorized to operate at a duty
factor not to exceed 50%. In August 1996, the Federal Communications Commissions (FCC) adopted RF
exposure guidelines with safety levels for handheld wireless devices.

Table of Contents
1. GETTING STARTED
1.1 FCC RF Exposure
1.2 FCC Part 15 /IC Compliance
1.3 Precautions for Batteries
1.4 Maintenance
1.5 Content of the packaging
1.6 Main features
2. BATTERY INFORMATION
2.1 Charging the Battery Pack
2.2 Charger Supplied
2.3 Use Caution with the Li-ion Battery
2.4 How to Charge
2.5 LED Indicator
2.6 How to Store the Battery
3. INSTALLATION OF ACCESSORIES
3.1 Installing the belt clip
3.2 Installing the battery pack
3.3 Additional Speaker/Microphone (Optional)
4. RADIO OVERVIEW
4.1 Main controls and parts of the radio
4.2 LCD Display
5. BASIC OPERATIONS
5.1 Turning your Radio On and Off
5.2 Setting the Volume

5.3 Choosing a Channel
5.4 Talking and Listening
5.5 SCAN
5.6 Monitor
5.7 Keypad lock
5.8 A/B switch
5.9 Flashlight and Emergency Alert
5.10 FM Radio (FM)
5.11 NOAA Weather Radio
5.12 1000Hz, 1450Hz, 1750Hz Tone-burst
6. WORKING THE MENU SYSTEM
6.1 Basic use
6.2 Shortcut Menu operations
6.3 Menu settings
7. ON-LINE SERVICE AND SUPPORT
Appendix A. - Trouble shooting guide
Appendix B. - Technical Specifications
Appendix C. - Shortcut Menu operations

1. GETTING STARTED
Pofung F12 is a multi-task FRS transceiver. Combining the latest technology in radio communication along with a sturdy
mechanical frame, F12 is the ideal and effective solution for the professionals who need to stay in touch with the working
team (in construction sites, buildings, shows, trade fairs or hotels) or for leisure users that just want to keep up with friends
and family.
To help you ward off bodily injury or property loss that may arise from improper operation, please read all the information
carefully before using our products.
1.1 FCC RF Exposure
WARNING! It is up to the user to properly operate this radio transmitter to insure safe operation. Please adhere to the
following:
Do not use the radio with a damaged antenna. If a damaged antenna comes into contact with the skin, a minor burn may
result.
Please contact your local dealer for a replacement antenna.
Device operation up to maximum duty cycle 50% and compliance with the public environment RF Exposure.
This EUT is compliance with SAR for uncontrolled exposure limits in IC RSS-102 at operating duty factors of up to 50% and
had been tested in accordance with the measurement methods and procedures specified in IEEE 1528 and IEC 62209. This
equipment should be installed and operated with a minimum distance of 2.5 cm must be maintained when held-to-face, and
body-worn operations are restricted to the approved original accessories (belt clip), a minimum distance of 0 cm.
Cet EUT est conforme au SAR pour les limites d'exposition incontrôlées dans IC RSS-102 à des facteurs de service allant
jusqu'à 50% et a été testé conformément aux méthodes et procédures de mesure spécifiées dans IEEE 1528 et IEC 62209.
Cet équipement doit être installé et utilisé avec une distance minimale de 2,5 cm doit être maintenu lorsqu'il est tenu face à
face, et les opérations portées sur le corps sont limitées aux accessoires d'origine approuvés (clip de ceinture), une distance
minimale de 0 cm.

■Hand-Held Operation (Held-to-Face)
This device was evaluated for typical hand-held (held-to-face) operations with a 1 inch spacing from the front of the radio.
For hand-held operation, the radio should be held 1 inch from the user's face in order to comply with FCC RF exposure
requirements.
■Body-Worn Operation
This device was evaluated for body-worn operations with the supplied belt-clip accessory. (All necessary accessories are
included in the package; any additional or optional accessories are not required for compliance with the guidelines.) Third
party accessories (unless approved by the manufacturer) should be avoided as these might not comply with FCC RF exposure
guidelines.
For body worn operation, this device has been tested and meets the Industry Canada RF exposure guidelines when used with
Pofung accessories supplied or designated for this product. Use of other accessories may not ensure compliance with
Industry Canada RF exposure guidelines.
Fonctionnement de l’appareil, lorsque porté sur le corps. Cet appareil a été testé et s’est avéré conforme aux normes
d’Industrie Canada et approuvé pour le port sur le corps à l’aide des accessoires Pofung inclus et conçus pour cet appareil.
L’utilisation d'accessoires ne respectant pas les exigences d'exposition RF d’Industrie Canada doit être évitée.
1.2 FCC Part 15 /IC Compliance
■FCC PART 15 COMPLIANCE
This device complies with Part 15 of the FCC Rules. Operation is subject to the condition that this device does not cause
harmful interference.
Changes or modifications not expressly approved by the party responsible for compliance could void your authority to
operate the equipment.
Avis de conformité à la FCC : Ce dispositif a été testé et s’avère conforme à l’article 15 des règlements de la Commission
fédérale des communications (FCC). Ce dispositif est soumis aux conditions suivantes: 1) Ce dispositif ne doit pas causer

d’interférences nuisibles et; 2) Il doit pouvoir supporter les parasites qu’il reçoit, incluant les parasites pouvant nuire à son
fonctionnement.
Tout changement ou modification non approuvé expressément par la partie responsable pourrait annuler le droit à
l’utilisateur de faire fonctionner cet équipement.
■IC COMPLIANCE
This device complies with Industry Canada license-exempt RSS standard(s).Operation is subject to the following two
conditions: (1) this device may not cause interference, and (2) this device must accept any interference, including
interference that may cause undesired operation of the device.
Changes or modifications not expressly approved by the party responsible for compliance could void your authority to
operate the equipment.
Cet appareil est conforme aux normes RSS exemptes de licences d’Industrie Canada. Son fonctionnement est soumis aux
deux conditions suivantes : (1) cet appareil ne doit pas causer d’interférences nuisibles et (2), il doit pouvoir accepter les
interférences, incluant celles pouvant nuire à son fonctionnement normal.
Tout changement ou modification non approuvé expressément par la partie responsable pourrait annuler le droit à
l’utilisateur de faire fonctionner cet équipement.
1.3 Precautions for Batteries
■Charging Prohibitions
To protect you against any property loss, bodily injury or even death, be sure to observe the following safety instructions:
1. Do not charge or replace your battery in a location containing fuels, chemicals, explosive atmospheres and other
flammable or explosive materials.
2. Do not charge your battery that is wet. Please dry it with a soft and clean cloth prior to charge.
3. Do not charge your battery suffering deformation, leakage and overheat.
4. Do not charge your battery with an unauthorized charger.
5. Do not charge your battery in a location where strong radiation is present.
6. Overcharge shall always be prohibited for it may shorten the life of your battery.
■Maintenance Instructions
To help your battery work normally or prolong its life, be sure to observe the following instructions:
1. Accumulated dust on charging connector may affect normal charging. Please use a clean and dry cloth to wipe it on a
regular basis.
2. It is recommended to charge the battery under 5℃~40℃. Violation of the said limit may cause battery life reduction or
even battery leakage.
3. To charge a battery attached to the product, turn it off to ensure a full charge.
4. Do not remove the battery or unplug the power cord during charging to ensure a smooth charging process.
5. Do not dispose of the battery in fire.
6. Do not expose the battery to direct sunlight for a long time nor place it close to other heating sources.
7. Do not squeeze and penetrate the battery, nor remove its housing.
■Transportation Instructions
1. Damaged batteries must not be transported.
2. To avoid short circuit, separate the battery from metal pars or from each other if two or more batteries are transported
in one packaging.
3. The radio must be switched off and secured against switch-on, if the battery is attached.
The content of the shipment must be declared in the shipping documents and by a Battery Shipping Label on the packaging.
Contact your hauler for the local regulations and further information.
■Precautions for Disposal
Once the service life of our products (including but not limited to radios and batteries) has ended,they shall not be disposed
as household garbage. Their recycling and disposal shall satisfy your local regulations.
1.4 Maintenance

To be safe and sure:
•Never open your radio’s case.
•Never change or replace anything in your radio except the batteries.
■Care and Safety
Your F17 was designed to fulfill any warranty obligations and to enjoy this product for many years.
As for all the electronically devices, we recommend you to follow this few suggestions:
•Do not attempt to open the unit. Non-expert handling of the unit may damage it and/or annul the warranty.
•When using regulated power supply, take notice of power voltage that must be 5V to avoid damages.
• High temperatures can shorten the life of electronic devices, and warp or melt certain plastics. Do not store the radio in
dusty or dirty areas.
• Keep the Radio dry. Rainwater or damp will corrode electronic circuits.
• If it appears that the Radio diffuses peculiar smell or smoke, please shut off its power immediately and take off the charger
or battery from the Radio.
• Do not transmit without antenna.
• To clean the radio, use a soft cloth dampened with water. Do not use cleaners or solvents because they can harm the body
of the unit and leak inside, causing permanent damage.
• Use a dry, lint-free cloth to clean the battery contacts.
■Hazardous Environments
Do not operate the radio in hazardous environments. Explosion or fire may result. Do not operate the radio near unshielded
electrical blasting caps.
Under certain conditions, radios can interfere with blasting operations and may cause an explosion. Turn your radio OFF to
prevent accidental transmission when in a blasting area or in areas posted: "Turn off two-way radio." Construction crews
often use remote control RF devices to set off explosives.

WARNING! Read this information before using the radio. In August 1996 the Federal Communications Commission (FCC)
of the United States with its action in Report and Order FCC 96-326 adopted an updated safety standard for human exposure
to radio frequency electromagnetic energy emitted by FCC regulated transmitters.
Those guidelines are consistent with the safety standard previously set by both U.S. and international standards bodies. The
design of the radio complies with the FCC guidelines and these international standards.
Never allow children to operate the radio without adult supervision and the knowledge of the following guidelines.
■Licensing Information
Use our radio in Canada/USA is subject to the rules & regulations of IC/FCC. Changes or modifications not expressly approved
by our may void the user authority granted by the IC/FCC to operate this radio and should not be made. To comply with
IC/FCC requirements, transmitter adjustments should be made only by or under the supervision of a person certified as
technically qualified to perform transmitter maintenance and repairs in the private land mobile and fixed services as certified
by an organization representative of the user of those services. Replacement of any transmitter component (crystal,
semiconductor, etc) not authorized by the IC/FCC equipment authorization for this radio could violate IC/ FCC rules.
Note: Use of this radio outside the country where it was intended to be distributed is subject to government regulations and
may be prohibited.
Important: Any changes or modifications not expressly approved by the party responsible for compliance could void the
user's authority to operate this device. Your radio is set up to transmit a regulated signal on an assigned frequency. It is
against the law to alter or adjust the settings inside the radio to exceed those limitations. Any adjustments to your radio
must be made by qualified technicians.
To be safe and sure:
• Never open your radio’s case.
• Never change or replace anything in your radio except the battery.
• Any attempt to change frequencies or output power of the radio invalidates the approval

1.5 Content of the packaging
• 1 F12 transceiver • 1 Li-Ion battery pack 1500mAh 3.7V
• 1 Fast desktop charger • 1 Wall adaptor
• 1 Belt clip
*If any item is missing, please verify with your Pofung dealer.
1.6 Main features
• 22 FRS Channels • Output power:FRS 2W
• 10 Selectable Call/Call Alerts • 11 Channels NOAA Weather Radio
• 258 Privacy Codes (50 CTCSS Tones and 208 DCS Codes) • 1750Hz tone for repeaters
• SOS Emergency function • FM radio receiver (88-108MHz)
• Channel Monitor, Channel Scan, Dual Watch functions • TOT (Time out timer)30/60/90/120/150/180s
• CTCSS and DCS codes research • Busy Channel Lockout function (BCL)
• Hands-Free Operation (VOX) • Power HI/ LO Settings
• Frequency step: 2.5/5/6.25/10/12.5/25KHz • Squelch adjustable in 9 levels
• VOICE: Vocal indication of the function selected • Keypad lock
• Low battery voice indicator • Battery Saver
• LED Flashlight • Support USB (Type-C) charging
• Li-Ion 1500mAh battery pack • 2pin Kenwood accessory jack
• Up to 8 Mile Range*
*Range may vary depending on environmental and/or topographical conditions.

About Range
Your F12 Series radios are designed to give you maximum range under optimum conditions.
• Maximum Range: Little to No sight Obstruction.
• Medium Range: Partial Obstruction to line of sight.
• Short Range: Major Obstruction to Ling of Sight.
Optimum Conditions are:
• Over water
• Open rural areas without obstructions
• Flat areas where you can see the other person
To ensure you get maximum range:
• Be sure to use fresh or fully charged batteries - low batteries will cause low power conditions.
• Be sure you are on a GMRS channel - FRS channels are restricted by the FCC to low power.
• Be sure to set your radio to use Hi power.
2. BATTERY INFORMATION
2.1 Charging the Battery Pack
The Li-ion battery pack is not charged at the factory; please charge it before use. Charging the battery pack for the first time
after purchase or extended storage (more than 2 months) may not bring the battery pack to its normal maximum operating
capacity. Best operation will require fully charging/ discharging the battery two or three times before the operating capacity
will reach its best performance. The battery pack life may be depleted when it’s operating time decreases even though it has
been fully and correctly charged. If this is the case, replace the battery pack.
2.2 Charger Supplied
Please use the specified charger provided by POFUNG. Other models may cause explosion and personal injury. After
installing the battery pack, and if the radio displays low battery with a voice prompt, please charge the battery.

2.3 Use Caution with the Li-ion Battery
a. Do not short the battery terminals or throw the battery into a fire. Never attempt to remove the casing from the battery
pack, as POFUNG cannot be held responsible for any accident caused by modifying the battery.
b. The ambient temperature should be between 5℃-40℃(40˚F - 105˚F) while charging the battery. Charging outside this
range may not fully charge the battery.
c. Please turn off the radio before inserting it into the charger. It may otherwise interfere with correct charging.
d. To avoid interfering with the charging cycle, please do not cut off the power or remove the battery during charging until
the green light is on.
e. Do not recharge the battery pack if it is fully charged. This may shorten the life of the battery pack or damage the battery
pack.
f. Do not charge the battery or the radio if it is damp. Dry it before charging to avoid damage.
WARNING
!
When keys, ornamental chain or other electric metals contact the battery terminal, the battery may become damage or
injure a human. If the battery terminals are short circuited it will generate a lot of heat. Take care when carrying and
using the battery. Remember to put the battery or radio into an insulated container. Do not put it into a metal container.
2.4 How to Charge
Your radios include a charging cradle and battery packs. Follow these instructions to recharge your radios.
Make sure to turn the radio OFF before placing the radio in the charging cradle.
a. The USB plug of the charging stand can be connected to the USB port of the mobile phone adapter, mobile power supply,
personal computer, and car cigarette lighter.
b. Set the charging cradle on the desk or tabletop and place the radio in the charging cradle with the keypad facing forward.
c. Make sure that the LED illuminates. Charge the battery pack for 6 hours and remove the radio from the charging cradle
after charging.
Note:
• Use only the supplied battery and AC adapter or approved accessories from pofung.

• Charge time may vary depending on the battery life remaining.
• The battery must be installed for the unit to operate, even if the unit is also connected to external power.
• If battery power is low, you cannot operate the radio even using external power. Allow the battery to charge before using. If
you try to transmit while power is low, the radio will automatically turn off.
• For fastest charging, turn off the radio before charging.
2.5 LED Indicator
STATUS
LED
No Battery
Green and red alternately flashing
Charge Normally
Red
Fully Charged
Green
Trouble
Red blinks fast for a long time
NOTE:Trouble means battery too warm, battery short-circuited or charger short-circuited.
2.6 How to Store the Battery
a. If the battery needs to be stored, keep it in status of 80% discharged.
b. It should be kept in low temperature and dry environment.
c. Keep it away from hot places and direct sunlight.
» Do not short circuit the battery terminals.
» Never attempt to remove the casing from the battery pack.
» Never store the battery in unsafe surroundings, as a short may cause an explosion.
» Do not put the battery in a hot environment or throw it into a fire, as it may cause an explosion.

3. INSTALLATION OF ACCESSORIES
Before the radio is ready for use we need to attach the battery pack, as well as charge the battery.
3.1 Installing the belt clip
a. To install the BELT CLIP, slide the clip down into the slot on the back of the radio until the BELT CLIP LATCH clicks.
b. To remove the BELT CLIP, press the LOCK TAB down, and then gently pull the belt clip up toward the top of the radio.
3.2 Installing the battery pack
Before attaching or removing the battery make sure your radio is turned off by turning the power/volume knob all the way
counter-clockwise.
To install the battery pack:
a. With the back of the radio facing you, insert the bottom part of the Li-ion battery pack to the bottom of the radio.
b. Push down the Li-ion battery pack into the radio until the Battery Lock Tab locks into place.
To remove the battery pack:
a. Press the Battery Lock Tab downward until the Li-ion battery pack unlocks from the radio.
b. Pull the Li-ion battery pack away from the radio.
3.3 Installing the Additional Speaker/Microphone (Optional)
Pry open the rubber MIC-Headset jack cover and then insert the Speaker / Microphone plug into the double jack.

4. RADIO OVER VIEW
4.1 Main controls and parts of the radio

1.
Antenna
2.
LED Flashlight
3.
Power Switch/ Volume control
4.
Led: transmission (red) / reception (green)
5.
[LAMP]: Press the key once to turn on the flashlight, Press and hold the key again to flash the flashlight, and
press the hand again to turn off the flashlight; Press and hold the key to turn on the audible and visual alarm
function
6.
[PTT]:Transmit key, hold the key to speak, release the key after speaking, and receive incoming calls;
7.
FM: Press to turn on the radio function, and press again to turn off the radio function;
8.
[SCAN ]: Press to send a CALL ALERT signal; Press and hold to enter SCAN mode.
9.
[MONI ]: Press to enter weather forecast mode; Press and hold to enter MONITOR mode.
10.
Battery release latch
11.
Belt clip
12.
Charging indicator: The red light is always on during charging, and the green light is always on when charging is
full.
13.
Micro-USB Charging Port: DC5V USB input
14
Speaker
15.
External Speaker/Microphone Jack: allows the connection with external devices such as headsets,
microphones.
16.
LCD Display
17.
+/- keys: push to select functions or Menu. Channel mode, press + to switch up the channel; press - to switch
channel down.
18.
Menu: press to enter the Menu functions and to confirm your selections.
19.
[A/B ] In standby mode, press this key to switch between main/sub channels between A/B channels. Press
and hold this key to lock or unlock the keyboard. Menu mode, Press the key to exit the menu; Press to enter
SCAN mode. Press and hold to turn KEY LOCK on/off.

4.2 LCD Display
Transmit and receive instructions
In channel mode, display the current channel frequency;
In menu mode, display menu items;
Battery level indicator. When the battery is almost used up, the icon starts blinking and
the transmission is blocked. Charge the radio.
Indicates the channel number that you stored
Appears when a positive shift is activated.
Appears when a negative shift is enabled.
This icon indicates the keypad lock. To unlock it press A/B key.

This symbol appears during transmission (when you press the PTT key) or reception.
When the radio is in rx mode, the led will light up green, while in tx mode it will be red.
Press and release to transmit your unique Call Tone signal to another radio.
The other person will hear a two second call tone. This tone is used only to establish voice
communications.
This letter is displayed when the Dual Watch function is active.
Low power selection
Narrow bandwidth: N = narrow. When the wide (W) bandwidth is activated, no icon is
displayed.
These symbols show that you set a CTCSS code in tx or rx. In tx mode it appears while you
are transmitting, while in rx mode it is shown also in stand-by condition.
These symbols show that you set a DCS code in tx or rx. In tx mode it appears while you
are transmitting, while in rx mode it is shown also in stand-by condition.
This icon indicates where the radio is operating, in which frequency or function. The
arrow is displayed close to the frequency band in use.
WEATHE
Enter weather forecast receiving mode (transmission prohibited in this mode)

5. BASIC OPERATIONS
5.1 Turning your Radio On and Off
To turn your radio ON, turn the rotary knob clockwise.
To turn your radio OFF, turn the rotary knob counterclockwise.
5.2 Setting the Volume
Increase volume by turning the rotary knob clockwise.
To decrease volume, turn the rotary knob counterclockwise.
Do not hold the radio close to your ear. If the volume is set to an uncomfortable level, it could hurt your ear.
5.3 Choosing a Channel
Your radio has 30 channels and 260 Privacy codes you can use to talk to others. In order to speak to someone, both your
radios must be set to the same channel and Privacy code.
Press [+/UP] to move up one channel at a time. Press and hold the key to scroll quickly up the channels.
Press [-/DOWN] to move down one channel at a time. Press and hold the key to scroll quickly down the channels.
5.4 Talking and Listening
All radios in your group must be set to the same channel and Sub-Code in order to communicate.
1. Hold your radio 2–3 cm from your mouth.
2. Press and hold the [PTT] key while speaking. The Transmit TX --- icon appears on the display.
3. Release the [PTT] key. You can now receive incoming calls. When you do, the Receive RX --- icon appears on the display.
For maximum clarity, hold the radio 2 to 3 cm away and avoid covering the microphone while talking.
5.5 SCAN
Your F12 can scan all 30 channels for activity. Pressing and holding [SCAN] key for 2 seconds to enter. Repeat the same
procedure to exit.
Your radio will rapidly scan each of the 30 channels and stop on any active channel. Your radio will resume scanning after 4

seconds when the channel is no longer active.
When you press the [PTT] key to transmit on an active channel, the scanning function will stop and remain on the active
channel for 5 seconds before resuming scan when [PTT] key is no longer pressed.
To resume scanning, quickly press the key.
5.6 Monitor
Press and hold the [MONI] key for around 2 second will let you hear noise so you can adjust the volume level of the radio
when not receiving a signal. This should be used to check activity on your current channel before transmitting.
Press and hold the [MONI] key for 3 second again to get out of Monitor mode.
5.7 Keypad lock
This function locks the keypad to prevent accidental pressure of the controls.
To avoid accidentally changing the radio setting, press the [A/B ] key for 2 seconds. The icon will appear on the display.
PTT, LAMP, MONITOR, and FM Radio keys will still be active. Repeat the same procedure to unlock the keypad.
5.8 A/B switch
Press the [A/B ] switch to select the master frequency.
5.9 Flashlight and Emergency Alert
This function is very useful for night illumination.
To turn it on press [LAMP]; push it again, the flash light will be strobe; push it again: it will turn off.
Open radio, press and hold the [LAMP] key for about 2 seconds to activate the sound and light alarm function. Press [LAMP]
key again to exit the alarm state.
5.10 FM Radio (FM)
The frequency range to listen to the radio is 78-108MHz.
With F12 turned on, Press [FM] to turn on the radio. Select the desired radio frequency with the
[+UP]/[-DOWN] keys. Press [FM] to exit FM radio.
Note: while you are listening to the radio, the channel of A / B receiving signal will automatically
This manual suits for next models
5
Table of contents
Other PO Fung Electronic Two-way Radio manuals

PO Fung Electronic
PO Fung Electronic BF-H6 User manual

PO Fung Electronic
PO Fung Electronic P10UV User manual

PO Fung Electronic
PO Fung Electronic F8 User manual

PO Fung Electronic
PO Fung Electronic P52UV User manual

PO Fung Electronic
PO Fung Electronic MP1 Series User manual

PO Fung Electronic
PO Fung Electronic DR-1801 UV Series User manual

PO Fung Electronic
PO Fung Electronic UV-9R PRO Series User manual

PO Fung Electronic
PO Fung Electronic GT-68 Series User manual

PO Fung Electronic
PO Fung Electronic UV-9G User manual

PO Fung Electronic
PO Fung Electronic UV-82 Series User manual