manuals.online logo
Brands
  1. Home
  2. •
  3. Brands
  4. •
  5. PO Fung Electronic
  6. •
  7. Two-way Radio
  8. •
  9. PO Fung Electronic BF-H6 User manual

PO Fung Electronic BF-H6 User manual

1
BF-H6 User Manual
To users
Thank you for your favor with our products.
This product is a high-power radio, If you are long time transmit will cause the
heat of this machine is a normal phenomenon, In the case of sufficient distance
recommended to use Middle (Middle power) or Low (Low power) to transmit!
Thanks for using!
LCD 大屏幕显示 LCD Screen
高中低三档功率可选 High/Medium/Low Power are optional
DTMF 编码 DTMF Encoded
U/V 全段接收 UHF/VHF Full frequency receive
128 组存储信道 Up to 128 memory channels.
中转 1750HZ 转发信令 1750 Hz TONE for access to repeaters
ANI 身份码发送 ANI code
数字/模拟亚音自动扫描 CTCSS/DCS to Automatic Scan
快捷菜单操作模式 Shortcut menu operation mode
有线复制功能 Wired Clone
紧急报警呼叫功能 Emergency alarm call function
中英文语音报号 Chinese/English switch over
2
熟悉本机 Familiar with this Product
■熟悉本机(插图说明)
Antenna
A helical antenna for receiving and transmitting signals.
Battery Push-button
This is for fixing the battery
Battery Pack
This is to power the radio
Speaker
This is for the radio output voice
Microphone
This is putting voice into the radio
External interface
This is for external earphones; Or external write frequency line, can use PC write frequency
software to write frequency operation and program upgrade.
Strap buckle
The radio body can be clamped on the belt for easy carrying.
【Power/Volume】Knob
Rotate the knob clockwise to turn the radio on or to increase the volume, and rotate the
knob counter-clockwise to turn the radio off or to decrease the volume.
【SOS】button
Long press to open the alarm function, and then press this button to cancel the alarm
function.
【PTT】Transmit button
After press this key, the radio is in the transmitting status and speaks into the microphone
to call the other party. After releasing this key, the radio is in the receiving status.
【MENU】button
Press it to activate the menu mode, enter the menu and press this button to select menu
items.
In power off status, Press and hold this button to switch channel mode or frequency mode.
【】/【】UP/DOWN button
In frequency mode, change the current frequency;
3
In channel mode, switch channels up and down;
In Menu status, change to set the menu items and menu values, press more than 2 seconds
to quickly forward or backward search.
In scanning status, Change the scanning direction.
[Exit] and A/B switch button
In the input status, clear the input information; In standby mode, press this button to
switch A/B, Switch 65-75/76-108mhz frequency in the FM mode.
* ,#, 0-9 number buttons
0-9 are numeric keys used for input frequency, channel number, menu item and menu
value, * key for channel, frequency, CTCSS/DCS and FM broadcasting station scanning,
Long press the # key to lock or unlock the keyboard, Press [PTT] button to transmit, and
then press the number button to transmit the corresponding DTMF number.
【PTT】键(发射按键)【PTT】Key(Transmit Key)
Transmit and receive conversion key: when transmitting, press this key and speak into the microphone; Release this key
when receiving.
1、Transmit Interface
2、Receive Interface (Triangle icon flicker)
侧键 1(CALL 键) Side key 1(CALL Key)
Press the button to turn on the FM radio, and then press the button to turn off the FM radio.
FM Radio Interface
侧键 2(MONI 键)Side key 2( MONI Key)
Long press this key to monitor function. In channel mode, short press to temporarily switch high, medium and low
transmission power. In frequency mode, short press can change high, medium and low transmission power.
橙色键 Orange Key
Long press this button to turn on the alarm function, short press again to close.
LCD 显示屏 LCD Screen
For display all working status of the Radio.
VFO/MR 键
For frequency mode and channel mode switching
1、Standby for frequency mode
4
2、Standby for channel mode
功能键盘 Function of the keyboard
Menu select/confirm key: [MENU]
Use this key to activate menu mode and select items in the menu mode.
MENU Interface
“▲” UP Key(Long press for more than 2 seconds to move forward quickly)
“▼“ DOWN Key(Long press for more than 2 seconds to back up quickly)
[BACK]/ [EXIT]: Exit/clear key (In the input status, clear the input information)
数字键盘 Numeric keypad
For enter information into the programming menu of a radio; in the non-standard CTCSS editing status, the non-standard
CTCSS can be directly input, and the corresponding DTMF encoding will be issued when the number key is pressed in the
transmit status.
[*] Key
Press this key to invert the receiving and transmitting frequencies;
Press for more than 2 seconds to lock or unlock the keyboard.
[#] Key
Press for more than 2 seconds to turn on frequency or channel scanning
In the FM radio Mode, press the button to search FM station automatically.
[0]Key
Press for more than 2 seconds to display the current battery voltage in standby mode.
Power / Volume Knob
To turn on the power, turn the [Power Switch / Volume Control] knob clockwise until you hear a "click" sound and a short
beep sounds. To turn off the radio, turn the knob counterclockwise until you hear a click. (English version supports channel
number broadcast); Turn clockwise to increase volume and vice versa.
状态指示灯 Led indicator lamp
Transmit ---- Red light
Receive-----Green light
外部接口 External interface
5
This is for external earphones; Or external write frequency line, can use PC write frequency software to write frequency
operation and program upgrade.
DTMF
After the DTMF is turned on, press the PTT + Side 2 will send out TONE.
点阵屏界面显示 LCD Icons
The LCD screen is used to display all the working status of the two-way radio. The corresponding function icons are displayed on the screen
during operation. The screen allows you to know the meaning of the icons and how to set the functions more quickly.
界面图标说明 Description of LCD Icons
No.
icon
Description
1
The channel signal indication
2
The channel transmits at high power;
The channel transmits at medium power
The channel transmits at low power
3
When the DTMF is set to DT-ST/DT+ANI/ANI-ST, the symbol appears
4
The current is CDCSS
The current is CTCSS
5
The current transmission frequency is the reception frequency plus a frequency bias(Set in menu 24th)
6
The current transmission frequency is the reception frequency minus a frequency bias(Set in menu 24th)
7
Has been set to dual-band double-waiting function, and allows waiting on two frequency bands displayed on the screen at the same time
8
The keyboard lock is locked; Press the [*] to unlock
9
The VOX has been turned on
10
In channel or frequency mode the invert the receiving and transmitting frequencies
11
The radio work in narrowband mode
12
The more bars, the more battery power, The icon flashes when the intercom is disabled
13
A/ B band pointer
14
Arabic
numerals
In channel mode, the current channel number for A
6
15
Arabic
numerals
In channel mode, the current channel number for B
■用前准备 Preparation before use
充电 Charging
Note: Be sure to ensure that the product is off when charging. Battery into the charger may be charging red flashing
constantly flashing, this is the battery power is too low, the charger to protect the battery pre-charge process, is a
normal phenomenon, Generally continue for 30 seconds to turn the red light of the normal status of charge
Please charge the battery with the charger specified by our company. The indicator light of the charger shows the charging
status.
1. Plug the power adapter into a power outlet;
2. Plug the other end of the power adapter into the socket on the back of the charging cradle;
3. Insert the battery or the battery-equipped product into the charging cradle correctly; the indicator light on the charging
cradle shows the charging status. When the indicator light is red, it indicates the start of charging. When the indicator
turns green, the charging is completed. Below is a detailed char.
Indicator display
Current charge status
Red light flashes
Battery power is too low
Red light
In charging
Green light
The charging is completed
Note:
●For best battery performance, charge for a minimum of 4 hours on first charge.
■电池信息 Battery information
●The first use of the battery
Since the battery is not fully charged at the factory, please charge the new battery before use. Under normal circumstances, the battery
when used for the first time, need to charge 4 hours, lithium-ion battery charging using slow charge or fast charge can be performed
when charging. It is recommended that the new battery be operated as above for the first three uses. When you find the battery power
is low, you need to charge the battery.
●Suitable battery type
Please use the specified battery for charging; use of other batteries may cause explosion, resulting in human injury.
7
●Battery safety attention
1. Do not allow metal contacts (including coins, keys, jewelry, or other conductive metal) to be touched by the battery contacts or pole
pieces. Otherwise, the battery may short circuit, discharge, heat or leak, which may result in damage to the item or personal injury.
Therefore, be careful when handling any battery.
2. Do not short-circuit the battery terminals or discard the battery in a fire. Do not disassemble the battery pack. When the battery is discarded,
please put into a dedicated battery recycling box.
●Battery normal operation instructions
★Please charge the battery indoors, battery charging at room temperature best.
★Under normal circumstances, the charger indicator from red to green when the battery is fully charged, at this time the battery can be
removed.
★You can charge when Battery installed in the walkie-talkie, but when charging is best to turn off the walkie talkie, to ensure that the battery
is fully charged.
★Please do not charge the battery when the battery power is not used up (after the battery is exhausted, the voice prompt alarm will be
given), which will shorten the service life of the battery.
★Do not put a fully charged battery back on the charger to "power up" again, as this operation significantly reduces the cycle life of the
battery.
●Extend battery life
★Battery performance will reduce below -20 ℃temperature conditions. Prepare back-up batteries for use in colder weather. Please do not
throw away cold batteries that cannot work. These batteries may be used at room temperature.
★Dusting the battery contacts may affect the battery life. Please wipe the contacts with a clean, dry cloth before inserting the batteries into
the walkie-talkie.
●Battery storage needs to know
1.Since the battery will have a self-discharge phenomenon, the battery when not in use for a long time, please fully charge the battery and
then stored to avoid over-discharge of its battery to damage the battery.
2. When the battery is in storage, remove the battery to recharge when stored about 6 months. To avoid over-discharge of electrolyte affect
battery capacity.
3. Pay attention to the temperature and humidity of the battery storage environment. Store the battery at room temperature in a cool, dry
place to minimize self-discharge of the battery.
8
电池电压、电量指示 Battery Voltage & Power Indication
Long press the 【0】key for display battery voltage,
The top right of the screen shows the current battery power icon is as follows:
Icon
Battery power
High
Medium
Low
Insufficient
■基本操作 Basic Operation
开机与关机 Power on/off
To turn on the power, turn the【Power Switch / Volume Control】knob clockwise until you hear a "click" sound and a short beep sounds. To
turn off the radio, turn the knob counterclockwise until you hear a click.
调节音量 Adjusting Volume
After turning on, turn the [Power switch / volume control] knob clockwise to increase the reception volume, and turn counterclockwise to
reduce the reception volume.
双段模式切换 Dual Standby Mode to Switch
Dual band mode can be selected through the menu; the path is as follows:
1. Press【MENU】to enter menu mode.
2. Press【▲】/【▼】to set, then press【MENU】to select.
3. Press【▲】/【▼】to the radio setting, then press【MENU】to select.
4. Press【▲】/【▼】to “Dual Standby”, then press【MENU】to select.
5.Press【▲】/【▼】to select the required option (Off/On).
6.Press【MENU】key to confirm and return to the previous menu.
频率模式(VFO) Frequency Mode(VFO)
VFO mode is the basic mode for changing the operating frequency. In the standby interface, press [VFO/MR] to switch to VFO mode, and press
【▲】/【▼】 to increase or decrease the frequency.
快捷输入频率 Quick Frequency Input
In addition to pressing【▲】/【▼】, you can also input the frequency directly. If the required operating frequency is far from the current
frequency, you can use the keypad to directly input the frequency.
⚫Press [VFO/MR] to switch to VFO mode.
* The frequency must be entered directly in VFO mode.
⚫Press the number buttons ([0] to [9]) to enter the desired frequency(The first three decimal places are MHZ and the last five
decimal places are KHZ).
⚫After entering the frequency manually, press and hold the [PTT] button to call the contact of current frequency.
9
Menu list
No
Level 1 menu
Level 2 menu
Description of
settings
English
中文
English
中文
0
Squelch
静噪等级
0,…,9
Squelch level, the
lower the level is easy
to interfere; the
higher the level of
sensitivity is worse,
it is best to set the
middle.
1
Step
步进频率
2.5KHz
In frequency mode, when
the UP and DOWN keys are
pressed, the step value
of frequency is
changed.
5.0KHz
6.25KHz
10.00KHz
12.50KHz
20.0KHz
25.0KHz
50.0KHz
2
Tx Power
发射功率
High
The radio transmits at
high power.
Middle
The radio transmits at
middle power.
Low
The radio transmits at
low power.
3
Power save
省电模式
OFF
Turn off power saving
mode.
ON
Turn on power saving
mode.
4
Vox Level
声控等级
OFF
Turn off VOX.
1,2,…10
VOX Level
5
Bandwidth
信道带宽
Narrow
The radio work in
narrowband mode.
6
Backlight
自动背光
Bright
The background light is
on all the time.
1Sec,2Sec,…10Sec
Turn off the backlight
automatically when the
time is up.
7
Dual
Standby
双频守侯
OFF
Turn off dual standby
mode.
ON
Turn on dual standby
mode.
8
Beep
提示音
OFF
Turn off beep prompt
10
Prompt
ON
Turn on beep prompt
9
Tx over
time
发射超时
OFF
Press and hold the PTT
key to keep transmits.
15,30,…600
The number goes from 15
to 600. In 15 steps,
Indicates the maximum
transmit time by
pressing the PTT key
10
Rx DCS
接收数字
哑音
OFF
DCS is not set
D023N,…,D754I
Standard sequence of
DCS.
11
Rx CTCSS
接收模拟
哑音
OFF
关闭
CTCSS is not set
67.0HZ,…,254.1HZ
Standard sequence of
CTCSS.
In Menu Mode, It can be
typed directly from the
keyboard (standard or
non-standard).
12
Tx DCS
发射数字
哑音
OFF
关闭
DCS is not set
D023N,…,D754I
Standard sequence of
DCS
13
Tx CTCSS
发射模拟
哑音
OFF
关闭
CTCSS is not set
67.0HZ,…,254.1HZ
Standard sequence of
CTCSS.
In Menu Mode, It can be
typed directly from the
keyboard (standard or
non-standard).
14
VOICE
提示语音
OFF
Turn off voice prompt
ON
Turn on voice prompt
15
DTMFST
侧音开关
OFF
DT-ST
ANI-ST
DT+ANI
16
S-CODE
可选信令
1,2,…,15
Signal code( only could
be set by PC software)
17
Scan Mode
扫描恢复
方式
TO
时间
Time mode scan
CO
载波
Carrier mode scan
SE
搜索
Search mode scan
18
PTT-ID
PTT 按键
发码
OFF
关闭
Do not send code when
PTT is pressed
BOT
按下发码
Press PTT to send code;
(only could be set by PC
software)
11
EOT
松开发码
Release PTT to send code
BOTH
同时发码
Send code when it is
pressed or released the
PTT.
19
MDF-A
A段显示
方式
Frequency
信道频率
In channel mode, the A
channel is display
channel frequency.
Name
信道名称
In channel mode, the A
channel is display
channel name. (only
could be set by PC
software)
20
MDF-B
B段显示
方式
Frequency
In channel mode, the B
channel is display
channel frequency.
Name
In channel mode, the B
channel is display
channel name. (only
could be set by PC
software)
21
Busy
Lockout
遇忙禁发
OFF
Transmit when the
channel is occupied
ON
The channel is occupied
and transmission is
prohibited
22
Key Auto
Lock
自动键盘
锁
OFF
Turn off keyboard lock
ON
Turn on keyboard lock
23
Direction
频差方向
None
无
In frequency mode,
there is no frequency
difference between
transmitting frequency
and receiving
frequency.
Plus
正向
In frequency mode, the
transmitting frequency
is equal to the
receiving frequency
plus the frequency
difference.
Minus
反向
In frequency mode, the
transmitting frequency
is equal to the
receiving frequency
minus the frequency
difference.
12
24
Offset
频差频率
00.000,…,99.998
In frequency mode, the
difference between the
transmitted and
received frequencies.
25
Memory
信道存储
000,…,127
When save a channel,
indicates the channel
number to be saved.
If a number is preceded
by “CH-”, the channel
already has channel
parameters.
26
Delete
信道删除
000,…,127
Deletes channel
parameters for the
specified channel,
If no “CH-”indicates
that the channel has no
parameters, the
operation is invalid.
27
Alarm Mode
报警模式
On site
Send sound
Send code
28
Scan CTCSS
扫描模拟
亚音
67.0HZ,…,254.1HZ
Automatic stop after
receiving the CTCSS
signal
29
Scan DCS
扫描数字
亚音
D023N,…,D754I
Automatic stop after
receiving the DCS
signal
30
TAIL
尾音消除
OFF
关闭
After releases the PTT,
the radio will not send
the code. Usually, when
passing through the
repeater, the radio
will make noise to
confirm whether the
signal of the radio is
transferred
ON
开启
When the PTT is
released, the radio
sends the code, and the
receiver makes an
instantaneous noise
31
RP_STE
过中继尾
音消除
OFF
关闭
When transmitting
across the repeater and
retransmitting, after
the transmitter
1s,2s,3s…10s
13
releases the PTT key,
the radio enters
receiving status. Due
to the delay of
repeater, the instant
signal transmitted by
the repeater can be
received. The value of
the menu item shall be
adjusted to ensure that
no noise of this radio
is generated when
transmitting across the
repeater, so as to
confirm whether the
relay is operating. The
menu item shall be set
OFF.
32
RPT-RL
过中继尾
音检测
OFF
关闭
When the signal is
transmitted across the
repeater and
retransmitted by it, in
order to confirm
whether the repeater
has retransmitted the
signal for this radio,
the delay time of the
repeater stopping
transmitting shall be
utilized to confirm
that the signal has been
retransmitted. The menu
item is used to adjust
the time of the noise.
If the noise isn't
needed, please set it as
OFF.
1s,2s,3s…10s
33
PROGER
发射结束
提示音
OFF
关闭
Turn off the end of call
prompt tone
ON
开启
Turn on the end of
call prompt tone
34
R-TONE
TONE 音
1000hz,1450hz,1750hz,2100hz
35
Power On
Msg
开机显示
Preset Logo
预设图标
Preset Msg
预设信息
14
Voltage
电池电压
36
Language
语言选择
中文
中文
English
English
37
Reset
恢复出厂
设置
VFO
频率模式
Initialize of Menu
ALL
全部
Initialize of Menu and
channel
◆发射DTMF Transmit DTMF
Press and hold the 【PTT】key and press the corresponding number key to launch the corresponding DTMF number
◆声控发射(VOX)
After activating this function, if the volume level of speech reaches the level selected by the radio, do not press the [PTT] button, the radio can
also be automatically transmit.
Operate:
1)Press【MENU】to enter menu mode.
2)Press【▲】/【▼】to select “VOX”,Or enter the number 4 directly into the menu item.
3)Press【MENU】to select, then the radio voice prompts “VOX”, Press【▲】/【▼】to select 1~10.
4)Press【MENU】the radio voice prompts “confirm”to Save and return to the previous menu.
5)Repeat the above operation, select OFF and turn OFF the VOX.
◆键盘锁定 Keypad Lock & Unlock
If the keypad isn’t needed, you can lock into prevent misuse. You can lock or unlock the keypad in the following ways:
1)Press【MENU】to enter menu mode.
2)Press【▲】/【▼】to select “Key Auto Lock”,Or enter the number 22 directly into the menu item.
3)Press【MENU】to select, then Press【▲】/【▼】to select “ON”.
4)Press【MENU】the radio voice prompts “confirm”to Save and return to the previous menu.
5)Repeat the above operation, select OFF and turn OFF the automatic keyboard lock.
The manual operation locks or unlocks the keypad in the following ways:
①n standby mode, long press 【*】for more than 2s, and the keyboard lock function will be enabled (voice prompt "lock").
②Repeat the above operation, turn off Keyboard lock function (voice prompt "unlock").
After the automatic keyboard lock function is turned on, the radio will automatically lock the keyboard without any keyboard operation
for 10 seconds
◆双频守候 Dual Standby
When in dual standby mode, the radio can receive the A or B channel. The operation is as follows:
1)Press【MENU】to enter menu mode.
15
2)Press【▲】/【▼】to select “Dual Standby”,Or enter the number 7 directly into the menu item.
3) Press【MENU】to select, then Press【▲】/【▼】to select “ON”.
4) Press【MENU】the radio voice prompts “confirm”to Save and return to the previous menu.
•Repeat the above operation, select OFF and turn OFF the Dual Standby function.
•In dual standby mode, the radio is in the scanning status of main and secondary channels. Even if the power saving function is
enabled, the power saving function is still invalid, and the standby time of the interphone will be shortened.
◆信道删除 Channel Deleted
1)Press【MENU】to enter menu mode.
2)Press【▲】/【▼】to select “Delete”, Or enter the number 7 directly into the menu item.
3) Press【MENU】to select, then the radio voice prompts “Delete Channel”
4) Press【▲】or【▼】to select the channel to delete.
·If the numeric prefix displays the character "CH-," it indicates that the channel number already has channel parameters, which can be
deleted
·If the number prefix does not have the display character "CH-", it means that the channel number has no parameters, does not need to
be deleted, and can be stored.
5)Press【MENU】the radio voice prompts “confirm”to Save and return to the previous menu.
·If the channel has no parameters, press [MENU] key to directly return to the previous menu (no voice prompt).
◆信道存储 Memory Channel
Example: The channel parameters are as follows and are stored in the channel number 001
①Rx Frequency: 440.5 MHZ
②Tx Frequency: 430.5 MHZ
③Rx DCS/CTCSS: D031N
④Tx DCS/CTCSS: D031N
⑤Tx Power: High
⑥Bandwidth: narrow band
Operating Steps:
1.Press the [VFO/MR] key to switch to VFO mode and the screen will display
2.In frequency mode, press [A/B] to make the frequency pointer symbol point to A .
3.Press the number key 4, 4, 0, 5, 0, 0 successively, and the frequency to 440.500MHZ to display on the screen .
16
4. Power Settings:Press the [MENU] →Keyboard [2] →[MENU] →【▲】or【▼】to select ‘HIGH’→ [MENU],
5. Bandwidth:Press the Keyboard [5] →[MENU] →【▲】or【▼】to select ‘NAWR’→ [MENU],
6. Rx DCS:Press the Keyboard [1] and [0] →[MENU] →【▲】or【▼】to select ‘D031N’→ [MENU],
·Setting the receive CDCSS, and automatically turn off the receive CTCSS; similarly, setting the receive CTCSS will automatically turn off
receive CDCSS.
To set CTCSS: Press the [MENU] →Keyboard [1] and [1] →[MENU] →【▲】or【▼】to select CTCSS →[MENU]。
7. Tx DCS: Press the Keyboard [1] and [0] →[MENU] →【▲】or【▼】to select ‘D031N’→ [MENU]
·Setting the transmit CDCSS, and automatically turn off the transmit CTCSS; similarly, setting the transmit CTCSS will automatically turn off
transmit CDCSS.
To set CTCSS: Press the [MENU] →Keyboard [1] and [3] →[MENU] →【▲】or【▼】to select CTCSS →[MENU]
·When setting up CTCSS, it can be entered numerically through the keyboard (non-standard and standard). If you select by the【▲】or
【▼】keys, you can only select standard CTCSS.
8. PTT-ID:Press the Keyboard [1] and [8] →[MENU]→【▲】or【▼】to select ‘OFF’→ [MENU],
9. Channel saves settings for receiving and transmitting at the same frequency:
1)Press the Keyboard [2] and [5] to display on the screen ,
2)Press the【MENU】,then the radio voice prompts “Memory Channel”, the screen display ,
3)Press the【▲】/【▼】to select empty channel, the screen display
4)Press the 【MENU】,then the radio voice prompts “Receive Memory”, the screen display ,then press the【MENU】,then the
radio voice prompts “Memory Channel”.
5)Press the 【MENU】,then the radio voice prompts “transmit Memory”, the screen display ,
6)Press [BACK] to frequency mode.
10. Channel saves settings for receiving and transmitting at different frequencies:
1)Press the [MENU] →Keyboard [2] and [5], the screen display ,
2)Press the【MENU】,then the radio voice prompts “Memory Channel”, the screen display ,
3)Press the【▲】/【▼】to select empty channel, the screen display 。
4)Press the 【MENU】,then the radio voice prompts “Receive Memory”, the screen display ;
5)Press [BACK] to frequency mode.
6)Follow step 3 and enter the desired transmit frequency;
17
7)Press the [MENU] →Keyboard [2] and [5], the screen display ,
8)press the【MENU】,then the radio voice prompts “Memory Channel”, the screen display ,
9)Press the 【MENU】,then the radio voice prompts “transmit Memory”, the screen display ;
10)Press [BACK] to frequency mode.
◆亚音扫描 CTCSS/CDCSS Scan
Before setting CTCSS/CDCSS scanning, set the receiving frequency to ensure that the signal can be received at the receiving frequency,
and cancel the dual standby function, and make the radio work in the frequency mode.
1)扫描模拟亚音 CTCSS Scan
A. Press the number key to enter the correct frequency.
B.Press【MENU】to enter menu mode.
C. Press【▲】/【▼】to select “Scan CTCSS”,Or enter the number 28 directly into the menu item.
D. Press【MENU】key.
The CTCSS changes indicate that the machine has entered the CTCSS scanning status, then CTCSS changes rapidly according to the
standard sequence. When the radio finds that the CTCSS in the receiving signal is consistent with one of the standard sets of CTCSS, the radio
stops scanning and receives the speech.
E. Press [BACK] to exit.
2)扫描数字亚音 CDCSS Scan
A. Press the number key to enter the correct frequency.
B.Press【MENU】to enter menu mode.
C. Press【▲】/【▼】to select “Scan DCS”,Or enter the number 29 directly into the menu item.
D. Press【MENU】key.
The CDCSS changes indicate that the machine has entered the CDCSS scanning status, then CDCSS changes rapidly according to the
standard sequence. When the radio finds that the CDCSS in the receiving signal is consistent with one of the standard sets of CDCSS, the radio
stops scanning and receives the speech.
E. Press [BACK] to exit.
◆模拟亚音频(CTCSS)/数字亚音频(CDCSS) CTCSS/CDCSS
CTCSS/CDCSS is mainly used to avoid receiving unrelated calls on the same frequency. If CTCSS/CDCSS is set, only calls with the same tone
signal set in the channel can be received within the effective communication range. However, if CTCSS/CDCSS signaling is not set up, all calls on
the same channel in the valid communication range can be heard.
The CTCSS/CDCSS can be set by write software or manually. You can set the parameters in menu 10, 11, 12 and 13.
A.CTCSS (51 Group)
67.0,69.3,71.9,74.4,77.0,79.7,82.5,85.4,88.5,91.5,94.8,97.4,100.0,103.5,107.2,110.9,114.8,118.8,123.0,
18
127.3,131.8,136.5,141.3,146.2,151.4,156.7,159.8,162.2,165.5,167.9,171.3,173.8,177.3,179.9,183.5,186.2,
189.9,192.8,196.6,199.5,203.5,206.5,210.7,218.1,225.7,229.1,233.6,241.8,250.3,254.1。
B.CDS (210 Group)
D023N,D025N,D026N,D031N,D032N,D036N,D043N,D047N,D051N,D053N,D054N,D065N,D071N,D072N,D073N,
D074N,D114N,D115N,D116N,D122N,D125N,D131N,D132N,D134N,D143N,D145N,D152N,D155N,D156N,D162N,
D165N,D172N,D174N,D205N,D212N,D223N,D225N,D226N,D243N,D244N,D245N,D246N,D251N,D252N,D255N,
D261N,D263N,D265N,D266N,D271N,D274N,D306N,D311N,D315N,D325N,D331N,D332N,D343N,D346N,D351N,
D356N,D364N,D365N,D371N,D411N,D412N,D413N,D423N,D431N,D432N,D445N,D446N,D452N,D454N,D455N,
D462N,D464N,D465N,D466N,D503N,D506N,D516N,D523N,D526N,D532N,D546N,D565N,D606N,D612N,D624N,
D627N,D631N,D632N,D645N,D654N,D662N,D664N,D703N,D712N,D723N,D731N,D732N,D734N,D743N,D754N
D023I,D025I,D026I,D031I,D032I,D036I,D043I,D047I,D051I,D053I,D054I,D065I,D071I,D072I,D073I,D074I,D114I,
D115I,D116I,D122I,D125I,D131I,D132I,D134I,D143I,D145I,D152I,D155I,D156I,D162I,D165I,D172I,D174I,D205I,
D212I,D223I,D225I,D226I,D243I,D244I,D245I,D246I,D251I,D252I,D255I,D261I,D263I,D265I,D266I,D271I,D274I,
D306I,D311I,D315I,D325I,D331I,D322I,D343I,D346I,D351I,D356I,D364I,D365I,D371I,D411I,D412I,D413I,D423I,
D431I,D432I,D445I,D446I,D452I,D454I,D455I,D462I,D464I,D465I,D466I,D503I,D506I,D516I,D523I,D526I,D532I,
D546I,D565I,D606I,D612I,D624I,D627I,D631I,D632I,D645I,D654I,D662I,D664I,D703I,D712I,D723I,D731I,D732I,D734I,
D743I,D754I
■故障处理指南 Troubleshooting Guide
Problem
Reason
Solution
The radio doesn’t start.
The battery doesn’t be installed
correctly.
Remove and re-install the battery.
The battery runs out.
Charging or change a new battery.
The battery is poor contact causing
by damaged or dirty.
Clearing the contact. Please get contact with
our distributor to repair, if you cannot solve
it.
The sound is small/
intermittent, or on sound
when receiving the signal.
Battery voltage is low.
Charging or change a new battery.
The voice is too small.
Turn up the sound.
The antenna is loose.
Turn off the radio and re-install the antenna.
The speaker is damaged or dirty.
Clear the speaker. Please get contact with
our distributor to repair, if you cannot solve
it.
Cannot talk with the
members in the same
group
The frequency is different with
other members.
Resetting the same frequency with them.
In the different digital or analog
channels
Correct to the same channel.
Too far away from each other
Get close with each other
Single call or group call
Be different in the
Setting the same frequency/channel/color
19
does not work in the
digital channel
frequency/channel/color code/
time slot
code/ time slot
Other sound in the
channel, which is not
from the members
Interference from the same
frequency
Change to new frequency, or correct the
squelch
The signal is not set yet.
Set the signal for all radio in the group
The loud noise
Be too away from other members.
Get close with other members.
Poor location, such as blocked by
tall buildings, or located in the
basement
Move to open environment, restart the
radio.
Interfere by the environment or
electromagnetic
Avoid the device interfering the radio
▲As above method still cannot solve your problem, or you meet other problem, please get contact with local distributor
to get the technological support.
■保养和清洁 Maintenance and Clean
To keep the performance and extend the service life, please note the content below for maintain the clear the radio.
■保养 Maintenance
◆Do not store the radio in an environment containing a corrosive electronic circuit material.
◆Do not directly lift an antenna or an external microphone in the course of carrying or using a radio.
◆Cover the appendage interface cover, when attachments are not used.
■清洁 Clean
◆Please use clean, dry cloth or brush to wipe off the surface of the radio and the dust attached to the charging pole
on a regular basis.
◆Wipe the radio on dirt with dust, lint free cloth, to prevent poor contact.
◆After long term use of radio, walkie-talkie buttons, control knobs and chassis are easy to dirty. You can use neutral
detergent (do not use strong corrosive chemicals) and wet cloth to clean. After cleaning, make sure the radio is completely
dry; otherwise please do not use it.
◆When the walkie-talkie does not in use, please attach the cover on the socket.
Please turn off the radio and remove the battery before clearing.
■ATTENTION
This equipment has been tested and found to comply with the limits for a Class B digital device, pursuant to part 15
of the FCC Rules. These limits are designed to provide reasonable protection against harmful interference in a residential
installation. This equipment generates uses and can radiate radio frequency energy and, if not installed and used in
accordance with the instructions, may cause harmful interference to radio communications. However, there is no guarantee
that interference will not occur in a particular installation. If this equipment does cause harmful interference to radio
20
or television reception, which can be determined by turning the equipment off and on, the user is encouraged to try to
correct the interference by one or more of the following measures:
- Reorient or relocate the receiving antenna.
- Increase the separation between the equipment and receiver.
-Connect the equipment into an outlet on a circuit different from that to which the receiver is connected.
-Consult the dealer or an experienced radio/TV technician for help
Changes or modifications not expressly approved by the party responsible for compliance could void the user's authority
to operate the equipment.
This device complies with Part 15 of the FCC Rules. Operation is subject to the following two conditions:
(1) this device may not cause harmful interference, and
(2) this device must accept any interference received, including interference that may cause undesired operation.
■主要技术指标 TECHNICAL SPECIFICATION
■Receiver
Receiver Sensitivity
≤0.25uV(12dB SINAD)
Audio Power
1W@10%
Audio Distortion
<10%
Signal-to-Noise
≥45dB
Adjacent Channel Selectivity
(Wide/Narrow)
≥65 dB /≥60 dB
Intermodulation
(Wide/Narrow)
≥65 dB /≥60 dB
Stray Suppression
≥65dB
Receive Current
≤380mA
总体规格
Frequency Range
VHF:136-174MHz UHF:400-480MHz(Rx)
VHF:144-148MHz UHF:420-450MHz(Tx)
Memory Channel
128 Group
Channel Spacing
12.5K(Narrow)
Operating Voltage
DC7.4V
Frequency Stability
±2.5ppm
Operating Temperature
-20~+60℃
Antenna Impedance
50Ω
Transmit Current
H≤2.5A; M≤1.8A; L≤1.1A
Modulation
11KΦF3E
Max Frequency Deviation
≤2.5KHz
Stray Power
≤7.5uW
Adjacent Channel power
≤-65 dB/≤-60 dB

Other PO Fung Electronic Two-way Radio manuals

PO Fung Electronic MP1 Series User manual

PO Fung Electronic

PO Fung Electronic MP1 Series User manual

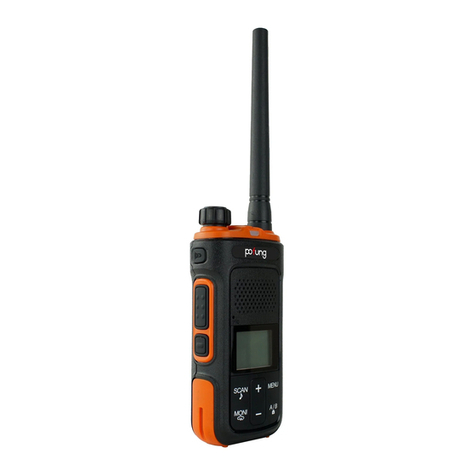
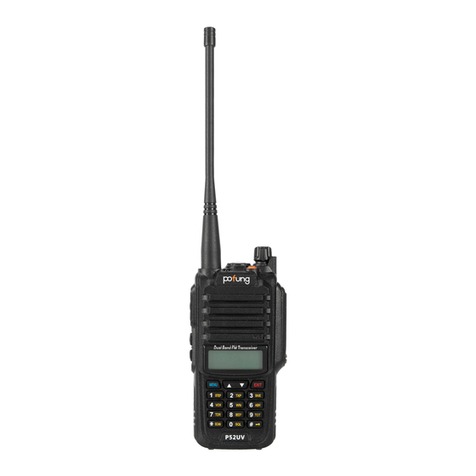
PO Fung Electronic P52UV User manual

PO Fung Electronic

PO Fung Electronic P52UV User manual

PO Fung Electronic UV-9G User manual

PO Fung Electronic

PO Fung Electronic UV-9G User manual

PO Fung Electronic P11UV User manual

PO Fung Electronic

PO Fung Electronic P11UV User manual

PO Fung Electronic P10UV User manual

PO Fung Electronic

PO Fung Electronic P10UV User manual

PO Fung Electronic UV-5R Pro User manual

PO Fung Electronic

PO Fung Electronic UV-5R Pro User manual

PO Fung Electronic GT-68 Series User manual

PO Fung Electronic

PO Fung Electronic GT-68 Series User manual

PO Fung Electronic UV-9R PRO Series User manual

PO Fung Electronic

PO Fung Electronic UV-9R PRO Series User manual

PO Fung Electronic F12 User manual

PO Fung Electronic

PO Fung Electronic F12 User manual

PO Fung Electronic DR-1801 UV Series User manual

PO Fung Electronic

PO Fung Electronic DR-1801 UV Series User manual

PO Fung Electronic MP23 Series User manual

PO Fung Electronic

PO Fung Electronic MP23 Series User manual

PO Fung Electronic F8 User manual

PO Fung Electronic

PO Fung Electronic F8 User manual

PO Fung Electronic UV-82 Series User manual

PO Fung Electronic

PO Fung Electronic UV-82 Series User manual

Popular Two-way Radio manuals by other brands

Amytel AW 630 user manual

Amytel

Amytel AW 630 user manual

Radio Shack BUZZBUGGS 21-1848 user manual

Radio Shack

Radio Shack BUZZBUGGS 21-1848 user manual

Cobra PR 145 user guide

Cobra

Cobra PR 145 user guide

Eyespy LINX Instruction guide

Eyespy

Eyespy LINX Instruction guide

switel WT118 operating instructions

switel

switel WT118 operating instructions

Cobra MicroTalk 2 FRS 110 operating instructions

Cobra

Cobra MicroTalk 2 FRS 110 operating instructions

RELM RPV516 owner's manual

RELM

RELM RPV516 owner's manual

Midland G-300 owner's manual

Midland

Midland G-300 owner's manual

Uniden MHS450 user manual

Uniden

Uniden MHS450 user manual

Uniden VOYAGER - VHF owner's manual

Uniden

Uniden VOYAGER - VHF owner's manual

Motorola XT420 user guide

Motorola

Motorola XT420 user guide

Motorola MJ270R - Radio FRS/GMRS Operation manual

Motorola

Motorola MJ270R - Radio FRS/GMRS Operation manual

stabo PMR 446 user manual

stabo

stabo PMR 446 user manual

Hytera PT790 manual

Hytera

Hytera PT790 manual

Tait TP2210-B1 instruction manual

Tait

Tait TP2210-B1 instruction manual

Motorola CP110 user guide

Motorola

Motorola CP110 user guide

Memorex MK-1700A instructions

Memorex

Memorex MK-1700A instructions

Cobra microTALK CXT225 owner's manual

Cobra

Cobra microTALK CXT225 owner's manual

manuals.online logo
manuals.online logoBrands
  • About & Mission
  • Contact us
  • Privacy Policy
  • Terms and Conditions

Copyright 2025 Manuals.Online. All Rights Reserved.