USING SPEAKON®CONNECTORS
Podium Pro Audio recommends using Speakon®style connectors for
speaker connections. There are numerous reasons why this is a good idea.
•Regulatory requirements in Europe have outlawed the use of dual
banana plugs for high powered amplifiers and it is likely that similar
regulatory controls will eventually appear worldwide.
•Connectors cannot be reversed, eliminating accidental speaker
phase reversal.
•Connectors lock onto the plug and cannot be accidentally
disconnected.
•Connectors are completely shock proof.
•Speakon® connectors meets all safety regulations currently in effect.
The VX Series amplifiers use four pin Speakon®connectors (Neutrik model
NL4FC or equivalent). See Figure 1 for wiring details.
If your speakers also have Speakon®connectors, do not assume
they use the same wiring convention. Check with the manufacturer of
your speakers for more information.
8
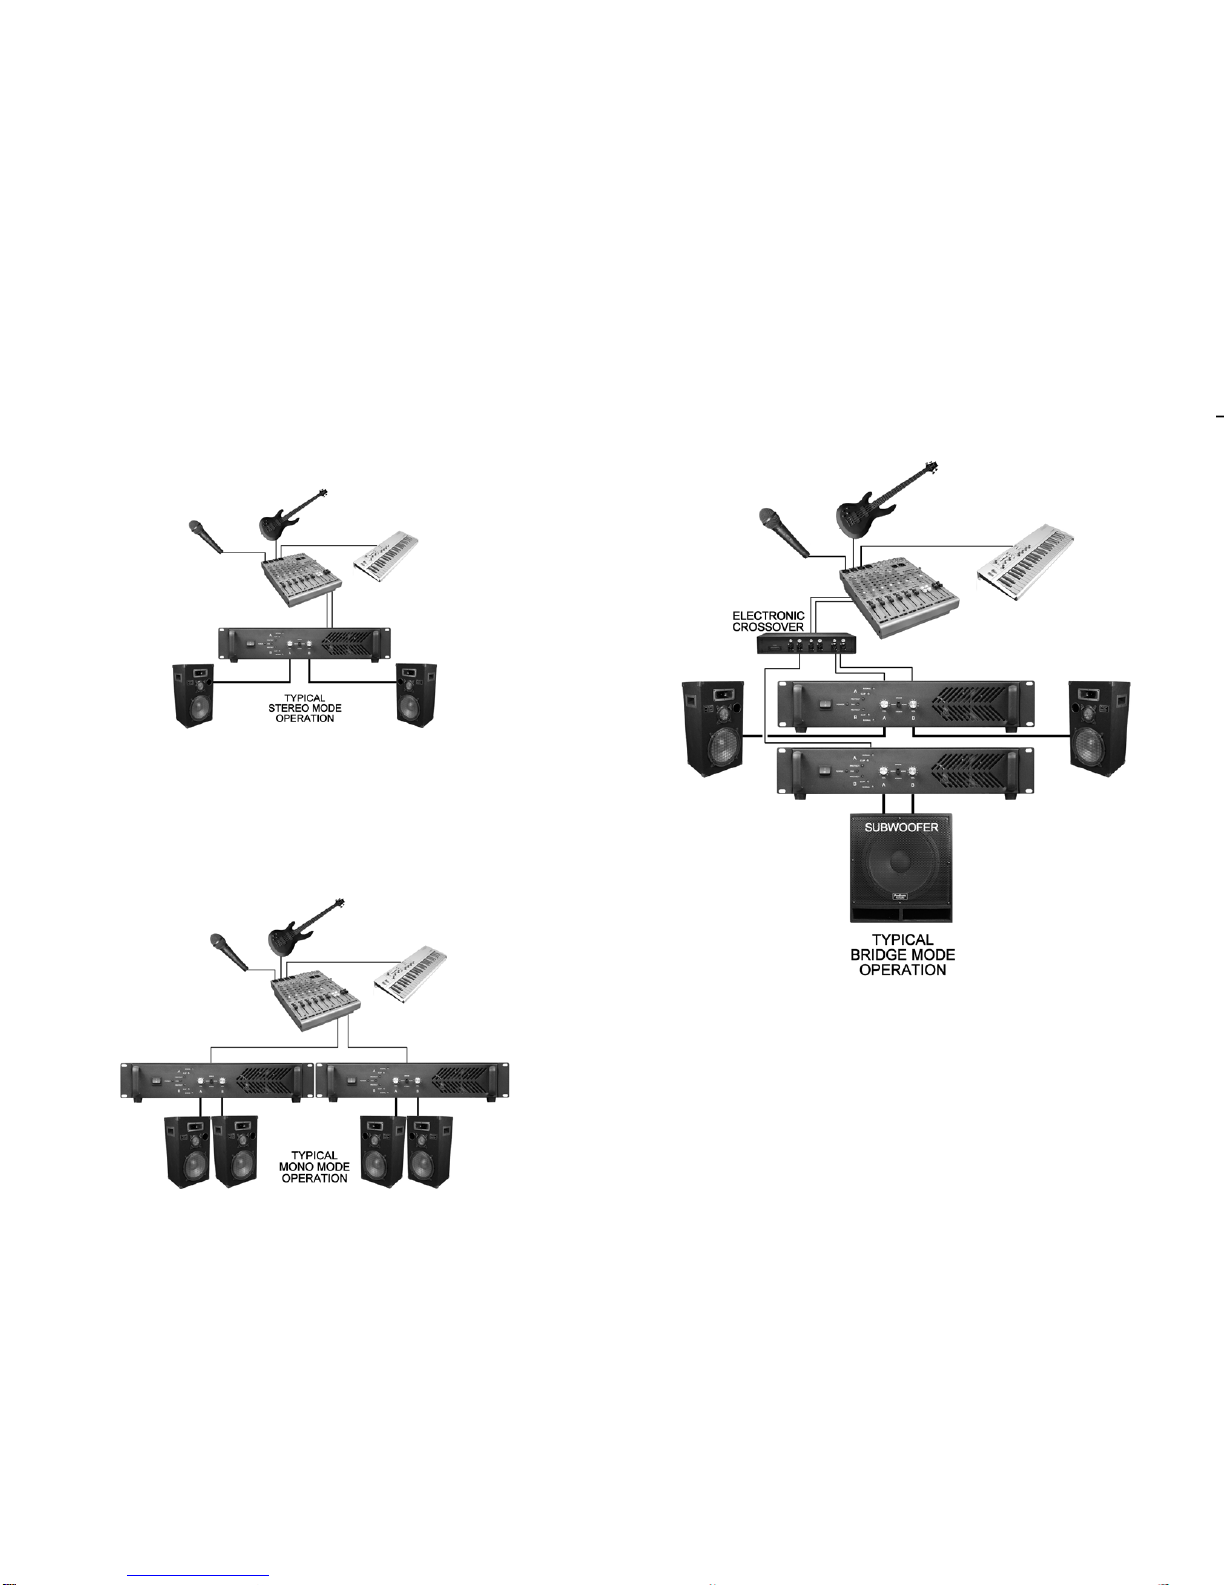
STEREO, MONO AND BRIDGE MODES EXPLAINED
To fully appreciate the potential benefits of operating the amplifier in “bridge” mode it is helpful to
briefly examine all three modes of operation.
STEREO MODE:
In STEREO MODE, the amplifier exhibits the following characteristics. . .
Normally, the amplifier is operated in STEREO MODE. In STEREO MODE the
two channels of amplification are independent of one another. See Figure A below.
•Signals applied to the channel A (left) input are amplified only by channel A.
•Signals applied to the channel B (right) input are amplified only by channel B.
•Channel A has no influence on channel B and vice versa.
•NOTE: Both channel A and B outputs are non-inverting: If the input signal goes
positive (+), the output signal also goes positive (+).
MONO MODE:
In MONO MODE, the amplifier exhibits the following characteristics. . .
When the amplifier is operated in MONO MODE, signals applied to the channel
A input are amplified by channel A and B. See Figure Babove.
•Signals applied to the channel A input are amplified by channel A and B.
•The channel B input is disabled.
•Effectively you now have two independent amplifiers sharing the same input channel.
•Although both A and B output channels will be identical, each channels’ volume level
can be independently adjusted. See page 6 “FRONT PANEL CONTROLS”.
•NOTE:Both channel A and B outputs are non-inverting: If the input signal goes
positive (+), the output signal also goes positive (+).
BRIDGE MODE:
BRIDGE MODE operation has the following characteristics. . .
In BRIDGE MODE, channel A and B amplify the signal applied to the channel
A input. Unlike MONO MODE, the channel B output is inverted. See Figure Cbelow.
•The signal applied to the channel A input is amplified by channel A and B.
oThe output of channel A is non-inverted: If the input signal goes positive (+),
the output signal also goes positive (+).
oThe output of channel B is inverted: If the input signal goes positive (+), the
output signal goes negative (-).
•Channel A and B are now operating as one channel. The channel A volume control
adjusts the output level of both A and B together.
oThe channel B volume control is disabled.
oThe channel B input is disabled.
•The loudspeaker is not connected to ground.
oThe speaker (+) lead is connected to channel A (RED connector).
oThe speaker (-) lead is connected to channel B (RED connector).
See page 3, “INPUT / OUTPUT CONNECTIONS”
5